If you have been keeping up to date with the headless commerce ecosystem, you will have heard some chatter in the community about the updated Shopify Storefront API. The API allows store owners to use their Shopify store as a backend service to power any frontend application of their choice.
What this means is that you can have a Shopify store that has all your products and then build your custom ecommerce site with any frontend tool of your choice (like React, Vue, Angular, Next.js, Nuxt, and so on). This allows you to sell the products in your Shopify store via other channels like mobile applications, online games, and web applications.
When we saw this announcement, my team at Netlify decided to take it for a spin and build stuff with it. The result was five different starter templates — Astro, Nuxt, Gridsome, Eleventy, and Angular — all built with a Shopify-powered backend store. Let’s build another one with SvelteKit!
The first thing we should probably do is set up a Shopify store. All this will not be possible without one. Here’s how you can quickly set one up for yourself:
If you did all that, take a break and get a glass of water. Then come back and join me. Let’s build this thing!
To get started with SvelteKit, you might want to take a quick look at SvelteKit’s documentation to get a sense of how it works. Otherwise, stick around and I’ll walk you through just what you need to get this site up!
Install and run SvelteKit with the commands below:
npm init svelte@next sveltekit-shopify-demo
cd sveltekit-shopify-demo
npm install
npm run dev -- --open
These commands will do a couple of things for you:
localhost:3000 like so: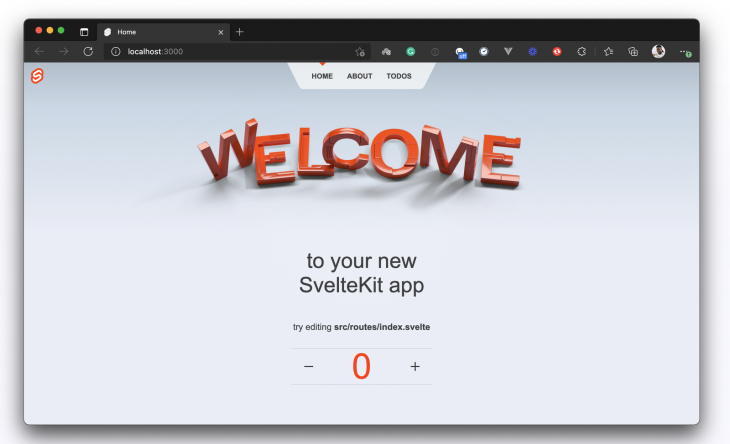
Okay, looks like we are all set to start editing this project and making it look like the site we want to build. Oh, and by the way, this is the project we are building, if you’d like to take a peep:
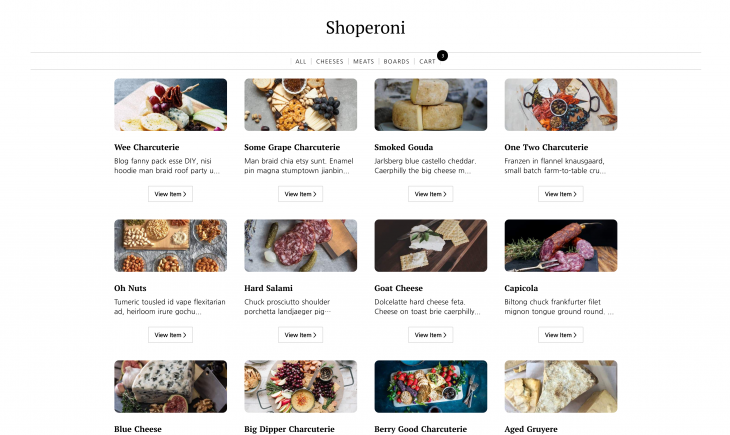
Alright, let’s get building!
For convenience, I’ll use a global style file in this project. Open your app.css file and update it with this CSS snippet for styling. That’s it for styling. All we need to do now is reference the right classes in the project files and this application should turn out exactly as expected.
What’s an ecommerce site without products, right? I know. If you created your Shopify account and added products to it, you should be able to see your product listing page in your Shopify admin dashboard.
Here’s mine. Thanks to my colleague Tara for creating this store and filling it up with products so that I can use it and pretend that I did all the work.
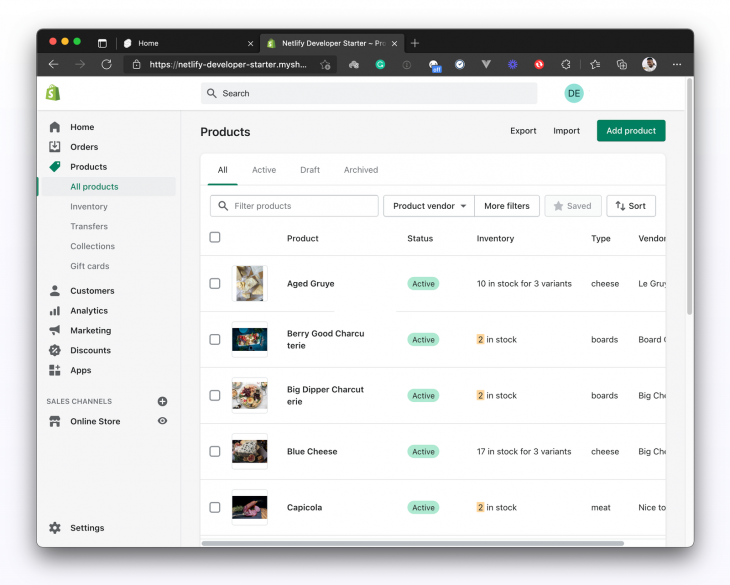
Now what we want to do is make an API call from our SvelteKit application to fetch all these products from our Shopify store and display them on our application. Before we do that, let’s talk about authentication.
Wouldn’t it be good to know that the data in your store is protected and you alone can access it? It is. Every Shopify store has credentials that you can use to access them from other applications — in this case, from our SvelteKit application.
If you haven’t generated credentials for your store yet, go ahead and generate the credentials now. Back in your SvelteKit project, create a .env file and update it with your Shopify API keys like so:
VITE_SHOPIFY_STOREFRONT_API_TOKEN = "ADD_YOUR_API_TOKEN_HERE"
VITE_SHOPIFY_API_ENDPOINT = "ADD_YOUR_STORE_API_ENDPOINT_HERE"
Now that we’ve gotten authentication out of the way, we can go ahead and fetch the products. This is probably a good time to let you know that the Shopify Storefront API is only GraphQL based. This means that there’s no REST alternative, so we’ll define GraphQL queries to interact with the API.
Before we fetch the products, we need a place to store them so that we can subsequently use the product data in other places in our application. This is where Svelte store comes in. If you’d like more information about it, I got you covered — read the linked info.
Create a store.js file in the root of your project folder and update it with this snippet:
// store.js
import { writable } from 'svelte/store';
import { postToShopify } from '../src/routes/api/utils/postToShopify';

export const getProducts = async () => {
    try {
        const shopifyResponse = await postToShopify({
            query: `{
         products(sortKey: TITLE, first: 100) {
          edges {
            node {
              id
              handle
              description
              title
              totalInventory
              productType
              variants(first: 5) {
                edges {
                  node {
                    id
                    title
                    quantityAvailable
                    price
                  }
                }
              }
              priceRange {
                maxVariantPrice {
                  amount
                  currencyCode
                }
                minVariantPrice {
                  amount
                  currencyCode
                }
              }
              images(first: 1) {
                edges {
                  node {
                    src
                    altText
                  }
                }
              }
            }
          }
        }
    }
      `
        });
        return shopifyResponse;
    } catch (error) {
        console.log(error);
    }
};
Okay, what’s going there? Let’s walk through it. First, we define a getProducts query that requests for the first 100 products we have in our Shopify store. Then, we pass the query to our PostToShopify utility function that takes the query, adds our API keys to authenticate the request, and calls the Shopify endpoint.
But you probably noticed that the postToShopify function doesn’t exist yet, so let’s go ahead and create it in the projects src/api/utils folder. If that folder doesn’t exist, you can create it or put the function wherever you want (just be sure to reference it properly). Mine lives in this directory: src/routes/api/utils/postToShopify.js.
Update the file with the snippet below:
export const postToShopify = async ({ query, variables }) => {
    try {
        const result = await fetch(import.meta.env.VITE_SHOPIFY_API_ENDPOINT, {
            method: 'POST',
            headers: {
                'Content-Type': 'application/json',
                'X-Shopify-Storefront-Access-Token': import.meta.env.VITE_SHOPIFY_STOREFRONT_API_TOKEN
            },
            body: JSON.stringify({ query, variables })
        }).then((res) => res.json());
        if (result.errors) {
            console.log({ errors: result.errors });
        } else if (!result || !result.data) {
            console.log({ result });
            return 'No results found.';
        }
        return result.data;
    } catch (error) {
        console.log(error);
    }
};
N.B., I’m using the environment variables we set earlier to authenticate the requests we are making to Shopify. Be sure to prefix your environment variables with import.meta.env.
With that done, we can now test our implementation to check if we are successfully fetching products from our Shopify store. Go into your project’s src/routes/index.svelte and update it with this snippet:
// src/routes/index.svelte
<script context="module">
    import { products, getProducts } from '../../store';
    export async function load(ctx) {
        await getProducts();
        return { props: { products } };
    }
</script>

<script>
export let products;
</script>
<svelte:head>
    <title>Home</title>
</svelte:head>
<section>
<h2>
    {#each $products as product}
        <p>{product.node.title} </p>
    {/each}
</h2>
</section>
What we are doing here is:
products to the index page as a propLet’s check the browser and see if that’s the case:
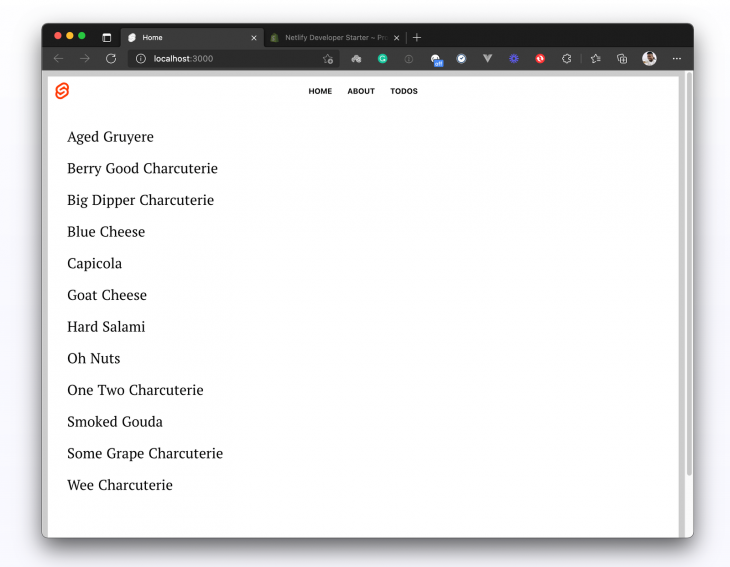
And we are indeed fetching the products from our store correctly.
Congratulations, we’ve gotten over the first task. But of course, we are only doing this to test our implementation. Let’s create two components (ProductCard.svelte and ProductList.svelte) to help us organize and display the products the way we want.
Create a components folder in your projects src folder and add the two files I mentioned above. I’ll set it up like this:
// src/components/ProductCard.svelte
<script>
    export let product;
</script>
<section>
    <div class="product-card">
        <div class="product-card-frame">
            <a href={`/products/${product.handle}`}>
                <img class="prodimg" src={product.images.edges[0].node.src} alt={product.handle} />
            </a>
        </div>
        <div class="product-card-text">
            <h3 class="product-card-title">{product.title}</h3>
            <p class="product-card-description">{product.description.substring(0, 60) + '...'}</p>
        </div>
        <a href={`/products/${product.handle}`}>
            <button>View Item {">"}</button>
        </a>
    </div>
</section>
Here, we are expecting a product prop that will be passed into this component from wherever we render it. When we get that prop, we then extract the different product details we need from it and then use those details to construct our product card as you can see in the snippet above.
Let’s do the same for our product listing component. Create a ProductList.svelte file in the src/components folder and set it up like so:
// src/components/ProductList.svelte
<script>
    import ProductCard from '../components/ProductCard.svelte';
    export let products;
</script>
<div class="product-grid">
    {#each products as product}
        <ProductCard product={product.node} />
    {/each}
</div>
Here, we receive a products prop from our index page (that is where we’ll render this component) and iterate over the products to render a product card for each product. With this, we can go over to the index page src/routes/index.svelte and render our productList component. Update it with this snippet:
// src/routes/index.svelte
<script context="module">
    import { products, getProducts } from '../../store';
    export async function load(ctx) {
        await getProducts();
        const productType = ctx.page.query.get('type');
        if (productType) {
            products.update((items) => {
                const updated = items.filter((product) => product.node.productType === productType);
                return updated;
            });
        }
        return { props: { products} };
    }
</script>
<script>
    import ProductList from '../components/ProductList.svelte';
    export let products
</script>
<svelte:head>
    <title>Shoperoni</title>
</svelte:head>
<main>
   <ProductList products={$products} />
</main>
Here, we are doing the following things:
Header component)ProductList component and passing the product data into it as a propThat’s it! When we check back on the browser, we should get a better-looking product listing page:
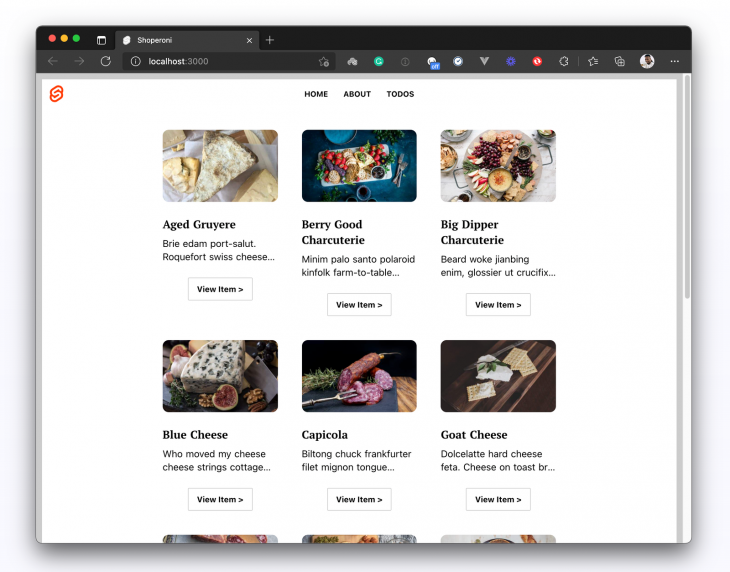
So we’ve set up our product listing page, great! what happens if a user clicks View Item on the screenshot above? At the moment, nothing. Actually, something will happen: the browser will navigate to this route /products/[the-product-title] and it will result in a 404 because that page doesn’t exist yet.
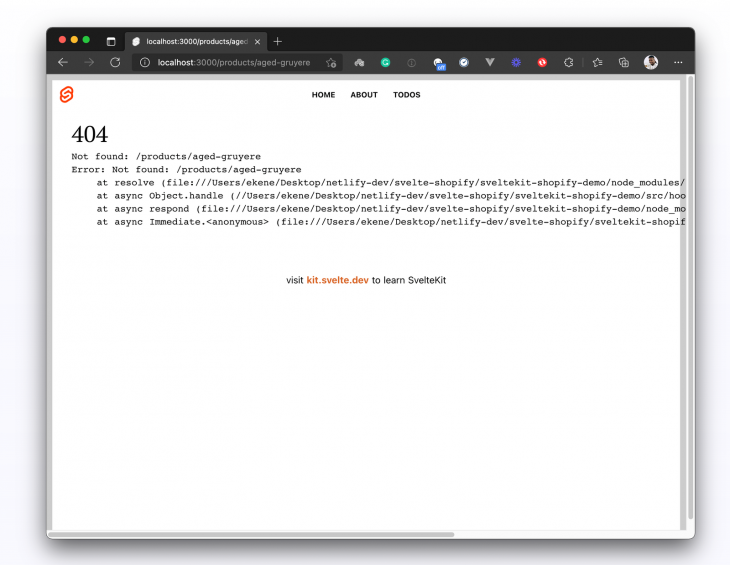
To create individual product pages, let’s update our store.js file and add another query that will take our product handle and use it to fetch that particular product from our Shopify store.
This would mean that whenever a user visits our individual product page, i.e., /products/aged-gruyere, the product handle aged-gruyere will be available on the page as page.params.handle. We can then use this handle to query Shopify for that product. Update store.js with this query:
// store.js
import { writable } from "svelte/store";
import { postToShopify } from "./src/routes/api/utils/postToShopify";
export const products = writable([]);
export const productDetails = writable([]);
export const getProducts = async () => {
   // get products query
};

// Get product details
export const getProductDetails = async (handle) => {
  try {
    const shopifyResponse = await postToShopify({
      query: `
        query getProduct($handle: String!) {
          productByHandle(handle: $handle) {
            id
            handle
            description
            title
            totalInventory
            variants(first: 5) {
              edges {
                node {
                  id
                  title
                  quantityAvailable
                  priceV2 {
                    amount
                    currencyCode
                  }
                }
              }
            }
            priceRange {
              maxVariantPrice {
                amount
                currencyCode
              }
              minVariantPrice {
                amount
                currencyCode
              }
            }
            images(first: 1) {
              edges {
                node {
                  src
                  altText
                }
              }
            }
          }
        }
      `,
      variables: {
        handle: handle,
      },
    });

    productDetails.set(shopifyResponse.productByHandle);
    return shopifyResponse.productByHandle;
  } catch (error) {
    console.log(error);
  }
};
Here, we are defining a new query that will fetch a particular product based on the product’s handle which we pass into the query as a variable. When we call getProductDetails() from our dynamic page and pass the product handle to it, we should get the products data returned.
Alright, let’s create the dynamic page that will represent our individual product pages. In the routes folder, create a new routes/products/[handle].svelte file and set it up like so:
// src/routes/products/[handle].svelte
<script context="module">
    import { productDetails, getProductDetails } from '../../../store';
    export async function load(ctx) {
        let handle = ctx.page.params.handle;
        await getProductDetails(handle);
        return { props: { productDetails } };
    }
</script>
<script>
    export let productDetails;
    let quantity = 0;
    let product = $productDetails
    let productImage = product.images.edges[0].node.src;
    let productVariants = product.variants.edges.map((v) => v.node);
    let selectedProduct = productVariants[0].id;
        const addToCart = async () => {
        // add selected product to cart
        try {
            const addToCartResponse = await fetch('/api/add-to-cart', {
                method: 'POST',
                body: JSON.stringify({
                    cartId: localStorage.getItem('cartId'),
                    itemId: selectedProduct,
                    quantity: quantity
                })
            });
            const data = await addToCartResponse.json();
            // save new cart to localStorage
            localStorage.setItem('cartId', data.id);
            localStorage.setItem('cart', JSON.stringify(data));
            location.reload();
        } catch (e) {
            console.log(e);
        }
    };
    function price(itemPrice) {
        const amount = Number(itemPrice).toFixed(2);
        return amount + ' ' + 'USD';
    }
</script>
<main> <!-- page content --> </main>
At this point, you might be wondering why we have two <script> tags on this snippet. Well, here’s why: we want the load() function I defined inside the first script to run before the component is rendered. And to do that, we need to add context="module" to the script. Everything else can go into a second script tag without the context prop.
So what we are doing in the code snippet above is:
load() function during initialization to get the individual product from our storeproductDetails object down to the page as a propproductDetails prop in the pageproductDetails object to get the data we need for the pageNext, let’s use the destructured product data to construct the product details page:
// src/routes/products/[handle].svelte
<script context="module">
//...
</script>
<script>
//...
</script>
<main class="product-page">
    <article>
        <section class="product-page-content">
            <div>
                <img class="product-page-image" src={productImage} alt={product.handle} />
            </div>
            <div>
                <h1>{product.title}</h1>
                <p>{product.description}</p>
                <form>
                    {#if productVariants.length > 1}
                        <div class="product-page-price-list">
                            {#each productVariants as { id, quantityAvailable, title, priceV2 }}
                                <div class="product-page-price">
                                    <input
                                        {id}
                                        bind:value={selectedProduct}
                                        type="radio"
                                        name="merchandiseId"
                                        disabled={quantityAvailable === 0}
                                    />
                                    <label for={id}>
                                        {title} - {price(priceV2.amount)}
                                    </label>
                                </div>
                            {/each}
                        </div>
                    {:else}
                        <div class="product-page-price is-solo">
                            {price(productVariants[0].priceV2.amount)}
                        </div>
                    {/if}
                    <div class="product-page-quantity-row">
                        <input
                            class="product-page-quantity-input"
                            type="number"
                            name="quantity"
                            min="1"
                            max={productVariants[0].quantityAvailable}
                            bind:value={quantity}
                        />
                        <button type="submit" on:click|preventDefault={addToCart} class="button purchase">
                            Add to Cart
                        </button>
                    </div>
                </form>
            </div>
        </section>
    </article>
</main>
And now if we click on the View Item button on the product listing page, we should get the individual product detail page like this:
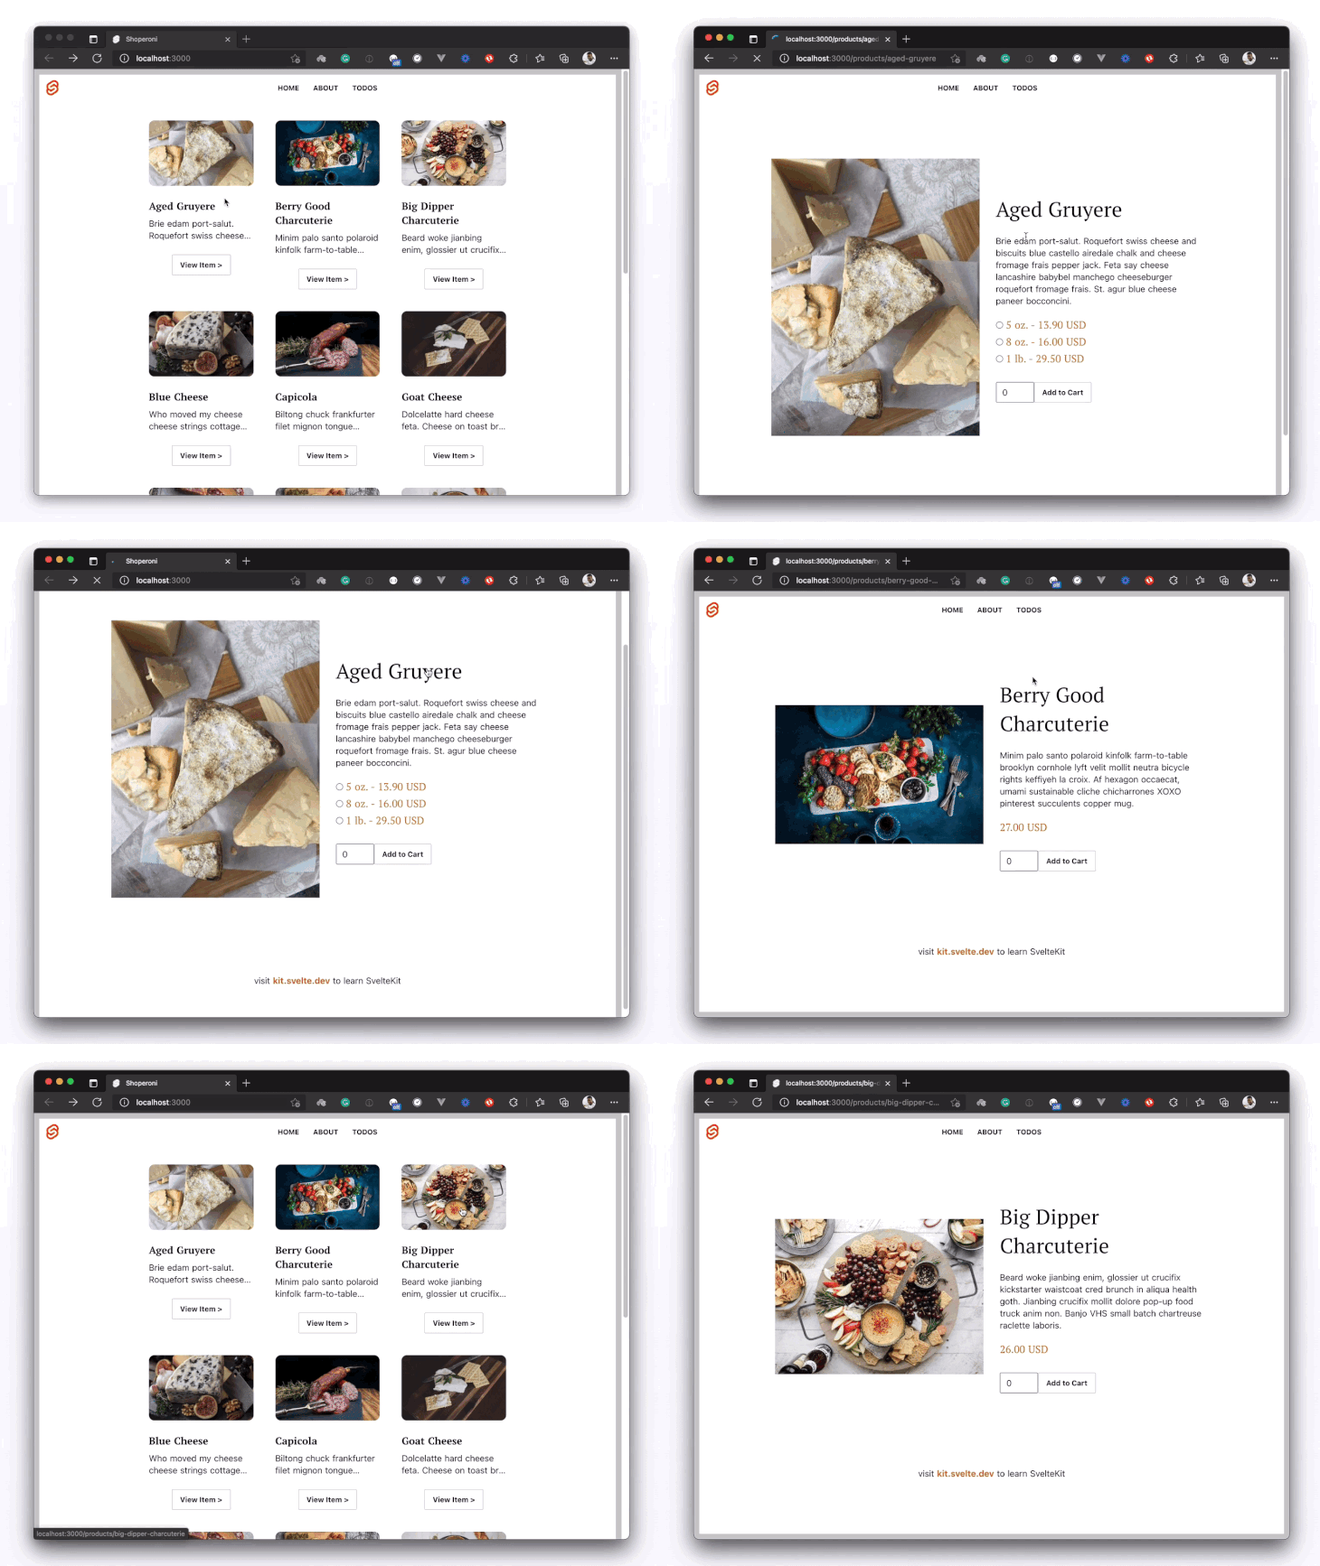
Seems like we are just about done. Let’s go ahead and deploy this site!
Now that we have a product listing page, and we can view our individual product pages, we can go ahead and deploy this site.
To deploy a SvelteKit app, you need to adapt it to the deployment target of your choice. The SvelteKit documentation provides some adapters that you can quickly use to deploy your app. I’ve chosen to deploy to Netlify using the Netlify adapter that is provided by SvelteKit.
The first thing we need to do is install the Netlify adapter into our SvelteKit project:
npm i -D @sveltejs/adapter-netlify@next
Then, edit your svelte.config.js file and import the Netlify adapter that we just installed:
import adapter from '@sveltejs/adapter-netlify';
export default {
    kit: {
        adapter: adapter(),
        target: '#svelte'
    }
};
We have the adapter installed and configured in our SvelteKit project. The next thing we want to do is create a netlify.toml file and set it up like so:
[build]
  command = "npm run build"
  publish = "build/"
  functions = "/functions/"

# Svelte requires node v12
[build.environment]
  NODE_VERSION = "12.20"
What we are doing here is telling Netlify that:
npm run build/build/functions (we are not using any Netlify functions in this project though)Lastly, push the project to Github and head over to your Netlify dashboard and deploy your site from the GitHub repository where you pushed it. If you need help here’s a one-minute guide on deploying to Netlify from GitHub to walk you through it. The demo is also hosted on Netlify if you’d like to explore the site.
So we’ve completed the building of a SvelteKit ecommerce site powered by a Shopify backend. In the next tutorial, we’ll hook it up with even more Shopify features as we add cart functionalities to this site. See you then.
LogRocket lets you replay user sessions, eliminating guesswork around why users don't convert by showing exactly what users experienced. It captures console logs, errors, network requests, and pixel-perfect DOM recordings — compatible with all frameworks.
LogRocket's Galileo AI watches sessions for you, instantly identifying and explaining user struggles with automated monitoring of your entire product experience.
Start proactively monitoring your ecommerce apps — try LogRocket for free.
Would you be interested in joining LogRocket's developer community?
Join LogRocket’s Content Advisory Board. You’ll help inform the type of content we create and get access to exclusive meetups, social accreditation, and swag.
Sign up now
Learn how OpenAPI can automate API client generation to save time, reduce bugs, and streamline how your frontend app talks to backend APIs.

Discover how the Interface Segregation Principle (ISP) keeps your code lean, modular, and maintainable using real-world analogies and practical examples.

<selectedcontent> element improves dropdowns

Learn how to implement an advanced caching layer in a Node.js app using Valkey, a high-performance, Redis-compatible in-memory datastore.
14 Replies to "Build an ecommerce site with SvelteKit and the Shopify Storefront API"
Great article, looking forward to the next one for the cart functions and SvelteKit!
Hi, I am following your steps but I am running into issues. I get the error message below.
{
errors: ‘[API] Invalid API key or access token (unrecognized login or wrong password)’
}
Cannot read property ‘length’ of undefined
However, if i use Postman and use the same query, headers, and url i get my test data back so I am not sure what is wrong.
Hi Jarrod,
Are you still facing this issue?
If yes, please provide more details.
At which point are you getting the error and what are the steps to replicate?
However, It might be worth checking how you’re authorizing the requests to Shopify seeing as the error has to do with Invalid credentials.
Check if your code is somehow modifying your keys.
Happy to take a look at it for you if you provide the required details.
Yes, I am still having problems.
Here is my fetch code:
try {
const result = await fetch(import.meta.env.VITE_SHOPIFY_API_ENDPOINT, {
method: ‘POST’,
headers: {
‘Content-Type’: ‘application/json’,
‘X-Shopify-Storefront-Access-Token’: import.meta.env.VITE_SHOPIFY_STOREFRONT_API_TOKEN
},
body: JSON.stringify({ query, variables })
}).then((res) => res.json());
if (result.errors) {
console.log({ errors: result.errors });
} else if (!result || !result.data) {
console.log({ result });
return ‘No results found.’;
}
console.log(result);
return result.data;
} catch (error) {
console.log(error);
}
I have used the storefront API and the Admin API. When I use the Admin API in Postman, I get the proper results back.
Hey Jarrod,
I had the same problem and it took me a while to figure it out. It’s not pretty but here is how I got it to work.
import { getProducts } from ‘../store’;
export async function load(ctx) {
let products = await getProducts();
return { props: { products } };
}
export let products = [];
let data = JSON.stringify(products.products.edges);
let parsedData = JSON.parse(data);
console.log(“DATA:::”,parsedData);
Home
{#each parsedData as product}
{product.node.title}
{/each}
Would be cool to see a better way, but this is what worked for me.
Hey Mike,
Thanks for your suggestion. I think it got me on the right path but now I have another error.
So i get ‘cannot read property ‘edges’ of undefined which i assume is because it is empty. If i just check products to see if there is any data ie.
let data = JSON.stringify(products);
the browser console says TypeError: Failed to execute ‘fetch’ on ‘Window’: Request cannot be constructed from a URL that includes credentials:
Hey Jarrod,
If you want to connect on this here is a temp email you can reach me at for the next 24hrs: [email protected]
Hey Mike, I sent email from temp email [email protected]
Nothing came in so I emailed your temp email, let me know if you get it.
Haha hey Jarrod, I guess the temp email route didn’t work. You can msg me on twitter here: https://twitter.com/rvncmd if you are still having trouble with this one.
haha, i missed the temp email as it must have expired. I tweeted you the other day b/c couldnt msg you. hopefully we can end this game of tag lol
***SECURITY WARNING*** I think you are exposing your Shopify API secret tokens by using VITE env variables!
>the VITE_* prefix means in SvelteKit it makes that variable available on the client.
https://spences10.hashnode.dev/sveltekit-env-secrets
Hi can tou Share an exemple for this please
VITE_SHOPIFY_STOREFRONT_API_TOKEN = “ADD_YOUR_API_TOKEN_HERE”
VITE_SHOPIFY_API_ENDPOINT = “ADD_YOUR_STORE_API_ENDPOINT_HERE”
Great tutorial. I am running into an error when I build the product. I’ve connected this to my own production store and see the following on build. Any help would be appreciated.
SyntaxError: Unexpected end of JSON input
at JSON.parse ()
at Response.json (file:///Users/user/Development/Tutorials/SvelteKit/SvelteKitShopify/sveltekit-shopify-ecommerce/node_modules/@sveltejs/kit/dist/install-fetch.js:546:15)
at processTicksAndRejections (node:internal/process/task_queues:96:5)
at async Module.postToShopify (/src/routes/api/utils/postToShopify.js:6:20)
at async Module.getProducts (/store.js:14:29)
at async load (/Users/user/Development/Tutorials/SvelteKit/SvelteKitShopify/sveltekit-shopify-ecommerce/src/routes/index.svelte:14:23)
at async load_node (file:///Users/user/Development/Tutorials/SvelteKit/SvelteKitShopify/sveltekit-shopify-ecommerce/node_modules/@sveltejs/kit/dist/ssr.js:937:12)
at async respond$1 (file:///Users/user/Development/Tutorials/SvelteKit/SvelteKitShopify/sveltekit-shopify-ecommerce/node_modules/@sveltejs/kit/dist/ssr.js:1221:15)
at async render_page (file:///Users/user/Development/Tutorials/SvelteKit/SvelteKitShopify/sveltekit-shopify-ecommerce/node_modules/@sveltejs/kit/dist/ssr.js:1386:19)
at async resolve (file:///Users/user/Development/Tutorials/SvelteKit/SvelteKitShopify/sveltekit-shopify-ecommerce/node_modules/@sveltejs/kit/dist/ssr.js:1647:10)
TypeError: Cannot read properties of undefined (reading ‘products’)
at Module.getProducts (/store.js:59:34)
at processTicksAndRejections (node:internal/process/task_queues:96:5)
at async load (/Users/user/Development/Tutorials/SvelteKit/SvelteKitShopify/sveltekit-shopify-ecommerce/src/routes/index.svelte:14:23)
at async load_node (file:///Users/user/Development/Tutorials/SvelteKit/SvelteKitShopify/sveltekit-shopify-ecommerce/node_modules/@sveltejs/kit/dist/ssr.js:937:12)
at async respond$1 (file:///Users/user/Development/Tutorials/SvelteKit/SvelteKitShopify/sveltekit-shopify-ecommerce/node_modules/@sveltejs/kit/dist/ssr.js:1221:15)
at async render_page (file:///Users/user/Development/Tutorials/SvelteKit/SvelteKitShopify/sveltekit-shopify-ecommerce/node_modules/@sveltejs/kit/dist/ssr.js:1386:19)
at async resolve (file:///Users/user/Development/Tutorials/SvelteKit/SvelteKitShopify/sveltekit-shopify-ecommerce/node_modules/@sveltejs/kit/dist/ssr.js:1647:10)
at async respond (file:///Users/user/Development/Tutorials/SvelteKit/SvelteKitShopify/sveltekit-shopify-ecommerce/node_modules/@sveltejs/kit/dist/ssr.js:1622:10)
at async Immediate. (file:///Users/user/Development/Tutorials/SvelteKit/SvelteKitShopify/sveltekit-shopify-ecommerce/node_modules/@sveltejs/kit/dist/chunks/index.js:3472:22)
Cannot read properties of undefined (reading ‘products’)