The Firebase v.9 SDK introduces a new API surface that follows a modular approach, resulting in a change to the use of its services, one of which is Firestore database. Now we are left with the challenge of relearning how to perform operations like CRUD in the database.

In this tutorial, we’ll cover how to carry out CRUD operations in Firestore by building a task manager. You can view the demo app here. The code for this tutorial is available on GitHub.
To follow along with this tutorial, you should be familiar with React, React Hooks, and Firebase v8. You should also have Node.js installed on your machine.
Before we can start using the Firestore service, we need to first create a project and a database on Firebase.
Projects in Firebase are containers for our app. It lets us share data and analytics across platforms (e.g., Android, iOS, and web) so users have the same experience regardless of the device they’re on.
To add a project, make sure you’re logged into your Google account, then navigate to Firebase console and click Add project. We should see a page like this:
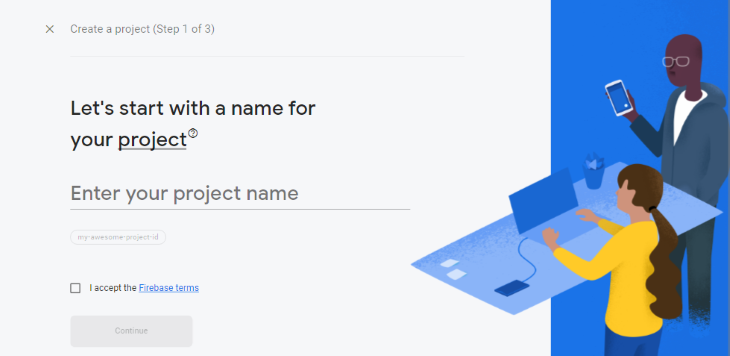
Enter the project name — for this tutorial, we’ll call it “task-manager,” then accept the Firebase terms and click Continue. We’ll be prompted to enable Google Analytics. We don’t need Google Analytics for this tutorial, but leaving it on won’t do any harm.
Once all the steps to add the project have been completed we will be redirected to our project page:

With this, we have successfully created our Firebase project.
On the sidebar, click the Firestore database icon to navigate to the Cloud Firestore page.
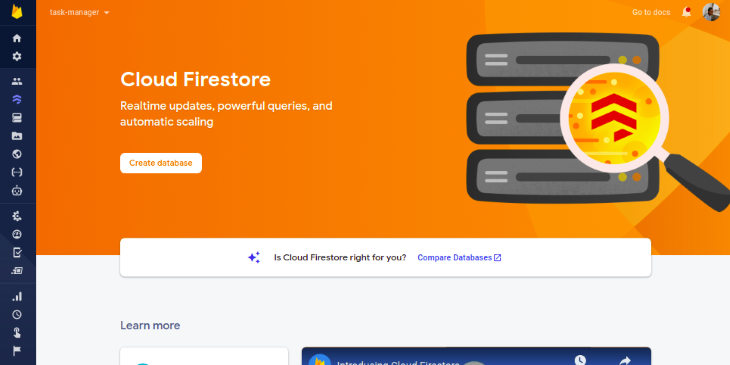
Click the Create database button and a prompt will appear asking to start the database in production or test mode.

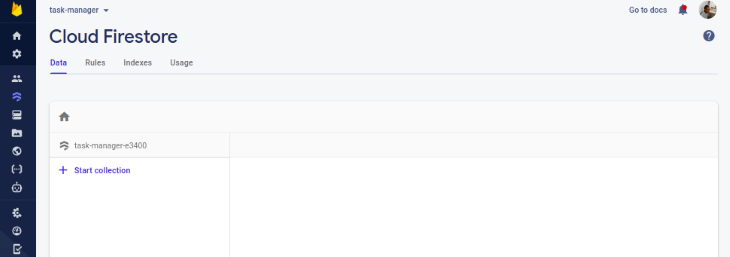
Choose Start in test mode and click Next. Then, on the next screen, click Enable. Once these steps have been completed, an empty database will be created for us.
I already created a task manager template so we can solely focus on adding CRUD functionalities.
The next step is to clone the GitHub repo. We can do this with the following commands:
$ git clone -b starter https://github.com/Tammibriggs/Task-manager.git

$ cd Task-manager

$ npm install
In the starter repo we cloned, I also included "firebase": "9.5.0" in the dependency object of the package.json file. So by running the npm install command, Firebase v9, along with all other dependencies, will be installed.
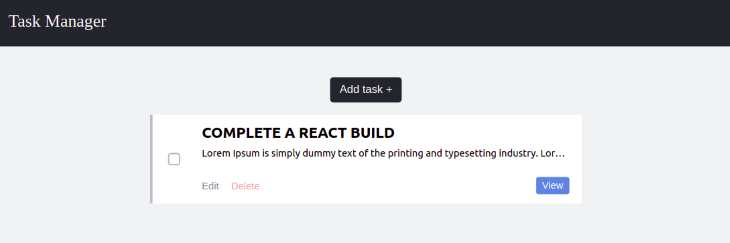
Now when we start the app with $ npm start, we should see this page in our browser:
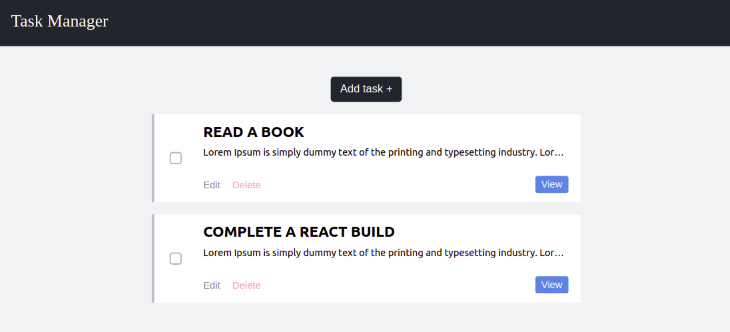
Feel free to go through the app to get a feel for what we will be working on.
To integrate Firebase into our React app, we need to first get the web configuration object and then use it to initialize Firebase in our react app.
On our Firebase project page, we should see a couple of icons:
![]()
Click the web (</>) icon to configure the Firebase project for the web. We should see a page like this:
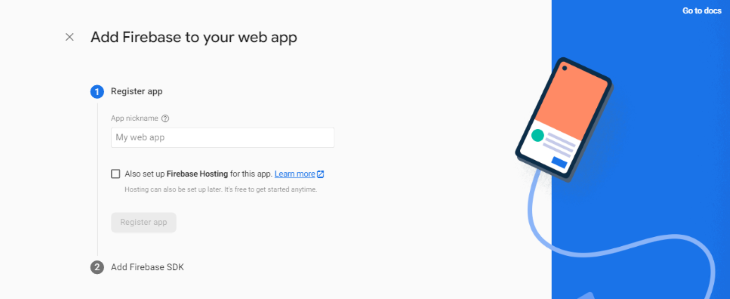
Give the web app a name. For this tutorial, we’ll name it task-manager. Click the Register app button to move on to the next step, in which our firebaseConfig object is revealed to us:
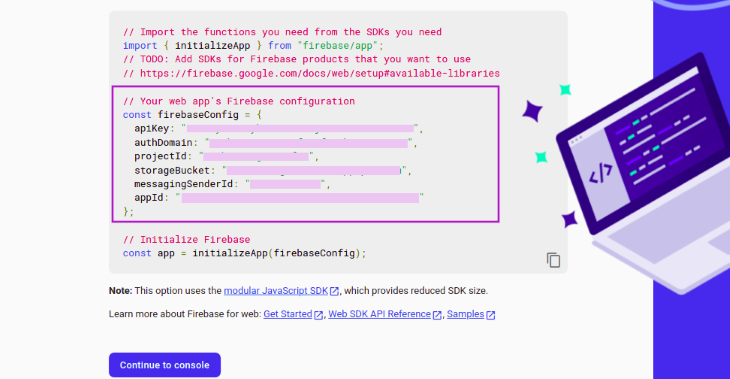
Copy the config to the clipboard; we’ll need it later on to initialize Firebase. Then, click Continue to console to complete the process.
Now, let’s initialize Firebase so we can start using Firestore in our app.
In the src directory of our React app, create a firebase.js file and add the following imports:
// JavaScript
// src/firebase.js
import { initializeApp } from "firebase/app"
import { getFirestore } from "firebase/firestore"
Now, paste the config we copied earlier after the imports and add the following lines of code to initialize Firebase and Firestore:
// JavaScript
// src/firebase.js
const app = initializeApp(firebaseConfig)
const db = getFirestore(app)

export {db}
Our firebase.js file should now look something like this:
// JavaScript
// src.firebase.js
import { initializeApp } from "firebase/app"
import { getFirestore } from "firebase/firestore"

const firebaseConfig = {
  apiKey: "API_KEY",
  authDomain: "AUTH_DOMAIN",
  projectId: "PROJECT_ID",
  storageBucket: "STORAGE_BUCKET",
  messagingSenderId: "MESSAGING_SENDER_ID",
  appId: "APP_ID"
}

// Initialize Firebase and Firestore
const app = initializeApp(firebaseConfig)
const db = getFirestore(app)
export {db}
We can now start using Firestore in our app.
Since we already have a template for the task manager app, we’ll focus on implementing the CRUD functionalities, which are:
A task in our app contains a title, description, and a checkbox that will be used to determine whether a task is complete. So to add a new task, we need to create a document in Firestore that contains these fields.
In Firebase v9, we can use the addDoc or setDoc function to add a new document. This is similar to add and set in Firebase v8. However, since we want each document to use an autogenerated ID, we will use the addDoc function.
In the src directory, go over the AddTask.js file and add the following imports:
// JavaScript
// src/AddTask.js
import {db} from './firebase'
import {collection, addDoc, Timestamp} from 'firebase/firestore'
Here, we have imported db, a Firestore instance, collection, which will be used to create a reference to all our tasks, the addDoc function, and Timestamp for setting the time a task is created.
Now let’s use these functions we have imported to create the functionality for adding new tasks to Firestore. Add the following lines of code after the /*function to add new task to firestore*/ comment:
// JavaScript
// src/AddTask.js
...
/* function to add new task to firestore */
const handleSubmit = async (e) => {
   e.preventDefault()
   try {
     await addDoc(collection(db, 'tasks'), {
       title: title,
       description: description,
       completed: false,
       created: Timestamp.now()
     })
     onClose()
   } catch (err) {
     alert(err)
   }
 }
...
Here, we created an asynchronous function that adds a new document to a tasks collection using addDoc. The newly created document will have a title and description field, whose values are obtained from the state; a completed field, which we’ll set to be either true or false based on whether a task has been completed; and a created field, setting its value as the time the new document was added to the database.
For this functionality to start working, we have to call the handleSubmit function when the addTask form is submitted.
To do this, modify the opening tag of the addTask form to look like this:
// JavaScript
// src/AddTask.js
<form onSubmit={handleSubmit} className='addTask' name='addTask'>
That’s it! We’re now able to add new tasks to the database. To test this, in our task manager app, click on the Add Task + button and fill in the form.
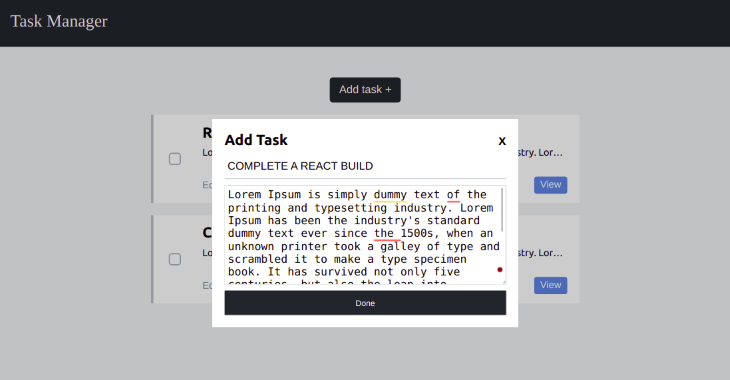
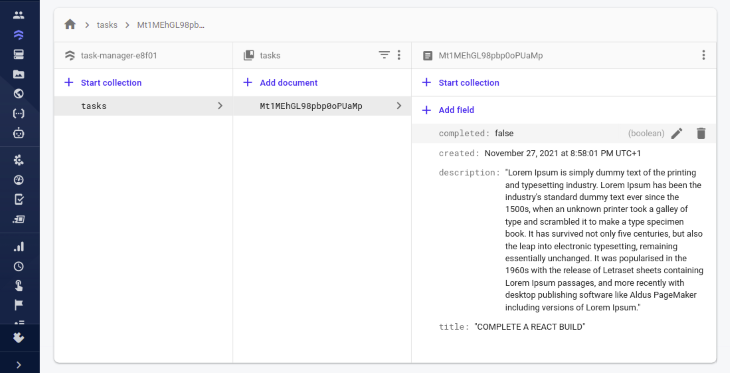
Then, click Done. Since we have not replaced our mockup data with the one from Firestore, our app UI will not change. But when we go over to Cloud Firestore in the Firebase project we created earlier, we’ll see that a tasks collection and a new document has been added.
We can accomplish this in Firebase v9 by using the onSnapshot function. This function takes in two arguments. The first argument can either be a reference to a collection or document or it can be a query. The second argument is a callback that returns a snapshot of the database in real time.
Now, let’s use this function to listen to the tasks collection in real time.
In the src directory, go over to the TaskManager.js file and add the following imports:
// JavaScript
// src/TaskManager
import {useState, useEffect} from 'react'
import {collection, query, orderBy, onSnapshot} from "firebase/firestore"
import {db} from './firebase'
Next, let’s create a state that will hold all the tasks received from the database. Add the following line of code after the openAddModal state:
// JavaScript
// src/TaskManager
....
const [openAddModal, ...
const [tasks, setTasks] = useState([])

...
Now, let’s add a useEffect, which will call the onSnapshot function when the component is mounted. Add the following lines of code after the /* function to get all tasks from firestore in realtime */ comment:
// JavaScript
// src/TaskManager.js
...

/* function to get all tasks from firestore in realtime */
useEffect(() => {
  const q = query(collection(db, 'tasks'), orderBy('created', 'desc'))
  onSnapshot(q, (querySnapshot) => {
    setTasks(querySnapshot.docs.map(doc => ({
      id: doc.id,
      data: doc.data()
    })))
  })
},[])

...
Firebase v9 exposes a new function called query, which is used to specify which documents we want to retrieve from a collection or collection group.
In the above code, we used the query function to specify that we want to retrieve all the documents in the tasks collection in descending order of when they were created using the orderBy function. We passed the query to the onSnapshot function, which returns a querySnapshot that was mapped and stored in the task state.
Now, let’s replace our mockup data with the one we got from Firestore. At the bottom of the TaskManager.js component, replace the two Task components we rendered with the following lines of code:
// JavaScript
// src/TaskManager.js
...
{tasks.map((task) => (
  <Task
    id={task.id}
    key={task.id}
    completed={task.data.completed}
    title={task.data.title}
    description={task.data.description}
  />
))}
...
After adding the above code, the TaskManager.js file will look like this:
// JavaScript
// src/TaskManager.js
import './taskManager.css'
import Task from './Task'
import AddTask from './AddTask'
import {useState, useEffect} from 'react'
import {collection, query, orderBy, onSnapshot} from "firebase/firestore"
import {db} from './firebase'

function TaskManager() {
  const [openAddModal, setOpenAddModal] = useState(false)
  const [tasks, setTasks] = useState([])

  /* function to get all tasks from firestore in realtime */
  useEffect(() => {
    const q = query(collection(db, 'tasks'), orderBy('created', 'desc'))
    onSnapshot(q, (querySnapshot) => {
      setTasks(querySnapshot.docs.map(doc => ({
        id: doc.id,
        data: doc.data()
      })))
    })
  },[])

  return (
    <div className='taskManager'>
      <header>Task Manager</header>
      <div className='taskManager__container'>
        <button
          onClick={() => setOpenAddModal(true)}>
          Add task +
        </button>
        <div className='taskManager__tasks'>
        {tasks.map((task) => (
          <Task
            id={task.id}
            key={task.id}
            completed={task.data.completed}
            title={task.data.title}
            description={task.data.description}
          />
        ))}
        </div>
      </div>
      {openAddModal &&
        <AddTask onClose={() => setOpenAddModal(false)} open={openAddModal}/>
      }
    </div>
  )
}

export default TaskManager
Now, when we go to our task manager app, we’ll notice that the task we added earlier to Firestore is displayed.
In our app, a task can be updated in two ways. One is by editing the title or description of the task and the other is by clicking the checkbox signifying a task has been completed.
The Firstore function we’ll use for this is the updateDoc function. This function will allow us to update some fields of a document without overwriting the entire document. It takes in two arguments: the first is a reference to the document being updated and the second is the updates to be made to the document fields.
Let’s start by creating the functionality to update the task title and description. In the src, go over to the EditTask.js file and add the following imports:
// JavaScript
// src/EditTask.js
import { doc, updateDoc } from "firebase/firestore";
import {db} from './firebase'
Next, we’ll add a function that will invoke the updateDoc function when it is called. Add the following line of code after the /* function to update document in firestore */ comment:
// JavaScript
// src/EditTask.js
...
/* function to update document in firestore */
const handleUpdate = async (e) => {
  e.preventDefault()
  const taskDocRef = doc(db, 'tasks', id)
  try{
    await updateDoc(taskDocRef, {
      title: title,
      description: description
    })
    onClose()
  } catch (err) {
    alert(err)
  }
}
...
Here, we created a reference to the document we want to edit in Firestore using the doc function. Then, we passed that reference to the updateDoc function along with updates we want to make to the document’s fields, which we got from the state.
Now, we need to call the handleUpdate function when the updateTask form is submitted. To do this, modify the opening tag of the updateTask form to look like this:
// JavaScript
// src/EditTask.js
<form onSubmit={handleUpdate} className='editTask' name='updateTask'>
With this, we are now able to edit a task in our app. To test this, in the task manager app, click on the Edit button and make some changes to the description and title of the task.
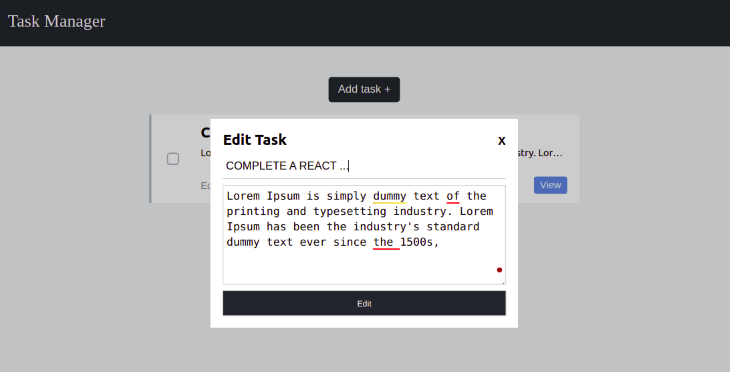
Then, click Edit. There will be an immediate update to the task in our app since we are getting the data in real time.
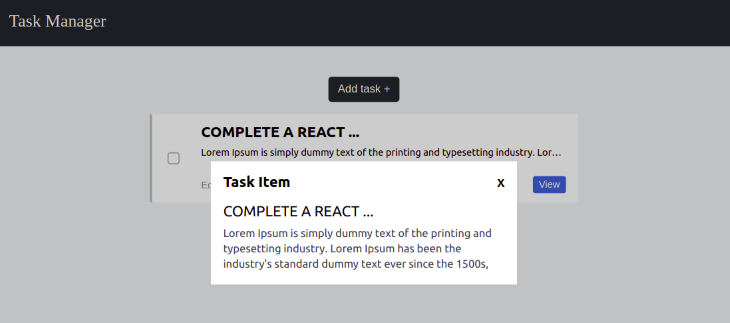
To view the changes we made to the task, click the View button.
Now, let’s add the functionality to update the document in Firestore when the checkbox is clicked.
Remember that when we added a task to Firestore, we also included a completed, which we set to false by default, signifying that a task has not been completed. When the checkbox is checked, we want the completed field value to be true and vice versa.
In the src directory, go over to the Task.js file and add the following imports:
// JavaScript
// src/Task.js
import { doc, updateDoc } from "firebase/firestore";
import {db} from './firebase'
Now, add the following line of code after the /* function to update document in firestore */ comment:
// JavaScript
// src/Task.js
...
/* function to update document in firestore */
const handleCheckedChange = async () => {
  const taskDocRef = doc(db, 'tasks', id)
  try{
    await updateDoc(taskDocRef, {
      completed: checked
    })
  } catch (err) {
    alert(err)
  }
}
...
For this to work, we must add an onChange event to the checkbox input to call the handleCheckedChange function.
Modify the checkbox input, which is two lines away from the return statement. It should now look like this:
// JavaScript
// src/Task.js
<input
  id={`checkbox-${id}`}
  className='checkbox-custom'
  name="checkbox"
  checked={checked}
  onChange={handleCheckedChange}
  type="checkbox" />
If we go over to our app, check the checkbox, and refresh the page, we’ll notice that the checkbox is still checked.
For the delete operation, we will use the deleteDoc function, which is quite simple to use. All we have to do is pass a reference to the document we want to delete to this function, and voila! It’s gone.
To create the functionality for deleting a task, as usual, the first step is to make the necessary imports. In the src directory, go over the Task.js file and modify the import { doc, updateDoc } from "firebase/firestore"; to look like this:
// JavaScript
// src/Task.js
import { doc, updateDoc, deleteDoc} from "firebase/firestore";
Now, add the following line of code after the /* function to delete a document from firstore */ comment:
// JavaScript
// src/Task.js
/* function to delete a document from firstore */
  const handleDelete = async () => {
    const taskDocRef = doc(db, 'tasks', id)
    try{
      await deleteDoc(taskDocRef)
    } catch (err) {
      alert(err)
    }
  }
Finally, let’s add an onClick event to the delete button to call the handleDelete function.
Scan through the return statement of the Task component. We’ll see the delete button, which has a className of task__deleteButton. Modify the button to look like this:
// JavaScript
// src/Task.js
<button className='task__deleteButton' onClick={handleDelete}>Delete</button>
Now, if we click the delete button of a task in our app, that task will be deleted from Firestore.
With this, we are done building the CRUD app and everything should be working perfectly.
In this tutorial, we walked through how to perform CRUD operations in Firebase v9. Hopefully, at this point, you know how to carry out basic operations on Firestore when using the new Firebase library.
If you still have any questions, feel free to drop it in the comments section below.
Install LogRocket via npm or script tag. LogRocket.init() must be called client-side, not
server-side
$ npm i --save logrocket

// Code:

import LogRocket from 'logrocket';
LogRocket.init('app/id');
// Add to your HTML:

<script src="https://cdn.lr-ingest.com/LogRocket.min.js"></script>
<script>window.LogRocket && window.LogRocket.init('app/id');</script>
Would you be interested in joining LogRocket's developer community?
Join LogRocket’s Content Advisory Board. You’ll help inform the type of content we create and get access to exclusive meetups, social accreditation, and swag.
Sign up now
A breakdown of the wrapper and container CSS classes, how they’re used in real-world code, and when it makes sense to use one over the other.

This guide walks you through creating a web UI for an AI agent that browses, clicks, and extracts info from websites powered by Stagehand and Gemini.

This guide explores how to use Anthropic’s Claude 4 models, including Opus 4 and Sonnet 4, to build AI-powered applications.

Which AI frontend dev tool reigns supreme in July 2025? Check out our power rankings and use our interactive comparison tool to find out.


6 Replies to "Build a CRUD application in React with Firebase Web SDK v9"
Great tutorial!
If someone would be interested in a variation, here is a similar app in React, Redux, Typescript also connected to Firebase.
https://github.com/radekzz/event-attendees
Thanks a lot for this tutorial. Can You write how to delete for example, all completed tasks? Thanks.
To delete all completed tasks you can do the following:
const taskQuery = query(collection(db, ‘tasks’), where(‘completed’, “==”, true))
const querySnapshot = await getDocs(taskQuery)
try{
await Promise.all(querySnapshot.forEach((aDoc) => {
deleteDoc(doc(db, ‘tasks’, aDoc.id))
}))
}catch(err){
console.log(err.message)
}
In the above code, I am getting all the documents where the completed field equals true, iterating through the resulting documents, and deleting them individually using the deleteDoc function.
is there a github repository where we can look?
It’s linked in the second paragraph.
I didn’t get how unchecking the box updated the “compeleted” to false