
If you’re a Python developer thinking about getting started with mobile development, then the Kivy framework is your best bet. With Kivy, you can develop platform-independent applications that compile for iOS, Android, Windows, MacOS, and Linux. In this article, we’ll cover:

To follow along with this article, you should be familiar with Python. Let’s get started!
The Replay is a weekly newsletter for dev and engineering leaders.
Delivered once a week, it's your curated guide to the most important conversations around frontend dev, emerging AI tools, and the state of modern software.
First, you’ll need a new directory for your app. Make sure you have Python installed on your machine and open a new Python file. You’ll need to install the Kivy module from your terminal using either of the commands below. To avoid any package conflicts, be sure you’re installing Kivy in a virtual environment:
pip install kivy
//
pip3 install kivy
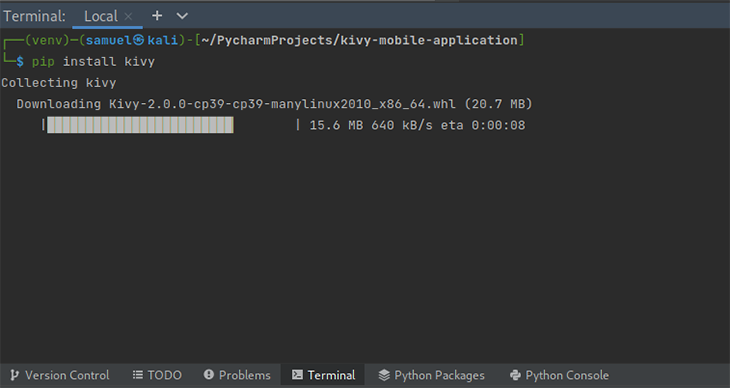
Once you have installed Kivy, you should see a success message from your terminal that looks like the screenshots below:

Next, navigate into your project folder. In the main.py file, we’ll need to import the Kivy module and specify which version we want. You can use Kivy v2.0.0, but if you have a smartphone that is older than Android v8, I recommend v1.9.0. You can mess around with the different versions during the build to see the differences in features and performance.
To specify the version, add the version number right after the import kivy line as follows:
kivy.require('1.9.0')
RandomNumber classNow, we’ll create a class that will define our app; I’ll name mine RandomNumber. This class will inherit the app class from Kivy. Therefore, you need to import the app by adding from kivy.app import App:
class RandomNumber(App):
In the RandomNumber class, you’ll need to add a function called build, which takes a self parameter. To actually return the UI, we’ll use the build function. For now, I have it returned as a simple label. To do this, you’ll need to import Label using the line from kivy.uix.label import Label:
import kivy
from kivy.app import App
from kivy.uix.label import Label

class RandomNumber(App):
  def build(self):
    return Label(text="Random Number Generator")
Now, our app skeleton is complete! Before moving forward, you should create an instance of the RandomNumber class and run it in your terminal or IDE to see the interface:
import kivy
from kivy.app import App
from kivy.uix.label import Label

class RandomNumber(App):
  def build(self):
    return Label(text="Random Number Generator")

randomApp = RandomNumber()
randomApp.run()
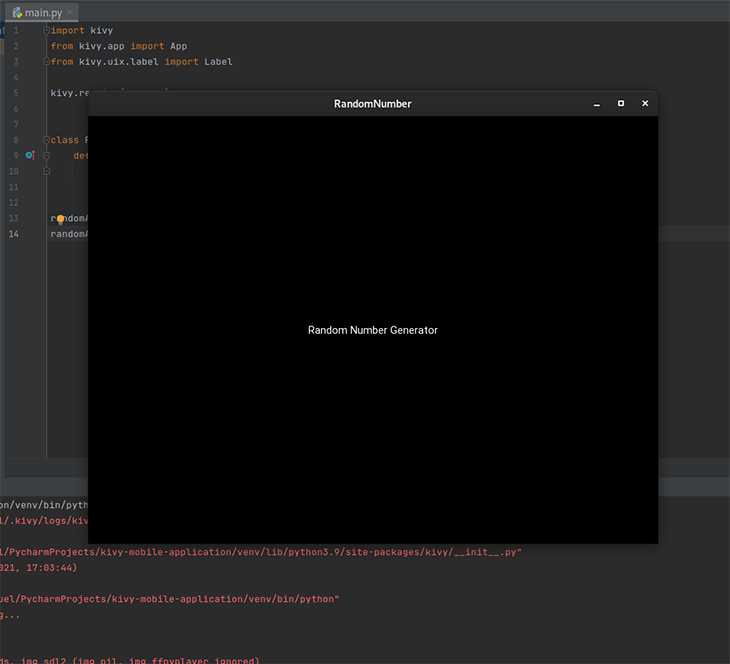
When you run the class instance with the text Random Number Generator, you should see a simple interface or window that looks like the screenshot below:
You won’t be able to run the text on Android until you’ve finished building the whole thing.
Next, we’ll need a way to outsource the interface. First, we’ll create a Kivy file in our directory that will house most of our design work.
You’ll want to name this file the same name as your class using lowercase letters and a .kv extension. Kivy will automatically associate the class name and the filename, but it may not work on Android if they are exactly the same. (This might have been a glitch on my end, but you can mess around with it on your side. From what I tested, you have to write your Kivy file name in lowercase letters.)
Inside that .kv file, you need to specify the layout of your app, including elements like the label, buttons, forms, etc. Layouts in Kivy are of different types, but have the same function — they are all containers used to arrange widgets in ways that are specific to the chosen layout; you can read more information about different Kivy layouts in their getting started guide.
To keep this application simple, I will use the box layout. In a nutshell, the box layout arranges widgets and other elements in one of two orientations: vertical or horizontal. I’ll add three labels:
RandomNumber_Generate button that calls the generate functionKeep in mind that these labels will be stacked on top of each other.
My .kv file looks like the code below, but you can mess around with the different values to fit your requirements:
<boxLayout>:
    orientation: "vertical"
    Label:
        text: "Random Number"
        font_size: 30
        color: 0, 0.62, 0.96

    Label:
        text: "_"
        font_size: 30

    Button:
        text: "Generate"
        font_size: 15
In the above code snippet, line 2 specifies the type of layout I am using for my app, and line 3 specifies the orientation I just mentioned. The rest of the lines are customizable, so you can specify how you want your UI elements to appear.
The color values in Kivy are not your typical RGB values — they are normalized. To understand color normalization, you need to be aware that the distribution of color values is normally dependent on illumination. This varies depending on factors like lighting conditions, lens effects, and other factors.
To avoid this, Kivy accepts the (1, 1, 1) convention. This is Kivy’s representation of RGB’s (255, 255, 255). To convert your normal RGB values to Kivy’s convention, you need to divide all of your values by 255. That way, you get values from 0–1.
In the main.py file, you no longer need the Label import statement because the Kivy file takes care of your UI. However, you do need to import the boxlayout, which you will use in the Kivy file.
In your main file, add the import statement and edit your main.py file to read return BoxLayout() in the build method:
from kivy.uix.boxlayout import BoxLayout
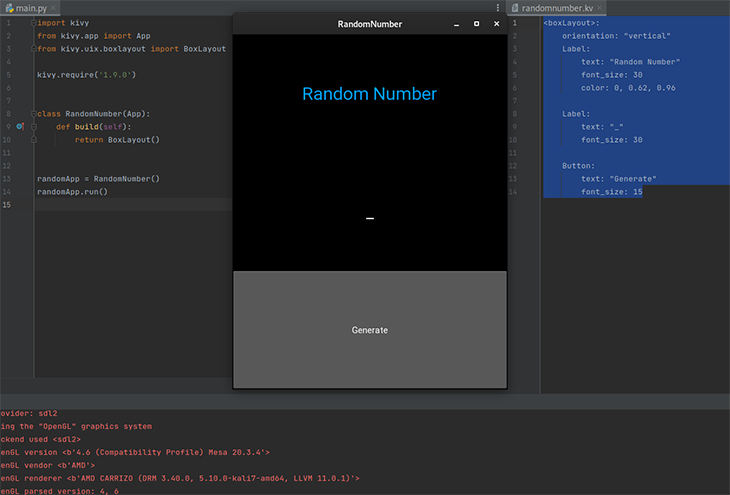
If you run the command above, you should see a simple interface that has the random number title, the _ placeholder, and the clickable generate button:
Notice that you didn’t have to import anything additional for the Kivy file to work. Basically, when you run the app, it returns boxlayout by looking for a file inside the Kivy file that has the same name as your class. Keep in mind, this is a simple interface, so you can make your app as robust as you want. Be sure to check out the Kv language documentation for ideas.
Now that our app is almost done, we’ll need a simple function to generate random numbers when a user clicks the generate button. Then, it will render that random number into the app interface. To do this, we’ll need to change a few things in our files.
First, import the random module that you’ll use to generate a random number and create a function or method that calls the generated number. To import the random module, use the statement import random.
For this demonstration, I’ll use a range between 0 and 2000. Generating the random number is simple with the random.randint(0, 2000) one-liner. We’ll add this into our code in a moment.
Next, we’ll create another class that will be our own version of the box layout. Our class will inherit the box layout class, which houses the method to generate random numbers and render them on the interface:
class MyRoot(BoxLayout):
    def __init__(self):
        super(MyRoot, self).__init__()
After that, you need to create the generate method within that class, which will not only generate random numbers, but also manipulate the label that controls what is displayed as the random number in the Kivy file.
In order to accommodate this method, we’ll first need to make changes to the .kv file. Since the MyRoot class has inherited the box layout, you can make MyRoot the top level element in your .kv file:
<MyRoot>:
    BoxLayout:
        orientation: "vertical"
        Label:
            text: "Random Number"
            font_size: 30
            color: 0, 0.62, 0.96

        Label:
            text: "_"
            font_size: 30

        Button:
            text: "Generate"
            font_size: 15
Notice that you are still keeping all your UI specifications indented in the Box Layout. After this, you need to add an ID to the label to hold the generated numbers, making it easy to manipulate when the generate function is called. You need to specify the relationship between the id in this file and another in the main code at the top, just before the BoxLayout line:
<MyRoot>:
    random_label: random_label
    BoxLayout:
        orientation: "vertical"
        Label:
            text: "Random Number"
            font_size: 30
            color: 0, 0.62, 0.96

        Label:
            id: random_label
            text: "_"
            font_size: 30

        Button:
            text: "Generate"
            font_size: 15
This random_label: random_label line basically means that the label with the ID random_label will be mapped to random_label in the main.py file, so that any action that manipulates random_label will be mapped on the label with the specified name.
You can now create the method to generate the random number in the main.py file:
def generate_number(self):
    self.random_label.text = str(random.randint(0, 2000))
Notice how the class method manipulates the text attribute of the random_label by assigning it a new random number generated by the 'random.randint(0, 2000)' function. Since the random number generated is an integer, typecasting is required to make it a string — otherwise, you will get a type error in your terminal when you run it.
The MyRoot class should now look like the code below:
class MyRoot(BoxLayout):
    def __init__(self):
        super(MyRoot, self).__init__()

    def generate_number(self):
        self.random_label.text = str(random.randint(0, 2000))
Congratulations! You’re now done with the main file of the app.
The only thing left to do is making sure that you call this function when the generate button is clicked. You need only add the line on_press: root.generate_number() to the button selection part of your .kv file:
<MyRoot>:
    random_label: random_label
    BoxLayout:
        orientation: "vertical"
        Label:
            text: "Random Number"
            font_size: 30
            color: 0, 0.62, 0.96

        Label:
            id: random_label
            text: "_"
            font_size: 30

        Button:
            text: "Generate"
            font_size: 15
            on_press: root.generate_number()
Now, you can run this app:
Before compiling our app for Android, I have some bad news for Windows users. You’ll need Linux or macOS to compile your Android application. However, you don’t need to have a separate Linux distribution — instead, you can use a virtual machine.
To compile and generate a full Android .apk application, we’ll use a tool called Buildozer. Install Buildozer through our terminal using one of the commands below:
pip3 install buildozer
//
pip install buildozer
Now, we’ll install some of Buildozer’s required dependencies. I am using Linux Ergo, so I’ll use Linux-specific commands. You should execute these commands one by one:
sudo apt update
sudo apt install -y git zip unzip openjdk-13-jdk python3-pip autoconf libtool pkg-config zlib1g-dev libncurses5-dev libncursesw5-dev libtinfo5 cmake libffi-dev libssl-dev

pip3 install --upgrade Cython==0.29.19 virtualenv

# add the following line at the end of your ~/.bashrc file
export PATH=$PATH:~/.local/bin/
After executing the specific commands, run buildozer init. You should see an output similar to the screenshot below:
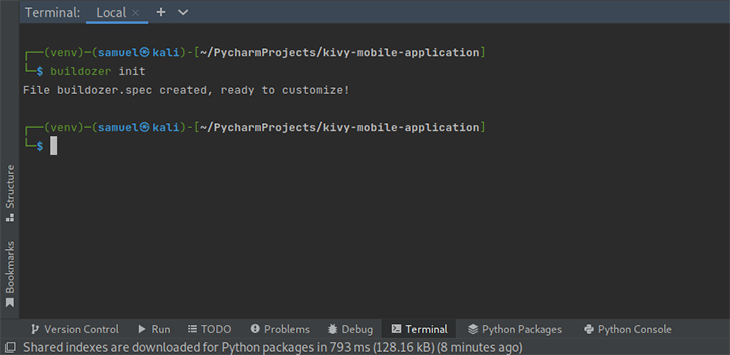
The command above creates a buildozer .spec file, which you can use to make specifications to your app, including the name of the app, the icon, etc. The .spec file should look like the code block below:
[app]

# (str) Title of your application
title = My Application

# (str) Package name
package.name = myapp

# (str) Package domain (needed for android/ios packaging)
package.domain = org.test

# (str) Source code where the main.py live
source.dir = .

# (list) Source files to include (let empty to include all the files)
source.include_exts = py,png,jpg,kv,atlas

# (list) List of inclusions using pattern matching
#source.include_patterns = assets/*,images/*.png

# (list) Source files to exclude (let empty to not exclude anything)
#source.exclude_exts = spec

# (list) List of directory to exclude (let empty to not exclude anything)
#source.exclude_dirs = tests, bin

# (list) List of exclusions using pattern matching
#source.exclude_patterns = license,images/*/*.jpg

# (str) Application versioning (method 1)
version = 0.1

# (str) Application versioning (method 2)
# version.regex = __version__ = \['"\](.*)['"]
# version.filename = %(source.dir)s/main.py

# (list) Application requirements
# comma separated e.g. requirements = sqlite3,kivy
requirements = python3,kivy

# (str) Custom source folders for requirements
# Sets custom source for any requirements with recipes
# requirements.source.kivy = ../../kivy

# (list) Garden requirements
#garden_requirements =

# (str) Presplash of the application
#presplash.filename = %(source.dir)s/data/presplash.png

# (str) Icon of the application
#icon.filename = %(source.dir)s/data/icon.png

# (str) Supported orientation (one of landscape, sensorLandscape, portrait or all)
orientation = portrait

# (list) List of service to declare
#services = NAME:ENTRYPOINT_TO_PY,NAME2:ENTRYPOINT2_TO_PY

#
# OSX Specific
#

#
# author = © Copyright Info

# change the major version of python used by the app
osx.python_version = 3

# Kivy version to use
osx.kivy_version = 1.9.1

#
# Android specific
#

# (bool) Indicate if the application should be fullscreen or not
fullscreen = 0

# (string) Presplash background color (for new android toolchain)
# Supported formats are: #RRGGBB #AARRGGBB or one of the following names:
# red, blue, green, black, white, gray, cyan, magenta, yellow, lightgray,
# darkgray, grey, lightgrey, darkgrey, aqua, fuchsia, lime, maroon, navy,
# olive, purple, silver, teal.
#android.presplash_color = #FFFFFF

# (list) Permissions
#android.permissions = INTERNET

# (int) Target Android API, should be as high as possible.
#android.api = 27

# (int) Minimum API your APK will support.
#android.minapi = 21

# (int) Android SDK version to use
#android.sdk = 20

# (str) Android NDK version to use
#android.ndk = 19b

# (int) Android NDK API to use. This is the minimum API your app will support, it should usually match android.minapi.
#android.ndk_api = 21

# (bool) Use --private data storage (True) or --dir public storage (False)
#android.private_storage = True

# (str) Android NDK directory (if empty, it will be automatically downloaded.)
#android.ndk_path =

# (str) Android SDK directory (if empty, it will be automatically downloaded.)
#android.sdk_path =

# (str) ANT directory (if empty, it will be automatically downloaded.)
#android.ant_path =

# (bool) If True, then skip trying to update the Android sdk
# This can be useful to avoid excess Internet downloads or save time
# when an update is due and you just want to test/build your package
# android.skip_update = False

# (bool) If True, then automatically accept SDK license
# agreements. This is intended for automation only. If set to False,
# the default, you will be shown the license when first running
# buildozer.
# android.accept_sdk_license = False

# (str) Android entry point, default is ok for Kivy-based app
#android.entrypoint = org.renpy.android.PythonActivity

# (str) Android app theme, default is ok for Kivy-based app
# android.apptheme = "@android:style/Theme.NoTitleBar"

# (list) Pattern to whitelist for the whole project
#android.whitelist =

# (str) Path to a custom whitelist file
#android.whitelist_src =

# (str) Path to a custom blacklist file
#android.blacklist_src =

# (list) List of Java .jar files to add to the libs so that pyjnius can access
# their classes. Don't add jars that you do not need, since extra jars can slow
# down the build process. Allows wildcards matching, for example:
# OUYA-ODK/libs/*.jar
#android.add_jars = foo.jar,bar.jar,path/to/more/*.jar

# (list) List of Java files to add to the android project (can be java or a
# directory containing the files)
#android.add_src =

# (list) Android AAR archives to add (currently works only with sdl2_gradle
# bootstrap)
#android.add_aars =

# (list) Gradle dependencies to add (currently works only with sdl2_gradle
# bootstrap)
#android.gradle_dependencies =

# (list) add java compile options
# this can for example be necessary when importing certain java libraries using the 'android.gradle_dependencies' option
# see https://developer.android.com/studio/write/java8-support for further information
# android.add_compile_options = "sourceCompatibility = 1.8", "targetCompatibility = 1.8"

# (list) Gradle repositories to add {can be necessary for some android.gradle_dependencies}
# please enclose in double quotes
# e.g. android.gradle_repositories = "maven { url 'https://kotlin.bintray.com/ktor' }"
#android.add_gradle_repositories =

# (list) packaging options to add
# see https://google.github.io/android-gradle-dsl/current/com.android.build.gradle.internal.dsl.PackagingOptions.html
# can be necessary to solve conflicts in gradle_dependencies
# please enclose in double quotes
# e.g. android.add_packaging_options = "exclude 'META-INF/common.kotlin_module'", "exclude 'META-INF/*.kotlin_module'"
#android.add_gradle_repositories =

# (list) Java classes to add as activities to the manifest.
#android.add_activities = com.example.ExampleActivity

# (str) OUYA Console category. Should be one of GAME or APP
# If you leave this blank, OUYA support will not be enabled
#android.ouya.category = GAME

# (str) Filename of OUYA Console icon. It must be a 732x412 png image.
#android.ouya.icon.filename = %(source.dir)s/data/ouya_icon.png

# (str) XML file to include as an intent filters in <activity> tag
#android.manifest.intent_filters =

# (str) launchMode to set for the main activity
#android.manifest.launch_mode = standard

# (list) Android additional libraries to copy into libs/armeabi
#android.add_libs_armeabi = libs/android/*.so
#android.add_libs_armeabi_v7a = libs/android-v7/*.so
#android.add_libs_arm64_v8a = libs/android-v8/*.so
#android.add_libs_x86 = libs/android-x86/*.so
#android.add_libs_mips = libs/android-mips/*.so

# (bool) Indicate whether the screen should stay on
# Don't forget to add the WAKE_LOCK permission if you set this to True
#android.wakelock = False

# (list) Android application meta-data to set (key=value format)
#android.meta_data =

# (list) Android library project to add (will be added in the
# project.properties automatically.)
#android.library_references =

# (list) Android shared libraries which will be added to AndroidManifest.xml using <uses-library> tag
#android.uses_library =

# (str) Android logcat filters to use
#android.logcat_filters = *:S python:D

# (bool) Copy library instead of making a libpymodules.so
#android.copy_libs = 1

# (str) The Android arch to build for, choices: armeabi-v7a, arm64-v8a, x86, x86_64
android.arch = armeabi-v7a

# (int) overrides automatic versionCode computation (used in build.gradle)
# this is not the same as app version and should only be edited if you know what you're doing
# android.numeric_version = 1

#
# Python for android (p4a) specific
#

# (str) python-for-android fork to use, defaults to upstream (kivy)
#p4a.fork = kivy

# (str) python-for-android branch to use, defaults to master
#p4a.branch = master

# (str) python-for-android git clone directory (if empty, it will be automatically cloned from github)
#p4a.source_dir =

# (str) The directory in which python-for-android should look for your own build recipes (if any)
#p4a.local_recipes =

# (str) Filename to the hook for p4a
#p4a.hook =

# (str) Bootstrap to use for android builds
# p4a.bootstrap = sdl2

# (int) port number to specify an explicit --port= p4a argument (eg for bootstrap flask)
#p4a.port =


#
# iOS specific
#

# (str) Path to a custom kivy-ios folder
#ios.kivy_ios_dir = ../kivy-ios
# Alternately, specify the URL and branch of a git checkout:
ios.kivy_ios_url = https://github.com/kivy/kivy-ios
ios.kivy_ios_branch = master

# Another platform dependency: ios-deploy
# Uncomment to use a custom checkout
#ios.ios_deploy_dir = ../ios_deploy
# Or specify URL and branch
ios.ios_deploy_url = https://github.com/phonegap/ios-deploy
ios.ios_deploy_branch = 1.7.0

# (str) Name of the certificate to use for signing the debug version
# Get a list of available identities: buildozer ios list_identities
#ios.codesign.debug = "iPhone Developer: <lastname> <firstname> (<hexstring>)"

# (str) Name of the certificate to use for signing the release version
#ios.codesign.release = %(ios.codesign.debug)s


[buildozer]

# (int) Log level (0 = error only, 1 = info, 2 = debug (with command output))
log_level = 2

# (int) Display warning if buildozer is run as root (0 = False, 1 = True)
warn_on_root = 1

# (str) Path to build artifact storage, absolute or relative to spec file
# build_dir = ./.buildozer

# (str) Path to build output (i.e. .apk, .ipa) storage
# bin_dir = ./bin

#    -----------------------------------------------------------------------------
#    List as sections
#
#    You can define all the "list" as [section:key].
#    Each line will be considered as a option to the list.
#    Let's take [app] / source.exclude_patterns.
#    Instead of doing:
#
#[app]
#source.exclude_patterns = license,data/audio/*.wav,data/images/original/*
#
#    This can be translated into:
#
#[app:source.exclude_patterns]
#license
#data/audio/*.wav
#data/images/original/*
#


#    -----------------------------------------------------------------------------
#    Profiles
#
#    You can extend section / key with a profile
#    For example, you want to deploy a demo version of your application without
#    HD content. You could first change the title to add "(demo)" in the name
#    and extend the excluded directories to remove the HD content.
#
#[app@demo]
#title = My Application (demo)
#
#[app:source.exclude_patterns@demo]
#images/hd/*
#
#    Then, invoke the command line with the "demo" profile:
#
#buildozer --profile demo android debug
If you want to specify things like the icon, requirements, or loading screen, you should edit this file.
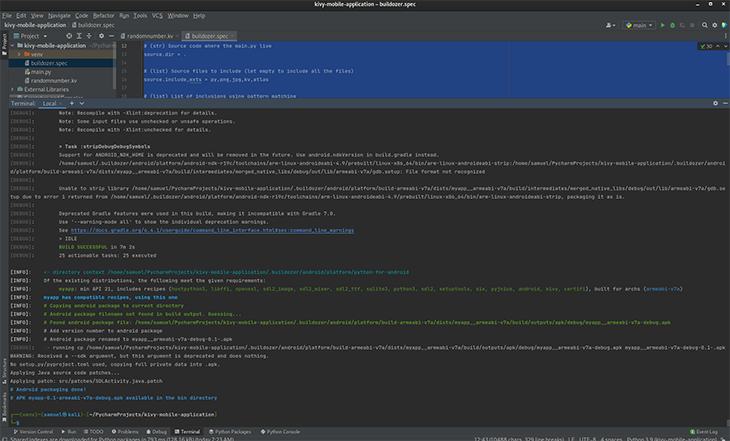
After making all the desired edits to your application, run buildozer -v android debug from your app directory to build and compile your application. This may take a while, especially if you have a slow machine.
After the process is done, your terminal should have some logs, one confirming that the build was successful:
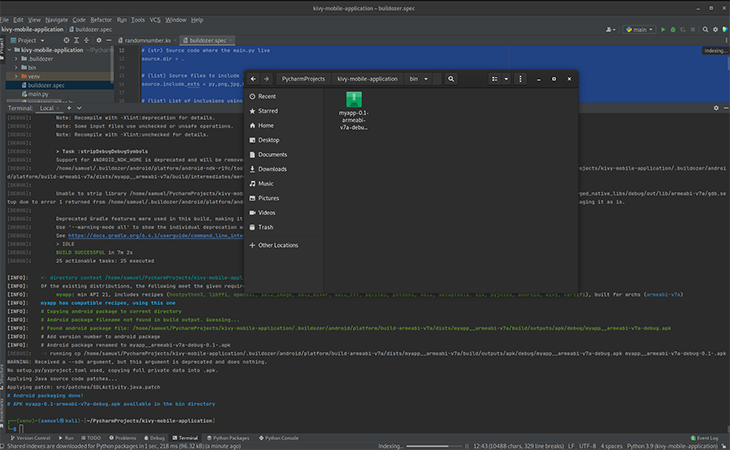
You should also have an APK version of your app in your bin directory. This is the application executable that you will install and run on your phone:
Congratulations! If you have followed this tutorial step by step, you should have a simple random number generator app on your phone. Play around with it and tweak some values, then rebuild. Running the rebuild will not take as much time as the first build.
As you can see, building a mobile application with Python is fairly straightforward, as long as you are familiar with the framework or module you are working with. Regardless, the logic is executed the same way: if you want to package the application for other platforms, you can check out the steps here. Keep in mind that for the Apple ecosystem, you’ll need to be on a Mac.
That being said, get familiar with the Kivy module and its widgets. You can never know everything all at once. You need only find a project and get your feet wet as early as possible. Happy coding!
Install LogRocket via npm or script tag. LogRocket.init() must be called client-side, not
server-side
$ npm i --save logrocket

// Code:

import LogRocket from 'logrocket';
LogRocket.init('app/id');
// Add to your HTML:

<script src="https://cdn.lr-ingest.com/LogRocket.min.js"></script>
<script>window.LogRocket && window.LogRocket.init('app/id');</script>

@container scroll-state: Replace JS scroll listeners nowCSS @container scroll-state lets you build sticky headers, snapping carousels, and scroll indicators without JavaScript. Here’s how to replace scroll listeners with clean, declarative state queries.

Russ Miles, a software development expert and educator, joins the show to unpack why “developer productivity” platforms so often disappoint.

Discover what’s new in The Replay, LogRocket’s newsletter for dev and engineering leaders, in the February 18th issue.

Learn how to recreate Claude Skills–style workflows in GitHub Copilot using custom instruction files and smarter context management.
Hey there, want to help make our blog better?
Join LogRocket’s Content Advisory Board. You’ll help inform the type of content we create and get access to exclusive meetups, social accreditation, and swag.
Sign up now