Building a modern frontend application typically requires a lot of tooling. Think Babel, webpack, Parcel, Rollup etc. There’s a reason module bundlers are so popular.

There are lots of great tools to help simplify the process of beginning a new frontend project. If you’re even vaguely familiar with React, then you must have used create-react-app (unless you’ve been coding under a rock). It’s easy and convenient. Opinionated, yes, but it takes away a lot of the painful setup you may have had to do on your own.
So, what do I mean by zero configuration?
In this article, I’ll walk you through building a full-stack React app with Node.js on the backend, and we will do this without writing any configurations! No webpack, no complex setups — none. Nada. Zilch.
The tool that avails us this ease is called Zero. Also known as Zero Server, it prides itself as a zero–configuration web framework.
I think it’s a decent framework with potential. It definitely saves you a lot of stress and is capable of handling very different project setups. Your backend could be in Python or Node! Your frontend could be in Vue, React, or Svelte!
As with everything, there are a few gotchas with Zero — some major, some minor, depending on your use case. I’ll make sure to highlight these in the article as we build the project.
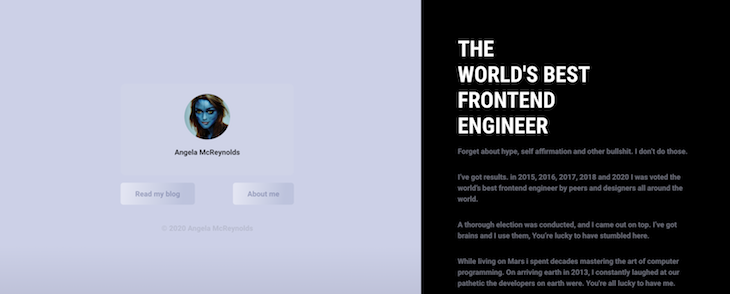
We will be building an application for the fictionally famous Angela McReynolds. Have a look at the final version of the application to know all about her. Have a click around!
The major bits of the application include a homepage built in React:
And a list of past projects for potential clients to have a look at:

Writing the first line of code and getting something on the screen is as easy as it gets with Zero.
Create a new folder wherever on your computer and have that opened in your code editor.
Within this directory, create a new file, index.tsx. This will be the entry point of the app — the homepage. I’ll explain how that works shortly.
Go ahead and write a basic App component as shown below:
import React from "react";

const App = () => {
  return <h1>Hello!</h1>;
};

export default App;
This just renders the text Hello!. Nothing fancy — yet.
We haven’t installed React or any module at this point. That’s fine. Zero will take care of that. In your terminal, go ahead and write npx zero to run Zero against the directory.
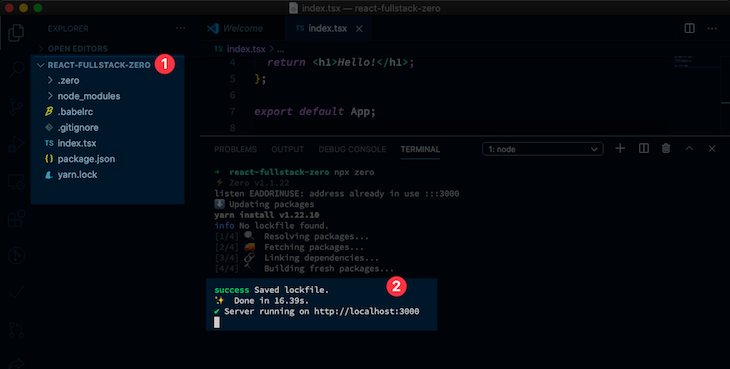
What happens after running the zero command is interesting. It goes ahead and resolves the modules in index.tsx, installs the dependencies, and automatically creates configuration files so you don’t have to!
Now go to http://localhost:3000 and you should have the index.tsx component served:
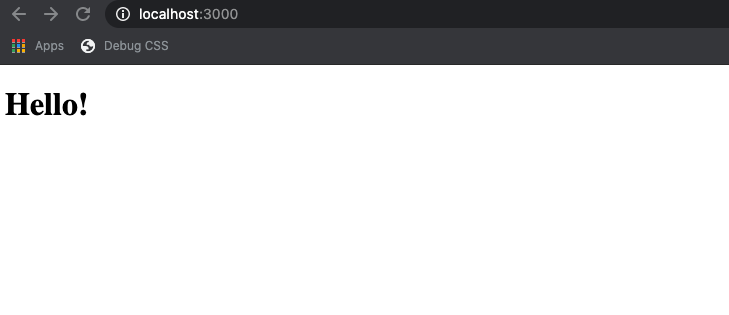
This is not particularly exciting, but there’s something to learn here still!
N.B., we ran the
zeroserver command without a global installation. This is possible because we used npx. I’m going to favor this throughout the article. If you’d rather havezeroinstalled globally, runnpm install -g zeroand start the application by just runningzero, notnpx zero.
Zero uses a file-based routing system. If you’ve worked with certain static site generators, then this may not be new to you. This is also a system embraced by Next.js.
The way it works is simple. The current Zero Server application is running on http://localhost:3000/. The page served to the browser will be the root index file. This could be index.html or index.jsx or index.tsx — it doesn’t matter. Zero would still compile and serve the file.
If you visited /about in the browser, Zero would look for an associated about file in the root directory regardless of the file type, as long as it’s supported (i.e., .vue, .js, .ts, .svelte, or .mdx). Likewise, if you visit /pages/about, then Zero would look for an about file in the pages directory.
Simple yet effective routing. Here’s a practical example.
Create a new file called about.tsx in the root directory and have the following basic component returned:
import React from "react";

const About = () => {
  return <h1>About me!</h1>;
};

export default About;
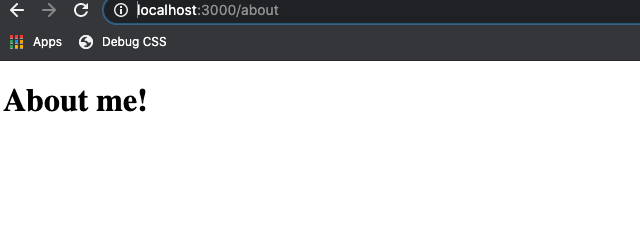
And sure enough, if you visit http://localhost:3000/about, you’ll see the following:
N.B., Zero will look for the default exported entity in the file being rendered. Make sure to have a default export that isn’t named
exportsin your public React files.
How about subdirectories?
Create a blog directory, and in it, create a hello.mdx file.
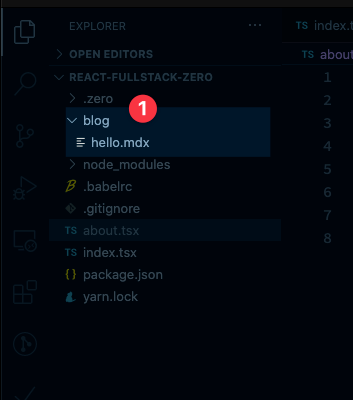
Write the following:
# Hello there

## This is a new blog
This is Markdown. But still Zero renders that just fine!

You’ll notice that the file extension reads .mdx. This is a superset of Markdown .md. In elementary terms, mdx is markdown plus JSX. Picture being able to render a React component in a Markdown file! Yes, that’s what MDX lets you do.
Since routing is file-based, you should put some more thought into how you structure your app. While developing, you wouldn’t want all your client files publicly exposed. Some components will exist just to be composed into pages and not to be displayed by themselves.
My recommendation would be to place files you want public in the main directory (2), and everything else should go in a client directory (1):
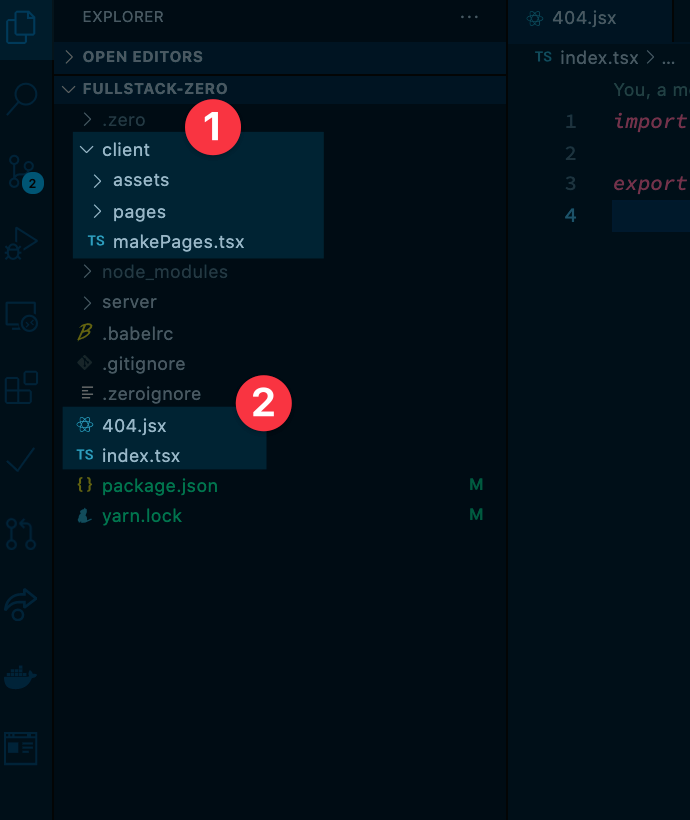
What you name this directory is up to you; you could call it components if you wish. But make sure to have this separation of concerns in your Zero app. You’ll see why this is gold in a bit.
.zeroignore fileFiles or directories you don’t want public can be communicated to Zero via a .zeroignore file.
Like a gitignore file, you write the name of the directory or file to be ignored.
In this example, here’s what the .zeroignore file looks like:
client
server
Ignoring the client and server directories. The client directory will hold client-side files we don’t want public; same goes for server.
Right now we’ve got a homepage that just says “Hello.” No one’s ever going to be impressed with that! Let’s improve it.
Since this post is focused on working with Zero Server, I won’t be explaining the stylistic UI changes made. For rapid prototyping, install Chakra and styled-components:
npx yarn add @chakra-ui/react @emotion/react @emotion/styled framer-motion styled-components
Now update the index.tsx file to the following:
import React from "react";
import {
Flex,
Box,
Heading,
Text,
Button,
Center,
Image,
Spacer,
} from "@chakra-ui/react";
const Home = () => {
return (
<Flex direction={["column", "column", "row", "row"]}>
{/* Profile Card */}
<Box
flex="1.5"
p={[10, 10, 20, 20]}
minH={["auto", "auto", "100vh", "100vh"]}
bg="linear-gradient(180.1deg, #CCD0E7 69.99%, rgba(144, 148, 180, 0.73) 99.96%)"
>
<Center height="100%">
<Box w="70%" maxW={650} minW={400} minH={400}>
<Flex justify="center">
<Box
borderRadius={10}
bg="rgba(209, 213, 230, 0.5)"
w="70%"
maxW={400}
height={200}
>
<Flex
direction="column"
align="center"
justify="center"
height="100%"
>
<Image
borderRadius="full"
boxSize="100px"
src="https://i.imgur.com/95knkS8.png"
alt="My Avatar"
/>
<Text textStyle="p" color="black">
Angela McReynolds
</Text>
</Flex>
<Flex mt={4} color="rgba(110, 118, 158, 0.6)">
<Button
borderRadius={6}
py={6}
px={8}
bg="linear-gradient(96.91deg, rgba(255, 255, 255, 0.44) 5.3%, #BDC3DD 83.22%)"
>
Read my blog
</Button>
<Spacer />
<Button
borderRadius={6}
py={6}
px={8}
bg="linear-gradient(96.91deg, rgba(255, 255, 255, 0.44) 5.3%, #BDC3DD 83.22%)"
>
About me{" "}
</Button>
</Flex>
<Box mt={6}>
<Text
textStyle="p"
textAlign="center"
color="black"
opacity={0.1}
>
© 2020 Angela McReynolds
</Text>
</Box>
</Box>
</Flex>
</Box>
</Center>
</Box>
{/* Details */}
<Box flex="1" bg="black" p={[10, 10, 20, 20]}>
<Heading as="h1" color="white" textStyle="h1">
THE <br />
WORLD'S BEST
<br /> FRONTEND
<br /> ENGINEER
</Heading>
<Text textStyle="p">
Forget about hype, self affirmation and other bullshit. I don’t do
those.
</Text>
<Text textStyle="p">
I’ve got results. in 2015, 2016, 2017, 2018 and 2020 I was voted the
world’s best frontend engineer by peers and designers all around the
world.
</Text>
<Text textStyle="p">
A thorough election was conducted, and I came out on top. I’ve got
brains and I use them, You’re lucky to have stumbled here.
</Text>
<Text textStyle="p">
While living on Mars i spent decades mastering the art of computer
programming. On arriving earth in 2013, I constantly laughed at our
pathetic the developers on earth were. You're all lucky to have me.
</Text>
<Box>
<Button
bg="linear-gradient(96.91deg, #BDC3DD 5.3%, #000000 83.22%)"
w={"100%"}
color="white"
_hover={{ color: "black", bg: "white" }}
>
See past projects
</Button>
</Box>
</Box>
</Flex>
);
};
export default Home;
Now you should have something like this when you visit localhost:3000:
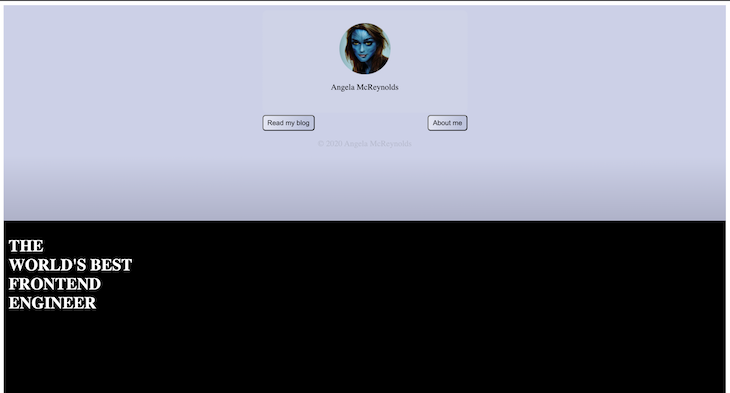
This right here is one of the biggest downsides of Zero. Out of the box, there’s no way to handle centralized page configurations; you’ve got to be creative. In many cases, you can figure this out, while others may turn out hacky.
In this particular scenario, we want to add centralized settings for the Chakra UI library.
You’ll have cases like this in your app, so here’s what I recommend.
Start off by populating the client directory with some structure that lets you house each page independent of the publicly exposed file.
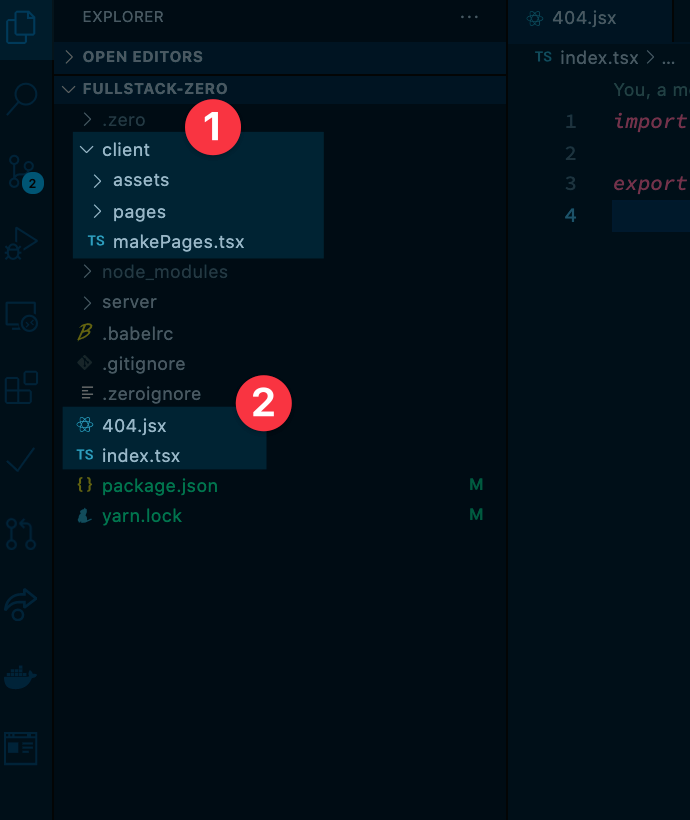
Don’t get confused — here’s what I mean. Create a pages directory and have Home and About subdirectories created. Move over the code from the public index.tsx and About.tsx into the respective directories.
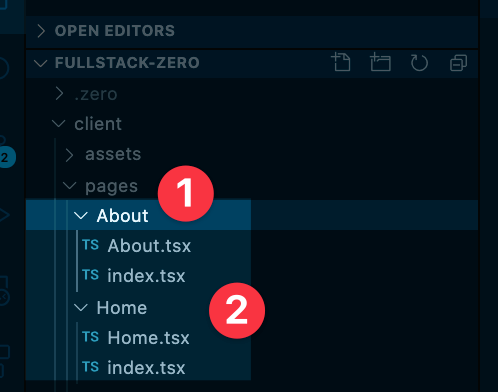
In this example, I have all the code for Home moved over like this:
// Home/Home.tsx

export const Home = () => {
  // copy code over
}
// Home/index.ts
export {Home as HomePage} from './Home'
Go ahead and do the same for the About page and export both from pages/index.tsx:
export { AboutPage } from "./About";
export { HomePage } from "./Home";
Now, here comes the good part.
Centralize whatever central page creation logic you’ve got in a separate file within the client directory. I’ve called this makePages.tsx
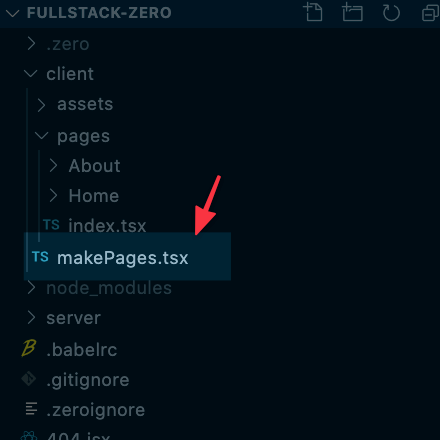
Theming, metadata, custom fonts … all of that added in one place. Here’s what we need for the example app.
Install react-helmet-async:
npx yarn add react-helmet-async
Then add the following to makePages.tsx:
import React from "react";
import { Helmet } from "react-helmet-async";
import { ChakraProvider, Box } from "@chakra-ui/react";
import { extendTheme } from "@chakra-ui/react";

const appTheme = extendTheme({
  colors: {
    brand: {
      100: "#CCD0E7",
      200: "6E769E60",
      800: "BDC3DD",
      900: "#9094B4",
    },
  },
  fonts: {
    heading: `"Roboto Condensed", sans-serif`,
    body: "Roboto, sans-serif",
    mono: "Menlo, monospace",
  },
  textStyles: {
    h1: {
      fontSize: ["4xl", "5xl"],
      fontWeight: "bold",
      lineHeight: "56px",
    },
    p: {
      fontWeight: "bold",
      py: 4,
      color: "rgba(204, 208, 231, 0.5)",
    },
  },
});

type PageWrapperProps = {
  children: React.ReactNode;
  title: string;
};

export const PageWrapper = ({
  children,
  title,
}: PageWrapperProps & React.ReactNode) => {
  return (
    <>
      <Helmet>
        <meta charset="UTF-8" />
        <title>{title}</title>
        <link rel="preconnect" href="https://fonts.gstatic.com" />
        <link
          href="https://fonts.googleapis.com/css2?family=Roboto+Condensed:wght@700&display=swap"
          rel="stylesheet"
        />
        <link
          href="https://fonts.googleapis.com/css2?family=Roboto+Condensed:wght@700&family=Roboto:wght@700&display=swap"
          rel="stylesheet"
        />
      </Helmet>
      <ChakraProvider theme={appTheme}>
        <Box w="100%" h="100vh">
          {children}
        </Box>
      </ChakraProvider>
    </>
  );
};
Now, your app will be different, of course, but you will still benefit from the structure described here. And you’ll perhaps save yourself a lot of time debugging and duplicating code.
Now, we need to use the PageWrapper component from makePages.tsx. PageWrapper takes a page component and ensures it’s got all the centralized logic.
Go to Home/index.tsx and have it use PageWrapper, as seen below:
// client/pages/Home/index.tsx

import { PageWrapper } from "../../makePages";
import { Home } from "./Home";

export const HomePage = () => (
  <PageWrapper title="Home">
    <Home />
  </PageWrapper>
);
Do the same for the About page by following the pattern established above.
In the exposed index.tsx home page, i.e. the root file served for localhost:3000, go ahead and use the new HomePage component:
// index.tsx
import { HomePage } from "./client/pages";

export default () => <HomePage />;
This now has all the centralized configuration for our client pages. Here’s the result:

Everything’s coming along nicely!
Go ahead and build yourself an About page. Use the same structure as above and see how that works too!
If you go ahead and visit a random page like http://localhost:3000/efdfdweg, you should see the following:
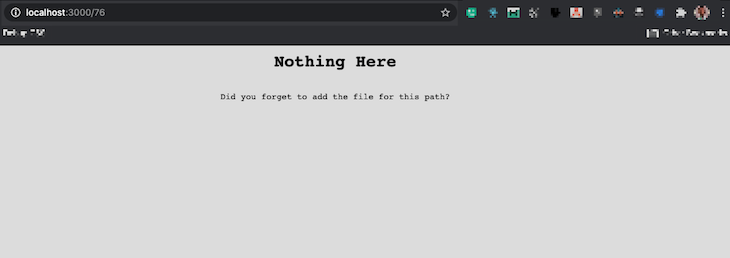
That’s OK. This is the default 404 page from Zero. To customize this, you just have to create a 404 file (in any supported file format) and Zero will serve it.
Let’s try that.
Create a 404.jsx file and have the following copied over:
// 404.jsx

import React from "react";
import {
  Container,
  Heading,
  Text,
  Link,
  Center,
  Image,
} from "@chakra-ui/react";
import { PageWrapper } from "./client/makePages";

export default () => (
  <PageWrapper>
    <Container bg="black">
      <Heading textStyle="h1" mt={7} textAlign="center" color="white">
        You seem lost :({" "}
      </Heading>
      <Text textStyle="p" textAlign="center">
        <Link href="/" color="brand.900">
          Go home
        </Link>
      </Text>
      <Image src="https://i.imgur.com/lA3vpFh.png" />
    </Container>
  </PageWrapper>
);
And sure enough, we’ve got an arguably nicer 404 page. Creative, huh?

We’ve got the essential functionality you need to be aware of on the client covered. This includes tricky bits such as centralizing your page setup. Now let’s switch focus to the backend for a bit. I’ll be using Node.js to keep things familiar.
Before any code implementation, you should be aware that routing works just the same here! And as with the client implementation, Zero supports different backend languages: Python and Node.
OK, so first things first.
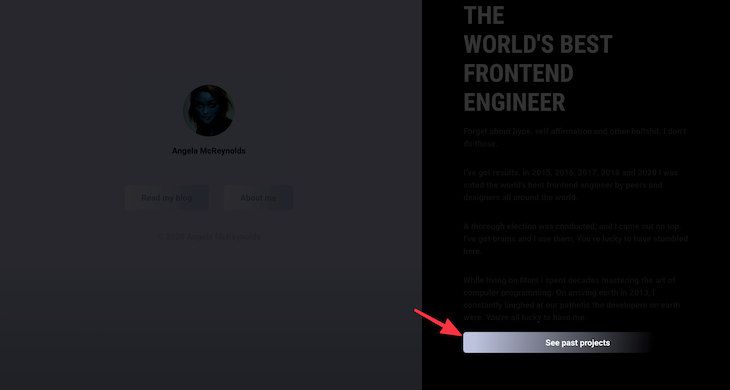
When a user clicks See past projects, we want to display a new page with a list of projects served from our backend written in Zero. Let’s set up a basic Node.js backend.
Create an api directory and a projects.ts file. All endpoints will be written in this api directory. Essentially, the endpoint will be something like ${APP_BASE_URL}/api/projects — which is semantic!
Since we’re using TypeScript, install the typing for Node as follows:
npx yarn add @types/node -D
Now paste the following in the projects.ts file:
const PROJECTS = [
  {
    id: 1,
    client: "TESLA",
    description: "Project Lunar: Sending the first humans to Mars",
    duration: 3435,
  },
  {
    id: 2,
    client: "EU 2020",
    description:
      "Deploy COVID tracking mobile and TV applications for all of Europe",
    duration: 455,
  },
  {
    id: 3,
    client: "Tiktok",
    description:
      "Prevent US app ban and diffuse security threat claims by hacking the white house",
    duration: 441,
  },
];

module.exports = function (req, res) {
  res.send({ data: PROJECTS });
};
This is a basic implementation, but note the Express style syntax:
module.exports = function (req, res) {
  res.send({ data: PROJECTS });
};
Where req and res represent the request and response objects. If you visit localhost:3000/api/projects, you should now receive the JSON object.
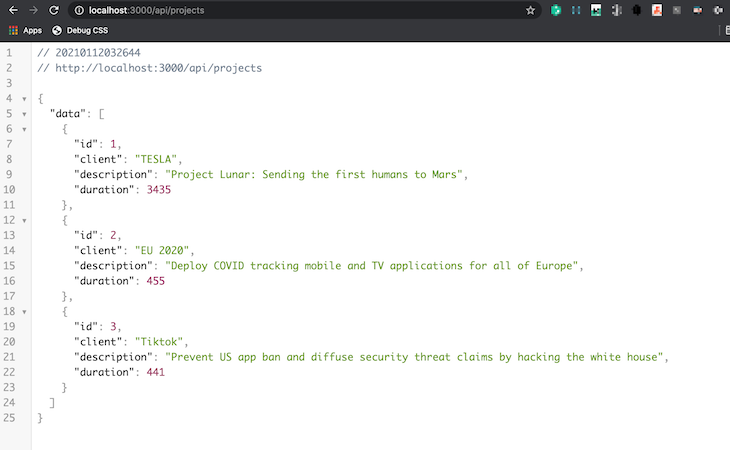
Now all we’ve got to do is make the fronted call this API endpoint.
In the pages directory, add a new Projects folder. Go ahead and paste the following in projects.tsx within this folder. Don’t worry, I’ll explain the important bits.
import {
  Thead,
  Tbody,
  Table,
  Tr,
  Th,
  Td,
  Heading,
  TableCaption,
  Box,
} from "@chakra-ui/react";
import { useState, useEffect } from "react";

export const Projects = () => {
  const [projects, setProjects] = useState([]);

  useEffect(() => {
    const fetchData = async () =>
      await fetch("/api/projects")
        .then((res) => res.json())
        .then(({ data }) => setProjects(data));

    fetchData();
  }, []);

  return (
    <Box
      flex="1.5"
      p={[10, 10, 20, 20]}
      minH="100vh"
      bg="linear-gradient(180.1deg, #CCD0E7 69.99%, rgba(144, 148, 180, 0.73) 99.96%)"
    >
      <Heading textStyle="h1"> Past Projects</Heading>

      <Table size="sm" my={10}>
        <TableCaption>Mere mortals can't achieve what I have </TableCaption>
        <Thead>
          <Tr>
            <Th>Client</Th>
            <Th>Description</Th>
            <Th isNumeric>Hours spent</Th>
          </Tr>
        </Thead>
        <Tbody>
          {projects.map((project) => (
            <Tr key={project.id}>
              <Td>{project.client}</Td>
              <Td>{project.description}</Td>
              <Td isNumeric>{project.duration}</Td>
            </Tr>
          ))}
        </Tbody>
      </Table>
    </Box>
  );
};
What’s most important here is the data fetch logic:
const [projects, setProjects] = useState([]);

  useEffect(() => {
    const fetchData = async () =>
      await fetch("/api/projects")
        .then((res) => res.json())
        .then(({ data }) => setProjects(data));

    fetchData();
  }, []);
Note the URL called: /api/projects. Zero supports another form of data fetching that works great with SSR, but the example here shows a client-side data fetch.
Now to link to the Projects page, we just need to edit the Button on the homepage to link to this page.
// client/pages/Home/Home.tsx
// add as and href props to the button.
...
<Button
   as="a"
   href="/projects"
   ...
>
    See past projects
</Button>
And now you should have this:
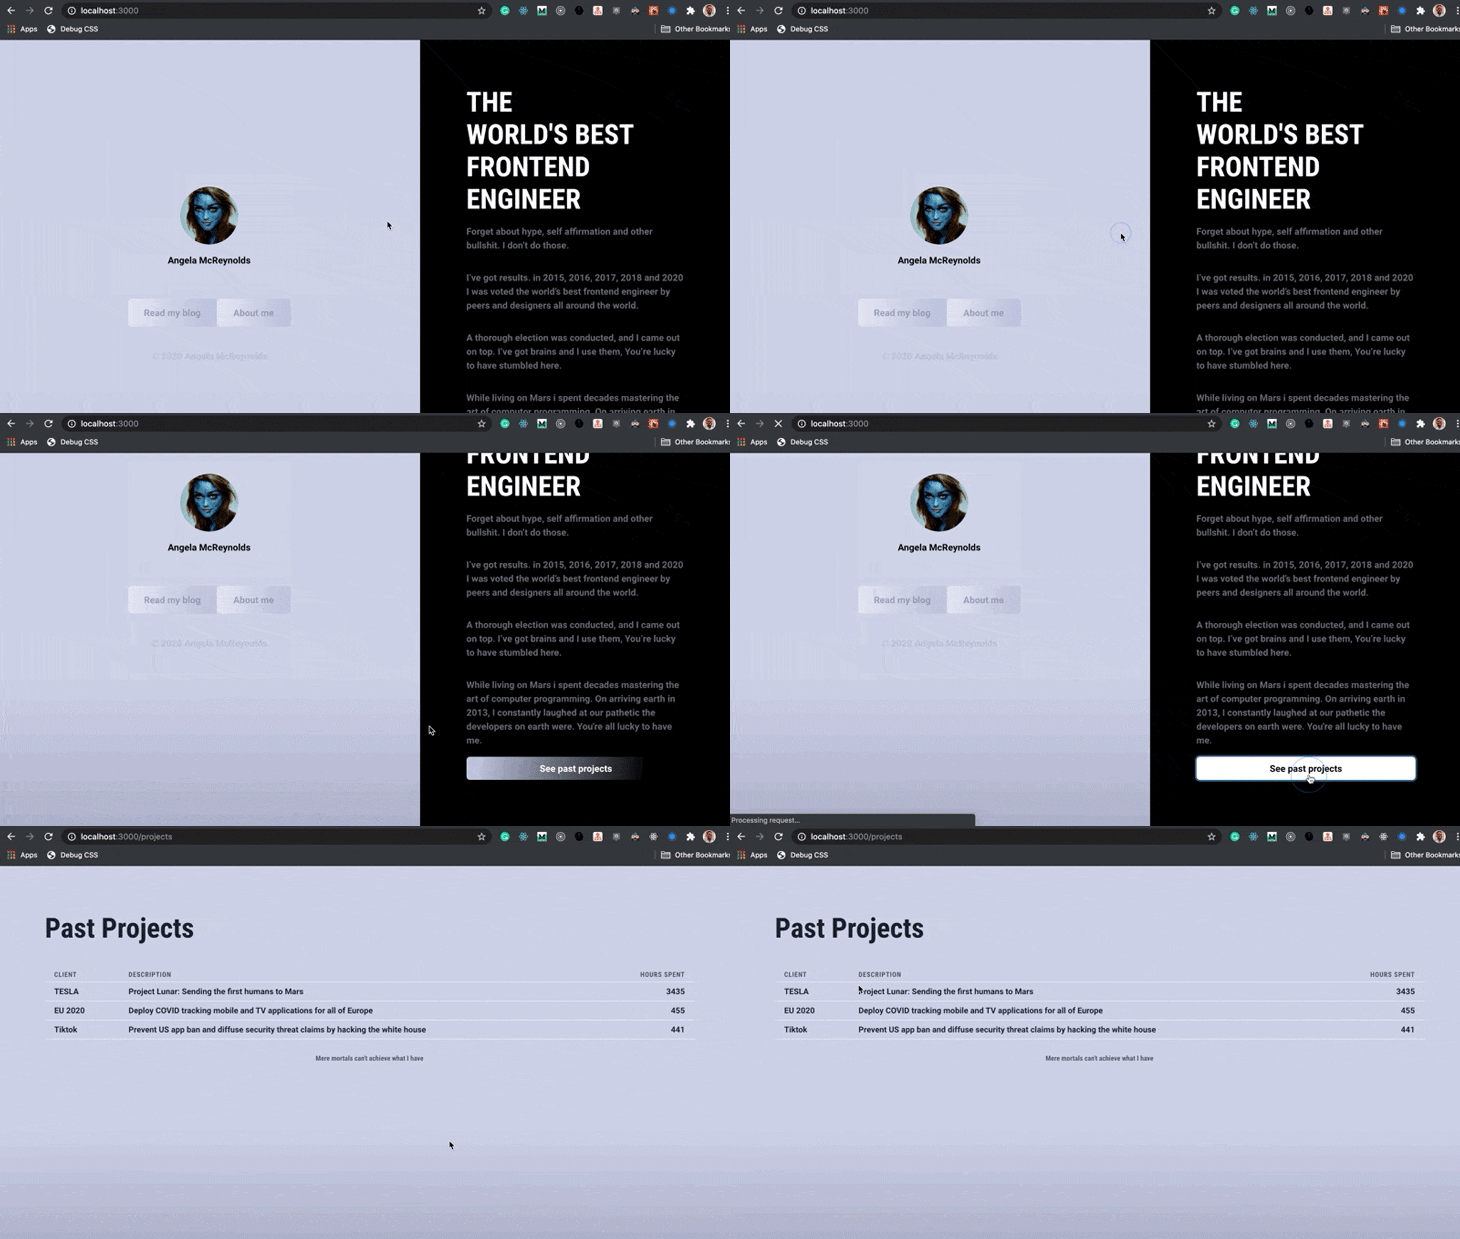
The Node backend we’ve got now is truly basic. But Zero supports a lot more. For example, we can handle query parameters sent from the frontend in the API function by retrieving that from req.body:
// api/projects.ts

module.exports = function (req, res) {
  const {id} = req.query.id
  res.send({ data: PROJECTS });
};

// frontend call e.g. /api/projects?id=1
It is worth mentioning that your exported API function will be called for other HTTP methods. e.g., POST, PUT, PATCH, and DELETE methods. These have to be handled specifically. For example, req.body will be populated with data sent via a POST request.
As with the frontend implementation, no global configuration options are provided by default with Zero. A common use case for this on the backend is centralizing logic via middleware. This is a common Express pattern.
The recommended way to do this is to move all middleware to a central directory or file, e.g., the server directory created earlier.
Here’s an example middleware:
// server/middleware.ts

const corsMiddleware = (req, res, next) => {
  res.header("Access-Control-Allow-Origin", "*");
  res.header(
    "Access-Control-Allow-Headers",
    "Origin, X-Requested-With, Content-Type, Accept"
  );
  next();
};
Note the call next(). Like Express, this makes sure the next middleware in the chain is called.
The benefit of centralization comes when you’ve got more than one middleware.
//server/middleware.ts

// middleware 2
const basicLoggerMiddleware = function(req, res, next) {
  console.log("method", req.method);
  next();
};
Now, instead of exporting each middleware singly, we centrally call each middleware, and then whatever handler is passed:
// server/middleware.ts
module.exports = (req, res, handler) => {
  basicLoggerMiddleware(req, res, () => {
    corsMiddleware(req, res, () => {
      handler(req, res);
    });
  });
};
Then you can invoke the middleware in your handler, e.g., api/projects.ts:
const middleware = require("./server/middleware");

const handler = (req, res) => {
    res.send({data: PROJECTS});
  }

module.exports = (req, res) =>
  middleware(req, res, handler);
Not the most elegant solution there is, I agree.
These are the basics of getting a full-stack app built with Zero. I strongly recommend checking out the official docs for cases I may not have mentioned in this article.
The premise of Zero is particularly impressive, largely because of the varying file formats supported on the fronted and backend — React, Vue, Svelte, all the way to Python.
However, for it to be widely adopted, especially for production cases, there’s still work to be done.
Some quick downsides you may notice include:
Regardless, I must say it’s a potentially great library with a clever take on “simple” web development. Good thing it’s open-source, so motivated individuals like me and you can contribute to improve it — if we find the time.
Install LogRocket via npm or script tag. LogRocket.init() must be called client-side, not
server-side
$ npm i --save logrocket

// Code:

import LogRocket from 'logrocket';
LogRocket.init('app/id');
// Add to your HTML:

<script src="https://cdn.lr-ingest.com/LogRocket.min.js"></script>
<script>window.LogRocket && window.LogRocket.init('app/id');</script>
Hey there, want to help make our blog better?
Join LogRocket’s Content Advisory Board. You’ll help inform the type of content we create and get access to exclusive meetups, social accreditation, and swag.
Sign up now
Not sure if low-code is right for your next project? This guide breaks down when to use it, when to avoid it, and how to make the right call.

Compare Firebase Studio, Lovable, and Replit for AI-powered app building. Find the best tool for your project needs.

Discover how to use Gemini CLI, Google’s new open-source AI agent that brings Gemini directly to your terminal.

This article explores several proven patterns for writing safer, cleaner, and more readable code in React and TypeScript.