Editor’s note: This article was last updated 12 May 2022 to include information on the inner workings of Blazor.
There are several frameworks developers can choose from when building single-page applications, with three of the most popular being Angular, React, and Vue. However, building SPAs with these three frameworks requires JavaScript.
But, what happens when a developer is interested in building SPAs but doesn’t want to deal with the caveats of JavaScript? In this article, we’ll explore React and Blazor, two different client-side options for minimizing JavaScript, comparing the two in terms of features. Let’s get started!
Blazor is a Microsoft UI framework that follows a unique approach, leveraging C# .NET and WebAssembly to create SPAs that run in web browsers. Essentially, Blazor allows a developer to build interactive client-side applications with HTML, CSS, and C#.
On the other hand, React is a declarative, efficient, and flexible JavaScript library for building user interfaces and UI components. React and Blazor share the similarity of being client-side frameworks and libraries for building rich, interactive, and modern client-side applications.
One unique feature of Blazor is its JavaScript interoperability, meaning a Blazor app can invoke JavaScript functions from .NET methods and .NET methods from JavaScript functions.
Blazor is composed of two major projects, Blazor WebAssembly, the client-side, and Blazor Server, the server-side. The Blazor Server implementation uses the more traditional .NET app approach and requires a server to connect to a frontend via SignalR for message passing. On the other hand, the Blazor WebAssembly implementation packages the project into a static bundle that can be deployed. In this article, we’ll focus on comparing Blazor WebAssembly with React.
Blazor Wasm runs with a compiled version of Xamarin’s Mono framework. The end result is that you can actually run a .NET C# application directly in the browser. Blazor compiles your .NET code into Wasm, which can then be deployed as a static bundle. For older browsers, Blazor uses asm.js to compile down to a common framework that older browsers can support.
Blazor also supports interoperability with JavaScript libraries. You can still use an npm module with a Blazor project by importing it with the build. To directly interact with JavaScript packages alongside your C# code, Blazor provides the IJSRuntime and JSRuntime in C#. Check out the Microsoft docs for a more detailed explanation.
Let’s create both a Blazor app and a React app and compare what comes out of the box. To create a new Blazor project, you need to download and install the .NET SDK and run the following command in your terminal:
dotnet new blazorwasm -n BlazorApp
The blazorwasm command means that we’re creating a new Blazor project with WebAssembly. The -n flag is for the name of project:
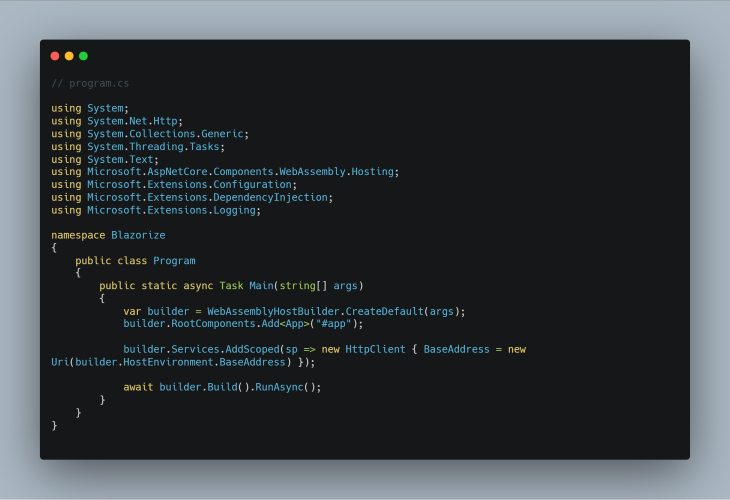
The program.cs file contains the main methods needed to get the WebAssembly app up and running:
We’re also mounting our app and selecting a tag with an ID of app. The HTTP client is loaded using a dependency injection technique, and the HTTP modules in our Blazor app are built on top of the JavaScript Fetch API:
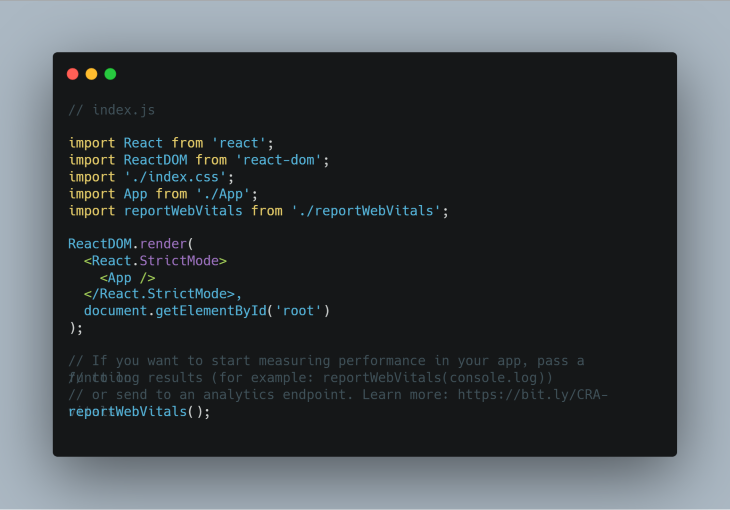
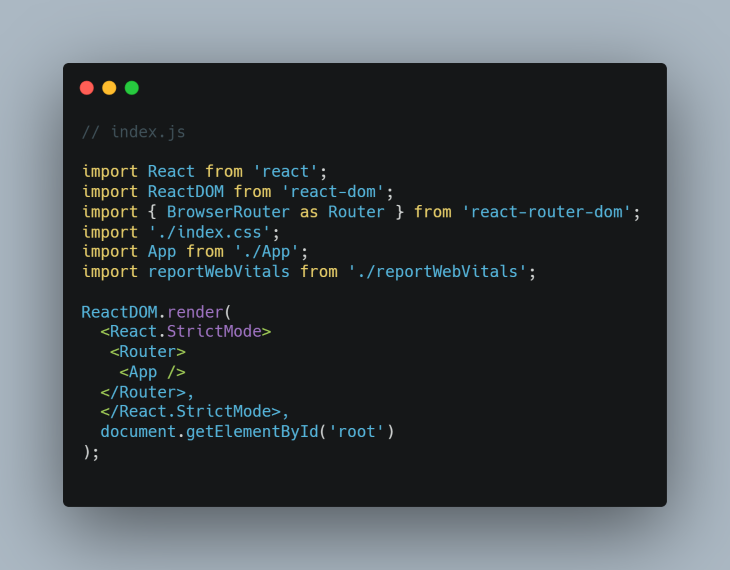
In a React app, index.js is similar to program.cs in a Blazor app. In the code snippet below, the React DOM renders our app component, and the element with the ID of root is selected as our root component:
Instead of JavaScript, Blazor uses C# as its programming language, leveraging the existing .NET ecosystem of .NET libraries. With this feature, C# developers are able to expand their skillset from only writing backend code with C# to building full-stack web and mobile applications with C# as the programming language.
At first, C# may look and feel unnatural to JavaScript developers, but once you get a good grasp of C#, you can build powerful full-stack applications written entirely in C#.
React uses JavaScript as its programming language. Essentially, web developers still get to write the language they’re the most used to. And, with React Native, you can build web, Android, and iOS applications that share the same code snippets.
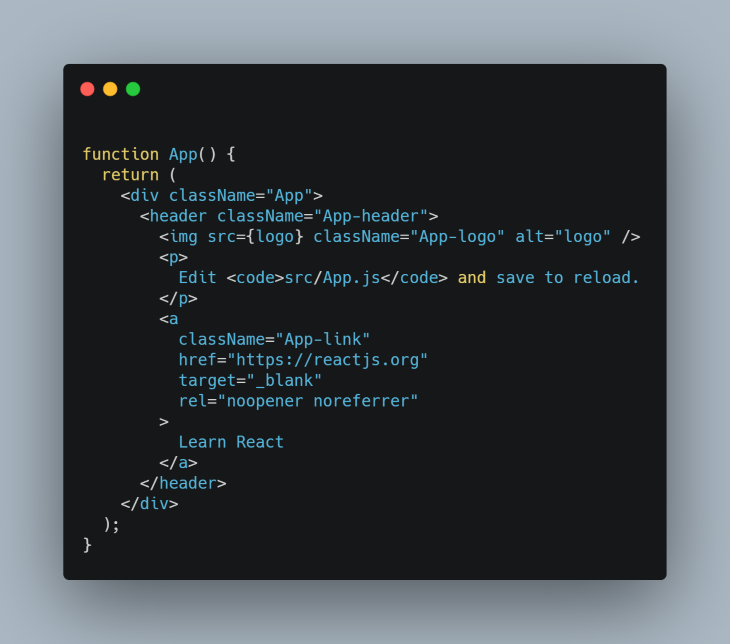
When creating an SPA with React, the Create React App toolchain is recommended. The Create React App toolchain will, by default, initialize a React app configured with JSX, which is a syntax extension for JavaScript. It acts like a templating engine that allows you to write HTML in React and also write JavaScript in HTML:
Blazor uses the Razor template engine, which has been around for years. The templating engine is not new in the C# and the ASP.NET ecosystem. It’s used to embed server-side code into webpages using C# and ASP.Net.
Just like JSX, the Razor template engine allows you to write C# code in your markup.
Blazor projects are slow on the client-side because you have to download the entire dot net runtime along with the necessary DLL libraries on your browser. Additionally, Blazor apps have latency issues. So if you’re building a web application that’s going to be accessed by people across the globe, Blazor shouldn’t be your go-to framework.
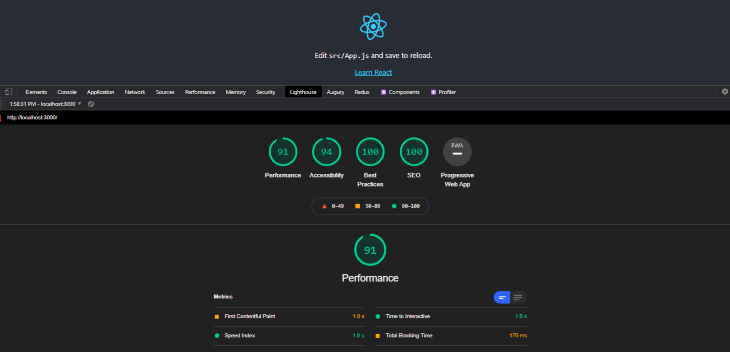
Another important thing to note is that during development in a Blazor app, you don’t get to enjoy the hot-reload features that you have in React. As a result, your development process is likely going to be slow because you have to hit the restart button to restart your app:
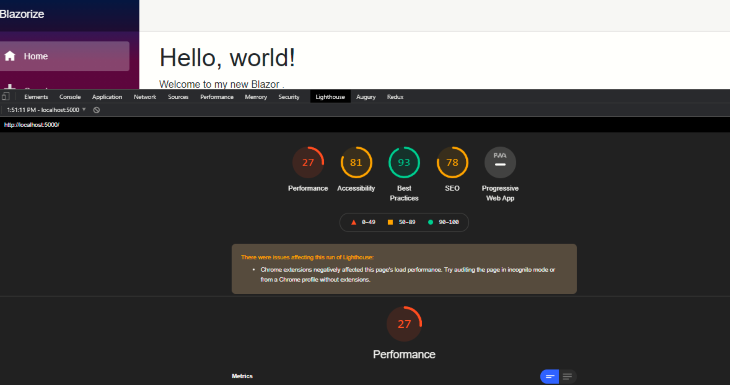
The lighthouse score from the diagram above clearly shows that Blazor apps have some serious performance issues. The initial page load time is slow because the necessary dependencies have to be downloaded on initial page load:
In this area, React shines. As a UI library, the core React package is as lean as possible. It is fully optimized out of the box to build blazing-fast, modern client-side applications using a component-based paradigm.
At the time of writing this, Microsoft has announced five new editions of Blazor, including Blazor WebAssembly and Blazor Server.
On the other hand, the React ecosystem is extremely large to the point where you can find packages on npm for almost everything you’re trying to implement. React is fully backed by Facebook, and it has a lot of community support given that it changed a lot about how client-side applications are built. Also, React feels natural to a web developer because it is still JavaScript.
React’s selling point is “learn once, write anywhere.” Essentially, with React, ReactDOM, and React Native, you can build out highly interactive and rich frontend web, Android, and iOS native applications. This makes it easy for most companies to build out solid products and platforms at a relatively low cost because they’ll just hire a developer who’s good with React and React Native.
At the time of writing this article, React has over 188k stars on GitHub. It’s inarguably one of the most loved JavaScript libraries in general. Meanwhile, Blazor has about 28k stars on GitHub.
Given the fact that Blazor was initially released in 2018 and is relatively new to the developer community at the time of writing, popularity may not be a valid reason to mark it down.
The Blazor PWA provides support for developers to build high-end progressive web apps. In a React application, adding PWA support is a breeze. Running the following command will initialize a React app with a service worker file added:
npx create-react-app my-app --template cra-template-pwa
Blazor Native, which is experimental at the time of writing, essentially allows developers to build native mobile apps with Blazor using the Mobile Blazor Bindings. Using C# and .Net, developing Android and iOS apps with Blazor is actually a possibility.
Blazor Hybrid apps are a combination of a native and a web UI in a single app. Using Blazor, you can write the native UI for your app and also create a web UI in your app, thereby creating the possibility of using Blazor to build both your web and mobile applications.
Essentially, you’ll share code snippets across your web and mobile application. This is definitely a good time to be a C# .Net developer.
React uses React Native to build native mobile applications, enabling React developers to build mobile apps with React. With React Native, you can use native UI controls and have full access to the native platform.
React Native is used in production today, but Blazor Native is still in the experimental phase of its development. When compared to React Native, Blazor Native has little community support.
React, like other JavaScript frameworks and libraries, uses npm and Yarn as package managers for managing dependencies. In a Blazor WebAssembly app, you can easily install a package in one of the following ways:
To install a package with PackageReference, navigate to the Blazorize.csproj file and add the package inside of the ItemGroup tag:
<PackageReference Include="System.Net.Http.Json" Version="5.0.0" />
To install a package with .NET CLI, navigate to the root of your app directory in your terminal and run the following command :
dotnet add package Microsoft.AspNetCore.Blazor.HttpClient --version 3.2.0-preview3.20168.3
Check out these guides to learn about the .NET CLI and Paket CLI.
By default, React offers two main approaches for handling state in components. A component can either handle its own state or data, or it can accept data via props. In dealing with the HTTP section, we’ll see how a component handles its own state.
Below is an example of how a component accepts data via props from its parent component in a React app:
// Parent Component

export default function Blog() {
    const blogPosts = [
        {
            id: 1,
            title: 'This is the title',
            content: 'This is some random content',
        },
        {
            id: 2,
            title: 'This is the title',
            content: 'This is some random content',
        },
        {
            id: 3,
            title: 'This is the title',
            content: 'This is some random content',
        },
        {
            id: 4,
            title: 'This is the title',
            content: 'This is some random content',
        },
    ]
    return (
        <>
            <BlogCard blogPosts={blogPosts}/>
        </>
    )
}
We passed in blogPosts, which is an array of objects containing blog posts, to the BlogCard component, which is the child component:
// Child Component

export default function BlogCard( { blogPosts } ) {
    return (
        <>
            {blogPosts.map(blogPost => (
                <div className="blog-post" key={blogPost.id}>
                    <h1>{blogPost.title}</h1>
                    <p>{blogPost.content}</p>
                </div>
                ))}
        </>
    )
}
Now, when we render the child component BlogCard, we can pass in the list of blog posts via props. To learn more about props in React, check out the official docs.
In Blazor, a child component can receive data from its parent components via parameters:
// Child Component
<h2>@Title</h2>
<p>@Content</p>
@code {
   // Demonstrates how a parent component can supply parameters
    [Parameter]
    public string Title { get; set; }
    [Parameter]
    public string Content { get; set; }
}
When you render a BlogCard component, you can pass in a Title and Content and it will be rendered accordingly:
<BlogCard Title="What is Blazor?" Content="Blazor is a web UI framework using C#/Razor and HTML..." />
In a React application, the router does not come preconfigured or installed. The React Router package is mostly used to implement client-side navigation.
According to the documentation, React Router works anywhere React is rendered, including in React Native projects. The API is really simple, yet it handles a lot of powerful features like URL parameters, component redirects, lazy loading, page transitions, nested routing, and more.
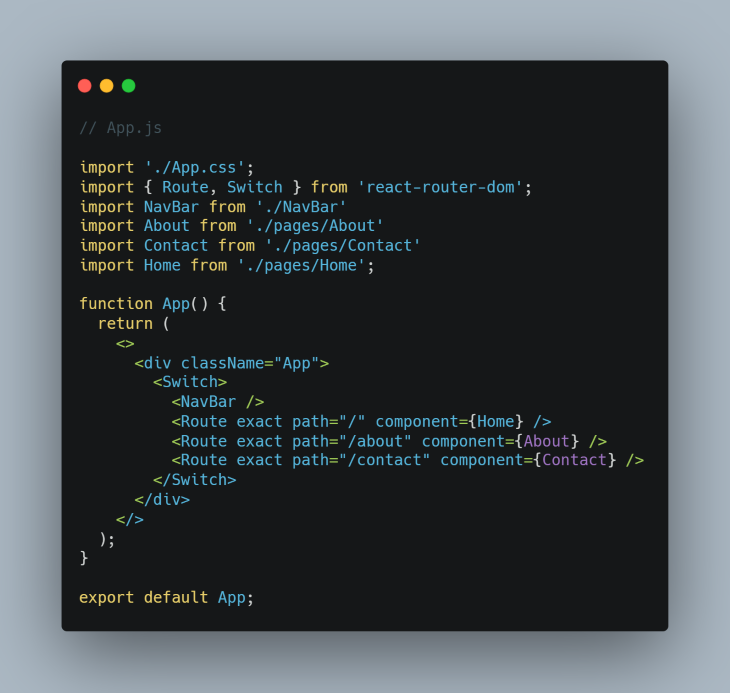
To set up routing in a React app, typically you would install the react-router-dom package and wrap your entire app in the index.js file with the browser router module from the React Router DOM package. Then, in your App.jscomponent, you would render your pages with the route module from the React Router DOM.
The images below illustrate how routing works in React:
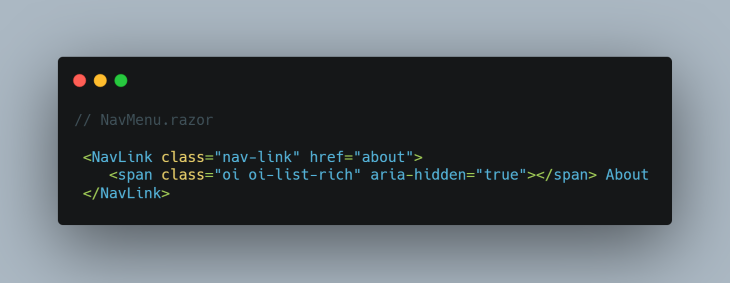
In a Blazor WebAssembly client-side application, the routing system leans on ASP.NET’s existing routing engine. You can map a route to a Blazor component by using the @page directive and then the path that you want to link to at the top of your file.
To navigate to another page, you have to use the NavLink component, which is similar to how the NavLink component works in the react-router-dom:
Programmatically navigate between pages in a Blazor app by injecting the NavigationManager at the top of the file with the code below:
@inject NavigationManager NavManager
Then, call the NavigateTo method in a function on the NavManager you’ve injected:
@inject NavigationManager NavManager
<p>Learn more about us</p>
<button @onclick="navigateHome">Go back home</button>

@code {
    private void navigateHome()
    {
        NavManager.NavigateTo("");
    }
}
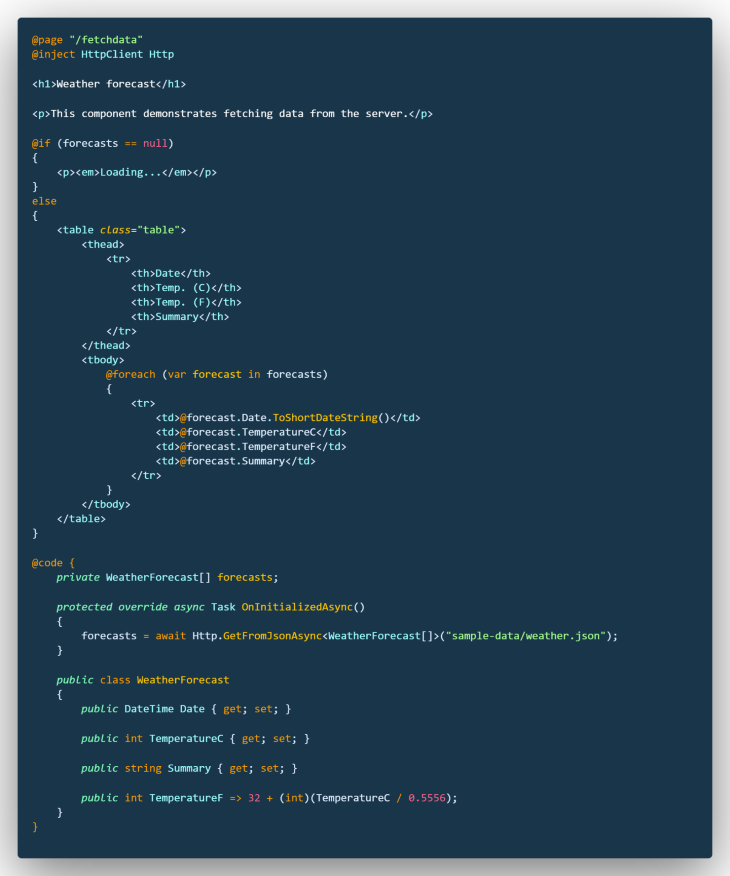
To explore handling HTTP requests in a Blazor application, we’ll create a FetchPost.razor file in the pages directory:
@page "/http"
@inject HttpClient Http

<h1>Blog post</h1>

@if (posts == null)
{
    <p><em>Loading...</em></p>
}
else
{
    <table class="table">
        <thead>
            <tr>
                <th>Title</th>
                <th>Body</th>
            </tr>
        </thead>
        <tbody>
            @foreach (var post in posts)
            {
                <tr>
                    <td>@post.title</td>
                    <td>@post.body</td>
                </tr>
            }
        </tbody>
    </table>
}
@code {
    private BlogPost[] posts;
    protected override async Task OnInitializedAsync()
    {
        posts = await Http.GetJsonAsync<BlogPost[]>("https://jsonplaceholder.typicode.com/posts");
        Console.WriteLine(posts);
    }
    public class BlogPost
    {
        public int id { get; set; }
        public String title { get; set; }
        public String body { get; set; }
    }
}
There are three interesting things that are going on here. First, we’re injecting HttpClient, a service that helps us make HTTP calls using the HTTP client. As of Blazor v3.1.0, you need to add Blazor HTTP Client to your Blazorize.csproj file.
Then, we invoke HttpClient using the GetJsonAsync() method to fetch a JSON from the defined endpoint. Finally, we create a result type with the type BlogPost that is able to pick out the relevant data found on the property post based on the incoming JSON structure.
To inject HttpClient, add @inject HttpClient Http at the top of the page. We invoke HttpClient to actively fetch the data. We do so by defining OnInitializedAsync(), a lifecycle method that is guaranteed to run when the page is initialized.
One of the benefits of using a library like React is the flexibility of its tools. React doesn’t provide an HTTP client like Blazor, so a React developer can decide to make HTTP requests using the Fetch API, Axios, or even XHR.
For HTTP requests, we’ll use the JavaScript Fetch API. The code below demonstrates how to make a simple HTTP request in a React app using the built-in JavaScript Fetch API:
// post.js

import React, { useState, useEffect } from 'react'
export default function Post() {
  const [posts, setPosts] = useState([]);
  const [loading, setLoading] = useState(true);

  useEffect(() => {
        fetch("https://jsonplaceholder.typicode.com/posts")
            .then(response => response.json())
            .then(post=> {
                setPosts(post)
                setLoading(false)
            })
    }, [])

   return (
        <div>
            {
            loading ?
                (
                    <p>Loading...</p>
                ) : (
                    posts.map((post, i) => (
                        <div>
                            <p>{post.title}</p>
                            <p>{post.body}</p>
                        </div>
                    ))
                )
            }
        </div>
    )
}
Notice that we are calling the endpoint on the useEffect Hook, telling React that our component needs to fetch the data from our API after rendering. Then, when our request is successful, we need to call setPosts and pass our post objects from the API. For more details on how useState Hooks work in React, check out the official docs.
Choosing the best frontend framework to build an SPA depends on a lot of factors, including team preference, ecosystem, performance, and scalability. In this article, we compared React and Blazor to see how both of these awesome frameworks work.
React and Blazor are similar in a few ways, and they can be used to accomplish the same tasks. So, which one should you choose to work with? You might have to consider their popularity, the type of project you’re building, scalability, and maintainability.
Hopefully, with the information in this article, you should be able to make informed decisions when choosing a frontend framework for your next project. I hope you enjoyed this article. Happy coding!
Install LogRocket via npm or script tag. LogRocket.init() must be called client-side, not
server-side
$ npm i --save logrocket

// Code:

import LogRocket from 'logrocket';
LogRocket.init('app/id');
// Add to your HTML:

<script src="https://cdn.lr-ingest.com/LogRocket.min.js"></script>
<script>window.LogRocket && window.LogRocket.init('app/id');</script>

Learn how to detect unused and ghost dependencies in JavaScript projects using Knip, a project-level linter that keeps your dependency graph accurate.

Learn how Storybook MCP enables AI agents to understand your component library, generate accurate UI, and validate code using documentation, stories, and automated tests.

Debug RSC hydration mismatches in production with Next.js instrumentation, Suspense isolation, HTML diffing, and CI smoke tests.

Explore why npm dependencies are a major supply chain security risk and how to protect JavaScript apps from compromised packages and transitive threats.
Would you be interested in joining LogRocket's developer community?
Join LogRocket’s Content Advisory Board. You’ll help inform the type of content we create and get access to exclusive meetups, social accreditation, and swag.
Sign up now

