Editor’s note: This article was last updated by Amazing Enyichi Agu in January 2026 to reflect React Router v7 and Data Mode, including createBrowserRouter routing, nested route layouts with <Outlet />, protected routes, a two-factor authentication flow, loaders and deferred data (defer, Await, Suspense), and updated guidance on passing link state and handling functions via context.

React Router is a popular and powerful routing library for React applications. It provides a declarative, component-based approach to routing and handles the common tasks of dealing with URL parameters (params), redirects, and loading data.
React Router provides one of the most intuitive APIs available and enables lazy loading and SEO-friendly server-side rendering. The v7 release of React Router merged its previous version with Remix (a full-stack React framework that already used React Router under the hood).
This tutorial will demonstrate how to create protected routes and add authentication using React Router v7. The tutorial will do this using the new data mode from React Router. So, fire up your favorite text editor, and let’s dive in!
The Replay is a weekly newsletter for dev and engineering leaders.
Delivered once a week, it's your curated guide to the most important conversations around frontend dev, emerging AI tools, and the state of modern software.
In your terminal, create a new React project by running the following command:
npm create vite@latest ReactRouterAuthDemo -- --template react-ts
# On Windows: use --- instead of --
cd ReactRouterAuthDemo
Next, install React Router as a dependency in the React app:
npm install react-router
Once the React Router dependency is installed, we’ll need the src/main.tsx file to be like so:
import { StrictMode } from "react";
import { createRoot } from "react-dom/client";
import App from "./App.tsx";

createRoot(document.getElementById("root")!).render(
  <StrictMode>
    <App />
  </StrictMode>
);
Now, we’re all set to use React Router components and hooks from anywhere in our app. Let’s replace the boilerplate code from the App.tsx file with some routes.
React Router provides the createBrowserRouter function that allows us to add routes to our application. Open the src/App.tsxfile and add the following:
import { createBrowserRouter, RouterProvider } from "react-router";
import { HomePage } from "./pages/Home";
import { LoginPage } from "./pages/Login";

const router = createBrowserRouter([
  { path: "/", Component: HomePage },
  { path: "/login", Component: LoginPage },
]);

const App = () => <RouterProvider router={router} />;

export default App;
Alternatively, we can create the routes with JSX using the createRoutesFromElements function. This is a declarative approach for defining routes and works in the same manner as the createBrowserRouter function:
import {
  createBrowserRouter,
  createRoutesFromElements,
  Route,
  RouterProvider,
} from "react-router";

const routes = createRoutesFromElements(
  <>
    <Route index Component={HomePage} />
    <Route path='login' Component={LoginPage} />
  </>
);

const router = createBrowserRouter(routes);
const App = () => <RouterProvider router={router} />;

export default App;
Next, we’ll first create Login.tsx and Home.tsx files inside the pages directory with the following content:
// src/pages/Login.tsx
export const LoginPage = () => (
<div>
<h1>This is the Login Page</h1>
</div>
);
// src/pages/Home.tsx
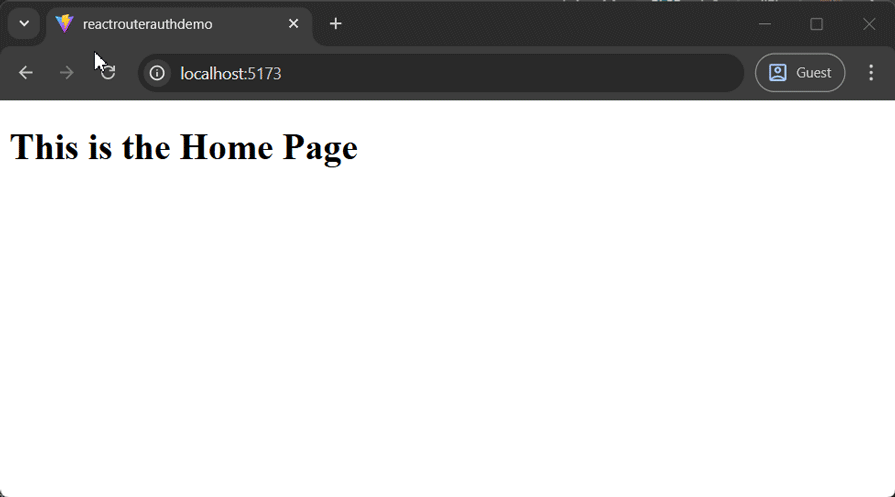
export const HomePage = () => (
<div>
<h1>This is the Home Page</h1>
</div>
);
Next, we’ll run this command to start the app:
npm run dev
On the browser, we see the HomePage component by default. If we go to the /login route, we’ll see the LoginPage component rendered on the screen.

Now that the basic setup is completed, let’s look at how we can create protected routes so that unauthenticated users cannot access certain content in our application.
Protected routes, often known as private routes, are a fundamental concept in web development used to restrict access to certain pages or resources to authenticated users only.
To implement a protected route in our project, let’s start by creating a custom useAuth hook to manage the authenticated user’s state using React’s Context API and the useContext hook:
// src/hooks/useAuth.tsx

import { createContext, useContext } from "react";

interface AuthData {
  user: string;
  login(data: string): Promise<void>;
  logout(): void;
}

export const AuthContext = createContext<AuthData | null>(null);

export const useAuth = () => {
  return useContext(AuthContext);
};
Next, create a provider component for this defined context. The provider gives every component downstream access to data from the context:
// ./src/components/AuthProvider.tsx

import { useMemo } from "react";
import { useNavigate, Outlet } from "react-router";
import { AuthContext } from "../hooks/useAuth";
import { useLocalStorage } from "../hooks/useLocalStorage";

export const AuthProvider = () => {
  const [user, setUser] = useLocalStorage("user", null);
  const navigate = useNavigate();

  const value = useMemo(() => {
    // call this function when you want to authenticate the user
    const login = async (data: string) => {
      setUser(data);
      navigate("/secret");
    };

    // call this function to sign out logged in user
    const logout = () => {
      setUser(null);
      navigate("/", { replace: true });
    };

    return { user, login, logout };
  }, [user, navigate, setUser]);
  return (
    <AuthContext.Provider value={value}>
      <Outlet/>
    </AuthContext.Provider>
  );
};
This AuthProvider exposes the user’s state and methods for user login and logout. When users successfully log in, the login()method modifies their state to reflect their authentication status. In addition, when users log out, we redirect them to the homepage using React Router’s useNavigate hook.
To maintain the user’s state even after a page refresh, let’s create the useLocalStorage hook, which synchronizes the state value with the browser’s local storage:
// src/hooks/useLocalStorage.tsx

import { useState } from "react";

export const useLocalStorage = <T,>(
  keyName: string,
  defaultValue: T
): [string, (value: T) => void] => {
  const [storedValue, setStoredValue] = useState(() => {
    try {
      const value = window.localStorage.getItem(keyName);
      if (value) {
        return JSON.parse(value);
      } else {
        window.localStorage.setItem(
          keyName,
          JSON.stringify(defaultValue)
        );
        return defaultValue;
      }
    } catch {
      return defaultValue;
    }
  });

  const setValue = (newValue: T) => {
    try {
      window.localStorage.setItem(keyName, JSON.stringify(newValue));
    } catch (err) {
      console.log(err);
    }
    setStoredValue(newValue);
  };

  return [storedValue, setValue];
};
Next, let’s create the ProtectedRoute component, which checks the current user’s state from the useAuth hook and redirects them to the home screen if they are not authenticated:
// ./src/components/ProtectedRoute.tsx

import { useEffect } from "react";
import { useNavigate, Outlet } from "react-router";
import { useAuth } from "../hooks/useAuth";

export const ProtectedRoute = ({ children }: { children: React.ReactNode }) => {
  const navigate = useNavigate();
  const data = useAuth();

  useEffect(() => {
    if (!data?.user) {
      // user is not authenticated
      navigate("/login");
    return;
    }
  });
  return <Outlet/>;
};
In the code above, we use React Router’s useNavigate hook to redirect unauthenticated users to the /login route.
With the base structure in place, the next step is to add a LoginPage route for user authentication and a Secret route that is only accessible to logged-in users.
In our Login.tsx within our pages directory, add the following:
import { useState } from "react";
import { useAuth } from "../hooks/useAuth";

export const LoginPage = () => {
  const [username, setUsername] = useState("");
  const [password, setPassword] = useState("");
  const data = useAuth();

  const handleLogin = async (e: React.FormEvent<HTMLFormElement>) => {
    e.preventDefault();
    // Here you would usually send a request to your backend to authenticate the user
    // For the sake of this example, we're using a mock authentication
    if (username === "user" && password === "password" && data?.login) {
      // Replace with actual authentication logic
      await data.login(username);
    } else {
      alert("Invalid username or password");
    }
  };

  return (
    <div>
      <form onSubmit={handleLogin}>
        <div>
          <label htmlFor='username'>Username:</label>
          <input
            id='username'
            type='text'
            value={username}
            onChange={(e) => setUsername(e.target.value)}
          />
        </div>
        <div>
          <label htmlFor='password'>Password:</label>
          <input
            id='password'
            type='password'
            value={password}
            onChange={(e) => setPassword(e.target.value)}
          />
        </div>
        <button type='submit'>Login</button>
      </form>
    </div>
  );
};
This component serves as the user’s login interface. It uses the useAuth hook to handle user authentication. When users enter their credentials and submit the form, the login() function from useAuth is called to authenticate and log them in.
Similarly, create a Secret.tsx file under the pages directory to represent a secured page that displays content exclusively to authenticated users:
import { useAuth } from "../hooks/useAuth";

export const Secret = () => {
  const { logout } = useAuth();

  const handleLogout = () => {
    logout();
  };

  return (
    <div>
      <h1>This is a Secret page</h1>
      <button onClick={handleLogout}>Logout</button>
    </div>
  );
};
We also added a logout button on our Secret page above, allowing users to sign out when necessary. This logout action will be handled by the logout() method from the useAuth hook.
Finally, in our App.tsx file, encapsulate all routes within the AuthProvider to provide a consistent authentication context across your app. Set up your routes as usual, and for routes that require authentication, use the <ProtectedRoute /> component to restrict access to only authenticated users:
// src/App.tsx

import { createBrowserRouter, RouterProvider } from "react-router";
import { ProtectedRoute } from "./components/ProtectedRoute";
import { HomePage } from "./pages/Home";
import { LoginPage } from "./pages/Login";
import { Secret } from "./pages/Secret";
import { AuthProvider } from "./components/AuthProvider";

const router = createBrowserRouter([
  {
    Component: AuthProvider,
    children: [
      { index: true, path: "/", Component: HomePage },
      { path: "login", Component: LoginPage },
      {
        path: "secret",
        Component: ProtectedRoute,
        children: [{ index: true, Component: Secret }],
      },
    ],
  },
]);

const App = () => <RouterProvider router={router} />;

export default App;
With these steps, we’ve created a basic authentication flow that only allows authenticated users to access protected routes. If you try to access /secret without logging in, you will be instantly redirected to the login page. However, you can access the secret page once you enter the default username and password into the login form.
Let’s enhance our application by integrating two-factor authentication (2FA) with React Router. 2FA adds an extra layer of security by requiring users to provide two distinct forms of identification before accessing sensitive features.
To proceed, let’s modify the existing authentication setup to include 2FA. Update your AuthProvider.tsx file with the following code:
// src/components/AuthProvider.tsx

import { useMemo, useState } from "react";
import { useNavigate, Outlet } from "react-router";
import { AuthContext } from "../hooks/useAuth";
import { useLocalStorage } from "../hooks/useLocalStorage";

export const AuthProvider = () => {
  const [user, setUser] = useLocalStorage<string | null>("user", null);
  const [is2FAVerified, setIs2FAVerified] = useState(false);
  const navigate = useNavigate();


  const value = useMemo(() => {
    // call this function when you want to authenticate the user
    const login = async (data: string) => {
      setUser(data);
      navigate("/verify-2fa");
    };


    // call this function to sign out logged in user
    const logout = () => {
      setUser(null);
      navigate("/", { replace: true });
    };


    const verify2FACode = async (code: string) => {
      // Mock verification logic
      if (code === "0000") {
        setIs2FAVerified(true);
        navigate("/secret"); // Navigate to a protected route after successful 2FA
        return true;
      }
      return false;
    };

    return { user, login, logout, is2FAVerified, verify2FACode };
  }, [user, navigate, setUser, is2FAVerified]);


  return (
    <AuthContext.Provider value={value}>
      <Outlet />
    </AuthContext.Provider>
  );
};
In this updated file, we’ve modified the login flow to support 2FA and added a mock verify2FACode() function, which accepts the code 0000 for simplicity. In a real-world application, this is where you would implement proper 2FA verification, such as sending and validating a code via SMS or email.
Next, we need to update the AuthData type definition in useAuth.tsx. Go ahead and update the TypeScript interface as shown below:
import { createContext, useContext } from "react";

export interface AuthData {
  user: string;
  login(data: string): Promise<void>;
  logout(): void;
  is2FAVerified: boolean;
  verify2FACode(code: string): Promise<boolean>;
}

export const AuthContext = createContext<AuthData | null>(null);
export const useAuth = () => {
  return useContext(AuthContext);
};
Next, let’s add a new page that allows users to enter the 2FA code sent to them:
// src/pages/Verify2FA.tsx

import { useState } from "react";
import { useNavigate } from "react-router";
import { useAuth } from "../hooks/useAuth";

export const Verify2FA = () => {
  const navigate = useNavigate();
  const data = useAuth();
  const [code, setCode] = useState("");

  const handleSubmit = async (e: React.FormEvent<HTMLFormElement>) => {
    e.preventDefault();
    const isValid = await data?.verify2FACode(code);
    if (isValid) {
      navigate("/secret");
    } else {
      alert("Invalid code. Please try again.");
    }
  };

  return (
    <form onSubmit={handleSubmit}>
      <input
        type='text'
        value={code}
        onChange={(e) => setCode(e.target.value)}
        placeholder='Enter verification code'
      />
      <button type='submit'>Verify</button>
    </form>
  );
};
We also need to update our ProtectedRoute component to integrate the 2FA verification logic:
import { useEffect } from "react";
import { Outlet, useNavigate } from "react-router";
import { useAuth } from "../hooks/useAuth";

export const ProtectedRoute = () => {
  const navigate = useNavigate();
  const data = useAuth();

  useEffect(() => {
    if (!data?.user) {
      // user is not authenticated
      navigate("/login");
      return;
    }
    if (!data?.is2FAVerified) {
      navigate("/verify-2fa");
      return;
    }
  });

  return <Outlet />;
};
With the Verify2FA and ProtectedRoute components in place, update your App.tsx route configuration to include the verify-2faroute, as shown below:
import { createBrowserRouter, RouterProvider } from "react-router";
import { HomePage } from "./pages/Home";
import { LoginPage } from "./pages/Login";
import { Secret } from "./pages/Secret";
import { Verify2FA } from "./pages/Verify2FA";
import { AuthProvider } from "./components/AuthProvider";
import { ProtectedRoute } from "./components/ProtectedRoute";

const router = createBrowserRouter([
  {
    Component: AuthProvider,
    children: [
      { index: true, path: "/", Component: HomePage },
      { path: "login", Component: LoginPage },
      { path: "verify-2fa", Component: Verify2FA },
      {
        path: "secret",
        Component: ProtectedRoute,
        children: [{ index: true, Component: Secret }],
      },
    ],
  },
]);

const App = () => <RouterProvider router={router} />;

export default App;
And that’s it! With the updated setup, unauthenticated users are redirected to the login page when they try to access the protected /secret route. If they’re logged in but have yet to pass 2FA, they’re redirected to the 2FA verification page. They can only access protected routes once both authentication steps are completed.
Another common authentication pattern is integrating React Router with third-party authentication libraries like Auth0. The process involves creating an Auth0 account, retrieving your credentials, and utilizing libraries such as auth0-react to implement the authentication process seamlessly.
While integrating Auth0 with React Router is outside the scope of this article, learning to do so could be a useful next step. For a comprehensive guide and to begin your setup, refer to the official Auth0 documentation.
<Outlet />One of the most powerful features of React Router is nested routes, introduced in v6. Nested routes allow a route to render other child routes, which is especially useful for building layout-based navigation. Since most application layouts are tied to specific URL segments, React Router supports this pattern naturally.
We’ve already seen <Outlet /> in action with the ProtectedRoute and AuthProvider components. To build on that, we can add a parent route for the <HomePage /> and <LoginPage /> routes, as shown below:
import { createBrowserRouter, RouterProvider } from "react-router";
import { HomePage } from "./pages/Home";
import { LoginPage } from "./pages/Login";
import { ProfilePage } from "./pages/Profile";
import { SettingsPage } from "./pages/Settings";
import { AuthProvider } from "./components/AuthProvider";
import { HomeLayout } from "./components/HomeLayout";
import { ProtectedLayout } from "./components/ProtectedLayout";

const router = createBrowserRouter([
  {
    Component: AuthProvider,
    children: [
      {
        path: "/",
        Component: HomeLayout,
        children: [
          { index: true, Component: HomePage },
          { path: "login", Component: LoginPage },
        ],
      },
      {
        path: "dashboard",
        Component: ProtectedLayout,
        children: [
          { path: "profile", Component: ProfilePage },
          { path: "settings", Component: SettingsPage },
        ],
      },
    ],
  },
]);

const App = () => <RouterProvider router={router} />;
export default App;
When the user navigates to /dashboard/profile, the router will render the <ProfilePage />. For this to occur, the parent route element must have an <Outlet /> component to render the child elements. The Outlet component enables nested UI elements to be visible when child routes are rendered.
The parent route element can also have additional common business logic and user interface. For example, in the <ProtectedLayout /> component, we have included the private route logic along with a common navigation bar that will be visible when the child routes are rendered:
import { useEffect } from "react";
import { useNavigate, Outlet, NavLink } from "react-router";
import { useAuth } from "../hooks/useAuth";

export const ProtectedLayout = () => {
  const navigate = useNavigate();
  const data = useAuth();

  useEffect(() => {
    if (!data?.user) {
      navigate("/");
      return;
    }
  });

  return (
    <div>
      <nav>
        <NavLink to='/settings'>Settings</NavLink>
        <NavLink to='/profile'>Profile</NavLink>
      </nav>
      <Outlet />
    </div>
  );
};
Instead of the <Outlet /> component, we can also opt to use the useOutlet Hook, which serves the same purpose:
import { useEffect } from "react";
import { useNavigate, useOutlet, NavLink } from "react-router";
import { useAuth } from "../hooks/useAuth";

export const ProtectedLayout = () => {
  const navigate = useNavigate();
  const outlet = useOutlet();
  const data = useAuth();

  useEffect(() => {
    if (!data?.user) {
      navigate("/");
      return;
    }
  });

  return (
    <div>
      <nav>
        <NavLink to='/settings'>Settings</NavLink>
        <NavLink to='/profile'>Profile</NavLink>
      </nav>
      {outlet}
    </div>
  );
};
Similar to protected routes, we don’t want authenticated users to access the /login path. We can handle this in the <HomeLayout /> component:
import { useEffect } from "react";
import { useNavigate, Outlet, NavLink } from "react-router";
import { useAuth } from "../hooks/useAuth";

export const HomeLayout = () => {
  const navigate = useNavigate();
  const data = useAuth();
  useEffect(() => {
    if (data?.user) {
      navigate("/dashboard/profile");
      return;
    }
  });

  return (
    <div>
      <nav>
        <NavLink to='/'>Home</NavLink>
        <NavLink to='/login'>Login</NavLink>
      </nav>
      <Outlet />
    </div>
  );
};
With React Router’s data mode, we can abstract data fetching away from our components. In earlier versions of React Router, this logic typically lived inside a component using the useEffect hook. With data mode, we can instead use the router’s loader() function to fetch data before a route is rendered.
For example, imagine a scenario where we need to load the logged-in user’s data when the application starts. Based on whether the user is authenticated, we can then redirect them to either the homepage or the dashboard.
To simulate this behavior, we’ll use a Promise with setTimeout() and retrieve the user from localStorage:
const getUserData = () =>
  new Promise((resolve) =>
    setTimeout(() => {
      const user = window.localStorage.getItem("user");
      resolve(user);
    }, 3000)
  );
Using the loader prop on the Route component, we can pass the Promise – getUserData() – to the AuthLayout component with the help of the defer() utility function. The defer() function allows us to pass promises instead of resolved values before the Route component is rendered:
import {
  Route,
  createBrowserRouter,
  createRoutesFromElements,
  defer
} from "react-router";

import { AuthLayout } from "./components/AuthLayout";
...
// ideally this would be an API call to server to get logged in user data
const getUserData = () =>
  new Promise((resolve) =>
    setTimeout(() => {
      const user = window.localStorage.getItem("user");
      resolve(user);
    }, 3000)
  );

export const router = createBrowserRouter(
  createRoutesFromElements(
    <Route
      element={<AuthLayout />}
      loader={() => defer({ userPromise: getUserData() })}
    >
      <Route element={<HomeLayout />}>
        ...
      </Route>

      <Route path="/dashboard" element={<ProtectedLayout />}>
        ...
      </Route>
    </Route>
  )
);
In the AuthLayout component, you can access the userPromise using the useLoaderData hook.
The Await component can render deferred values with an inbuilt error-handling mechanism. The Await component should be wrapped in React Suspense to enable a fallback UI. In this case, we’re rendering a linear progress bar until the userPromise is resolved.
We can pass a component to the errorElement prop to render an error UI state if the Promise gets rejected.
Finally, we can pass the user data as an initial value to the AuthProvider:
import { Suspense } from "react";
import { useLoaderData, useOutlet, Await } from "react-router";
import LinearProgress from "@mui/material/LinearProgress";
import Alert from "@mui/material/Alert";
import { AuthProvider } from "../hooks/useAuth";

export const AuthLayout = () => {
  const outlet = useOutlet();

  const { userPromise } = useLoaderData();

  return (
    <Suspense fallback={<LinearProgress />}>
      <Await
        resolve={userPromise}
        errorElement={<Alert severity="error">Something went wrong!</Alert>}
        children={(user) => (
          <AuthProvider userData={user}>{outlet}</AuthProvider>
        )}
      />
    </Suspense>
  );
};
To verify the error condition, you can reject the Promise as shown below:
// for error
const getUserData = () =>
  new Promise((resolve, reject) =>
    setTimeout(() => {
      reject("Error");
    }, 3000)
  );
In this section, we’ll look at how to pass state through React Router links. Any state you pass must be JSON serializable, meaning it needs to be a plain object, string, or number – data types that can be safely converted to JSON.
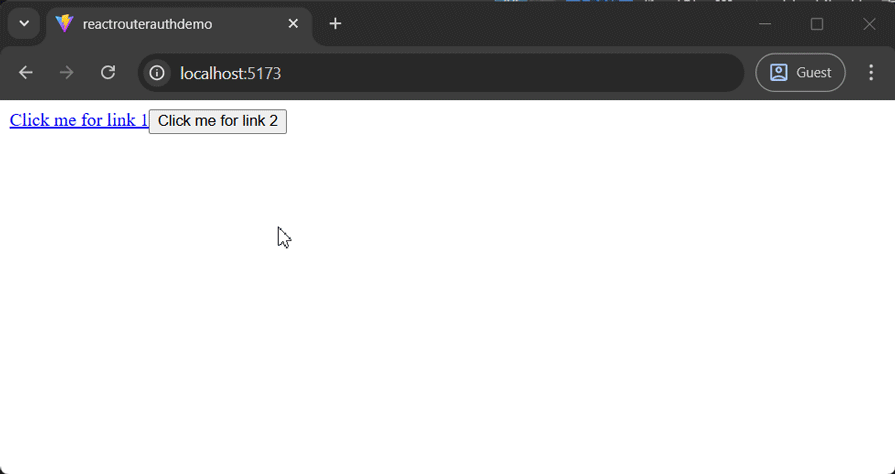
To demonstrate this, we’ll start by defining navigation using <Link> and useNavigate.
Using <Link>:
<Link
  to="/link-one"
  state={{
    foo: "This is state for link 1",
  }}
>
  Click me for link 1
</Link>
When this link is clicked in React Router, simply navigate to /link-one, and attach the state to the route transition.
Using useNavigate:
import { useNavigate } from 'react-router'
// ....

// Inside the React component
const navigate = useNavigate()
const clickHandler = () => {
  navigate("/link-two", {
    state: {
      hi: "This is state for link 2",
    },
  });
};
When you click the button above, it will navigate to our LinkTwo and pass the state along with the navigation.
In our next step, our job is to access these states in our components. We created two components, LinkOne and LinkTwo, where we will access these states.
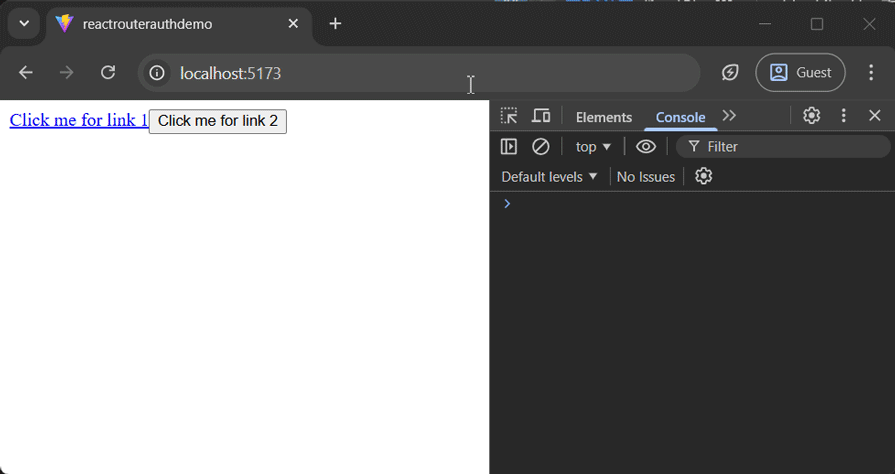
During navigation, we receive states using the useLocation() hook:
const LinkOne = () => {
  const location = useLocation();
  console.log("This is from component 1", location.state);
  return <div>Inside Link One</div>;
};

const LinkTwo = () => {
  const location = useLocation();
  console.log("This is from component 2", location.state);
  return <div>Inside Link Two</div>;
};
At this point, we need to set up our routes. While this could have been done earlier, introducing it here makes more sense within the flow of the tutorial. The route configuration looks like this:
const router = createBrowserRouter([
  { Component: LinkOne, path: '/link-one' },
  { Component: LinkTwo, path: '/link-two' },
])
When a user navigates to one of these routes, React Router renders the appropriate component and makes the navigation state available to it.
In the final step, we’ll log and use that state. The complete example below shows how everything fits together:
import {
  Link,
  Outlet,
  useNavigate,
  useLocation,
  createBrowserRouter,
  RouterProvider,
} from "react-router";

const LinkOne = () => {
  const location = useLocation();
  console.log("This is from component 1", location.state);
  return <div>Inside Link One</div>;
};
const LinkTwo = () => {
  const location = useLocation();
  console.log("This is from component 2", location.state);
  return <div>Inside Link Two</div>;
};

const router = createBrowserRouter([
  {
    Component: AppLayout,
    path: "/",
    children: [
      { Component: LinkOne, path: "/link-one" },
      { Component: LinkTwo, path: "/link-two" },
    ],
  },
]);

function AppLayout() {
  const navigate = useNavigate();
  const clickHandler = () => {
    navigate("/link-two", {
      state: {
        hi: "This is state for link 2",
      },
    });
  };
  return (
    <div className='App'>
      <div>
        <Link
          to='/link-one'
          state={{
            foo: "This is state for link 1",
          }}
        >
          Click me for link 1
        </Link>
        <button onClick={clickHandler}>Click me for link 2</button>
      </div>
      <div>
        <Outlet />
      </div>
    </div>
  );
}

function App() {
  return <RouterProvider router={router} />;
}

export default App;
With this setup, you can pass state through React Router.
As mentioned earlier, any state passed through a React Router link must be JSON serializable. Since functions don’t meet this requirement, they can’t be passed as link state to other routes, at least not directly.
That said, there is a way to work around this limitation. One option is to store functions in the application’s context and pass an identifier string through the route state. The destination route can then use that identifier to look up and invoke the corresponding function from context.
However, this approach doesn’t really align with the intended purpose of link state. Link state is designed for passing serializable values that should persist across navigation. If you need certain functions to be available across routes, a cleaner and more idiomatic solution is to place those functions in React context and call them wherever they’re needed.
In the example below, we’ll store two functions in the app’s context and access them inside our components using the useOutletContext hook.
import {
  Link,
  Outlet,
  useNavigate,
  useOutletContext,
  createBrowserRouter,
  RouterProvider,
} from "react-router";

interface AppContext {
  sayHello(): void;
  sayGoodbye(): void;
}

const useFunc = () => useOutletContext<AppContext>();

const LinkOne = () => {
  const { sayHello } = useFunc();
  return (
    <div>
      <button onClick={sayHello}>Execute Function 1</button>
    </div>
  );
};

const LinkTwo = () => {
  const { sayGoodbye } = useFunc();
  return (
    <div>
      <button onClick={sayGoodbye}>Execute Function 2</button>
    </div>
  );
};

const router = createBrowserRouter([
  {
    Component: AppLayout,
    path: "/",
    children: [
      { Component: LinkOne, path: "/link-one" },
      { Component: LinkTwo, path: "/link-two" },
    ],
  },
]);

function AppLayout() {
  const navigate = useNavigate();
  const sayHello = () => console.log("Hello from sayHello!");
  const sayGoodbye = () => console.log("Goodbye from sayGoodbye!");
  const clickHandler = () => {
    navigate("/link-two");
  };
  return (
    <div className='App'>
      <div>
        <Link to='/link-one'>Click me for link 1</Link>
        <button onClick={clickHandler}>Click me for link 2</button>
      </div>
      <div>
        <Outlet
          context={{ sayHello, sayGoodbye } satisfies AppContext}
        />
      </div>
    </div>
  );
}

function App() {
  return <RouterProvider router={router} />;
}

export default App;
In the code above, the approach we used involved not passing states to routes but instead calling them directly from the context. Also, notice that instead of creating a context provider, you can just pass your context to the <Outlet /> component.
Here are the functions getting triggered:
React Router v7 builds on previous releases by introducing a more unified, data-first approach to routing. By combining routing, layouts, and data loading into a single router configuration, it provides a clearer and more scalable foundation for modern React applications.
With data mode in v7, you can handle optimistic UI, loading, and error states using loaders, deferred data, and Await, while keeping data fetching outside of your components. In this guide, we used these capabilities to build protected routes, nested layouts, and a two-factor authentication flow using React Router v7.
If you’re adopting React Router v7 or migrating from an earlier version, these patterns should help you design authentication and routing logic that is easier to reason about and maintain.
Install LogRocket via npm or script tag. LogRocket.init() must be called client-side, not
server-side
$ npm i --save logrocket

// Code:

import LogRocket from 'logrocket';
LogRocket.init('app/id');
// Add to your HTML:

<script src="https://cdn.lr-ingest.com/LogRocket.min.js"></script>
<script>window.LogRocket && window.LogRocket.init('app/id');</script>

A hands-on test of Claude Code Review across real PRs, breaking down what it flagged, what slipped through, and how the pipeline actually performs in practice.

CSS art once made frontend feel playful and accessible. Here’s why it faded as the web became more practical and prestige-driven.

Learn how inline props break React.memo, trigger unnecessary re-renders, and hurt React performance — plus how to fix them.

This article showcases a curated list of open source mobile applications for Flutter that will make your development learning journey faster.
Would you be interested in joining LogRocket's developer community?
Join LogRocket’s Content Advisory Board. You’ll help inform the type of content we create and get access to exclusive meetups, social accreditation, and swag.
Sign up now

