Editor’s note: This article was last validated for accuracy 16 November 2022.

In early JavaScript frameworks like Angular, it was common to have all the state in your application embedded inside routes, services, controllers, local storage, and session storage. However, as applications grew larger, it became harder to keep track of what was being stored where.
Improvement came in the form of state management libraries like Redux and Vuex. Newer frameworks like Svelte have taken a more simplistic approach to state management, eliminating the need to install libraries and offering stores that manage state within the framework instead. In this article, we’ll explore how Svelte manages and handles state in an application.
Svelte’s context API is perfect for cross-component communication without having to complicate your codebase by passing around props. The context API is enabled by two inbuilt Svelte functions, getContext and setContext. You can make an object or value available anywhere within your app by setting it in the context and associating it with a key, as shown in the code sample below:
<script>
  import { setContext } from 'svelte'

  const thisObject = {}

  setContext('thisKey', thisObject)
</script>
To make thisKey available in a different component within the app, simply import it using the getContext function:
<script>
  import { getContext } from 'svelte'

  const thisObject = getContext('thisKey')
</script>
Keep in mind that you can only use getContext to retrieve a key in the component that used setContext or a component within the same component tree. To communicate properties and values across two components within different trees, Svelte uses stores.
As an app increases in size, it tends to increase in complexity. At this point, it’s not a great idea to nest certain parts of the app’s state in the app’s component hierarchy; you’ll have some properties that need to be accessed by different components.
Svelte handles this type of property via stores, which are objects that hold a value and can notify you when that value changes. Svelte has two kinds of stores for handling state in applications, writable and readable stores.
Writable stores are objects that hold values or properties that can be accessed by different components within an app. Let’s use the writable store to hold a value that we can then alter or pass around our app. To access this value, you would export it from the store and save it as a JavaScript file:
<!-- location.js -->
<script>
  import writable from 'svelte/store'

  export const city = writable('New York')
</script>
You can then import it into any other component where it’s needed as follows:
<scipt>
  import { city } from './location.js'
</script>
The value in a writable store can be altered. Should you need to change the value of city in any component where it is imported, you can use the set() method:
<!-- Map.svelte -->

<script>
  import { city } from './location.js'

  city.set('Washington')

</script>
Or, you can use the update() method to run a callback that passes the current value as an argument:
<!-- Map.svelte -->

<script>
  import { city } from './location.js'

  const newCity = 'Washington'

  function changeCity() {
    city.update(existing => newCity)
  }

</script>
Alternately, you could have components watch out for changes to the value you set in your store by using Svelte’s subscribe() method:
<!-- Map.svelte -->

<script>
  import { city } from './location.js'

  const watch = city.subscribe(value => {
    console.log(value);
  });
</script>
Like writable stores, readable stores hold objects, but they cannot be updated from external components. When using a readable store, you have to set its value when you create it. Readable stores are mostly used to handle data that you need to be immutable. Below is an example of what you might handle using a readable store, a counter:
<!-- counter.js -->

<script>
  import { readable } from 'svelte/store'

  export const counter = readable(0, set => {
    setTimeout(() => {
     set(1)
    }, 1000)
  })
</script>
The counter above can then be imported into another component as follows:
<!-- Home.svelte-->

<script>
  import { counter } from './store.js'
</script>

<h1>You have {$counter} seconds left!<h1>
Let’s build an actual app where we’ll manage state in Svelte. Our app will be just a basic updated list. First, we’ll create a Svelte project. In your terminal, input the following command:
npm create vite@latest dealership-svelte -- --template svelte
Then, navigate to the project directory and install all the dependencies of this project:
npm install
The complete app should have a folder structure similar to the following:
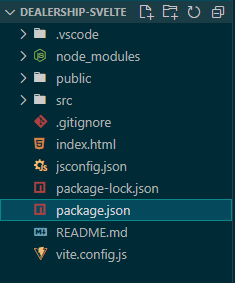
Once the app is built, deploy it by running npm run dev in your terminal. This deploys the app on the port localhost:5000.
In the src folder in our project, let’s create a store folder, which we’ll use for keeping our stores. Next, we’ll create a file to contain what we need to store, define methods for updating the values of our store, and reset them to their default values. We’ll call this file cars.js:
 // src/store/cars.js

 import { writable } from 'svelte/store';

 const CARS = [
     { make: "Ford", model: "Taurus", year: "2015" },
     { make: "Toyota", model: "Avalon", year: "2013" }
 ];

 const { subscribe, set, update } = writable(CARS);

 const addCar = car => update(cars => {
     return [...cars, car];
 });

 const reset = () => {
     set(CARS);
 };

 export default {
     subscribe,
     addCar,
     reset
 }
You can now import the exported methods subscribe , addCar, and reset into any component and use them to subscribe, add new values, and reset our list of cars, respectively.
Next, we’ll create components that will receive the methods exported from our store. We’ll create two components, CarPage, which we’ll use when we want to add a new car, and CarList, which will show the list of added cars. CarPage will update all added cars and respond to changes automatically:
<!-- src/CarPage.svelte -->
<script>
        import cars from "./store/cars";
</script>

<div id="carPage">
        { #each $cars as car }
                <p>{car.make} {car.model}</p>
                <p>{car.year}</p>
                <hr />
        { /each }
</div>
Next, we’ll create CarList, which is a form that lets us update and remove vehicles accordingly:
<!-- src/CarList.svelte -->
<script>
        import cars from "./store/cars";

        // binding values
        let make = "";
        let model = "";
        let year = "";

        // submit car
        const submitCar = () => {
                cars.addCar({ make, model, year });
                // reset values
                make = model = year = "";
        }
</script>

<div id="carList">
    <input type="text"  bind:value={make} placeholder="Enter vehicle make" />
    <input type="text"  bind:value={model} placeholder="Enter vehicle model" />
    <input type="year" bind:value={year} placeholder="Enter vehicle year" />
    <input type="submit" on:click={submitCar} value="Include Vehicle" />
    <input type="submit" on:click={cars.reset} value="Reset Vehicle list" />
</div>
Lastly, we’ll import both CarList and CarPage into App.svelte:
<!-- src/App.svelte-->

<script>
    import CarList from "./CarList.svelte";
    import CarPage from "./CarPage.svelte";
</script>
<main>
    <h1>Car Dealership</h1>
    <CarList />
    <CarPage />
</main>
At this point, we’ll have an application that shows the rudiments of managing state using Svelte. Our app’s behavior should model the one in the video below:
Svelte’s adaptability makes it a great choice for building small scale apps that require you to manage state. Its offering of customizable stores to choose from is brilliant, allowing you to isolate preferences via stores. Certainly, we should see more promising features and alterations on this with more contributors to the Svelte repo on GitHub.
Hey there, want to help make our blog better?
Join LogRocket’s Content Advisory Board. You’ll help inform the type of content we create and get access to exclusive meetups, social accreditation, and swag.
Sign up now
Get to know RxJS features, benefits, and more to help you understand what it is, how it works, and why you should use it.

Explore how to effectively break down a monolithic application into microservices using feature flags and Flagsmith.

Native dialog and popover elements have their own well-defined roles in modern-day frontend web development. Dialog elements are known to […]

LlamaIndex provides tools for ingesting, processing, and implementing complex query workflows that combine data access with LLM prompting.


5 Replies to "Application state management with Svelte"
Thank you for the solid explanation of a use-case for stores in Svelte.
I recently started going through the Svelte documentation, and this really helped me tie things together in my mental model for how stores can be used.
Thanks great guide, just please fix the error in the function:
“`
const addCar = car => update(car => {
return […cars, car];
});
“`
Should be:
“`
const addCar = cars => update(car => {
return […cars, car];
});
“`
Shouldn’t it be:
“`
const addCar = car => update(cars => {
return […cars, car];
});
“`
?
Guys you got this backwards. addCar() should take a parameter of car (singular) and update should take cars (plural). Should be like this:
const addCar = car => update(cars => {
return […cars, car];
});
Thanks for the catch 👍