Angular v20 was officially released on May 28. At first glance, it might look like a maintenance update: no fancy new syntaxes or groundbreaking rewrites. Some might even call it boring.

But here’s the truth: Angular’s strength lies in its steady and consistent evolution. Over the years, Angular has quietly refined its architecture, boosted performance, and enhanced the developer experience.
This release continues that tradition. It’s packed with practical, production-ready upgrades that will enable us to build apps faster and with more confidence.
In this article, we will delve into six practical features and enhancements from Angular v20 that help you work smarter:
linkedSignal API — To manage related statehttpResource — The new experimental API@defer and hydration triggersin operators, and untagged template literals— Improved code clarity and expressivenessLet’s dive a little deeper.
Let’s begin by looking at how to upgrade or start a new Angular v20 project.
To build a new Angular v20 app, begin by upgrading your Angular CLI with the following commands:
npm install -g @angular/cli@20
ng version # Verify your CLI version
ng new my-angular-20-app
To upgrade an existing Angular app, the easiest way is to let Angular CLI handle the update. Navigate to the project root directory and execute the command below:
ng update @angular/core@20 @angular/cli@20
This ng update command will update the dependencies to v20 in package.json, and migrate the codebase. In many cases, that is all you need.
However, for more complex applications or those with extensive third-party library dependencies, some manual changes may be needed. In those cases, follow the office upgrade guide for best practices and tips.
linkedSignal API to manage related stateSince Signal was introduced as a developer preview in Angular v16, it has quickly become the core of Angular state management. Prior to the v20 release, fundamental APIs like signal, computed, input, and view queries APIs have been promoted to stable status.
With Angular v20, more Signal APIs are graduated: effect, linkedSignal, toSignal. While the immediate use case is obvious (reactive state management), their real strength is enabling us to make clean, fast, and reactive states in our components and services.
Consider linkedSignal as a prime example of this enhanced capability. It’s a writable signal that reacts to another source and lets us control overrides when needed.
linkedSignal offers a clean solution for managing related states, such as when a parent value (e.g., selected region) determines child options (e.g., languages), while still allowing user override. For instance, when a user selects a region, the system automatically sets the default language for that region. The user can also manually choose a language, and the app will remember and reapply it when they return to that region later.
Before linkedSignal was introduced, it typically required combinations of computed and effect to achieve the region-to-language determination.
Consider this example of how we might have implemented it before:
regions = [
  {
    code: 'NA',
    name: 'North America',
    languages: ['en', 'es', 'fr'],
    defaultLanguage: 'en'
  },
  {
    code: 'EU',
    name: 'Europe',
    languages: ['en', 'fr', 'de', 'es'],
    defaultLanguage: 'en'
  },
  {
    code: 'AS',
    name: 'Asia',
    languages: ['zh', 'ja', 'ko', 'en'],
    defaultLanguage: 'zh'
  }
];
selectedRegion = signal('NA'); // North America by default
availableLanguages = computed(() => {
  return this.regions.find(r => r.code === this.selectedRegion())?.languages || ['en'];
});

// Track the selected language separately
selectedLanguage = signal<string>('en');
effect(
    () => {
      const currentRegion = this.regions.find(
        (r) => r.code === this.selectedRegion()
      );
      const languages = this.availableLanguages();
      const currentLanguage = this.selectedLanguage();
      // If current language is not in the new region's languages, switch to default
      if (!languages.includes(currentLanguage)) {
        this.selectedLanguage.set(
          currentRegion?.defaultLanguage || languages[0]
        );
      }
    },
    { allowSignalWrites: true }
  );
While it works, the solution isn’t ideal. The effect() reads from selectedRegion, availableLanguages, and selectedLanguage, then sets selectedLanguage if the selected language isn’t valid. It creates a reactive side effect that both reads and writes the same signal, potentially creating an infinite loop (read → write → re-run).
Here is how we implement it using linkedSignal:
// ... regions data
selectedRegion = signal('NA'); // North America by default
availableLanguages = computed(() => {
  return this.regions.find(r => r.code === this.selectedRegion())?.languages || ['en'];
});
selectedLanguage = linkedSignal<string[], string>({
  source: this.availableLanguages,
  computation: (languages, previous) => {
    const region = this.regions.find(r => r.code === this.selectedRegion());
    const defaultLanguage = region?.defaultLanguage || languages[0];
    return previous && languages.includes(previous.value)
      ? previous.value
      : defaultLanguage;
  }
});

// example usage
this.selectedRegion.set('EU'); // Auto set language to 'en' (EU default)
this.selectedLanguage.set('fr'); // Manual override to 'fr'
this.selectedRegion.set('EU'); // Returns to 'fr' because it was previously set
this.selectedRegion.set('AS'); // Switches to 'zh' (Asia default)
In the above example, we use linkedSignal, and avoid the potential complexities associated with the effect() that both reads from and writes to the same signal. The logic for managing the language preference is encapsulated in the linkedSignal‘s computation function, leading to code that is more predictable and simpler to reason about.
httpResourceAngular v19 introduced the Resource API, and now Angular v20 adds a new experimental feature: httpResource. The goal of httpResource is to provide a declarative way to manage the lifecycle of HTTP GET requests using Signals. It helps track data, loading, and error states reactively.
httpResource is designed for read-only operations (GET). For actions like PUT, POST, or DELETE, we should continue using HttpClient. In fact, httpResource is built on top of HttpClient, not a replacement for it.
It is worth noting that httpResource is eagerly executed. Unlike HttpClient, which only dispatches a request when subscribed to an observable, httpResource begins fetching data as soon as it’s defined.
Here’s how we use httpResource to fetch a list of users from an API:
  userResource = httpResource<User[]>(() =>
    `https://apis/users`
  });
The httpResource function returns an HttpResourceRef, which provides properties like value, isLoading, and error that can be used directly in the template:
 @if (users.isLoading()) {
      <!-- Showing a loading spinner-->
    }
    @if(users.error()) {
      <div class="error">Couldn't fetch data...</div>
    }
  <ul>
    @for (user of users.value(); track user.id) {
      <li>{{ user.name }}</li>
    }
  </ul>
As shown above, the new httpResource API simplifies async handling by automatically managing loading, error, and data states. This ultimately reduces repetitive code.
Since httpResource uses HttpClient, we can still apply interceptors through the HttpClient provider:
bootstrapApplication(AppComponent, {
  providers: [
    provideHttpClient(
      withInterceptors([loggingInterceptor, cachingInterceptor])
    )
  ]
});
As an experimental API, httpResource may change before its final release. Always check the latest Angular documentation for updates.
@defer and hydration triggersAngular introduced server-side rendering in version 16. In SSR, hydration is the process of transforming the server-side rendered HTML to an interactive web app by adding event listeners and states.
Initially, SSR uses full hydration, meaning the entire page is hydrated simultaneously. Incremental hydration was introduced in Angular v19 as developer preview; now it has achieved stable status in Angular v20. The incremental hydration process lets developers delay the loading and hydration of specific parts of the template, helping reduce bundle size and speed up time to interaction.
To use incremental hydration, enable SSR and configure hydration in app.config.ts:
export const appConfig: ApplicationConfig = {
  providers: [
    provideClientHydration(
      withIncrementalHydration() // Enables progressive hydration
    )
  ]
};
Incremental hydration depends on @defer. @defer works like lazy loading; it delays the loading of components or template parts until needed. This lets us prioritize rendering critical content while deferring less essential elements.
We can control when deferred content loads using various built-in triggers. There are a few different types of triggers:
on viewport — Renders when the content enters the viewporton interaction — Renders after a user interacts with a related elementon idle— Renders when the browser becomes idleon immediate — Renders immediately after component initializationFor example:
@defer(on interaction)
{ <app-chat-widget /> }
We can also consider hydration triggers. They control when Angular makes the server-side rendered HTML interactive on the client side. Each @defer block can include multiple hydration triggers, separated by a semicolon (;).
@defer(hydrate on viewport) {
  <app-heavy-dashboard />
} @placeholder {
  <div class="skeleton-loader">Loading dashboard...</div>
} @defer(hydrate on interaction) {
  <app-user-input />
}
Note that the @placeholder block defines fallback content shown while the deferred content is loading.
never is a special trigger for incremental hydration. The hydrate never option tells Angular to skip client-side hydration for content inside a @defer block during the initial load, keeping it in its server-rendered state. This is especially useful for static, content-heavy pages:
@defer (on viewport; hydrate never) {
  <app-static-chart />
} @placeholder {
  <div>Loading chart...</div>
}
Here are some best practices:
@defer for below-the-fold content (e.g., dashboards, comments, secondary features)@placeholder to avoid layout shiftson viewport for long pages to lazy-load components only when they scroll into viewSometimes, we need to create components dynamically, such as when rendering based on user input or runtime data. In Angular, this can be done using the createComponent function.
Starting in v20, new binding APIs allow us to add directives and set bindings directly when creating dynamic components.
Before v20, setting an input value required using setInput, and handling output data involved manually subscribing to events. Here is an example:
async createComponent() {
  const { CounterComponent } = await import('../counter/counter.component');

  this.componentRef = this.container.createComponent(CounterComponent);
  this.componentRef.setInput('title', 'Child component: counter');
  this.componentRef.setInput('count', this.counterValue);
  // Manual event binding (output)
  this.componentRef.instance.countChange.subscribe((value: number) => {
    this.counterValue = value;
  });

  this.componentRef.instance.closed.subscribe(() => {
    this.componentRef.destroy();
  });
}
With v20, we can use the new binding API to achieve the same in a declarative way:
async createComponent() {
  this.componentRef = this.container.createComponent(CounterComponent, {
    bindings: [
      inputBinding('title', () => 'Child component: counter'),
      twoWayBinding('count', this.counterValue),
      outputBinding('closed', () => {
        this.componentRef.destroy();
      }),
    ],
  });
}
In the example above, we set up bindings for the CounterComponent using binding APIs:
inputBinding for the static input titlecount input and the counterValue signal, so changes in count update counterValue, and vice versaoutputBinding for the closed event, which destroys the component when triggeredAngular detects inputs and outputs for twoWayBinding based on naming conventions. In this case, count pairs with countChange automatically.
The new APIs reduce boilerplate and align with reactivity patterns, making the code intuitive and maintainable.
in operators, and untagged template literalsAngular v20 introduces several language enhancements to improve code clarity and expressiveness. These include the exponential operator (**), the in operator, and untagged template literals. Let’s explore each one with examples.
Angular templates now support the native JavaScript ** operator for power calculations:
 // Component
  base = model<number>(0);
  exponent = model<number>(0);


  <!-- Template -->
  <input type="number" [(ngModel)]="base" placeholder="Base" />
  <input type="number" [(ngModel)]="exponent" placeholder="Exponent" />
  <p>Result: {{ base() ** exponent() }}</p>
This lets us use base() ** exponent() for calculations in the template. Writing expressions this way makes it more readable and clearly expresses its intent.
The in operator lets us check whether a property exists in an object:
  <!-- Template -->
    <input [(ngModel)]="propertyToCheck" placeholder="Property name" />
    <p>
      "{{ propertyToCheck() }}" exists in circle object:
      {{ propertyToCheck() in circle }}
    </p>


  // Component
  circle = {
    radius: 10,
    color: 'blue',
  };
  propertyToCheck = model<string>('radius');
This is useful for conditionally displaying or interacting with object properties in a way that functions like the in operator in TypeScript. This update helps align Angular expressions more closely with TypeScript.
Another useful feature in v20 is untagged template literals. Before v20, string concatenation was common in templates. Now, we can use backticks and ${} for clearer and easier string interpolation:
  <!-- Before untagged Template Literal -->
  <div [class]="'message-' + (isError() ? 'error' : 'success')">
    {{ infoMessage() }}
  </div>
  <!-- With untagged Template Literal -->
  <div [class]="`message-${isError() ? 'error' : 'success'}`">{{ `${infoMessage()}` }}</div>
The first example above uses string concatenation to set a dynamic class based on whether isError() is true or false.
The second example achieves the same result using an untagged template literal, which is cleaner and easier to read.
Untagged template literals are useful in building dynamic styles, such as themable UIs or CSS-in-JS utilities. It allows us to combine static styles with dynamic values in a cleaner way, avoiding messy manual string concatenation.
These enhancements may seem small, but they help bring Angular templates closer to JavaScript/TypeScript behaviour and reduce code noise.
AI is obviously becoming a huge part of modern software. The Angular team naturally wants to ensure Angular is a top choice for creating AI-powered web apps.
Angular v20 provides tools and documentation to help large language models (LLMs) understand how to write better Angular code and make it simpler to integrate AI models and services into our Angular apps.
llms.txt is a proposed standard to help LLMs understand and use websites’ content better.
The Angular team made two versions to help LLMs and AI tools generate better Angular code:
llms.txt – A simple file with links to important Angular docs and code samples.llms-full.txt – A larger file with more detailed resources about how Angular works and how to build Angular appsThe Angular team also introduced the official Angular AI documentation site for Angular devs. We can find guidance, best practices, code recipes, and starter projects for building AI-powered Angular apps.
In this article, we focus on five enhancements that offer immediate benefits for developers. Beyond these, Angular v20 includes several improvements to enhance the framework and developer experience.
Zoneless mode is now in developer preview, enabling apps to run without Zone.js for better performance and simpler debugging. Improved type checking and language service support for host bindings help catch errors earlier and boost IDE integration.
Angular DevTools also improved, with more insights and debugging capabilities. Lastly, there’s experimental support for Vitest, a modern and fast unit testing framework, giving teams more options beyond Karma.
Together, these updates help us build faster, cleaner, and more maintainable Angular apps.
Ground-breaking? Maybe not. But Angular v20 definitely makes an instant impact for its users.
Debugging Angular applications can be difficult, especially when users experience issues that are difficult to reproduce. If you’re interested in monitoring and tracking Angular state and actions for all of your users in production, try LogRocket.
LogRocket lets you replay user sessions, eliminating guesswork by showing exactly what users experienced. It captures console logs, errors, network requests, and pixel-perfect DOM recordings—compatible with all frameworks.
With Galileo AI, you can instantly identify and explain user struggles with automated monitoring of your entire product experience.
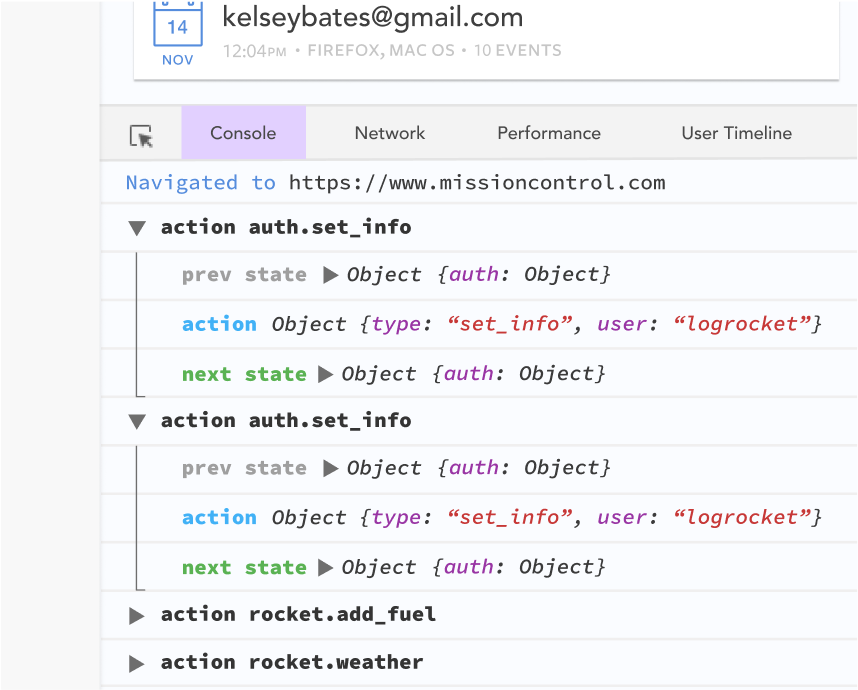
The LogRocket NgRx plugin logs Angular state and actions to the LogRocket console, giving you context around what led to an error, and what state the application was in when an issue occurred.
Modernize how you debug your Angular apps — start monitoring for free.

Learn how to protect full-stack projects from NPM supply chain attacks with a practical security checklist.

Explore 15 essential MCP servers for web developers to enhance AI workflows with tools, data, and automation.

Learn how contrast-color() automatically picks accessible text colors using native CSS, without JavaScript.

Learn how to build a harness-style AI workflow using Claude Code with specialized Dev, QE, and Ops subagents, gated handoffs, MCP telemetry, and LEARNING.md.
Would you be interested in joining LogRocket's developer community?
Join LogRocket’s Content Advisory Board. You’ll help inform the type of content we create and get access to exclusive meetups, social accreditation, and swag.
Sign up now

