Lifecycle hooks are a special functionality in Angular that allow us to “hook into” and run code at a specific lifecycle event of a component or directive.

Angular manages components and directives for us when it creates them, updates them, or destroys them. With lifecycle hooks, we can gain better control of our application.
To do this, we add some specific hook methods prefixed with ng to our component or directive. These hooks are split into two types: hooks for components or directives and hooks for child components.
The Replay is a weekly newsletter for dev and engineering leaders.
Delivered once a week, it's your curated guide to the most important conversations around frontend dev, emerging AI tools, and the state of modern software.
This article will cover the following:
These are the hooks for components or directives, in call order:
constructor()OnChangesOnInitDoCheckOnDestroyAnd these are the hooks for a component’s children components:
AfterContentInitAfterContentCheckedAfterViewInitAfterViewCheckedBelow is a summary of the Angular lifecycle hooks in a table:
OnChanges |
Called when the input properties have changed |
OnInit |
Called on initialization |
DoCheck |
Developer’s custom change detection |
OnDestroy |
Called before the component is destroyed |
AfterContentInit |
Called when the component’s content ngContent is initialized |
AfterContentChecked |
Called when the component’s content is updated or checked for updates |
AfterViewInit |
Called when the component’s projected view has been initialized |
AfterViewChecked |
Called after the projected view has been checked |
In Angular, components are the smallest units of building blocks for a component tree. This enables us to develop and maintain our codebase very easily. Components are classes with the @Component() decorator on the them, like so:
@Component({
  selector: "app-comp",
  template: `<div>AppComponent</div>`,
  styles: ``
})
class AppComponent implements OnInit {
  //...
}
Directives are technically components, but they operate on the non-UI part of the DOM. Their work is to add extra functionality to the DOM. Directives are also classes, but decorated with the @Directive() class decorator.
Examples of in-built directives are *ngFor , *ngIf, etc. We can create our own directive by doing this:
@Directive({
  selector: '[highlight-text]'
})
export class HighlightDirective {
  //...
}
The following are lifecycle hooks for components or directives, with explanations of how they work and how to use them.
Constructor()This is the constructor we are familiar with in JS classes. It is included because our components/directives are JavaScript classes with either an @Component or @Directive decorator. So this constructor is called when our component/directive instance is created by Angular using the new keyword.
OnChangesOnChanges is a lifecycle hook that is called when any data-bound property of a directive changes. An ngOnChanges() method must be defined to handle the changes.
Let’s say our BComponent has the input property books:
@Component({
 selector: 'bcomp',
 template: `
 <div *ngFor="let book of books">
 {{book}}
 </div>
 `
})
export class BComponent implements OnChanges {
 @Input() book
 ngOnChanges() {
 console.log("The book property changed")
 }
}
@Component({
 // ...
 template: `
 <bcomp [books]="books"></bcomp>
 `
})
export class App {
 books = ["Michael Crichton: Prey"]
}
App bound its books property to BComponent’s books. Note how we implemented the OnChanges interface and added the ngOnChanges method. ngOnChanges will be called by Angular when the books property it receives from the App component has changed.
If we mutate the books property in the App component, Angular will not pick it up, and the ngOnChanges in the BComponent will not be run:
@Component({
 // ...
 template: `
 <bcomp [books]="books"></bcomp>
 `
})
export class App {
 books = ["Michael Crichton: Prey"]
 constructor() {
 setInterval(()=> {
 this.books.push("New Book: " + Date.now())
 }, 1000)
 }
}
The push method is a mutating method, and with the above code, BComponent will not pick up any changes and ngOnChanges will not be run.
As the BComponent is not an OnPush CD strategy, its view will be updated but the new book added to books will not be displayed, because Angular updates a component/directive input bindings before the updating it DOM.
We should be aware of immutability and always try to return a new state/reference. We will use a non-mutating method called Array#concat:
@Component({
 // ...
 template: `
 <bcomp [books]="books"></bcomp>
 `
})
export class App {
 books = ["Michael Crichton: Prey"]
 constructor() {
 setInterval(()=> {
 this.books = this.books.concat(["New Book: " + Date.now()])
 }, 1000)
 }
}
Now, the ngOnChanges on BComponent will be run.
Very simply, ngOnChanges is run when the component/directive’s input bindings have changed.
OnInitOnInit is a lifecycle hook that is called after Angular has initialized all data-bound properties of a directive. Define an ngOnInit() method to handle any additional initialization tasks.
This hook is called when the first change detection is run on the component. After the first run it is switched off never to be run again. It is a best practice to add our initialization logic here.
To hook into this, we will implement the OnInit interface and add ngOnInit method in our component/directive:
@Component({
 //...
})
export class BComponent implements OnInit {
 ngOnInit() {
 console.log("ngOnInit called")
 }
}
constructor and OnInit?Constructor and OnInit seem the same, but they are called at different phases. Angular has two phases: the bootstrapping phase and the change detection phase.
The constructor is called at the bootstrapping phase. This phase is when Angular creates the instances of services, pipes, components, and directives in our module. Angular initializes the component and resolves its dependencies and passes it to the constructor.
The change detection phase happens after the bootstrapping phase when Angular finally calls the tick method ApplicationRef#tick.
What is change detection? This is a mechanism whereby Angular detects a change in the state of a component/directive and updates the DOM to reflect as such. Angular detects this using Zone.js, a library that monkey-patches the following asynchronous APIs in the browser:
setTimeout, clearTimeout, setInterval, etc.XMLHttpRequest objectAt the change detection phase, these hooks are called in sequence:
OnInitDoCheckOnChangesProof:
// https://github.com/angular/packages/core/src/view/provider.ts
export function checkAndUpdateDirectiveDynamic(
 view: ViewData, def: NodeDef, values: any[]): boolean {
 const providerData = asProviderData(view, def.nodeIndex);
 const directive = providerData.instance;
 let changed = false;
 let changes: SimpleChanges = undefined !;
 for (let i = 0; i < values.length; i++) {
 if (checkBinding(view, def, i, values[i])) {
 changed = true;
 changes = updateProp(view, providerData, def, i, values[i], changes);
 }
 }
 if (changes) {
 directive.ngOnChanges(changes);
 }
 if ((def.flags & NodeFlags.OnInit) &&
 shouldCallLifecycleInitHook(view, ViewState.InitState_CallingOnInit, def.nodeIndex)) {
 directive.ngOnInit();
 }
 if (def.flags & NodeFlags.DoCheck) {
 directive.ngDoCheck();
 }
 return changed;
}
So, the OnInit is called after the component tree has been constructed, and the dependencies are resolved and passed to the component/directive’s instances. After being called, it is switched off.
What do we mean by being switched off? Each component/directive in Angular has view states:
export const enum NodeFlags {
 OnInit = 1 << 16,
 OnDestroy = 1 << 17,
 DoCheck = 1 << 18,
 OnChanges = 1 << 19,
 AfterContentInit = 1 << 20,
 AfterContentChecked = 1 << 21,
 AfterViewInit = 1 << 22,
 AfterViewChecked = 1 << 23,
 // ...
}
The above is a bitmask of a view state. Internally, components/directives are referred to as a view. Each components’ view is created with view states depending on the lifecycle hook it implemented. A view state can be the combination of any of the above bitmasks. Note that each hook has a bitmask.
As our component BComponent implements the OnInit, its view state will be OnInit = 1 << 16.
When the OnInit hook is called on a component/directive, Angular checks whether it is the first time. If it is, it updates the state mask to be true and calls the ngOnInit method:
if ((def.flags & NodeFlags.OnInit) &&
 shouldCallLifecycleInitHook(view, ViewState.InitState_CallingOnInit, def.nodeIndex)) {
 directive.ngOnInit();
 }
So on the next CD run, the above will always be false and the ngOnInit call will be skipped.
DoCheckDoCheck is a callback method that performs change detection, invoked after the default change detector runs.
This hook comes after the OnInit hook. DoCheck is not run on an event like OnInit and OnChanges, which are called when a change in input properties occurs or when the component/directive is initialized. Instead, this hook is added so the developer can add his or her custom code to perform a custom CD.
DoCheck invokes a custom change-detection function for a directive, in addition to the check performed by the default change-detector:
if (def.flags & NodeFlags.DoCheck) {
 directive.ngDoCheck();
 }
As we see above, this hook is constantly run on every CD cycle whether the component/directive is an OnPush or Default component. That your ngDoCheck hook is called does not mean your component/directive is being checked, just that the hook is called:
@Component({
 selector: 'bcomp',
 template: `
 <div *ngFor="let book of books">
 {{book}}
 </div>
 `,
 changeDetection: ChangeDetectionStrategy.OnPush
})
export class BComponent implements OnChanges {
 @Input() book
 ngOnChanges() {
 console.log("The book property changed")
 }
}
@Component({
 // ...
 template: `
 <bcomp [books]="books"></bcomp>
 `
})
export class App {
 books = ["Michael Crichton: Prey"]
}
The BComponent is an OnPush component, which means it will be checked first for changes in its input bindings and then, on subsequent CD runs, the component and its children will be skipped for a check. OnPush CD strategy is an optimization technique that only renders the component when necessary or when its input bindings have changed.
If the BComponent implements DoCheck and adds the ngDoCheck method, it will be always be run even when the CD run on it is skipped:
@Component({
 selector: 'bcomp',
 template: `
 <div *ngFor="let book of books">
 {{book}}
 </div>
 `,
 changeDetection: ChangeDetectionStrategy.OnPush
})
export class BComponent implements OnChanges, DoCheck {
 @Input() book
 ngOnChanges() {
 console.log("The book property changed")
 }
 ngDoCheck() {
 console.log("ngDoCheck on BComponent called")
 }
}
@Component({
 // ...
 template: `
 <bcomp [books]="books"></bcomp>
 `
})
export class App {
 books = ["Michael Crichton: Prey"]
 constructor() {
 setInterval(()=> {
 this.books.push("Book Name: "+Date.now())
 }, 1000)
 }
}
On the first CD run, BComponent will be re-rendered, and we will see the following logged on our console:
The book property changed
ngDoCheck on BComponent called
As the App component starts to update the books property, itself (App) will be updated, but the CD run on BComponent will be skipped because Angular won’t see any change in the BComponent books array.
Yet, we will see ngDoCheck and BComponent called on the console. This is because of how Angular is structured.
When CD is run on a component, it goes through five stages:
OnChanges if there were changes in its input propsOnInit on the children components if it hasn’t alreadyDoCheck on the children’s componentsupdateRenderer function to update the DOM interpolationsDoCheck has no condition before it is run, so it must be run so far as the component/directive implements the DoCheck interface.
If App uses the Array#concat method to push a new book, we will always see the following, because concat returns a new object reference:
The book property changed
ngDoCheck on BComponent called
DoCheck?As it runs on no condition, we can use DoCheck to add a custom CD mechanism of our own.
The default change-detection algorithm looks for differences by comparing bound-property values by reference across change detection runs. You can use this hook to check for and respond to changes by some other means.
When the default change detector detects changes, it invokes ngOnChanges if supplied, regardless of whether you perform additional change detection. Typically, you should not use both DoCheck and OnChanges to respond to changes on the same input.
Ideally, Angular supports and preaches immutability in our objects, but with ngDoCheck, we can track object mutations.
Using our example:
@Component({
 selector: 'bcomp',
 template: `
 <div *ngFor="let book of books">
 {{book}}
 </div>
 `,
 changeDetection: ChangeDetectionStrategy.OnPush
})
export class BComponent {
 @Input() book
}
@Component({
 // ...
 template: `
 <bcomp [books]="books"></bcomp>
 `
})
export class App {
 books = ["Michael Crichton: Prey"]
 constructor() {
 setInterval(()=> {
 this.books.push("Book Name: "+Date.now())
 }, 1000)
 }
}
Since the App component is pushing a new value using the Array#push method, Angular won’t pick up the change because Array#push mutates the books array. Thus, the BComponent won’t pick up the change. Here ngDoCheck comes in, because we can use it to check for object mutation.
The BComponent will implement the DoCheck interface and add the ngDoCheck method. Next, we will inject the ChangeDetectorRef so BComponent can trigger CD when its custom CD detects a change:
@Component({
 selector: 'bcomp',
 template: `
 <div *ngFor="let book of books">
 {{book}}
 </div>
 `,
 changeDetection: ChangeDetectionStrategy.OnPush
})
export class BComponent implements OnChanges, DoCheck {
 @Input() books
 lastBooksArray
 constructor(private changeDetectorRef: ChnageDetectorRef) {}
 ngOnChanges() {
 console.log("The book property changed")
 this.lastBooksArray = this.books
 }
 ngDoCheck() {
 console.log("ngDoCheck on BComponent called")
 if(this.lastBooksArray.length != this.books.length){
 this.changeDetectorRef.markForChange()
 }
 }
}
@Component({
 // ...
 template: `
 <bcomp [books]="books"></bcomp>
 `
})
export class App {
 books = ["Michael Crichton: Prey"]
 constructor() {
 setInterval(()=> {
 this.books.push("Book Name: "+Date.now())
 }, 1000)
 }
}
We injected ChangeDetectorRef to hook into the CD of BComponent, implemented the DoCheck and OnChanges, and added ngDoCheck and ngOnChanges methods.
In the ngOnChanges method, we saved the last books array change, so when the array is mutated in the App component we can check for the change in ngDoCheck and mark the BComponent for CD on the next CD cycle.
OnDestroyOnDestroy is a lifecycle hook that is called when a directive, pipe, or service is destroyed. Use this for any custom cleanup that needs to occur when the instance is destroyed.
This hook is mostly used to unsubscribe from our observable streams and detach event handlers to avoid memory leaks.
Angular is structured like a tree, so components can have both parent and child components. In other words, what is rendering the component and what the component is rendering.
The hooks we are going to learn about here are the hooks that will be called at specific lifecycle events of a component’s child components. The hooks are declared in the parent component, so developers can add their custom code to augment their component’s functionality.
Hooks in the parent component are called when the child component’s content has been initialized, when the UI or view of the child component has been initialized and rendered, or when the child component’s change detection has been run.
AfterContentInitAfterContentInit is called when the content of a component/directive has initialized. In this case, “content” is the component/directives that are projected in between the <ng-content></ng-content> tags:
@Component({
 selector: 'bcomp',
 template: `
 <div>This is a BComponent</div>
 `
})
export class BComponent {}
@Component({
 selector: 'acomp',
 template: `
 <ng-content></ng-content>
 `
})
export class AComponent implements AfterContentInit {
 ngAfterContentInit() {
 // ...
 }
}
@Component({
 template: `
 <acomp>
 <bcomp></bcomp>
 </acomp>
 `
})
export class App {}
The AComponent will project any elements in between its tag <acomp></acomp> inside the ng-content tag. Now, in the App component, the BComponent is projected in the acomp tag. When the BComponent is being initialized, the ngAfterContentInit hook will be called in AComponent.
AfterContentCheckedThis is hook is called after the default change detector for the component/directive projected into a component via the ng-content tag has completed its check:
@Component({
 selector: 'acomp',
 template: `
 <ng-content></ng-content>
 `
})
export class AComponent implements AfterContentInit {
 ngAfterContentInit() {
 // ...
 }
}
@Component({
 template: `
 <acomp>
 {{data}}
 </acomp>
 `
})
export class App implements AfterContentChecked {
 data: any
 ngAfterCOntentChecked() {
 //...
 }
}
The App component has a data property that is inside the AComponent. When the data property changes, the ngAfterContentChecked method will be called.
AfterViewInitThis hook is called after a component’s view and its children’s views have been created and fully initialized.
This hook comes in handy when we want to reference a component/directive instance in our component using ViewChild/ViewChildren.
Using it in any other method might cause an error because the component/directive might not have been initialized at the time of use:
@Component({
 selector: 'acomp',
 template: `
 `
})
export class AComponent {
 aCompMethod() {
 //...
 }
}
@Component({
 template: `
 <acomp #acomp></acomp>
 `
})
export class App {
 @ViewChild('acomp') acomp: AComponent
 constructor() {
 setInterval(()=>{
 this.acomp.aCompMethod()
 }, 1000);
 }
}
We got the reference of acomp’s class AComponent by putting # in the App component template.
Then, we used ViewChild to tell Angular to set the instance of AComponent to acomp variable. We might fall into error if the AComponent has not been initialized when we requested for the AComponent’s instance.
If we called the AComponent’s aCompMethod at one-second intervals, it might throw a reference error because AComponent has not been initialized in that time. With larger intervals, the aCompMethod will be called without error because by that time, the AComponent will be created.
To prevent this reference miss, we will implement the AfterViewInit interface and add the ngAfterViewInit method. Then, call the aCompMethod in the ngAfterViewInit:
@Component({
 selector: 'acomp',
 // ...
})
export class AComponent {
 aCompMethod() {
 }
}
@Component({
 template: `
 <acomp #acomp></acomp>
 `
})
export class App implements AfterViewInit {
 @ViewChild('acomp') acomp: AComponent
 ngAfterViewInit() {
 //...
 setInterval(()=>{
 this.acomp.aCompMethod()
 }, 1000);
 }
}
Now, we won’t have a reference miss when we call the aCompMethod because it will be called when the class AComponent has been created and initialized.
AfterViewCheckedThis hook is called after the change detector of a component/directive’s child component has been run for checks.
Be careful not to set any variables bound to the template here. If you do, you’ll receive the "Expression has changed after it was checked" error.
@Component({
 selector: 'acomp',
 // ...
})
export class AComponent {
 @Input() data
 aCompMethod() {
 return this.data * 9
 }
}
@Component({
 template: `
 <div>
 {{aCompData}}
 <acomp [data]="data" #acomp></acomp>
 <button (click)="changeData()"></button>
 </div>
 `
})
export class App implements AfterViewChecked {
 @ViewChild('acomp') acomp: AComponent
 data: any
 acompData:any
 changeData() {
 this.data = Date.now()
 }
 ngAfterViewChecked() {
 //...
 this.acompData = this.acomp.aCompMethod()
 }
}
AComponent has an input binding data, and we change the data binding when we click the changeData button, as we want to display the result of AComponent‘s aCompMethod result in the aCompData.
If we call the method in any other place, we might hit a reference error because Angular might not be done with CD run on the AComponent. So we implemented the AfterViewChecked interface and added ngAfterViewInit method because the method will be run when the AComponent has completed its CD run.
In this case, we won’t get an incorrect data value when we call the aCompMethod, because the data will have the current value.
This is a comprehensive list of Angular lifecycle events with examples. This post explained in-depth when each lifecycle event occurs, their timeline, and what causes them to trigger.
Next time, if you happen to forget any lifecycle event, you can always always come back to this article.
If you have any questions regarding this or anything I should add, feel free to leave a comment!
Debugging Angular applications can be difficult, especially when users experience issues that are difficult to reproduce. If you’re interested in monitoring and tracking Angular state and actions for all of your users in production, try LogRocket.
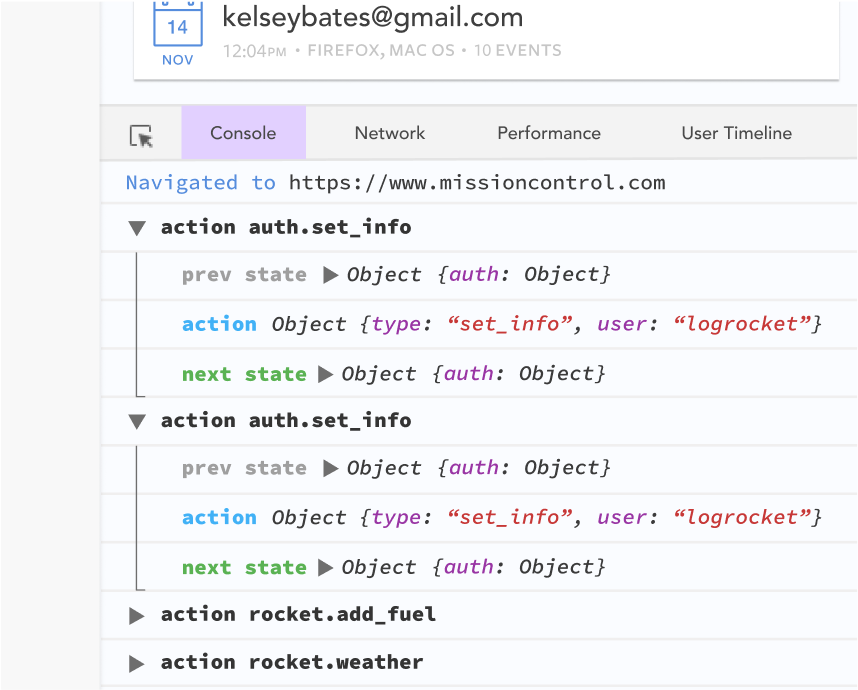
LogRocket lets you replay user sessions, eliminating guesswork by showing exactly what users experienced. It captures console logs, errors, network requests, and pixel-perfect DOM recordings—compatible with all frameworks.
With Galileo AI, you can instantly identify and explain user struggles with automated monitoring of your entire product experience.
The LogRocket NgRx plugin logs Angular state and actions to the LogRocket console, giving you context around what led to an error, and what state the application was in when an issue occurred.
Modernize how you debug your Angular apps — start monitoring for free.

Learn about TypeScript v6’s breaking changes, new ES2025 features, and deprecated options. A complete migration guide from v5 to prepare for v7.

Learn how Vite+ unifies Vite, Vitest, Oxlint, Oxfmt, Rolldown, and Node.js management in one CLI.

AI companies are buying developer tools as coding agents turn runtimes, package managers, and linters into strategic infrastructure.

Learn how AI-assisted development governance uses rules, agents, hooks, and protocols to help AI coding tools produce safer, more consistent code.
Hey there, want to help make our blog better?
Join LogRocket’s Content Advisory Board. You’ll help inform the type of content we create and get access to exclusive meetups, social accreditation, and swag.
Sign up now

