Editor’s note: This article was last updated 13 July 2022 to reflect new features added in Mocha v.9.

No matter what kind of app you’re building, you should always test it before deployment. There are myriad of testing frameworks available, including Jest, Jasmine, QUnit, Karma, and Cypress, among others. One of the most popular testing frameworks for JavaScript is Mocha.
In this comprehensive tutorial, we’ll demonstrate how to test a Node.js app with Mocha, including writing our own test suites and running Mocha tests in the browser. We’ll cover the following in detail:
Mocha is an open source JavaScript testing framework that runs on Node.js and in the browser. It’s designed for testing both synchronous and asynchronous code with a very simple interface.
Mocha runs tests serially to deliver flexible and accurate reporting while mapping uncaught exceptions to their corresponding test cases. Mocha provides functions that execute in a specific order, logging the results in the terminal window. Mocha also cleans the state of the software being tested to ensure that test cases run independently of each other.
While it can be used with most assertion libraries, Mocha is commonly used with Chai, a popular assertion library for Node.js and the browser.
Mocha provides a variety of interfaces for defining test suites, hooks, and individual tests, including TSS, Exports, QUnit, and Require.
The default interface is behavior-driven development (BDD), which aims to help developers build software that is predictable, resilient to changes, and not error-prone. BDD evolved from test-driven development (TDD), which requires you to:
The main difference between TDD and BDD is that BDD calls for writing test cases in a shared language, simplifying communication between technical and nontechnical stakeholders like developers, QA teams, and business leaders.
First, you’ll need to install Mocha either globally on your local machine or as a dependency for your project. You can do so with the respective codes below:
npm i --global mocha

npm i --save-dev mocha
Installing Mocha globally on your local machine makes the Mocha CLI binary available for use in your command line terminal. You can run tests with Mocha on your terminal with the command below:
mocha
If you only installed Mocha as a development dependency for your project, you can access the Mocha binary from the node_modules directory of your project:
./node_modules/mocha/bin/mocha
To complete your Mocha setup, you’ll have to write a unit test for a very simple functionality and configure a script to run the test using Mocha.
Mocha automatically looks for tests inside the test directory of your project. Go ahead and create this directory in your project root:
mkdir test
Next, modify the "test" script in your package.json to run tests using Mocha. It should look like the following:
/* package.json */

{
  "scripts": {
    "test": "mocha"
  }
}
With this setup, you can run the tests in your project using the simple command below:
npm test
At the moment, we have everything set up for running our tests with Mocha, but we don’t have any tests to run yet. Let’s write the tests for the desired functionalities of our software.
Writing tests often requires using an assertion library. An assertion is a feature used to verify that the result from a programming operation matches the expected result. Mocha does not discriminate, regardless of which assertion library you choose to use.
If you’re using Mocha in a Node.js environment, you can use the built-in assert module as your assertion library. However, there are more extensive assertion libraries you can use as well, like Chai, Expect.js, Should.js, and more.
For all the tests in this guide, we’ll use Chai as the assertion library. Install Chai as a development dependency for your project as follows:
npm i --save-dev chai
Chai provides the assert, expect, and should assertion styles:
// Assert style
var assert = require('chai').assert;
var numbers = [1, 2, 3, 4, 5];

assert.isArray(numbers, 'is array of numbers');
assert.include(numbers, 2, 'array contains 2');
assert.lengthOf(numbers, 5, 'array contains 5 numbers');
// Expect style
var expect = require('chai').expect;
var numbers = [1, 2, 3, 4, 5];

expect(numbers).to.be.an('array').that.includes(2);
expect(numbers).to.have.lengthOf(5);
// Should style
var should = require('chai').should();
var numbers = [1, 2, 3, 4, 5];

numbers.should.be.an('array').that.includes(2);
numbers.should.have.lengthOf(5);
You can learn more about the assertions and assertion styles Chai provides in the official Chai documentation.
The code below demonstrates what a test suite defined using the BDD interface would look like:
// begin a test suite of one or more tests
describe('#sum()', function() {

  // add a test hook
  beforeEach(function() {
    // ...some logic before each test is run
  })

  // test a functionality
  it('should add numbers', function() {
    // add an assertion
    expect(sum(1, 2, 3, 4, 5)).to.equal(15);
  })

  // ...some more tests

})
Now, let’s write our first test suite and run the tests with Mocha. To start, you must implement a sum() function that:
number, throwing an error if any is not a numbernumber0 if no argument is passedFirst, define the test suite with tests for the required functionalities. Create a new sum.js file in the test directory of your project and add the following code snippet to it:
/* test/sum.js */

var sum = require('../sum.js');
var expect = require('chai').expect;

describe('#sum()', function() {

  context('without arguments', function() {
    it('should return 0', function() {
      expect(sum()).to.equal(0)
    })
  })

  context('with number arguments', function() {
    it('should return sum of arguments', function() {
      expect(sum(1, 2, 3, 4, 5)).to.equal(15)
    })

    it('should return argument when only one argument is passed', function() {
      expect(sum(5)).to.equal(5)
    })
  })

  context('with non-number arguments', function() {
    it('should throw error', function() {
      expect(function() {
        sum(1, 2, '3', [4], 5)
      }).to.throw(TypeError, 'sum() expects only numbers.')
    })
  })

})
Notice that the sum module was required in the test file although we haven’t created it yet. Also notice that the sum() call is wrapped in a function to test that an error is thrown when non-number arguments are passed. This is a requirement of the .throw()assertion, as specified in the Chai assertions documentation.
Next, go ahead and implement the functionality for the sum() function as a module export, run the tests, and ensure that all the tests pass. Create a new sum.js file in the root directory of your project containing the following code snippet:
/* sum.js */

module.exports = function() {

  // Convert arguments object to an array
  var args = Array.prototype.slice.call(arguments);

  // Throw error if arguments contain non-finite number values
  if (!args.every(Number.isFinite)) {
    throw new TypeError('sum() expects only numbers.')
  }

  // Return the sum of the arguments
  return args.reduce(function(a, b) {
    return a + b
  }, 0);

}
Now, you can run the tests in your terminal by running the test script defined earlier:
npm test
You should get an output that looks like the following:
The tests you have written so far are for functionalities involving code that is executed synchronously. However, most Node.js applications require a lot of asynchronous code. Mocha also makes it easy to test asynchronous code with a very similar syntax.
You can use any of the following methods to test asynchronous code with Mocha:
Let’s look at each of these methods in depth.
The function passed as second argument to it() can be passed an optional callback function as its first argument. When this callback function is passed, Mocha knows that the test is for asynchronous functionality. Conventionally, the callback function is named done, but you are at liberty to use any identifier you choose:
it('test expectation', function(done) {
// test asynchronous code
// call done() to terminate test and proceed to the next test
}
There are a few things to note about the done() callback.
For one, it must be called for Mocha to terminate the test and proceed to the next test; otherwise, the test keeps running until the timeout reaches. It should not be called more than once within an it() function block. Calling it multiple times will throw an error.
Because it is a node-style callback, it can take an Error instance err as its first argument. Calling the done() callback with an Error instance causes the test to fail with the given error.
Before you proceed, here is a simple module that exports an asynchronous md5() function for computing the MD5 hash of a string. Create a new md5.js file in the root directory of your project and add the following code to it:
/* md5.js */

var crypto = require('crypto');

module.exports = function(string, callback) {
  var withCallback = typeof callback === 'function';

  try {

    var hash = crypto.createHash('md5')
      .update(string)
      .digest('hex');

    withCallback && callback(null, hash);

  } catch (e) {
    if (withCallback) callback(e);
    else throw e;
  }
}
The following code snippet contains a simple test for this asynchronous function using a callback function. Create a new md5.js file in the test directory of your project and add the following code:
/* test/md5.js */

var md5 = require('../md5');
var expect = require('chai').expect;

describe('#md5()', function() {

  context('with string argument', function() {
    it('should compute MD5 hash', function(done) {

      md5('Glad Chinda', function(err, hash) {
        // call the done() callback with the error if any
        // to terminate the test with an error
        if (err) return done(err);

        // add some assertions
        expect(hash)
          .to.be.a('string')
          .that.matches(/^[a-f0-9]{32}$/)
          .and.equal('877dbb93f50eb8a89012e15bd37ee7e4');

        // finally call the done() callback
        // to terminate the test
        done();
      })

    })
  })

  context('with non-string argument', function() {
    it('should throw an error', function(done) {

      md5(12345, function(err, hash) {
        // call the done() callback with the error if any
        // to terminate the test
        if (err) {

          // add an assertion to check the error
          expect(function() { throw err })
            .to.throw(TypeError, 'The “data” argument must be of type string or an instance of Buffer, TypedArray, or DataView');

          // finally call the done() callback
          // to terminate the test and return
          return done();

        }

        // call the done() callback
        // to terminate the test
        done();
      })

    })
  })

})
Now, if you run the tests on your terminal, you’ll get an output that looks like the following:
If you’re developing in an environment with support for promises, it’s likely that most of the asynchronous operations will be based on promises. Mocha also makes it possible for you to test asynchronous code that uses promises.
Whenever you return a promise from the function passed to it(), Mocha knows that the functionality to be tested is asynchronous, so it waits for the promise to be fulfilled before proceeding to the next test.
In Mocha ≥v3.0.0, calling the done() callback when a promise is returned results in an exception since this is not allowed. However, in older versions of Mocha, the call is ignored.
To test asynchronous code that uses promises, you’ll create another version of the md5 module that is based on promises. Create a new promise-md5.js file in the root directory of your project with the following code:
/* promise-md5.js */

const md5 = require('./md5');

module.exports = (string) => new Promise(
  (resolve, reject) => {
    md5(string, (err, hash) => {
      return err ? reject(err) : resolve(hash)
    })
  }
)
The following code snippet contains a simple test suite for the promise-md5 module. Create a new promise-md5.js file in the test directory of your project and add the following code:
/* test/promise-md5.js */

var promiseMd5 = require('../promise-md5');
var expect = require('chai').expect;

describe('#promiseMd5()', function() {

  context('with string argument', function() {
    it('should compute MD5 hash', function() {

      return promiseMd5('Glad Chinda')
        .then(function(hash) {
          // add some assertions
          expect(hash)
            .to.be.a('string')
            .that.matches(/^[a-f0-9]{32}$/)
            .and.equal('877dbb93f50eb8a89012e15bd37ee7e4');
        })

    })
  })

  context('with non-string argument', function() {
    it('should throw an error', function() {

      return promiseMd5(12345)
        .catch(function(err) {
          // add an assertion to check the error
          expect(function() { throw err })
            .to.throw(TypeError, 'The “data” argument must be of type string or an instance of Buffer, TypedArray, or DataView');
        })

    })
  })

})
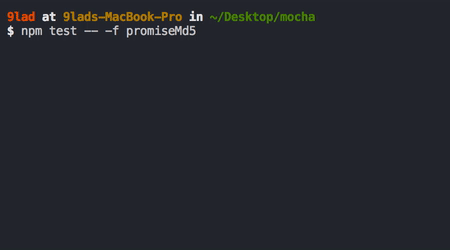
Now, go ahead and run the test with this slightly modified test command:
npm test -- -f promiseMd5
This command uses -— to pipe the command options and arguments to the underlying Mocha CLI binary. The -f flag instructs Mocha to run only tests that contain the given string, which in this case, is promiseMd5. The output should look like the following:
For environments that support the more recent async/await syntax, Mocha also supports passing async functions as the second argument to it(). The previous promise-md5.js tests can be rewritten as follows:
/* test/promise-md5.js */

var promiseMd5 = require('../promise-md5');
var expect = require('chai').expect;

describe('#promiseMd5()', function() {

  context('with string argument', function() {
    it('should compute MD5 hash', async function() {

      // use await to wait until the promise is fulfilled
      var hash = await promiseMd5('Glad Chinda');

      // add some assertions
      expect(hash)
        .to.be.a('string')
        .that.matches(/^[a-f0-9]{32}$/)
        .and.equal('877dbb93f50eb8a89012e15bd37ee7e4');
    })

  })

  context('with non-string argument', function() {
    it('should throw an error', async function() {

      await promiseMd5(12345).catch(function(err) {
        // add an assertion to check the error
        expect(function() { throw err })
          .to.throw(TypeError, 'The “data” argument must be of type string or an instance of Buffer, TypedArray, or DataView');
       })

    })
  })

})
Mocha makes provision for creating test hooks. Hooks are basically logic that have been configured to run before or after tests. They are useful for setting up preconditions for tests or cleaning up resources after tests.
With the default BDD interface, Mocha provides four hooks:
before() : Runs once before the first test case in the blockbeforeEach() : Runs before each test caseafterEach() : Runs after each test caseafter() : Runs once after the last test case in the blockDepending on the hooks that apply to a given test suite, the hooks are run together with the tests in the suite in a definite sequence:
before() -> beforeEach() -> test() -> afterEach() -> after()
Each hook basically takes a callback function as an argument. The callback function contains logic to be executed when the hook is triggered. The logic can be either synchronous or asynchronous, just as it is with regular test cases:
describe('some module', function() {

  beforeEach(function() {
    // some logic to run before each test
    // logic can be sync or async
  })

})
Hooks can also take an optional description as the first argument, which makes it easier to track errors. However, if a named function is passed as an argument to a hook, the name of the function is used as a description if no explicit description was passed:
describe('some module', function() {

  // HOOK WITH NAMED FUNCTION
  beforeEach(function createSession() {
    // beforeEach:createSession
  })

  // HOOK WITH DESCRIPTION
  beforeEach('create a user session', function() {
    // beforeEach:create a user session
  })

})
The describe() function is a way to group tests in Mocha. You can nest your tests in groups as deep as you deem necessary. describe() takes two arguments, the name of the test group and a callback function.
Whenever a hook is defined outside of a definite describe() block, the hook becomes a root-level hook. Root-level hooks apply to all test files regardless of where they are defined. Mocha implicitly creates a describe() block, called the root suite.
In the following code snippet, the afterEach() Hook will be triggered after every test in every file:
var tests = 1;

// Will run after every test in every file
afterEach(function() {
  console.log('Test #' + (tests++));
})
Sometimes, you may want to perform an asynchronous operation before running any of your test suites. Mocha allows you to delay the root suite by running the Mocha binary with the --delay option.
For your project’s test command, it will look like the following:
npm test -- --delay
Running this command instructs Mocha to attach a special run() callback function to the global context. Calling the run() function instructs it to run all the test suites that have been described. Therefore, run() can be called after the asynchronous operation is completed to run the tests.
To see an example, add the following code snippet to any of the test files you created earlier. Keep in mind that it must never be inside an it() block:
// Delay running the tests until after 5s
setTimeout(function() {
  run()
}, 5000);
Now, run the tests with the following command:
npm test -- --delay
Notice that the tests are delayed for five seconds before running. However, if the run() method is never called, the tests will never run. The output should look like the following:

Whenever a callback function is not passed as second argument to it(), the test case is marked as pending, indicating that the test is yet to be written. Pending tests are not failed tests, and they are included in the test results:
describe('#flattenArray()', function() {
  // a pending test
  it('should flatten array');
})
You can also specify test suites and test cases that should or should not be run. Mocha provides two helpful methods, only() and skip(), for controlling exclusive and inclusive behavior of test suites and test cases.
Use the describe.skip() method to prevent the tests in a suite from running and the describe.only() method to ensure that the tests in a suite run:
// Tests in this suite will run
describe.only('#flattenArray()', function() {
  it('should flatten array', function() {});
})

// Tests in this suite will not run
describe('#mergeArray()', function() {
  it('should merge two arrays', function() {});
})
This also applies to test cases using it(). You can skip a test at runtime by calling this.skip() inside the callback function passed to it(). This makes it possible to dynamically skip a test based on some condition.
Calling this.skip() effectively aborts the test. It is considered best practice to avoid executing further instructions after a call to this.skip(). Every test that is skipped at runtime using this.skip() will be marked as a pending test:
describe.only('#flattenArray()', function() {
// This test will run
it.only('should flatten array', function() {});
// This test will not run
it('should recursively flatten array', function() {});
})
describe.only('#mergeArray()', function() {
// This test is skipped at runtime for production environment
// In production, it will not run and will be marked as pending
it('should merge two arrays', function() {
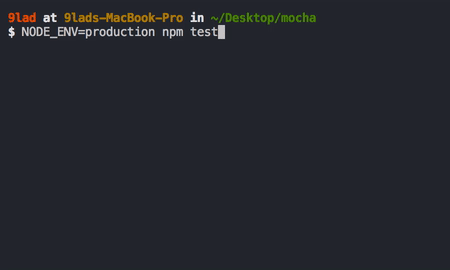
if (process.env.NODE_ENV === 'production') {
return this.skip();
}
});
})
You can use .only() and .skip() multiple times to select a set of suites and tests to run. However, you must note the following:
Mocha enables you to specify the number of times a failed test can be retried. While this is not recommended for unit tests, it can be useful when writing end-to-end tests, where some external resources may not be available for some reason.
Mocha provides a this.retries() function that allows you specify the number of times a failed test can be retried. For each retry, Mocha reruns the beforeEach() and afterEach() Hooks but not the before() and after() Hooks.
The code snippet below shows a simple example that uses the Cypress test runner to visit a webpage. If the server responds with a status code other than 2xx, possibly because of slow network or bad internet connection, the test is marked as failed:
describe('test medium site', function() {

  // all failed tests in this suite will only be retried 2 times
  this.retries(2);

  it('should load medium homepage', function() {
    // can only retry this test 5 times
    this.retries(5);

    cy.visit('https://medium.com');
  })

})
With this.retries(5), the test is allowed to be retried a maximum of five times before it can be marked as failed.
Using the this.slow() method, Mocha allows you to define the amount of time that should elapse before tests are considered as being slow. The number passed to this.slow() represents the amount of time in milliseconds:
describe('slow test', function() {

  // Tests will be considered slow after 1 second elapses
  this.slow(1000);

  // Completes after the specified 1 second elapses
  it('should be complete in a second', function(done) {
    setTimeout(done, 1500);
  })

  // Completes immediately
  it('should be complete instantly', function() {})

})
Notice the red 1506ms indicator used to mark the slow test. The test is considered slow because it took more than the specified one second, 1000ms, to run completely.
By default, Mocha will timeout for any test that takes more than two seconds, 2000ms, to run completely. When a timeout happens, the test is marked as failed and a timeout error is thrown:
However, Mocha provides a this.timeout() method for specifying the amount of time that should elapse before a timeout happens for a given test suite, hook, or test case. The number passed to this.timeout() represents the amount of time in milliseconds.
The timeout can be configured differently at different levels, like the suite, hook, and test levels:
describe('some time-consuming operation', function() {

  // set a 5 seconds timeout for this suite
  this.timeout(5000);

  before('some long setup', function(done) {
    // set a hook-level timeout
    this.timeout(2500);

    setTimeout(done, 2250);
  })

  it('should take less than 200ms', function(done) {
    // set a test-level timeout
    this.timeout(200);

    setTimeout(done, 150);
  })

})
Note that calling this.timeout() with 0 disables the timeout completely:
describe('some time-consuming operation', function() {

  // disable timeout for this suite
  this.timeout(0);

  // test that takes a long time to complete
  it('should take a long time', function(done) {
    setTimeout(done, 10000);
  })

})
So far, you’ve been exposed to all the tooling that Mocha makes available for writing tests. However, there are still lots of utilities you can leverage when using Mocha, several of which are only available to you when using the Mocha CLI binary.
To get the list of available options you can apply to Mocha, run the following command:
mocha -h
From your project, you can use the following command instead:
npm test -- -h
The -w, --watch flag instructs Mocha to watch for changes in test files and re-run the tests. This is very useful for writing tests while in development:
mocha --watch
The -A, --async-only flag forces all tests to require a callback function or return a promise, thereby behaving asynchronously. Tests that don’t specify a callback function or return a promise will be marked as failed:
mocha --async-only
The -b, --bail flag forces Mocha to bail after the first test failure:
mocha --bail
The -t, --timeout <ms> option allows you to set the timeout for your test cases. Mocha uses a default of two seconds. You can set the timeout by specifying the number of milliseconds or a value with an s suffix to specify the time in seconds:
mocha -t 3000
The code above is equivalent to the following:
mocha --timeout 3s
To disable timeouts entirely, you can use --no-timeouts, which is equivalent to --timeout 0:
mocha --no-timeouts
Mocha also allows you to set the threshold for slow running tests by using the -s, --slow <ms> option. The default threshold is 75ms. As you saw earlier, Mocha uses this threshold value to highlight tests that are taking too long to run:
mocha --slow 100
When you use the --dry-run flag, which was introduced in Mocha v.9, you tell Mocha to execute the runner and make all tests pass without actually running any test or hook, just like when you use it().skip and it().only.
The -g, --grep <pattern> flag instructs Mocha to run tests and test suites that match a particular pattern, or regular expression, which is internally converted to a RegExp.
On the other hand, the -f, --fgrep <string> flag, as stated earlier, instructs Mocha to run only tests and test suites that contain the specified string.
The following command will run all tests and test suites that contain the string array:
mocha -f array
The -r, --require <module> flag allows you to require modules and libraries that you use in your test files, like assertion libraries, instead of manually invoking require() in your code. This works for modules like should.js. However, to access the module’s exports, you’ll have to require the module in your code:
mocha --require should
The --file <file> flag allows you to add one or more files that you want to be included first in your test suite. These files may contain some form of setup logic required for your tests. The --file flag can be used multiple times to include multiple files.
Mocha provides several interfaces for writing tests. The default is the BDD interface, which we’re using throughout this guide. The -u, --ui <name> allows you to specify another interface to use:
mocha --ui exports
The -R, --reporter <name> flag allows you to specify the reporter you prefer for displaying the test results. In this tutorial, we’re using the default guide, spec.
Mocha also allows you to specify third-party reporters using the -R, --reporter <name> flag:
mocha -R list
The Mocha test runner can also be used in the browser; every release of Mocha contains builds of ./mocha.css and ./mocha.js for use in the browser. Let’s run through a simple setup to run Mocha tests on the browser.
Create a new public directory in the root of your project. Next, create a new file named index.html in the newly created public directory and add the following code:
<!doctype html>
<html>
<head>
  <meta charset="utf-8">
  <title>Mocha Tests</title>

  <!-- Include Mocha CSS styles -->
  <link href="https://cdn.rawgit.com/mochajs/mocha/2.2.5/mocha.css" rel="stylesheet">
</head>

<body>
  <div id="mocha"></div>

  <!-- Add the Chai assertion library -->
  <script src="http://chaijs.com/chai.js"></script>

  <!-- Add the Mocha test library -->
  <script src="https://cdnjs.cloudflare.com/ajax/libs/mocha/10.0.0/mocha.min.js"></script>

  <script>
    // Set chai.expect as a global variable
    var expect = chai.expect;

    // Setup Mocha to use the BDD interface
    mocha.setup('bdd');
  </script>

  <!-- Import the sum function -->
  <script src="/sum.js"></script>

  <!-- Import the tests for the sum function -->
  <script src="/sum.test.js"></script>

  <script>
    // Run the tests with Mocha
    mocha.run();
  </script>

</body>
</html>
Notice that the static CSS and JavaScript files for Mocha and the Chai assertion library have been imported into the page. The element serves as the mount point for displaying the test results.
In setting up Chai, chai.expect is mapped to a global variable named expect so that it can be used in the test scripts for making assertions. Mocha is set up to use the BDD interface by calling mocha.setup(‘bdd’). The tests are run using the mocha.run()method.
Next, create a new sum.js file inside the public directory you created earlier and add the following code to it:
/* public/sum.js */

function sum() {
  // Convert arguments object to array
  var args = Array.prototype.slice.call(arguments);

  // Throw error if arguments contain non-finite number values
  if (!args.every(Number.isFinite)) {
    throw new TypeError('sum() expects only numbers.')
  }

  // Return the sum of the arguments
  return args.reduce(function(a, b) {
    return a + b
  }, 0);
}
Then, create a new sum.test.js file in the public directory with the following code:
/* public/sum.test.js */

describe('#sum()', function() {
  context('without arguments', function() {

    it('should return 0', function() {
      expect(sum()).to.equal(0)
    })

  })

  context('with number arguments', function() {

    it('should return sum of arguments', function() {
      expect(sum(1, 2, 3, 4, 5)).to.equal(15)
    })

    it('should return argument when only one argument is passed', function() {
      expect(sum(5)).to.equal(5)
    })

  })

  context('with non-number arguments', function() {

    it('should throw error', function() {
      expect(function() {
        sum(1, 2, '3', [4], 5)
      }).to.throw(TypeError, 'sum() expects only numbers.')
    })

  })
})
Optionally, you can set up a simple server to serve the public files. For this demo, we’ll use live-server. Go ahead and install it as a dependency for your project as follows:
npm install --save-dev live-server
Modify the "scripts" section of your package.json file to include a script for serving the public files and running the Mocha tests in the browser. It should look like the following:
/* package.json */

{
  "scripts": {
    "test": "mocha",
    "test:browser": "live-server --port=9000 --mount=/:public"
  }
}
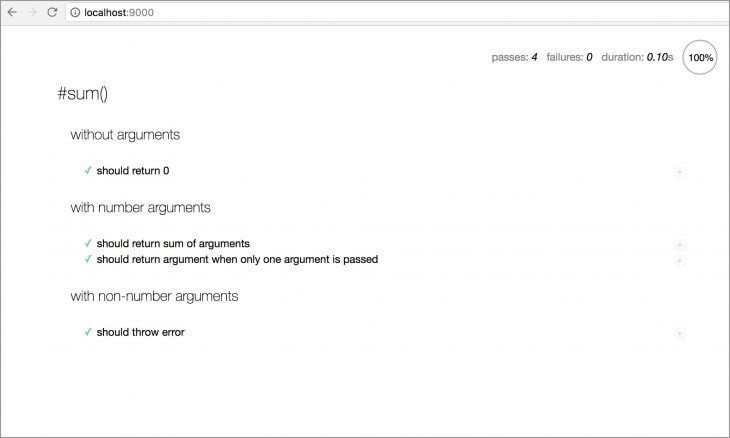
We’ve added a test:browser script to start the live server on port 9000 and serve the files from the public directory. Finally, run the new script:
npm run test:browser
The code above should start the server on port 9000 and launch a browser tab for you. The test output on the browser should look like the following:
In this guide, we took you through the basics of testing Mocha on Node.js and in the browser. We also demonstrated how to write and run tests for your JavaScript programs.
Although this guide is quite extensive, you can always refer to the Mocha.js documentation for any details not covered in this article.
 Monitor failed and slow network requests in production
Deploying a Node-based web app or website is the easy part. Making sure your Node instance continues to serve resources to your app is where things get tougher. If you’re interested in ensuring requests to the backend or third-party services are successful, try LogRocket.

LogRocket lets you replay user sessions, eliminating guesswork around why bugs happen by showing exactly what users experienced. It captures console logs, errors, network requests, and pixel-perfect DOM recordings — compatible with all frameworks.
LogRocket's Galileo AI watches sessions for you, instantly identifying and explaining user struggles with automated monitoring of your entire product experience.
LogRocket instruments your app to record baseline performance timings such as page load time, time to first byte, slow network requests, and also logs Redux, NgRx, and Vuex actions/state. Start monitoring for free.

Debug RSC hydration mismatches in production with Next.js instrumentation, Suspense isolation, HTML diffing, and CI smoke tests.

Explore why npm dependencies are a major supply chain security risk and how to protect JavaScript apps from compromised packages and transitive threats.

Enabled React Compiler v1.0 on a production Next.js app. Here’s every warning, breakage, and silent opt-out I documented — and what actually worked.

We built the same app in TanStack Start RSC and Next.js RSC. TanStack shipped 40% less JS and built 4x faster — but Next.js is still the safer production bet.
Hey there, want to help make our blog better?
Join LogRocket’s Content Advisory Board. You’ll help inform the type of content we create and get access to exclusive meetups, social accreditation, and swag.
Sign up now

