Editor’s Note: This WebSockets tutorial was updated on 29 January 2024 to update content, explore the differences between WebSocket and WebSocket Secure, and recommend popular WebSocket libraries for React, such as SockJS and Socket.IO.

It was previously quite common for most web apps to have a closely connected backend and frontend, so the apps served data with the view content to the user’s browser. Nowadays, we typically develop loosely coupled, separate backends and frontends by connecting the two with a network-oriented communication line.
For example, developers often use the RESTful pattern with the HTTP protocol to implement a communication line between the frontend and backend for data transferring. But the HTTP-based RESTful concept uses a simplex communication (one-way), so we can’t push data directly from the server (backend) to the client (frontend) without implementing workarounds such as polling.
The WebSocket protocol solves this drawback of the traditional HTTP pattern, offers a full-duplex (or two-way) communication mechanism, and helps developers build real-time apps, such as chat, trading, and multi-player game apps.
In this article, I will explain the theoretical concepts behind the WebSocket protocol and demonstrate how to build a real-time collaborative document editing app with a Node.js backend and React frontend using the WebSocket protocol.
The WebSocket protocol offers persistent, real-time, full-duplex communication between the client and the server over a single TCP socket connection.
The WebSocket protocol has only two agendas: To open up a handshake and to help the data transfer. Once the server accepts the handshake request sent by the client and initiates a WebSocket connection, they can send data to each other with less overhead at will.
WebSocket communication takes place over a single TCP socket using either WS (port 80) or WSS (port 443) protocol. Almost every browser except Opera Mini provides admirable support for WebSockets at the time of writing, according to Can I Use.
The following video explains how the WebSocket protocol works and benefits users compared to the traditional HTTP protocol:
WebSockets tutorial: How to go real-time with Node and React
Learn how to build a real-time chat app with Node and React using WebSockets. Introduction — 00:00 HTTP protocol — 00:17 Build a chat app — 03:01 Create the server — 04:09 Creat the client –07:00 Implement a login functionality — 11:52 Implement user interface — 13:45 Conclusion — 19:57 GitHub repo: https://github.com/kokanek/web-socket-chat Try LogRocket for free: https://logrocket.com/?yt43 LogRocket is a frontend application monitoring solution that lets you replay problems as if they happened in your own browser.
Historically, creating web apps that needed real-time data required an abuse of HTTP protocol to establish bidirectional data transfer. There were multiple methods used to achieve real-time capabilities by enabling a way to send data directly from the server to clients, but none of them were as efficient as WebSocket. HTTP polling, HTTP streaming, Comet, and SSE (server-sent events) all have their drawbacks.
The very first attempt to solve the problem was by polling the server at regular intervals. The normal polling approach fetches data from the server frequently based on an interval defined on the client side (typically using setInterval or recursive setTimeout). On the other hand, the long polling approach is similar to normal polling, but the server handles the timeout/waiting time.
The HTTP long polling lifecycle is as follows:
There were a lot of loopholes in long polling — header overhead, latency, timeouts, caching, and so on.
This mechanism saved the pain of network latency because the initial request is kept open indefinitely. The request is never terminated, even after the server pushes the data. The first three lifecycle methods of HTTP streaming are the same in HTTP long polling.
When the response is sent back to the client, however, the request is never terminated; the server keeps the connection open and sends new updates whenever there’s a change. HTTP streaming is a generic concept and you can design your own streaming architecture with available low-level streaming APIs in server-side and client-side modules, i.e., building an HTTP streaming solution with Node streams and the browser’s Fetch API.
With SSE, the server pushes data to the client, similar to HTTP streaming. SSE is a standardized form of the HTTP streaming concept and comes with a built-in browser API.
A chat or gaming application cannot completely rely on SSE. This is because we can’t send data from the client to the server using the same server-side event stream as SSE isn’t full-duplex and only lets you send data directly from the server to clients.
The perfect use case for SSE would be, for example, the Facebook News Feed: whenever new posts come in, the server pushes them to the timeline. SSE is sent over traditional HTTP and has restrictions on the number of open connections.
Learn more about the SSE architecture from this GitHub Gist file. These methods were not just inefficient compared to WebSockets. The code that went into them appeared as a workaround to make a request-reply-type protocol full-duplex-like.
WebSockets are designed to supersede existing bidirectional communication methods. The existing methods described above are neither reliable nor efficient when it comes to full-duplex real-time communications.
WebSockets are similar to SSE but also triumph in taking messages back from the client to the server. Connection restrictions are no longer an issue because data is served over a single TCP socket connection.
As mentioned in the introduction, the WebSocket protocol has only two agendas: 1.) to open up a handshake, and 2.) to help the data transfer. Let’s see how WebSockets fulfills those agendas. To do that, I’m going to spin off a Node.js server and connect it to a client built with React.
First, download or clone this GitHub repository into your computer. This repository contains the source code of the sample collaborative document editing app. Open it with your favorite code editor. You will see two directories as follows:
server: A Node.js WebSocket server that handles the document editor’s backend logicclient: The React app that connects to the WebSocket server for real-time featuresYou can start the document editor app with the following commands:
#-- Set up and start the server
cd server
npm install # or yarn install
npm start # or yarn start

#-- Set up and start the client
cd client
npm install # or yarn install
npm start # or yarn start
Run the app with the above commands, try to open it with two browser windows, then edit the document from both:
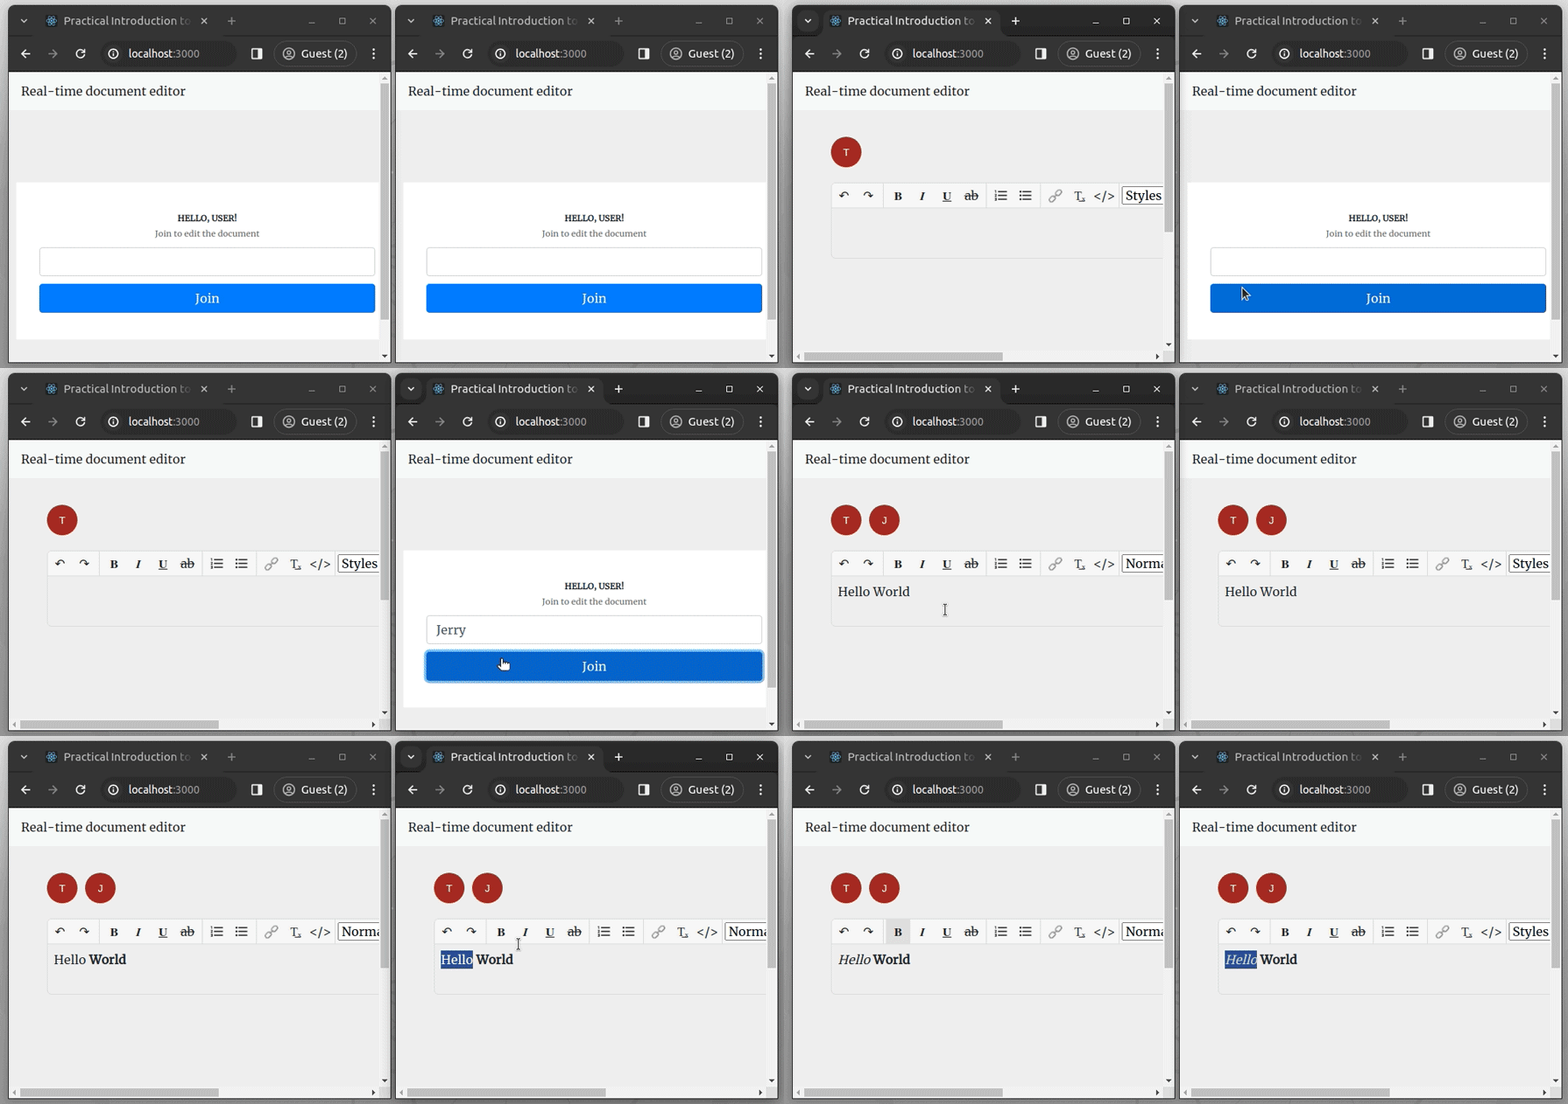
Let’s study the source code and learn how it works using WebSockets!
We can make use of a single port to spin off the HTTP server and attach the WebSocket server. The code below (taken from server/index.js) shows the creation of a simple HTTP server. Once it is created, we tie the WebSocket server to the HTTP port:
const { WebSocketServer } = require('ws');
const http = require('http');

// Spinning the HTTP server and the WebSocket server.
const server = http.createServer();
const wsServer = new WebSocketServer({ server });
const port = 8000;
server.listen(port, () => {
  console.log(`WebSocket server is running on port ${port}`);
});
In the sample project, I used the popular ws library to attach a WebSocket server instance to an HTTP server instance. Once the WebSocket server is attached to the HTTP server instance, it will accept the incoming WebSocket connection requests by upgrading the protocol from HTTP to WebSocket.
I maintain all the connected clients as an object in my code with a unique key generated via the uuid package on receiving their request from the browser:
// I'm maintaining all active connections in this object
const clients = {};

// A new client connection request received
wsServer.on('connection', function(connection) {
  // Generate a unique code for every user
  const userId = uuidv4();
  console.log(`Received a new connection.`);

  // Store the new connection and handle messages
  clients[userId] = connection;
  console.log(`${userId} connected.`);
});
When you open the app with a new browser tab, you’ll see a generated UUID on your terminal as follows:
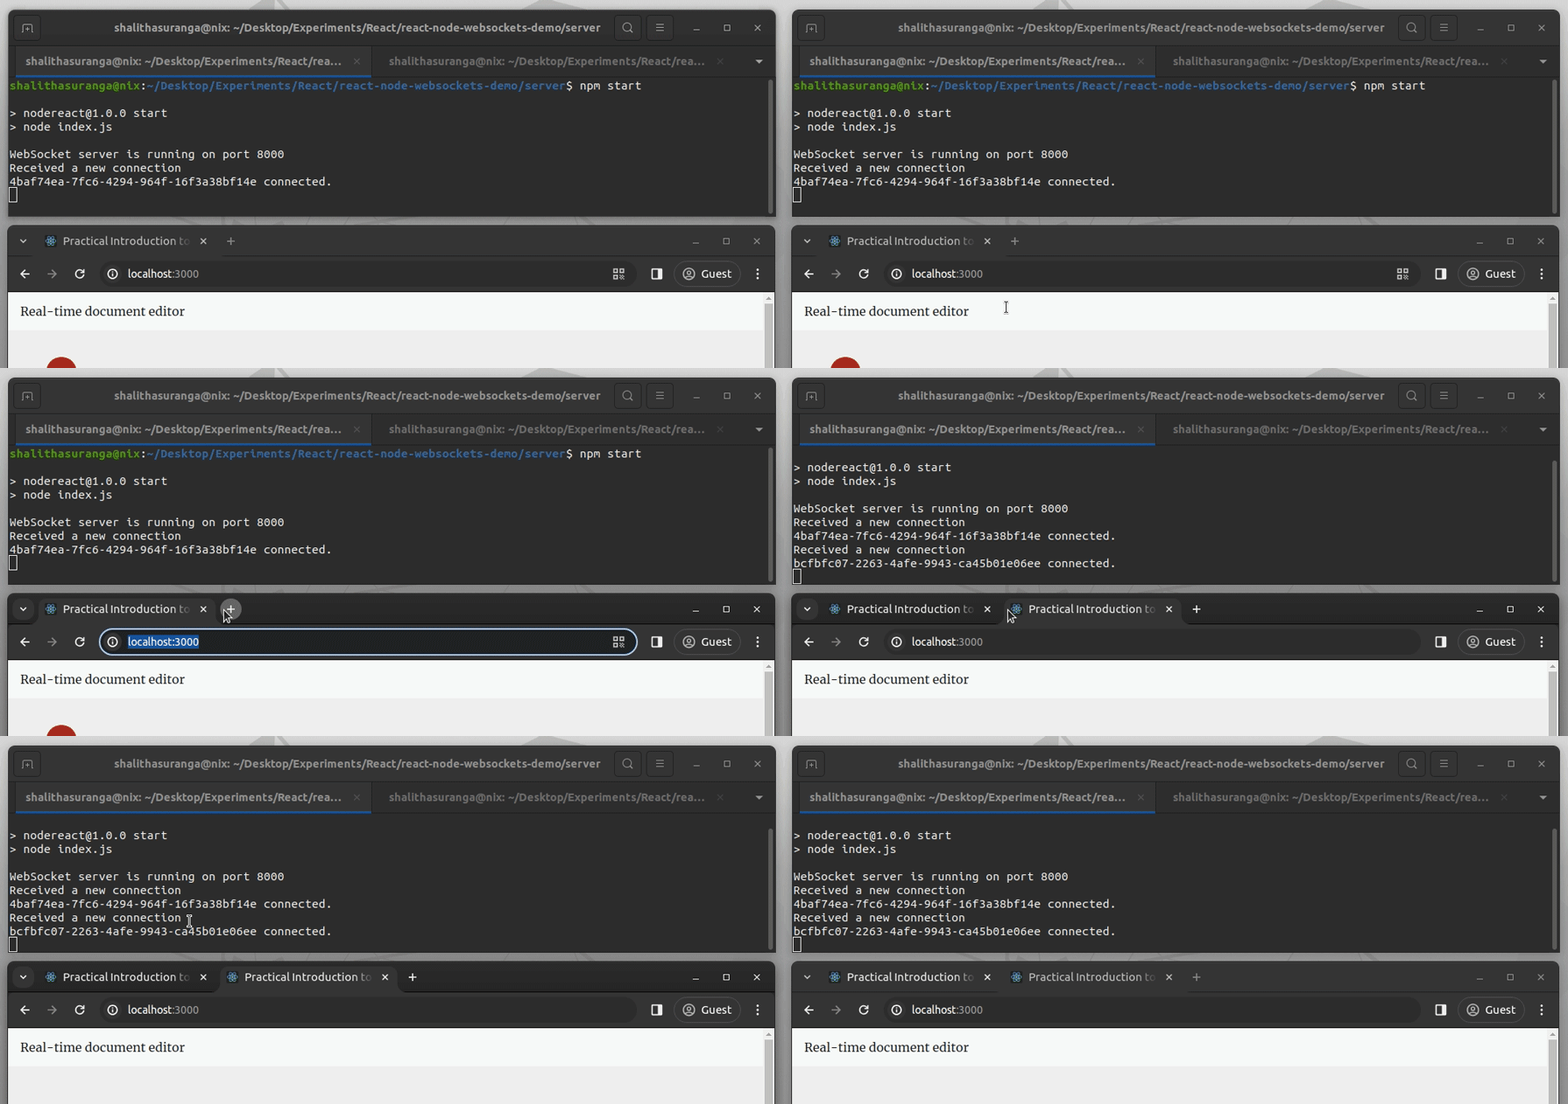
When initiating a standard HTTP request to establish a connection, the client includes the Sec-WebSocket-Key within the request headers. The server encodes and hashes this value and adds a predefined GUID. It echoes the generated value in the Sec-WebSocket-Accept in the server-sent handshake.
Once the request is accepted in the server (after necessary validations in production), the handshake is fulfilled with status code 101 (switching protocols). If you see anything other than status code 101 in the browser, the WebSocket upgrade has failed, and the normal HTTP semantics will be followed.
The Sec-WebSocket-Accept header field indicates whether the server is willing to accept the connection or not. Also, if the response lacks an Upgrade header field, or the Upgrade does not equal websocket, it means the WebSocket connection has failed.
The successful WebSocket server handshake looks like this:
HTTP GET ws://127.0.0.1:8000/ 101 Switching Protocols
Connection: Upgrade
Sec-WebSocket-Accept: Nn/XHq0wK1oO5RTtriEWwR4F7Zw=
Upgrade: websocket
At the client level, I use the React useWebSocket library to initiate a WebSocket connection. We can also use the built-in WebSocket browser API without any third-party package, but using the browser API directly in React functional components typically generates complex code.
As a solution, we can create a custom React hook for WebSocket connections, but then we will re-invent the wheel and create a React useWebSocket clone. React useWebSocket offers the useWebSocket Hook to manage WebSocket connections from React functional components.
As soon as the request is accepted by the server, we will see WebSocket connection established on the browser console.
Here’s the initial scaffold to create the connection to the server via the App component (in client/src/App.js):
import React from 'react';
import useWebSocket from 'react-use-websocket';

import './App.css';

const WS_URL = 'ws://127.0.0.1:8000';

function App() {
  useWebSocket(WS_URL, {
    onOpen: () => {
      console.log('WebSocket connection established.');
    }
  });

  return (
    <div>Hello WebSockets!</div>
  );
}

export default App;
The following headers are sent by the client to establish the handshake:
HTTP GET ws://127.0.0.1:8000/ 101 Switching Protocols
Upgrade: websocket
Connection: Upgrade
Sec-WebSocket-Key: vISxbQhM64Vzcr/CD7WHnw==
Origin: http://localhost:3000
Sec-WebSocket-Version: 13
Now that the client and server are connected via the WebSocket handshake event, the WebSocket connection can transmit messages as it receives them, thereby fulfilling the second agenda of the WebSocket protocol.
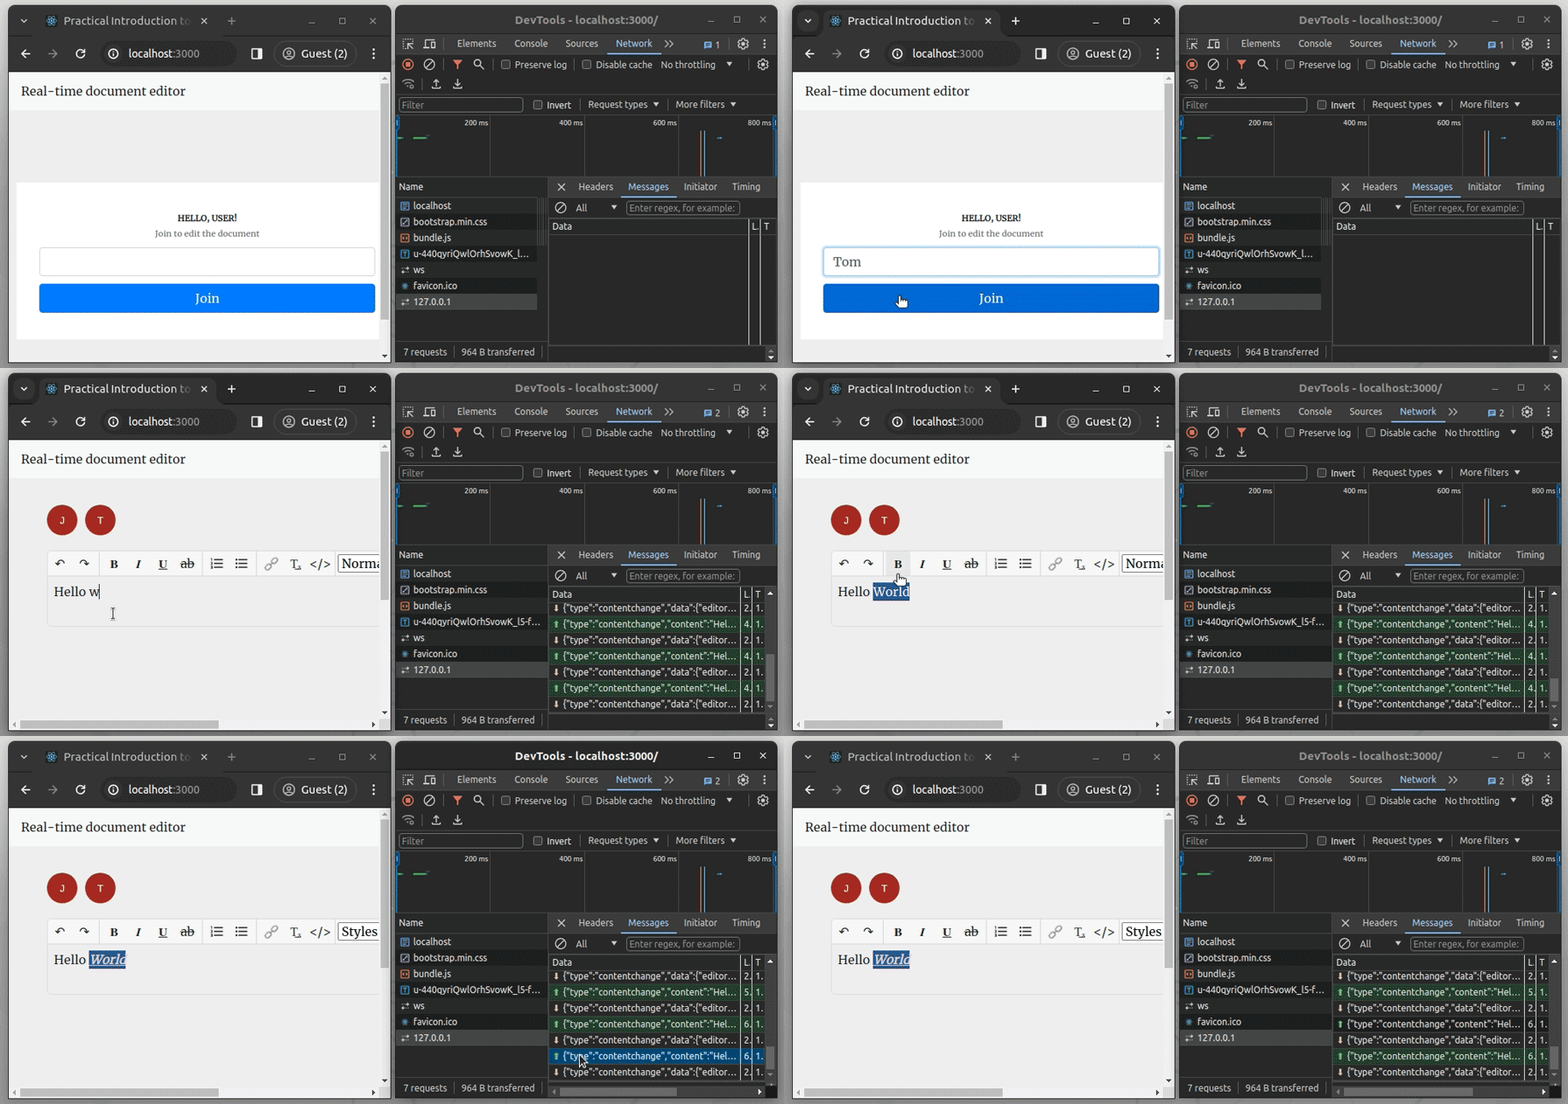
Users can join together and edit a document in the sample React app. The app tracks two events:
The protocol allows us to send and receive messages as binary data or UTF-8 (N.B., transmitting and converting UTF-8 has less overhead). Try inspecting WebSocket messages by using Chrome DevTools to see sent/received messages, as shown in the preview above.
Understanding and implementing WebSockets is very easy as long as we have a good understanding of the socket events: onopen, onclose, and onmessage. The terminologies are the same on both the client and the server side.
From the client, when a new user joins in or when content changes, we trigger a message to the server using sendJsonMessage to take the new information to the server:
/* When a user joins, I notify the
server that a new user has joined to edit the document. */
function LoginSection({ onLogin }) {
  const [username, setUsername] = useState('');
  useWebSocket(WS_URL, {
    share: true,
    filter: () => false
  });
  function logInUser() {
    if(!username.trim()) {
      return;
    }
    onLogin && onLogin(username); // Triggers sendJsonMessage in App
  }
  // ----
  // ----

/* When content changes, we send the
current content of the editor to the server. */
function handleHtmlChange(e) {
  sendJsonMessage({
    type: 'contentchange',
    content: e.target.value
  });
}

return (
  <DefaultEditor value={html} onChange={handleHtmlChange} />
);
Listening to messages from the server is pretty simple. For example, see how the History component listens to user events and renders the activity log:
function History() {
  const { lastJsonMessage } = useWebSocket(WS_URL, {
    share: true,
    filter: isUserEvent
  });
  const activities = lastJsonMessage?.data.userActivity || [];
  return (
    <ul>
      {activities.map((activity, index) => <li key={`activity-${index}`}>{activity}</li>)}
    </ul>
  );
}
Here we used the share: true setup to reuse the existing WebSocket connection we initiated in the App component. By default, the useWebSocket Hook re-renders the component whenever the WebSocket connection receives a new message from the server and the connection state changes.
As a result, the History component will re-render for user and editor events. So, as a performance enhancement, we use the filter: isUserEvent setup to re-render the component only for user events.
In the server, we simply have to catch the incoming message and broadcast it to all the clients connected to the WebSocket. This is one of the differences between the infamous Socket.IO and WebSocket: we need to manually send the message to all clients when we use WebSocket. Socket.IO is a full-fledged library, so it offers inbuilt methods to broadcast messages to all connected clients or specific clients based on a namespace.
See how we handle broadcasting in the backend by implementing the broadcastMessage() function:
function broadcastMessage(json) {
  // We are sending the current data to all connected active clients
  const data = JSON.stringify(json);
  for(let userId in clients) {
    let client = clients[userId];
    if(client.readyState === WebSocket.OPEN) {
      client.send(data);
    }
  };
}
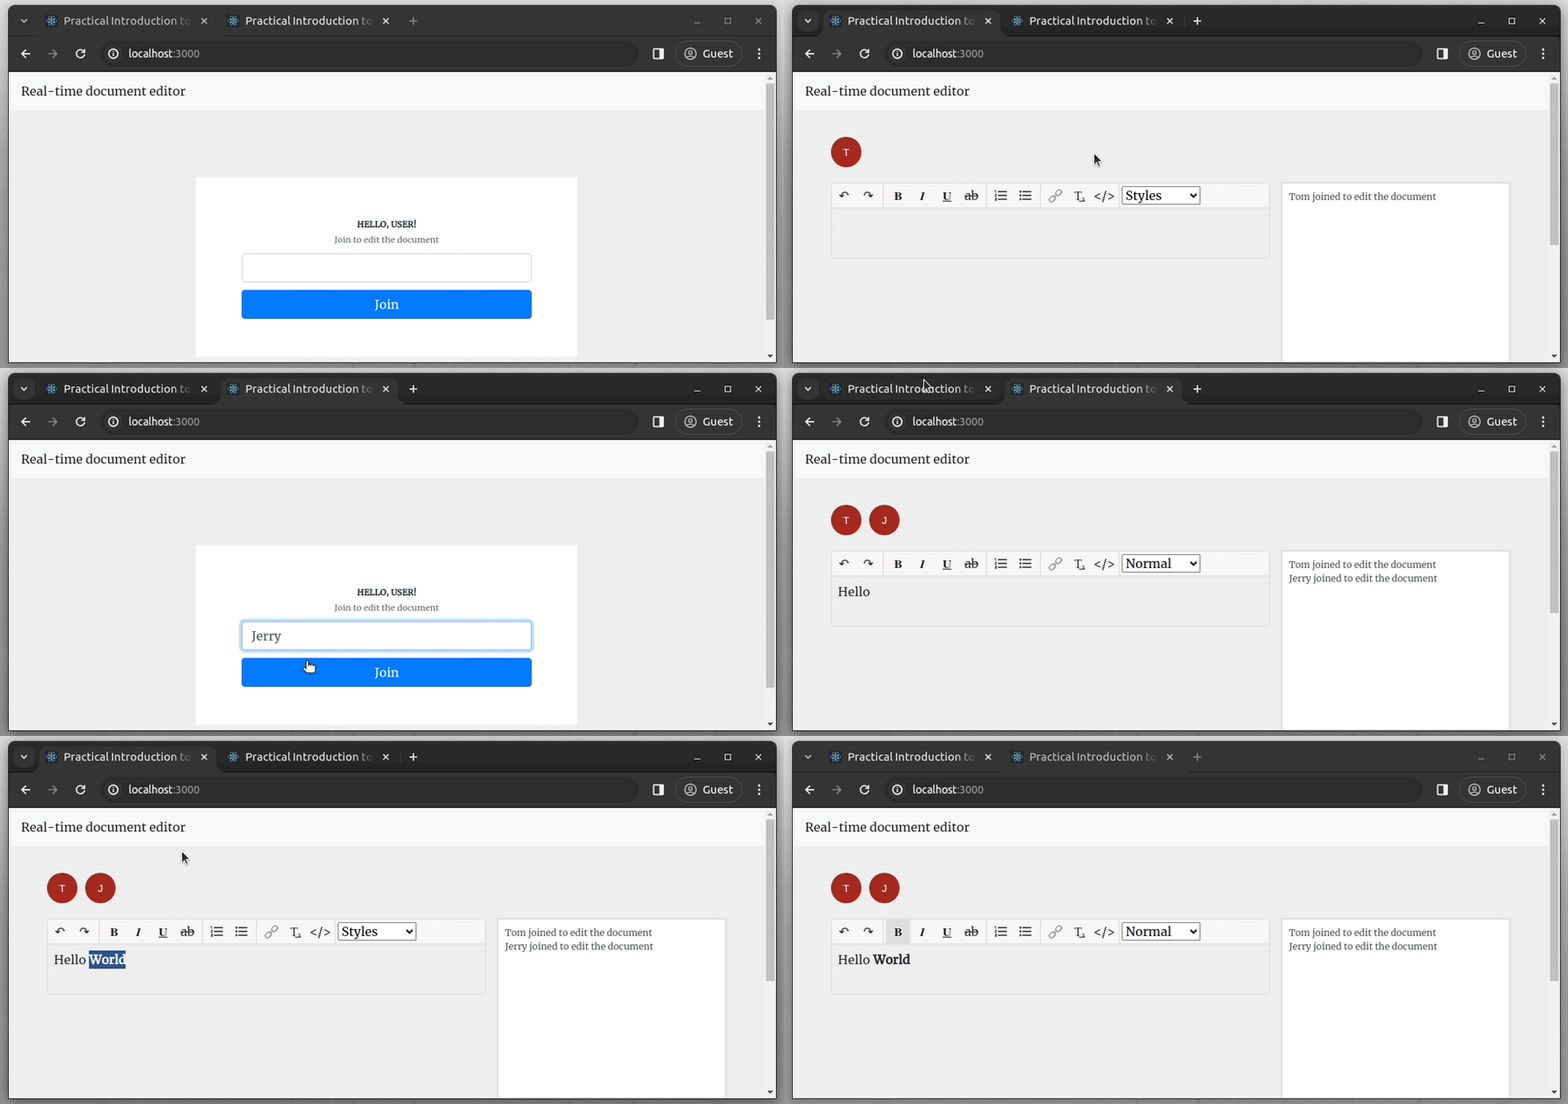
When the browser is closed, the WebSocket invokes the close event, which allows us to write the logic to terminate the current user’s connection. In my code, I broadcast a message to the remaining users when a user leaves the document:
function handleDisconnect(userId) {
    console.log(`${userId} disconnected.`);
    const json = { type: typesDef.USER_EVENT };
    const username = users[userId]?.username || userId;
    userActivity.push(`${username} left the document`);
    json.data = { users, userActivity };
    delete clients[userId];
    delete users[userId];
    broadcastMessage(json);
}

// User disconnected
connection.on('close', () => handleDisconnect(userId));
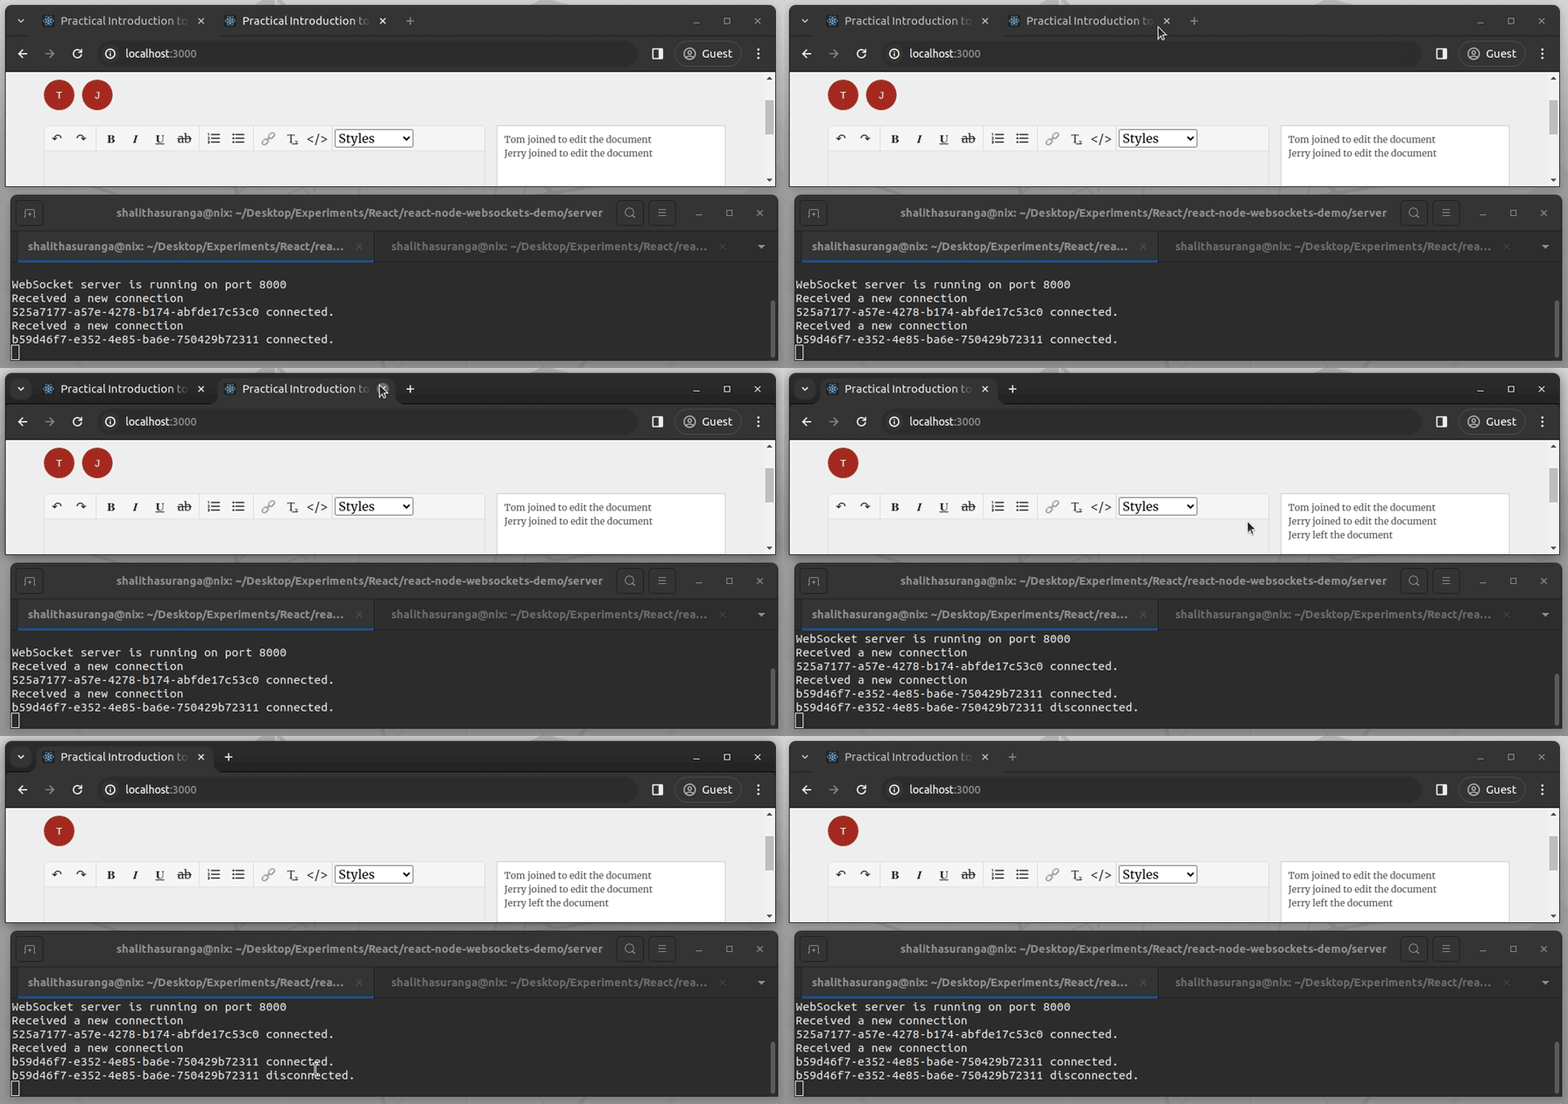
Test this implementation by closing a browser tab that has this app. You’ll see information on both the history section of the app and the browser console, as shown in the following preview:
In the sample app, we used WS as the protocol identifier of the WebSocket connection URL. WS refers to a normal WebSocket connection that gets established via the plain-text HTTP protocol.
This connection stream is not as secure as traditional http:// URLs and can be intercepted by external entities, so WebSocket offers the WebSocket Secure (WSS) mode via the WSS protocol identifier by integrating the SSL/TLS protocol. Similar to https:// URLs, the WSS-based connections cannot be intercepted by external entities because data gets encrypted with the SSL/TLS protocol.
Here is a summary of the differences between WS and WSS:
| Comparison factor | WS | WSS |
|---|---|---|
| The abbreviation stands for | WebSocket | WebSocket Secure |
| Connection initialization protocol | HTTP | HTTPS (HTTP Secure) |
| Data encryption | No | Yes, via the SSL/TLS protocol using RSA-like algorithms |
| Transport layer security | No | Yes, data encryption is handled via the SSL/TLS protocol |
| Application layer security | No, the developer should handle these protections | No, the developer should handle these protections |
Using WSS over WS is recommended to prevent man-in-the-middle (MITM) attacks, but using WSS doesn’t implement cross-origin and application-level security, so make sure to implement necessary URL origin checks in WebSocket servers and a strong authentication method (i.e., a token-based technique) in applications to prevent application-level security vulnerabilities.
For example, if a chat app needs login/signup, make sure to let only authenticated users establish WebSocket connections by validating a token before the HTTP handshake succeeds.
Using WSS instead of WS is programmatically simple. You need to use wss in the WebSocket connection URL in the React app:
const WS_URL = 'wss://example.com';
Also, make sure to use the https module with digital certificates/keys as follows:
const https = require('https');
const fs = require('fs');

const httpsOptions = {
    key: fs.readFileSync('./crypto/key.pem'),
    cert: fs.readFileSync('./crypto/certificate.pem')
};

const server = https.createServer(httpsOptions);
That’s all for enabling WSS from the programming perspective, but from the networking perspective, you have to generate cryptographic keys and certificates via a trusted Certificate Authority (CA).
Node.js doesn’t offer an inbuilt API to create WebSocket servers or client instances, so we should use a WebSocket library on Node.js. For example, we used the ws library in this tutorial. The browser standard offers the built-in WebSocket API to connect with WebSocket servers, so selecting an external library is optional on the browser, but using libraries may improve your code readability on frontend frameworks and boost productivity as they come with pre-developed features.
For example, we used the React useWebSocket library with React to connect to the WebSocket server writing less implementation code.
React useWebSocket is not the only library that lets you work with WebSockets in React. Choose a preferred WebSocket library for React from the following table based on the listed pros and cons:
| WebSocket library | Pros | Cons |
|---|---|---|
| socket.io-client: Bidirectional and low-latency communication for every platform | Fallbacks to HTTP polling if WebSocket connections are not supported. Offers many inbuilt features, such as broadcasting, offline message queue, client namespaces, automatic re-connect logic, etc. | Doesn’t offer React-specific APIs, so developers have to write connectivity, cleanup code with core React Hooks. App bundle size increment is higher than React itself |
| React useWebSocket: React Hook for WebSocket communication | Offers a pre-developed React hook with inbuilt React-specific features, such as auto re-render, using a shared WS object among components, etc. Supports Socket.IO connections and implements automatic re-connect logic. Lightweight compared to other libraries | Doesn’t work inside React class components. Requires React 16.8 or higher. Doesn’t implement fallback transport methods |
| sockJS-client: A JavaScript library for browser that provides a WebSocket-like object | Fallbacks to HTTP polling if WebSocket connections are not supported. Offers a W3C WebSockets API-like interface | Doesn’t offer React-specific APIs. App bundle size increment is higher than React itself |
| Sarus: A minimal WebSocket library for the browser | A minimal library that implements an offline message queue and re-connect logic. Offers a simple API that anyone can learn in seconds | Doesn’t offer React-specific APIs. Doesn’t implement fallback transport methods |
N.B., Bundle size increments were calculated using the BundlePhobia npm package size calculator tool.
Note that Socket.IO and SockJS work as fully-featured bidirectional messaging frameworks that use WebSockets as the first transport method. They offer productive inbuilt features with fallback mechanisms but increase your app bundle size, and they want you to use a specific library for implementing the server (i.e., using the socket.io package for Node-based servers).
So, if your app doesn’t need a fallback transport method, selecting React useWebSocket is a good decision. You can also drop React useWebSocket to make a more lightweight app bundle by using the native WebSocket browser API. Choose a library or use the native browser API according to your preference.
WebSockets are one of the most interesting and convenient ways to achieve real-time capabilities in a modern application. They give us a lot of flexibility to leverage full-duplex communications. I’d strongly suggest working with WebSocket using the native WebSocket API or other available libraries that use WebSocket as a transport method.
Happy coding! 🙂
Install LogRocket via npm or script tag. LogRocket.init() must be called client-side, not
server-side
$ npm i --save logrocket

// Code:

import LogRocket from 'logrocket';
LogRocket.init('app/id');
// Add to your HTML:

<script src="https://cdn.lr-ingest.com/LogRocket.min.js"></script>
<script>window.LogRocket && window.LogRocket.init('app/id');</script>
Would you be interested in joining LogRocket's developer community?
Join LogRocket’s Content Advisory Board. You’ll help inform the type of content we create and get access to exclusive meetups, social accreditation, and swag.
Sign up now
useActionState in React: A practical guide with examplesDiscover how React’s useActionState Hook makes it easier to handle user actions, especially form submissions and async state changes.

Compare two libraries that support creating 3D experiences in the browser. Learn how to get started with each, their core features, and key differences.

Image component to optimize imagesExplore automatic image optimization using Next Image, the built-in image optimization solution for Next.js.
Discover how to integrate frontend AI tools for faster, more efficient development without sacrificing quality.
9 Replies to "WebSockets tutorial: How to go real-time with Node and React"
Great, post have you come across any issues in real-world scenario, where a single server has exposed a port on node.js server and multiple clients~80 has seen a deadlock and websocket blockage?
Websocket not working after generating production APK using react native , anyone please help on this
Hi Avanthika , great post.
Do you know if I can set the header with authentication tokens in the handshake.I mean using W3CW websocer api.
Apparently the W3CW websocket api only support 2 arguments in the cosntructor.
there is any way to do that?
Thanks.
FYI the code block under “Sending and listening to messages on the client side” is the same as the setup block earlier in the article and doesn’t show the example of using client.send.
Thanks for pointing that out, we’ve updated the post
This great piece for getting started with WebSocket.
I’m building WebSocket GUI testing client here – https://firecamp.io I’d love to know your thoughts.
It’s the same in “Sending and listening to messages on the server side”. The server side was never updated to explain how the editorContent is stored, its scope, nor how to store active users. Very good article otherwise. I like that it isn’t a complete code project and one must dissect it a bit to make it work for any situation. In my case, I integrated this into a new app using react hooks (useState and useEffect).
SSE doesn’t make developers tired. LOL. WebSockets dev is, in fact, far more complicated. The maximum 6 browser connections for SSE also no longer exists with HTTP/2, while WebSockets continue to be blocked by some proxies and load balancers. And most chat apps are actually a perfect use case for SSE because users generally aren’t posting 60 messages per second. There is useful example code on DigitalOcean and Marmelab.com.
“we can’t send data directly from the client (frontend) to the server (backend) without implementing workarounds such as polling”
Are client and server switched up here? You can send data directly to the server in a post request.