Generally, when building SPAs there’s a need to protect certain routes. For example, let’s say we have a dashboard route that can only be accessed by authenticated users, we can make use of an auth middleware to ensure that only authenticated users have access to the dashboard route.

In this tutorial, we’ll see how we can implement a middleware pipeline for a Vue app using Vue-Router.
The Replay is a weekly newsletter for dev and engineering leaders.
Delivered once a week, it's your curated guide to the most important conversations around frontend dev, emerging AI tools, and the state of modern software.
A middleware pipeline is a stack of different middlewares ran in parallel with each other.
Using our hypothetical case study from the introductory paragraph, let’s say we have another route at /dashboard/movies, that we only want accessible to subscribed users. We already know that to access the dashboard route, you need to be authenticated. How then do we go about protecting the /dashboard/movies route to ensure that only authenticated and subscribed users have access to that route? By using a middleware pipeline, we can chain several middlewares together and ensure they are run in parallel.
To get started, we’ll be using the Vue CLI to quickly scaffold a new Vue project.
vue create vue-middleware-pipeline
Once the project directory has been created and installed, navigate to the newly created directory and run the following command from the terminal:
npm i vue-router vuex
Vue-router — is the official router for Vue.js
Vuex — is a state management library for Vue
Our application is going to have three components.
Login — This component will be displayed to users that have not been authenticated.
Dashboard — This component will be displayed to users that are signed in.
Movies — We’ll display this component to users that are signed in and have an active subscription.
Let’s create those components. Navigate to the src/components directory and create the following files: Dashboard.vue Login.vue and Movies.vue
Edit the Login.vue file with the following code:
<template>
  <div>
    <p>This is the Login component</p>
  </div>
</template>
Edit the Dashboard.vue file with the following code:
<template>
  <div>
    <p>This is the Dashboard component for authenticated users</p>
    <router-view/>
  </div>
</template>
Finally, add the following code to the Movies.vue file:
<template>
  <div>
    <p>This is the Movies component for authenticated and subscribed users</p>
  </div>
</template>
A store, in regards to Vuex , is simply a container for holding our application state. This will allow us to determine if a user is authenticated as well as check if the user is subscribed or not.
Inside the src folder, create a store.js file and add the following code to the file:
import Vue from 'vue'
import Vuex from 'vuex'

Vue.use(Vuex)


export default new Vuex.Store({
    state: {
        user: {
            loggedIn: false,
            isSubscribed: false
        }
    },

    getters: {
        auth(state) {
            return state.user
        }
    }
})
The store contains a user object within its state. The user object contains a loggedIn and isSubscribed property which helps us determine if a user is logged in and has an active subscription. We’ve also defined a getter inside the store that returns the user object.
Before we create our routes, let’s define them and associate the respective middlewares that will be attached to each of these routes.
/login will be accessible to everybody except authenticated users. When authenticated users visit this route, they should be redirected to the dashboard route. This route will have a guest middleware attached to it.
/dashboard will only be accessible to authenticated users. Unauthenticated users should be redirected to the /login route when they visit this route. We’ll associate an auth middleware with this route.
/dashboard/movies will be accessible to only authenticated and subscribed users. This route will be protected by a isSubscribed and auth middleware.
Next, create a router folder in the src directory and then create a router.js file inside that folder. Edit the file with the following code:
import Vue from 'vue'
import Router from 'vue-router'
import store from '../store'

import Login from '../components/Login'
import Dashboard from '../components/Dashboard'
import Movies from '../components/Movies'


Vue.use(Router)

const router = new Router({
    mode: 'history',
    base: process.env.BASE_URL,
    routes: [
        {
            path: '/login',
            name: 'login',
            component: Login
        },

        {
            path: '/dashboard',
            name: 'dashboard',
            component: Dashboard,
            children: [{
                path: '/dashboard/movies',
                name: 'dashboard.movies',
                component: Movies
            }
        ],
        }
    ]
})


export default router
Here, we created a new router instance while passing in a couple of configuration options as well as a routes property which accepts all the routes we defined earlier. At the moment, it’s important to note that none of these routes are protected. We’ll fix that shortly.
Next, let’s inject the router and our store into the Vue instance. Edit the src/main.js file with the code below:
import Vue from 'vue'
import App from './App.vue'
import router from './router/router'
import store from './store'

Vue.config.productionTip = false


new Vue({
  router,
  store,
  render: h => h(App),
}).$mount('#app')
In the src/router directory, create a middleware folder and then create guest.js ,auth.js and IsSubscribed.js file under that particular folder. Add the following code to the guest.js file:
export default function guest ({ next, store }){
    if(store.getters.auth.loggedIn){
        return next({
           name: 'dashboard'
        })
    }

    return next()
   }
The guest middleware checks to see if the user is authenticated. If they’re authenticated, they are redirected to the dashboard route.
Next, edit the auth.js file with the following code:
export default function auth ({ next, store }){
 if(!store.getters.auth.loggedIn){
     return next({
        name: 'login'
     })
 }

 return next()
}
In the auth middleware, using the store we check to see whether the user is currently authenticated. Depending on if the user is logged in or not, we either continue with the request or redirect them to the login page.
Edit the isSubscribed.js file with the following code:
export default function isSubscribed ({ next, store }){
    if(!store.getters.auth.isSubscribed){
        return next({
           name: 'dashboard'
        })
    }

    return next()
   }
The isSubscribed middleware is similar to the auth middleware. Using our store we check to see if the user is subscribed. If the user is subscribed, they can access the intended route or else they are redirected back to the dashboard page.
Now that we’ve created all our middlewares, let’s make use of them to protect our routes. Edit the src/router/router.js file with the following code:
import Vue from 'vue'
import Router from 'vue-router'
import store from '../store'

import Login from '../components/Login'
import Dashboard from '../components/Dashboard'
import Movies from '../components/Movies'

import guest from './middleware/guest'
import auth from './middleware/auth'
import isSubscribed from './middleware/isSubscribed'


Vue.use(Router)

const router = new Router({
    mode: 'history',
    base: process.env.BASE_URL,
    routes: [{
            path: '/login',
            name: 'login',
            component: Login,
            meta: {
                middleware: [
                    guest
                ]
            }
        },

        {
            path: '/dashboard',
            name: 'dashboard',
            component: Dashboard,
            meta: {
                middleware: [
                    auth
                ]
            },
            children: [{
                path: '/dashboard/movies',
                name: 'dashboard.movies',
                component: Movies,
                meta: {
                    middleware: [
                        auth,
                        isSubscribed
                    ]
                }
            }],
        }
    ]
})


export default router
Here, we imported all our middlewares and then for each of the routes we defined a meta field that contains a middleware array. The middleware array contains all the middlewares we want to be associated with a particular route.
The navigation guards provided by Vue Router are the only reason why we can use a middleware to protect our routes in the first place. These navigation guards are primarily used to guard routes either by redirecting or canceling it.
One of those guards is the global before guard which is usually a hook called just before a route is triggered. To register a global before guard, we define a beforeEach method on the router instance.
const router = new Router({ ... })
router.beforeEach((to, from, next) => {
 //necessary logic to resolve the hook
})
The beforeEach method receives three arguments:
to: This is the route we intend on accessing.
from: This is the route we’re currently coming from.
next: This is the function called to resolve the hook.
Using the beforeEach hook, we can run our middleware.
const router = new Router({ ...})

router.beforeEach((to, from, next) => {
    if (!to.meta.middleware) {
        return next()
    }
    const middleware = to.meta.middleware

    const context = {
        to,
        from,
        next,
        store
    }
    return middleware[0]({
        ...context
    })
})
We first check to see if the current route being processed has a meta field that contains a middleware property. If the middleware property is found, we assign it to a const variable. Next, we define a context object which contains everything we’ll need to pass to each of the middleware. We then call the very first middleware in the middleware array as a function while passing in the context object.
Try visiting the /dashboard route, you should be redirected to the login route. This is because of the store.state.user.loggedIn property in our /src/store.js is set to false. Change the store.state.user.loggedIn property to true and you should be able to access the /dashboard route now.
Our middleware is working now, but not quite the way we want it to. Our goal was to achieve a pipeline where we can run multiple middlewares against a particular route.
return middleware[0]({ …context})
Notice this line of code from the code block above, we’re only calling the first piece of middleware passed from the middleware array in the meta field. How then do we ensure other middlewares contained in the array, if any, are called too? This where our pipeline comes in handy.
Navigate to the src/router directory and then create a middlewarePipeline.js file. Add the following code to the file:
function middlewarePipeline (context, middleware, index) {
    const nextMiddleware = middleware[index]

    if(!nextMiddleware){
        return context.next
    }

    return () => {
        const nextPipeline = middlewarePipeline(
            context, middleware, index + 1
        )

        nextMiddleware({ ...context, next: nextPipeline })

    }
}

export default middlewarePipeline
The middlewarePipeline takes in three arguments:
context: This is the context object we created earlier on so that it can be passed to each piece of middleware in the stack.
middleware: This is the middleware array itself as defined on the meta field of the route.
index: This is the index of the current middleware being run in the middleware array.
const nextMiddleware = middleware[index]
if(!nextMiddleware){
return context.next
}
Here, we simply pluck out the middleware at the index that was passed to the middlewarePipeline function. If no middleware is found at that index , the default next callback is returned.
return () => {
const nextPipeline = middlewarePipeline(
context, middleware, index + 1
)
nextMiddleware({ ...context, next: nextPipeline })
}
We invoke the nextMiddleware to be run while passing in the context and then the nextPipeline const . It is important to note that the middlewarePipeline function is a recursive function that will call itself to fetch the next middleware to run in the stack, while incrementing the indexby 1.
Let’s make use of our middlewarePipeline . Edit the src/router/router.jsfile with the following code:
import Vue from 'vue'
import Router from 'vue-router'
import store from '../store'

import Login from '../components/Login'
import Dashboard from '../components/Dashboard'
import Movies from '../components/Movies'

import guest from './middleware/guest'
import auth from './middleware/auth'
import isSubscribed from './middleware/isSubscribed'
import middlewarePipeline from './middlewarePipeline'


Vue.use(Router)

const router = new Router({
    mode: 'history',
    base: process.env.BASE_URL,
    routes: [{
            path: '/login',
            name: 'login',
            component: Login,
            meta: {
                middleware: [
                    guest
                ]
            }
        },

        {
            path: '/dashboard',
            name: 'dashboard',
            component: Dashboard,
            meta: {
                middleware: [
                    auth
                ]
            },
            children: [{
                path: '/dashboard/movies',
                name: 'dashboard.movies',
                component: Movies,
                meta: {
                    middleware: [
                        auth,
                        isSubscribed
                    ]
                }
            }],
        }
    ]
})

router.beforeEach((to, from, next) => {
    if (!to.meta.middleware) {
        return next()
    }
    const middleware = to.meta.middleware

    const context = {
        to,
        from,
        next,
        store
    }


    return middleware[0]({
        ...context,
        next: middlewarePipeline(context, middleware, 1)
    })

})

export default router
Here, we’re making use of the middlewarePipeline to run subsequent middlewares contained in the stack.
return middleware[0]({
...context,
next: middlewarePipeline(context, middleware, 1)
})
After the first middleware has been called, using the middlewarePipeline function, subsequent middlewares contained in the stack are also called, till there are no longer any middlewares available.
If you visit the /dashboard/movies route, you should be redirected to the /dashboard route. This is because the user is currently authenticated but has no active subscription. Set the store.state.user.isSubscribed property in our store to true . You should be able to access the /dashboard/moviesroute now.
Middlewares are a great way of protecting different routes in an application. This is a very simple implementation of how you can make use of multiple middlewares to protect a single route in your Vue application. You can find the link to the Github repo here.
Debugging Vue.js applications can be difficult, especially when users experience issues that are difficult to reproduce. If you’re interested in monitoring and tracking Vue mutations and actions for all of your users in production, try LogRocket.

LogRocket lets you replay user sessions, eliminating guesswork by showing exactly what users experienced. It captures console logs, errors, network requests, and pixel-perfect DOM recordings — compatible with all frameworks.
With Galileo AI, you can instantly identify and explain user struggles with automated monitoring of your entire product experience.
Modernize how you debug your Vue apps — start monitoring for free.

Learn how inline props break React.memo, trigger unnecessary re-renders, and hurt React performance — plus how to fix them.

This article showcases a curated list of open source mobile applications for Flutter that will make your development learning journey faster.
Discover what’s new in The Replay, LogRocket’s newsletter for dev and engineering leaders, in the April 1st issue.
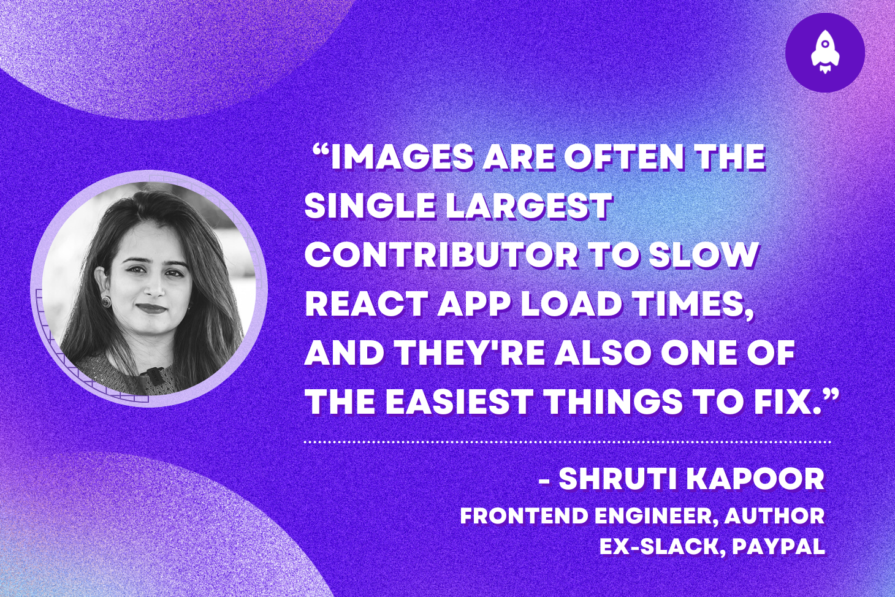
This post walks through a complete six-step image optimization strategy for React apps, demonstrating how the right combination of compression, CDN delivery, modern formats, and caching can slash LCP from 8.8 seconds to just 1.22 seconds.
Would you be interested in joining LogRocket's developer community?
Join LogRocket’s Content Advisory Board. You’ll help inform the type of content we create and get access to exclusive meetups, social accreditation, and swag.
Sign up now

