Testing is an important part of any software development process. Visual regression testing, in particular, is a great asset to have in your release process, as visual errors in frontend applications are some of the hardest to catch.

End-to-end (E2E) frameworks provide some tools to alleviate this, but often times teams still have to rely on someone to run the application and visually inspect a build before delivery. This process is often time-intensive and may require multiple team members. In this article, we’ll learn that Argos CI provides this form of testing in an automated fashion. Argos CI is used by many large companies, including Ant Design and MUI.
We’ll cover how to get started with Argos CI and demonstrate an example project that is connected to Argos CI for visual regression testing. If you’d like to follow along, please check out the argos-into project that can be found on my GitHub.
My sample project is basically just a small contacts app that was originally created for this Remix tutorial. I made a few small changes and added my two cats and a dog to the contacts. I recommend looking at that project’s code while following the next few sections.
Argos CI is a developer tool made specifically to incorporate visual regression testing into your regular CI/CD process. Argos allows you to have your CI/CD pipeline automatically detect visual changes in your frontend code and approve those changes in the process of making a regular pull request.
Argos CI takes screenshots you generate through a process in your pipeline and verifies the changes between those screenshots. Through the Argos CI dashboard, you can view changes that come into your project repo and then approve or reject them as part of your PR process.
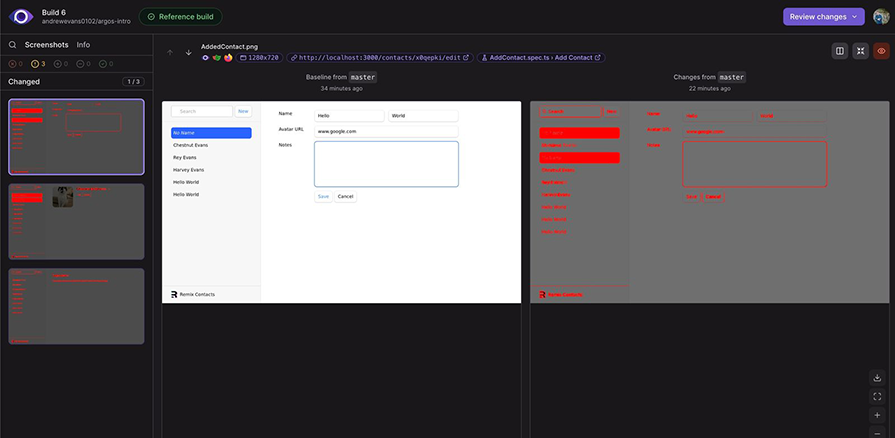
Once you are connected to Argos CI, you are given a dashboard that has a really nice interface to show changes that have been detected, with a before and after view of the pages with the changes highlighted:
When you connect Argos CI to your GitHub repo, you’ll see the Argos verification step as a “status check” with new PRs:
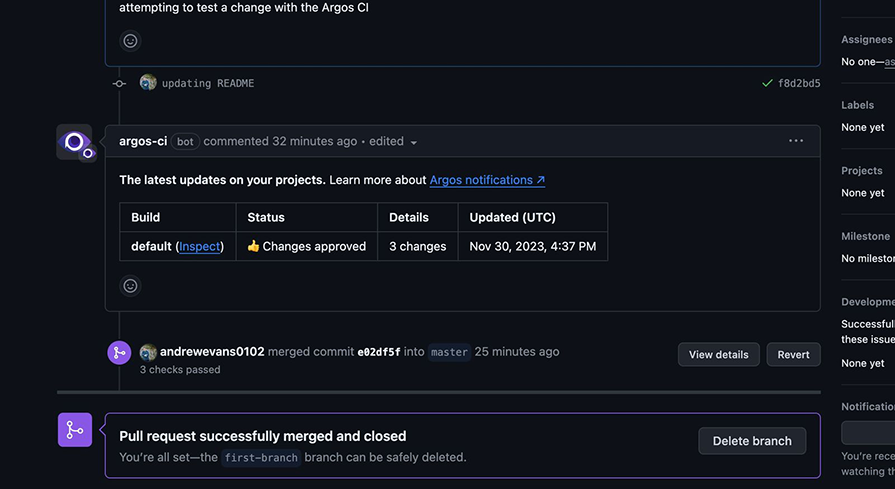
Links will appear for you to click when the status checks run; they’ll take you to the associated pipeline step and let you see what’s happening.
In my sample project, I’m using GitHub Actions, but there is documentation for other CI/CD platforms as well. In the next sections, I’ll do a walkthrough of how I got Argos CI working for my project.
At a high level, here is how it works:
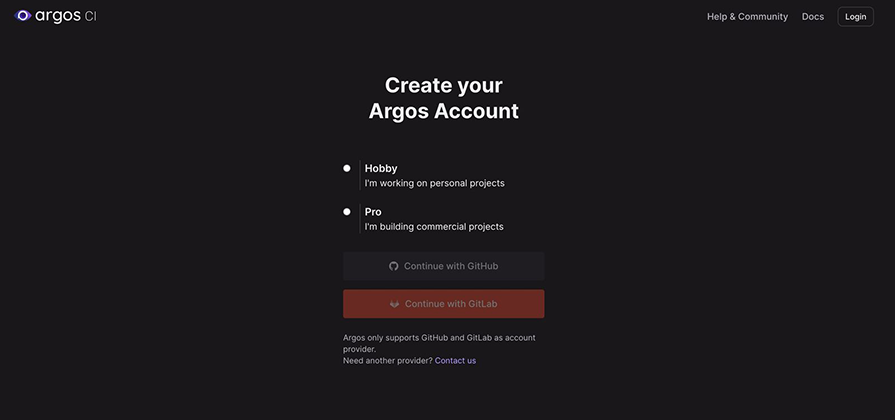
As I said in the above section, I’m using GitHub Actions for my project. Following the instructions on the Argos CI documentation, I first went to their website and created a free Argos CI account:
With my account created, I then connected my project to my new Argos CI account:
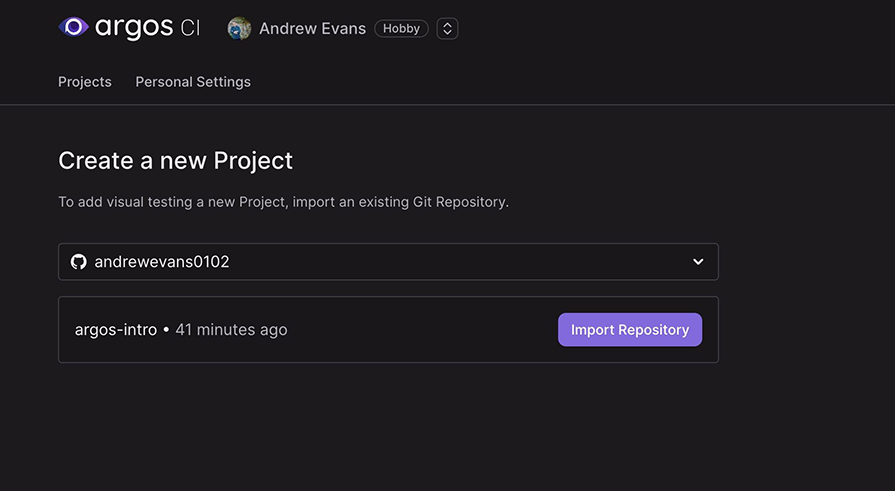
Going through the new project dialog, I selected the repo I wanted to connect and then clicked the Import Repository button that you see above. The repo then showed up in the UI:
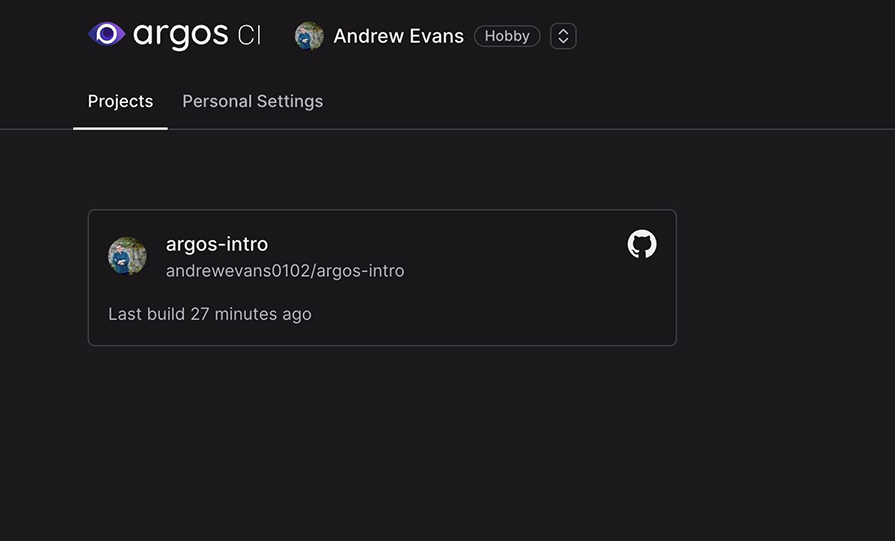
I can also click into the repository to view a set of build histories:
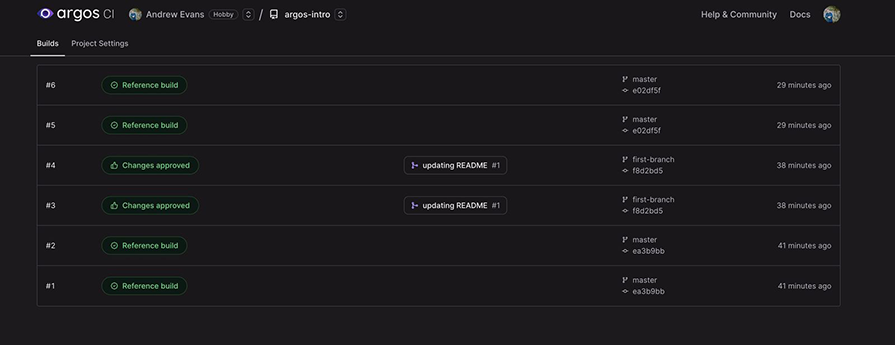
I ran my GitHub Actions several times, which you can see in the above list of the builds. If you’re first setting everything up, this list will be empty.
To actually go through the process of generating screenshots, uploading them, and having Argos CI verify the changes there are a few more steps.
As I said in the intro, my project uses Playwright. Argos CI has a great set of docs that can walk you through how to use Playwright with Argos CI, so I won’t cover that here.
Let’s add the Argos CI Playwright reporter as a dev-only package to my project:
npm install --save-dev @argos-ci/playwright
Once installed, I modified my playwright.config.ts file to include the Argos CI reporter:
    reporter: process.env.CI
        ? [['list'], ['@argos-ci/playwright/reporter']]
        : 'list',
With that setup, I next turned to my GitHub Action definition to add a step for Argos CI.
The specific step in my GitHub Actions .yaml file to add Argos just included the following:
  - name: Upload screenshots to argos-ci.com
    continue-on-error: true
    # 👇 change "./screenshots" by your screenshots folder path
    run: npm exec argos upload ./screenshots
I did this after my tests ran in the pipeline; I had already set up a step in my GitHub Actions pipeline to run the tests. My full .yaml file looks like the following:
name: Playwright Tests
on:
    push:
        branches: [main, master]
    pull_request:
        branches: [main, master]
jobs:
    test:
        timeout-minutes: 60
        runs-on: ubuntu-latest
        steps:
            - uses: actions/checkout@v3
            - uses: actions/setup-node@v3
              with:
                  node-version: 18
            - name: Install dependencies
              run: npm ci
            - name: Install Playwright Browsers
              run: npx playwright install --with-deps
            - name: Run Playwright tests
              run: npx playwright test
            - uses: actions/upload-artifact@v3
              if: always()
              with:
                  name: playwright-report
                  path: playwright-report/
                  retention-days: 30
            - name: Upload screenshots to argos-ci.com
              continue-on-error: true
              # 👇 change "./screenshots" by your screenshots folder path
              run: npm exec argos upload ./screenshots
Notice that I’m using screenshots as the folder name. If you have the screenshot location set somewhere else in your Playwright config, you’ll need to set that during the upload step, as the code comment indicates above.
Also, please note that, with GitHub Actions in particular, the token used to connect to Argos CI is read without additional configuration. If you have an issue with the token, please check out the docs on how to set this up.
It’s also important to note that I’ve added steps in my Playwright tests that take screenshots. Each framework has its own way of doing this, but basically in my two example tests built with Remix, the following uses the argosScreenshot component:
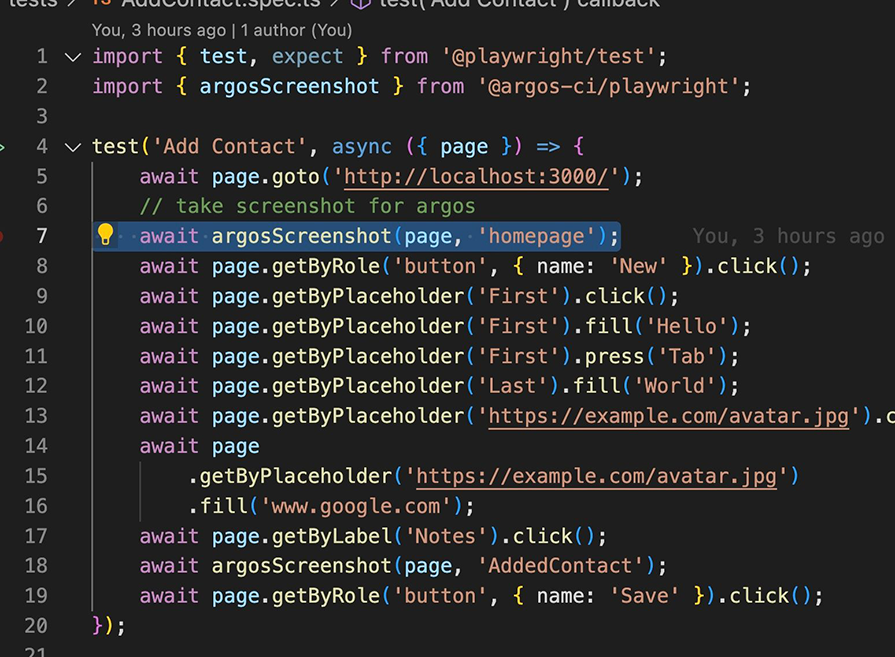
Since I’m using the Argos Playwright reporter and have installed the appropriate npm package, this takes care of putting the screenshot in the right place for Argos CI to pick it up.
With all of the above setup, you should now see the Playwright tests and Argos CI running when PRs are opened.
One question you may be asking at this point is: What does Argos use as a reference build to evaluate changes? In the project settings, Argos CI defaults to using the default branch (in my case, main) to do a build and the, compare to the new PR’s screenshots:

You can configure this, as well as several other things, in the project settings. In the next section, I’ll walkthrough a real example of me making a change to the project repo and Argos CI seeing the change.
Now that I’ve got everything set up, my Remix project should be able to see any changes made and ask for my approval when they come in to GitHub from a new PR.
To show a change, I’m going to go remove user John Smith from my contacts app, which will change what is shown in the lefthand navigation bar.
Here is my opened PR with Argos CI running:
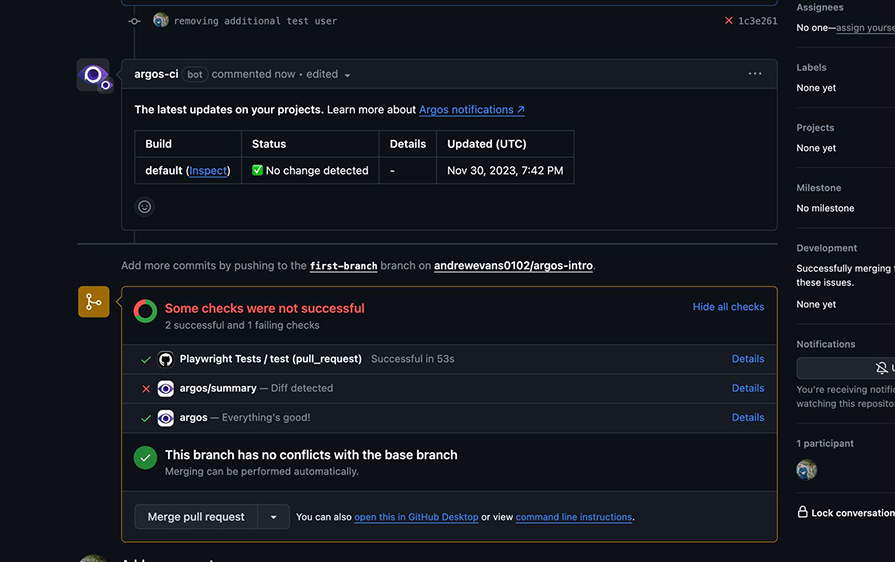
In the Status checks block, you’ll notice that a “Diff detected” message appears. If I click into the details, it should take me to the Argos CI dashboard build and show that it sees a change has happened:
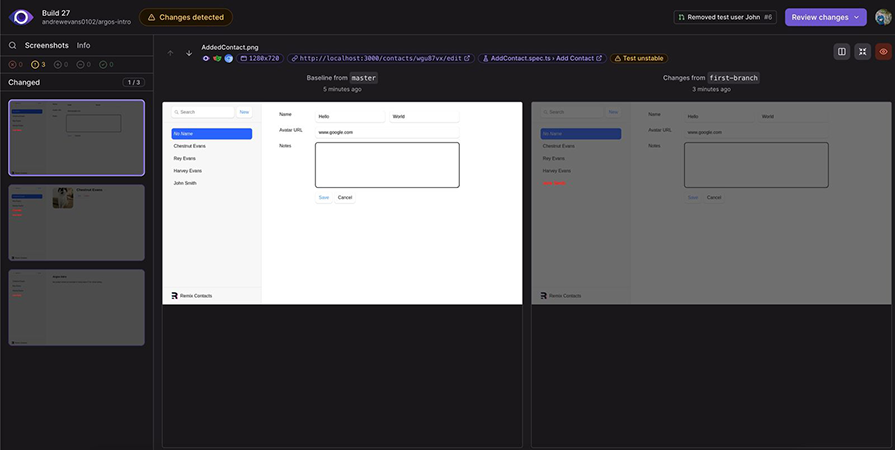
As you can see in the screenshot, on the left we can see John Smith in our contacts app, but on the right he has disappeared.
In the top section, I can choose to either Approve or Reject the changes:

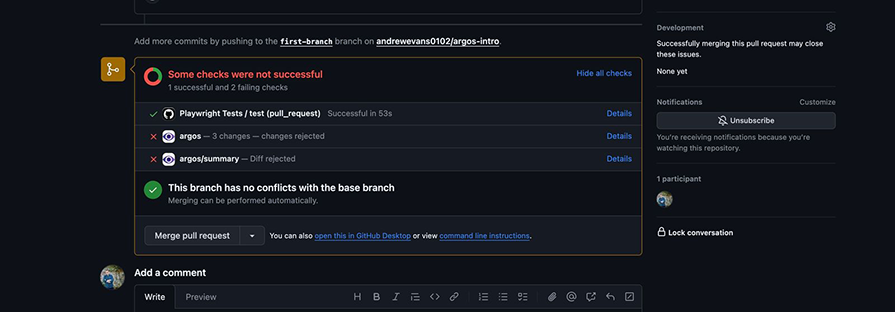
If I reject the change, the status check will show that:
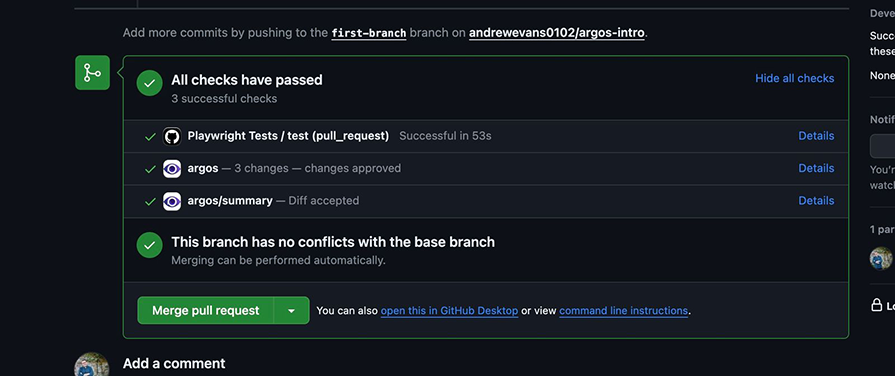
When I approve the change, my PR now shows a success message, indicating that all checks passed:
In this post, I introduced Argos CI and showcased how it can automate visual regression testing for your projects. We covered how to integrate Argos CI with an example Remix project using Playwright and a GitHub action.
Argos CI is very flexible and can accommodate different use cases. There are several advanced features in Argos CI if you want to do things like run parallel builds. I recommend checking out the Argos CI docs for more information.
The ability to automate visual regression testing with Argos CI is a powerful feature that can really help teams with project delivery. I only touched on a brief example and Argos CI’s high points in this post, but I recommend trying it out yourself and seeing what different things you can do with the visual test results.
I hope this post has helped you get started, and provided you with ways to learn more if you want to use this technology in your projects. Thanks for reading the post!
Install LogRocket via npm or script tag. LogRocket.init() must be called client-side, not
server-side
$ npm i --save logrocket

// Code:

import LogRocket from 'logrocket';
LogRocket.init('app/id');
// Add to your HTML:

<script src="https://cdn.lr-ingest.com/LogRocket.min.js"></script>
<script>window.LogRocket && window.LogRocket.init('app/id');</script>
Would you be interested in joining LogRocket's developer community?
Join LogRocket’s Content Advisory Board. You’ll help inform the type of content we create and get access to exclusive meetups, social accreditation, and swag.
Sign up now
Get to know RxJS features, benefits, and more to help you understand what it is, how it works, and why you should use it.

Explore how to effectively break down a monolithic application into microservices using feature flags and Flagsmith.

Native dialog and popover elements have their own well-defined roles in modern-day frontend web development. Dialog elements are known to […]

LlamaIndex provides tools for ingesting, processing, and implementing complex query workflows that combine data access with LLM prompting.