Editor’s note: This article was reviewed and updated on 10 October 2024 to add information around three ways to access the Crop option in Figma and some general tips for cropping in Figma.
When you’re creating professional quality designs in Figma, it helps to have high quality images in your design file. But sometimes you’ll find a great image and discover that it’s not the right size or shape to suit your needs. Fortunately, you don’t have to take the image to another manipulation tool; you can perform all of the cropping you could possibly need inside of Figma.
Whether your need is simple, like turning a square avatar photo into a circle, or more complex, like cutting out the shape of a person’s body, you can handle any of these tasks by mastering the cropping techniques that already exist in Figma.
You can find the Crop option in three ways in Figma:
Escape, or pressing Enter or Returnoption keyWe’ll go over basic cropping in Figma step-by-step, including cropping a square shape and cropping a circle shape. If you want to do more advanced cropping, you can jump ahead to the simple shape cropping example or the section on complex shape cropping.
Whether you’re on a Mac or Windows device, or using Figma’s new UI or previous UI, there are a few useful tips that will make your image cropping experience smoother:
It may also be helpful to know that the parts of the image you crop are hidden, not deleted. If you need to adjust the crop, you can just repeat the cropping process.
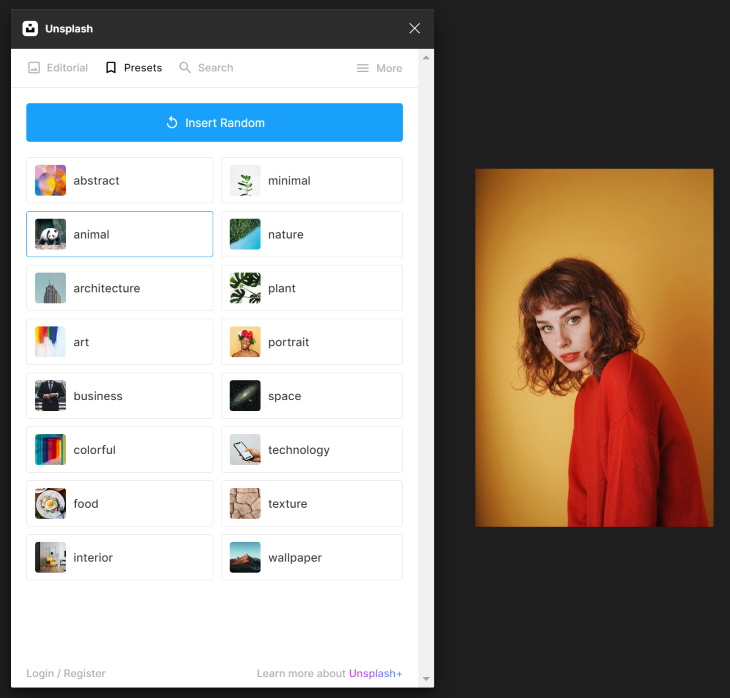
Before we get to more advanced techniques, we should start with the basic ways to crop an image in Figma. To begin, I like to use the Unsplash plugin to generate a random, high-quality, open-source image of a person.
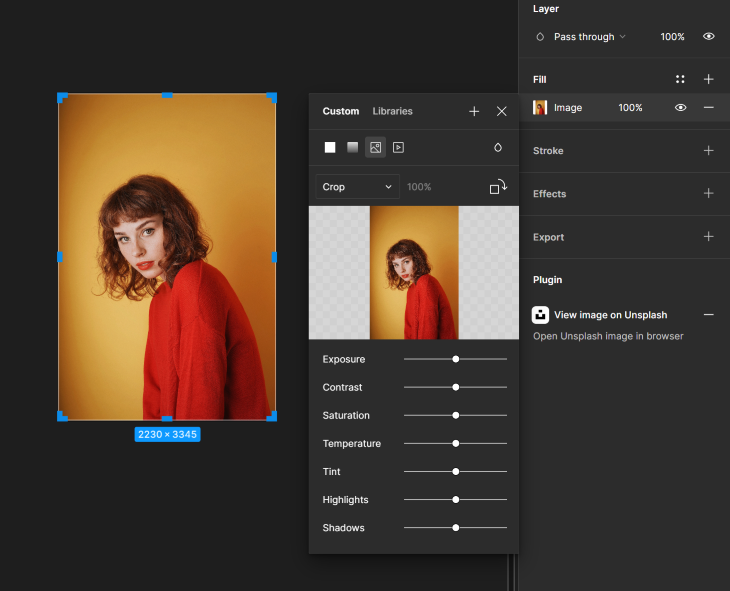
For many user interfaces, I might need this image to have a square aspect ratio, so to do this, I can perform a simple crop operation by opening the image details from the Fill section of the Design panel and selecting Crop from the dropdown menu.
This will expose the eight cropping handles that I can click and drag as desired. As a shortcut, you can also start from the original image on your canvas and hold down Ctrl while dragging any corner of the image to quickly crop while you drag:
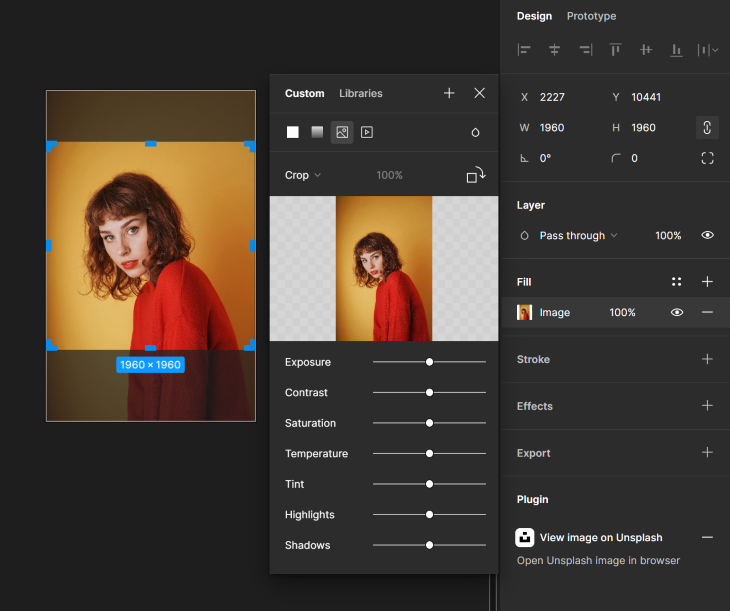
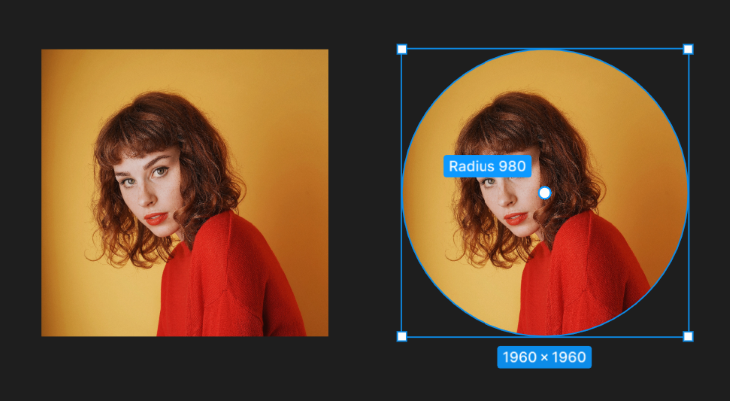
Since I want this final image to be a precise square, I can also use the Width and Height properties to set equal values and then hold shift while dragging a corner handle to maintain that exact 1:1 ratio while resizing the image:
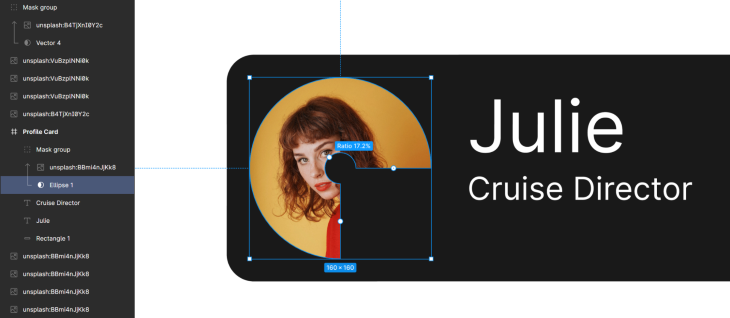
If I’m turning this image into an avatar for a user profile UI, I’ll want to further crop it into a circle, since that’s more common for avatars and profile pictures. To do this, I’ll simply set a corner radius that’s at least half the height of the image, or drag the corner radius handles from the image until it becomes a circle:
Now my image is ready to go.
Sometimes you won’t start with the image first. What if you already have a handful of assets in Figma and you need to make your images fit into those assets?
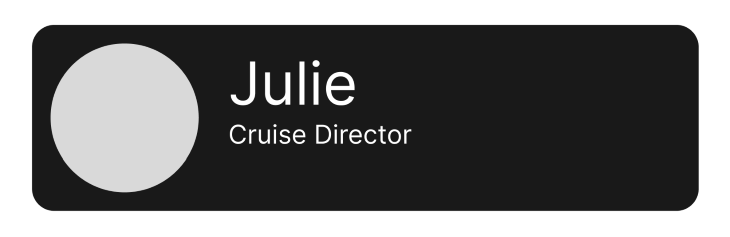
That’s where shape cropping can help. Let’s walk through the steps together.
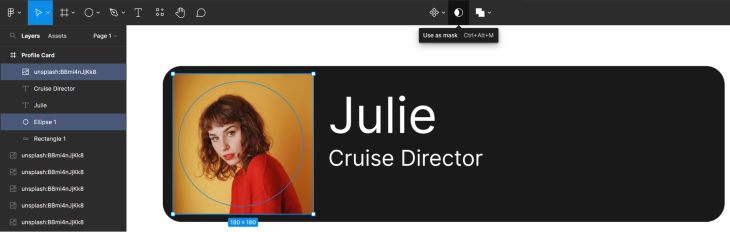
First, I’ll want to make a duplicate of my original image; that way I’ll still be able to refer back to the original later if I want. Then I’ll place that copy on top of the placeholder ellipse on the profile card:

Using Ctrl while I click to select multiple layers, I select both the ellipse layer and the image layer. Then at the top of the screen, I select Use as mask. This immediately creates a group containing both original layers:
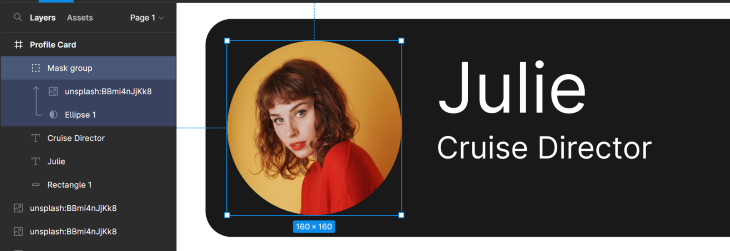
One of the main benefits of this method is that I can always go back to the original ellipse and manipulate the shape. As I make changes, the overlaid image continues to crop accordingly. This can be helpful anytime you need to crop an image into a more complex shape:
Sometimes your task isn’t simply to change the size or shape of the image, but to extract a specific portion of the image itself. Often this requires you to step beyond basic geometric shapes and create an abstract mask.
Let’s pretend we need to mock up some virtual backgrounds for a photobooth app. How will we demonstrate what each background will look like against the same head? The best way to do this is to crop only our foreground and then copy and paste it on top of each of our backgrounds.
First, use the pen tool to trace the outline of our foreground subject. Because this is such a complex shape, the edge detail of the final crop will depend on how many points you choose to add to this shape. If you zoom in on your image, it is easier to capture those details with additional vector nodes. For a smoother mask shape, you can add a corner radius to the vector:
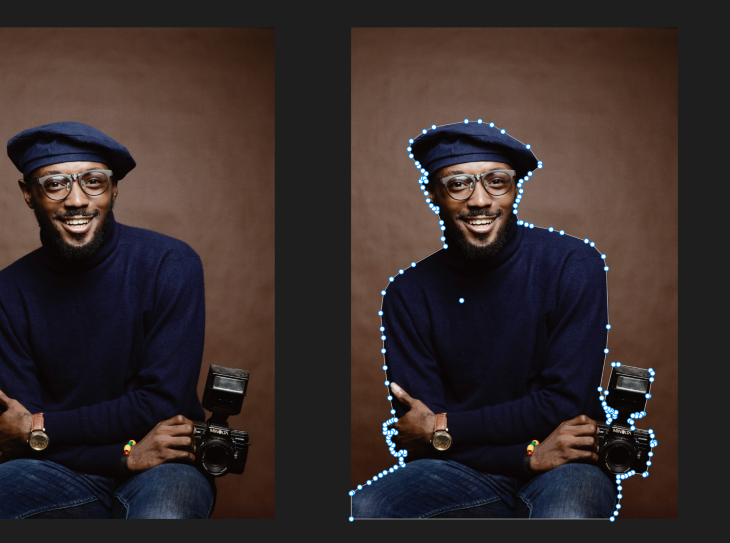
As you finish tracing your foreground subject, make sure it is a closed loop. Masking will not work properly without an enclosed shape.
Then, just as you did before with a simple shape crop, select both the vector layer and the image, then at the top of the screen select Use as mask. You will be left with just the foreground subject you traced:
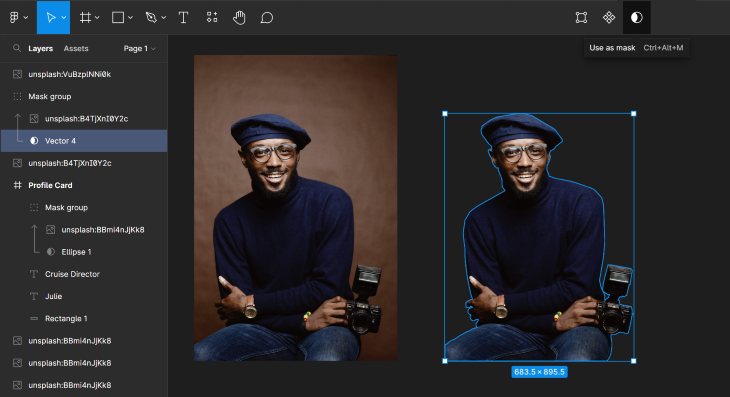
From here, you can now place your cropped image in front of any background you want:

There was a time when image manipulation required several different pieces of software, and designers would need to tediously work across each one to achieve their desired outcome. Fortunately, Figma continues to deliver an all-in-one tool that excels at most of these tasks.
Figma makes it particularly easy for designers to crop and mask images without relying on any third party tools. For UX designers, image manipulation is only a small part of the job, but getting each image just right is critical to deliver visually appealing interfaces. Once you master cropping and masking in Figma, you can return your focus to the big picture.

LogRocket's Galileo AI watches sessions and understands user feedback for you, automating the most time-intensive parts of your job and giving you more time to focus on great design.
See how design choices, interactions, and issues affect your users — get a demo of LogRocket today.
Design engineering has always lived between design and code. But with AI tools turning prompts into interfaces and code into editable canvases, that bridge is becoming a new way of building.
A three-week mobile banking project taught me that the “proper” UX process is not always realistic. Sometimes, the better approach is to work with what you know, identify what you still need to learn, and make the strongest decision possible under real constraints.
A/B testing compares two versions of a design to see which performs better with real users. Here’s how UX teams can use it to test hypotheses, measure outcomes, and make smarter product decisions.

This case study shows how one ad experience redesign increased total ad exposure while lowering perceived friction, proving that timing and context can matter more than raw interruption.


