Editor’s Note: This post was reviewed for accuracy on 1 March 2023. The React Flow v11.5 release in January 2023 introduced new features that make it easier to connect nodes and work with bigger flows, such as the connectionRadius prop, error handling, auto pan, touch support, and the extended generic Node type. In addition, the React Flow team released a new version of the node-resizer package.

Successful projects require a combination of adequate planning and architecture. Planning a project can be a pain, especially when you have to draw each flow on paper. Luckily, there are various products to help you plan your projects. In this article, we will look at how to use React Flow to plan your next React project.
Jump ahead:
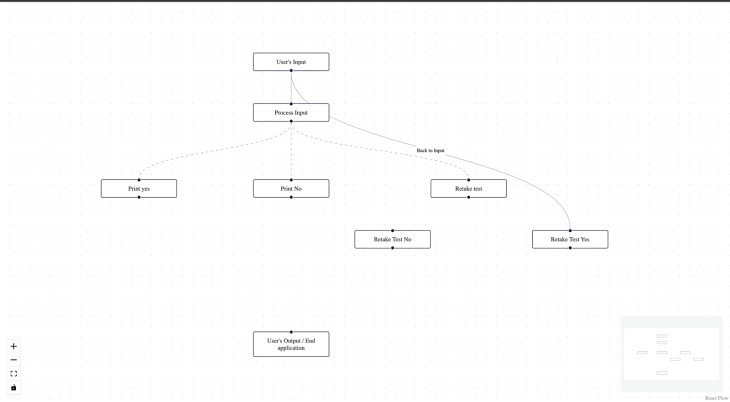
React Flow is a React library for creating interactive graphs and node-based editors. It can create workflows with decision-making and is also used for presentations. With React Flow, you can create your entire React project architecture programmatically, with the flexibility to customize each node diagrammatically:

React Flow is free to use, has an easy setup and integration, and takes less than five minutes to set up and use. It includes zooming and panning, multi-selection, and several event handlers integrated out of the box.
Second, the React Flow library is highly flexible and customizable. The user can style nodes and elements to their preferences. The library also comes with several plugin supports for customization:
To understand the reliability of our applications, we run tests on them to clear our doubts. React Flow is tested with Cypress. According to the docs, it also supports testing with Playwright and Jest.
And, with 12k stars on Github and an average weekly download of 161k, it’s popular among devs. It has extensive community support that allows it to be maintained, thus giving users a long time assurance and scalability.
To better understand how to use React Flow, let’s build our custom flow.
Let’s start by scaffolding our React app. Run the command below to scaffold react in your preferred directory:
yarn create react-app working-with-reactflow
Once we’ve installed the necessary packages and libraries, change the directory into the newly created project and run this command to install React Flow.
yarn add reactflow
Before we build our React Flow application, let’s create a custom style for our application. Copy and paste the code below into the src/index.css file:
html,
body,
#root {
  width: 100%;
  height: 100%;
  margin: 0;
  padding: 0;
  box-sizing: border-box;
}
Nodes are an essential feature of React Flow that allows you to render anything you like.
According to the React Flow docs, nodes are individual containers or components that contain brief information about the container by type default, input, or output. Each node can be placed in a precise location on Canvas using the x and y property to set its initial position.
Now, let’s get started by building our first nodes. Create a nodes.js file in the src folder and paste the code below into it:
export default [
  {
    id: "1",
    type: "input",
    data: { label: "User's Input" },
    position: { x: 500, y: 100 },
  },
  {
    id: "2",
    data: { label: "Process Input" },
    type: "default",
    position: { x: 500, y: 200 },
  },
  {
    id: "3",
    data: { label: "Print yes" },
    position: { x: 200, y: 350 },
  },
  { id: "4", data: { label: "Print No" }, position: { x: 500, y: 350 } },
  { id: "5", data: { label: "Retake test" }, position: { x: 850, y: 350 } },
  {
    id: "6",
    data: { label: "Retake Test Yes" },
    position: { x: 1050, y: 450 },
  },
  { id: "7", data: { label: "Retake Test No" }, position: { x: 700, y: 450 } },
  {
    id: "8",
    type: "output",
    data: { label: "User's Output / End application" },
    position: { x: 500, y: 650 },
  },
];
In the code block above, we’re creating an array of objects. Each object contains a unique id, type (default if not specified), and data, which contains an object with the label property and, finally, a position property to specify the viewport position of the node.
React Flow edges are lines that connect nodes. Edges can connect to multiple nodes to form a flow and can be drawn and removed manually.
To create an edge for our node, create an edge.js file in the src folder and paste the code below into it:
export default [
  { id: "el1-2", source: "1", target: "2" },
  { id: "el2-3", source: "2", target: "3", animated: true },
  { id: "el2-4", source: "2", target: "4", animated: true },
  { id: "el2-5", source: "2", target: "5", animated: true },
  { id: "el6-1", source: "1", target: "6", label: "Back to Input" },
];
In the code block above, we’re creating an array of objects, where each object contains a unique id, the source where the edge starts, the target location, a label for identification, and an animated Boolean value.
With our nodes and edges in place, let’s use them in our React Flow application. Copy and paste the code below into a newly created Flow.jsx file:
import { useCallback, useState } from "react";
import ReactFlow, {
  applyEdgeChanges,
  applyNodeChanges,
  addEdge,
  MiniMap,
  Controls,
  Background,
} from "reactflow";
import "reactflow/dist/style.css";
import initialNodes from "./nodes.js";
import initialEdges from "./edges.js";

function Flow() {
  const [nodes, setNodes] = useState(initialNodes);
  const [edges, setEdges] = useState(initialEdges);

  const onNodeChange = useCallback(
    (x) => setNodes((newNode) => applyNodeChanges(x, newNode)),
    [setNodes]
  );

  const onEdgeChange = useCallback(
    (x) => setEdges((eds) => applyEdgeChanges(x, eds)),
    [setEdges]
  );

  const onEdgeConnect = useCallback(
    (x) => setEdges((eds) => addEdge({ ...x, animated: true }, eds)),
    [setEdges]
  );

  return (
    <ReactFlow
      nodes={nodes}
      edges={edges}
      onNodesChange={onNodeChange}
      onEdgesChange={onEdgeChange}
      onConnect={onEdgeConnect}
    >
      <MiniMap />
      <Controls />
      <Background />
    </ReactFlow>
  );
}
export default Flow;
In the code block above, we created a state for the initalNodes and initialEdges, which are later used in the ReactFlow component. We also observe changes in the nodes and edges whenever their position is changed on Canvas.
We’re making the edges connectable from wherever they’re drawn from one node to another by listening and updating the changes applied to the state using the onConnect property.
We’re also utilizing the React Flow’s plugins to display the MiniMap, which gives us an overview of the entire flow, the Controls for the control panel, and the Background to improve the graphical representation of the canvas.
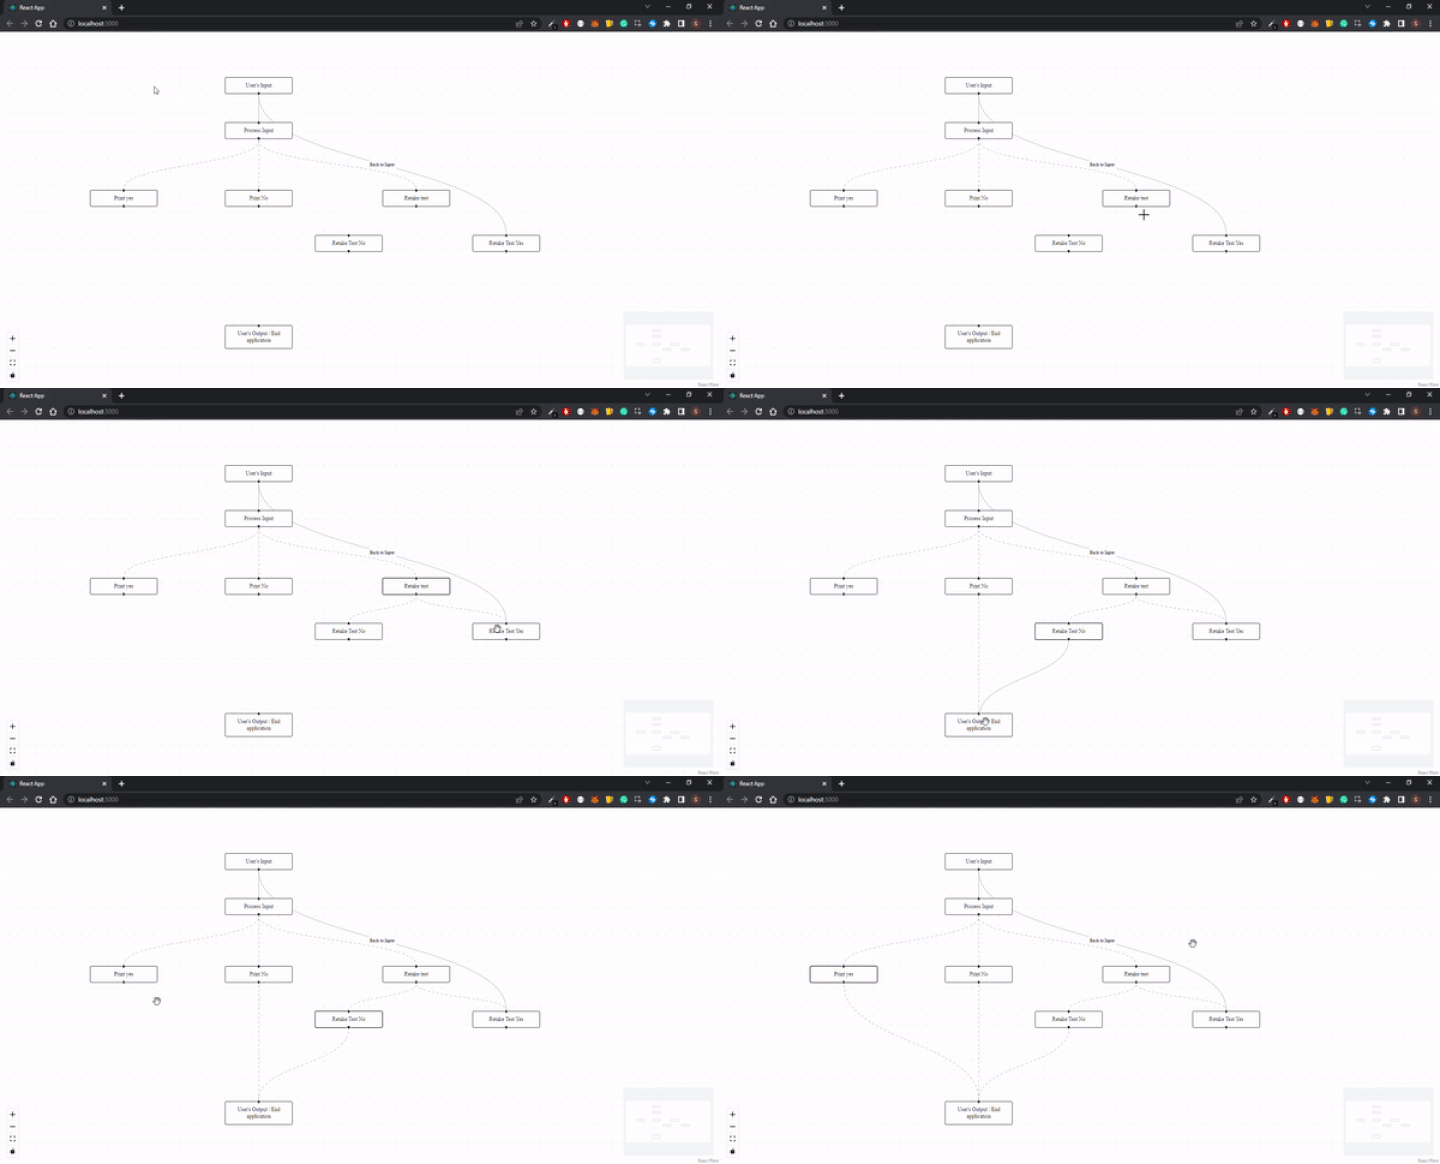
With our progress so far, we should be able to get the following result:

With many options in the development market, choosing a library that suits your requirements can be stressful. However, with React Flow, getting your project planned and architectured can be simplified, saving you stress.
The React Flow library scores excellent for project planning because of its simplicity and flexibility. React Flow is trusted by thousands of users, including small open-source development teams and organizations like Stripe and Typeform. The library has been used to create chatbot builders, music synthesizers, machine-learning tools, and more.
Despite many rivals in the market, React Flow stands out as one of the best libraries for project planning and flow and remains beneficial for users throughout the development phase of large projects.
In this article, we’ve looked at the React Flow library, its uses, and how you can plan your next React project. We’ve also built our custom flow to demonstrate the flexibility of React Flow. React Flow has other features that could be useful for your next project, so head over to the docs to learn more.
You can see the complete source code here.
Install LogRocket via npm or script tag. LogRocket.init() must be called client-side, not
server-side
$ npm i --save logrocket

// Code:

import LogRocket from 'logrocket';
LogRocket.init('app/id');
// Add to your HTML:

<script src="https://cdn.lr-ingest.com/LogRocket.min.js"></script>
<script>window.LogRocket && window.LogRocket.init('app/id');</script>
Would you be interested in joining LogRocket's developer community?
Join LogRocket’s Content Advisory Board. You’ll help inform the type of content we create and get access to exclusive meetups, social accreditation, and swag.
Sign up now
Discover how to use Gemini CLI, Google’s new open-source AI agent that brings Gemini directly to your terminal.

This article explores several proven patterns for writing safer, cleaner, and more readable code in React and TypeScript.

A breakdown of the wrapper and container CSS classes, how they’re used in real-world code, and when it makes sense to use one over the other.

This guide walks you through creating a web UI for an AI agent that browses, clicks, and extracts info from websites powered by Stagehand and Gemini.
One Reply to "Using React Flow to plan a React project"
Nice blog