
Web developers who need fast, secure, and scalable applications, often turn to Cloudflare Workers to achieve these goals. But integrating Workers with Remix, the framework that focuses on building server-rendered React applications, can be challenging. Fortunately, Superflare is here to help.

Superflare is an experimental full-stack toolkit designed to work with Cloudflare Workers, providing features like a relational ORM for D1 databases (Cloudflare queryable databases built on SQLite) and utilities for R2 storage (Cloudflare object storage).
In this article, we’ll discuss how Superflare improves the integration of Remix and Cloudflare Workers. Then, we’ll demonstrate why Superflare is a must-have for web developers looking to maximize the power of Cloudflare Workers with Remix.
For our tutorial, we’ll create a simple link shortener, similar to Bit.ly. We’ll also add an authentication system and a database to store the link.
Jump ahead:
The Replay is a weekly newsletter for dev and engineering leaders.
Delivered once a week, it's your curated guide to the most important conversations around frontend dev, emerging AI tools, and the state of modern software.
Cloudflare Workers provides serverless computing for the edge, meaning developers can write and deploy code that runs at Cloudflare’s edge locations anywhere in the world. This allows for fast and efficient execution of code and reduces latency for end users.
Superflare is built on top of Cloudflare’s primitives, which means you cannot use Superflare without using Cloudflare. Cloudflare acts as a reverse proxy that sits in front of any type of cloud infrastructure, making internet properties faster, more secure, and more reliable.
Superflare aims to provide a simpler solution by embracing vendor lock-in with Cloudflare and focusing on its core features, like D1 databases and R2 storage. It is designed to work like a “glue” between Cloudflare and your framework of choice, without dictating routing, controllers, or views.
Despite these advantages, there are a few tradeoffs to consider when using Superflare:
Using Cloudflare Workers with Remix and Superflare offers several benefits:
By combining Cloudflare Workers, Remix, and Superflare, developers can build fast, scalable, and efficient web applications that leverage the power of Cloudflare’s edge network and the modern features of Remix and Superflare.
Superflare is a versatile and powerful toolkit for building applications on Cloudflare Workers, providing essential utilities and seamless integration with popular frameworks. Here are some of Superflare’s most important features:
ActiveRecord style for data model interactions, making it easier to work with our data modelsTo demonstrate using Cloudflare Workers with Remix and Superflare, we’ll create a simple link shortener, similar to Bit.ly. For our example, we’ll add an authentication system and a database to store the shortened link.
You can access the full source code for the project on GitHub and see the demo app that we’ll build here:
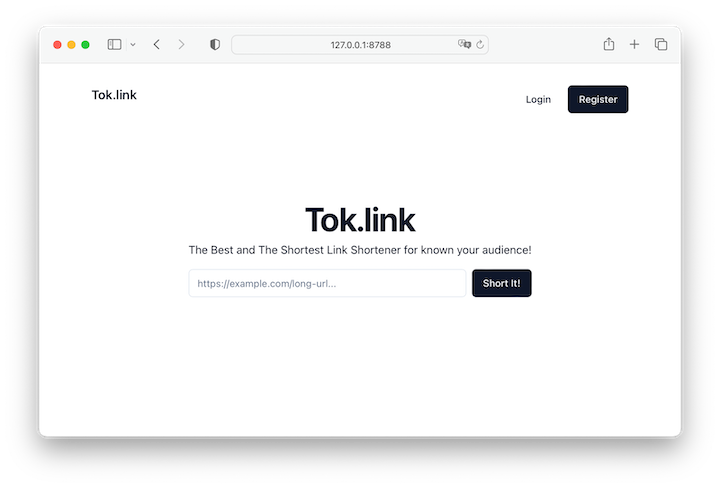
Let’s start by running the following command to create a new Superflare project:
npx superflare@latest new tok
This command will ask you about bindings for D1, R2, and KV, and will offer to create them if necessary:
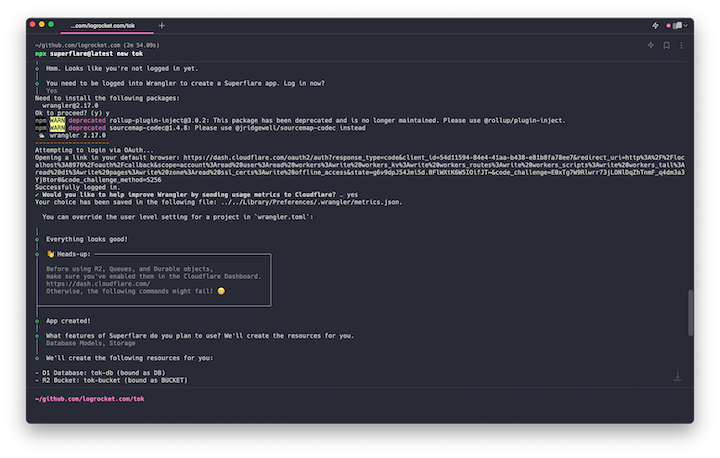
Next, run the following command to start a Superflare local development server:
npx superflare dev
Superflare uses Wrangler, the Cloudflare Workers CLI, to spin up the development server. Superflare also uses Wrangler for tasks like modifying the D1 database through migrations. Wrangler is used for generating, configuring, building, previewing, and publishing Cloudflare Workers projects from our development environment. It accesses Cloudflare OAuth token to manage Workers’ resources on our behalf.
To confirm that the local dev server is set up, open http://127.0.0.1:8788 in your browser.
Storing data in a database is one of the most critical aspects of developing a full-stack application. Fortunately, Superflare offers support for the D1 Document database from Cloudflare, which is built on top of SQLite and provides an efficient and scalable solution.
Run the Superflare database migration using the following command:
npx superflare migrate
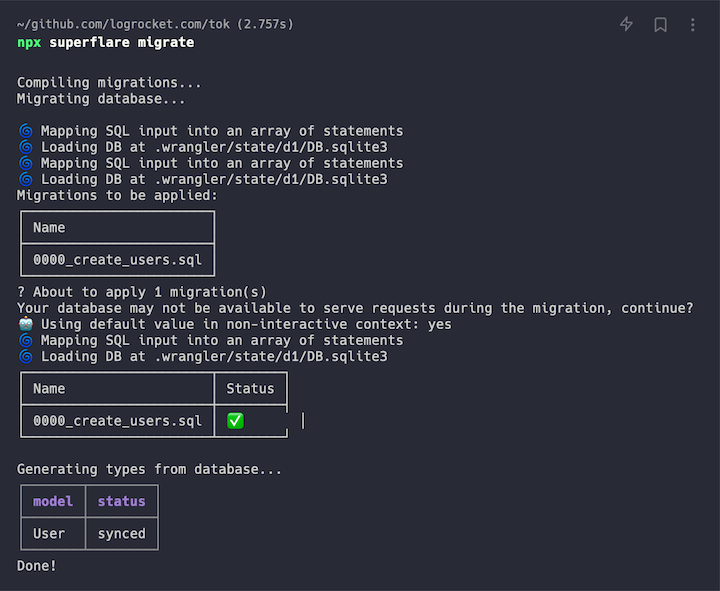
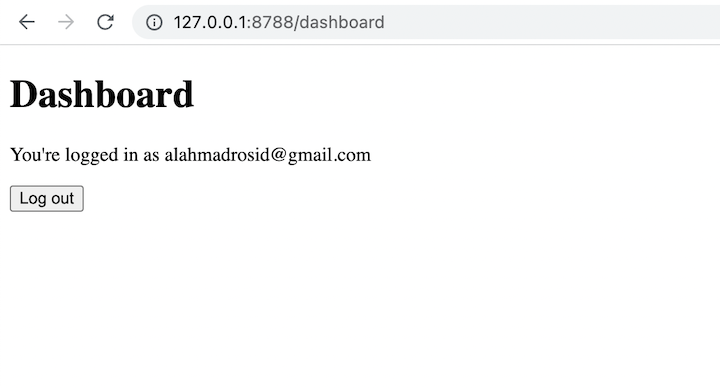
To check if everything is working, go to: http://127.0.0.1:8788/register and try to register a new user. After successful registration, you’ll see a dashboard page like this:
To create a model and migration for the D1 Document database, we can use the CLI provided by Superflare:
npx superflare generate model Path --migration
This will create a new file:
Generating model Path
Generated model Path at ~/tok/app/models/Path.ts
Migration generated at ~/tok/db/migrations/0001_create_paths.ts
To define the column we can edit the ~/tok/db/migrations/0001_create_paths.ts file:
import { Schema } from "superflare";
export default function () {
  return Schema.create("paths", (table) => {
    table.increments("id");
    table.integer("user_id");
    table.string("route").unique();
    table.string("url");
    table.string("link");
    table.timestamps();
  });
}
Now, run the migration:
npx superflare migrate
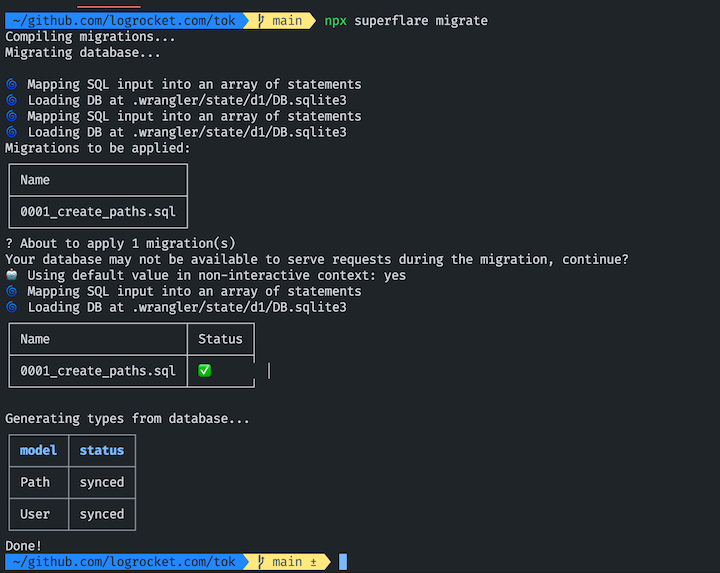
Next, let’s create one more model to store unique visitors:
npx superflare generate model Visitor --migration
Edit the schema in the ~/tok/db/migrations/0002_create_visitors.ts file, like so:
import { Schema } from "superflare";
export default function () {
  return Schema.create("paths", (table) => {
    table.increments("id");
    table.integer("user_id");
    table.integer("path_id");
    table.string("ip_address");
    table.timestamps();
  });
}
Now we can run the migration to create the tables:
npx superflare migrate
This command will generate the superflare.env.d.ts file, which will be used as our database schema type. This will enable us to access the table properties from our model.
Here’s an example of the schema properties of the User model:
...
interface UserRow {
  id: number;
  email: string;
  password: string;
  createdAt: string;
  updatedAt: string;
}
Now, let’s try out Superflare’s inbuilt authentication system.
When leveraging the Superflare CLI to create a new project, the authentication system is conveniently preconfigured.
Here are the steps necessary to successfully implement registration logic within the system:
export async function action({ request, context: { auth } }: ActionArgs) {
  if (await auth.check(User)) {
    return redirect("/dashboard");
  }
  const formData = new URLSearchParams(await request.text());
  const email = formData.get("email") as string;
  const password = formData.get("password") as string;
  if (await User.where("email", email).count()) {
    return json({ error: "Email already exists" }, { status: 400 });
  }
  const user = await User.create({
    email,
    password: await hash().make(password),
  });
  auth.login(user);
  return redirect("/dashboard");
}
Use the following code for the login logic:
export async function action({ request, context: { auth } }: ActionArgs) {
  if (await auth.check(User)) {
    return redirect("/dashboard");
  }
  const formData = new URLSearchParams(await request.text());
  const email = formData.get("email") as string;
  const password = formData.get("password") as string;
  if (await auth.attempt(User, { email, password })) {
    return redirect("/dashboard");
  }
  return json({ error: "Invalid credentials" }, { status: 400 });
}
And, use this code for the logout logic:
import { type ActionArgs, redirect } from "@remix-run/server-runtime";
export async function action({ context: { auth } }: ActionArgs) {
  auth.logout();
  return redirect("/");
}
Next, let’s create an app/routes/path.ts file to create, edit, and read the shortened links data:
import { type ActionArgs, redirect, json } from "@remix-run/server-runtime";
import { nanoid } from "nanoid";
import { Path } from "~/models/Path";
import { User } from "~/models/User";
type UpdateRequest = {
  path: Path;
  url: string;
  title?: string;
  route: string;
};
async function handleUpdate({ path, url, title, route }: UpdateRequest) {
  path.url = url;
  path.title = title || "";
  path.route = route;
  path.save();
  return redirect("/histories");
}
export async function action({ request, context: { auth } }: ActionArgs) {
  if (!(await auth.check(User))) {
    return redirect("/login");
  }
  const user = (await auth.user(User)) as User;
  const formData = new URLSearchParams(await request.text());
  let url = formData.get("url") as string;
  let title = formData.get("title") as string;
  let route = formData.get("route") as string;
  let id = formData.get("id") as unknown as number;
  if (id) {
    let path = await Path.find(id);
    if (!path) {
      return json({ error: "Path not found!" });
    }
    return handleUpdate({ path, url, title, route });
  }
  if (!route) {
    route = nanoid(6);
  }
  await Path.create({
    user_id: user.id,
    title,
    url,
    route,
  });
  return redirect("/histories");
}
The Superflare database ORM draws inspiration from Laravel; if you’ve worked with that framework before, you may already be familiar with how the ORM interface looks. When a request is captured via a Cloudflare Workers endpoint useful data, such as request headers and database instances, are provided in the action({ request, context: { auth, env } }: ActionArgs) code.
Retrieving user data from authentication is also straightforward using const user = (await auth.user(User)) as User;. The action function runs on the server when a user makes a POST request, enabling access to both user request information and the database. This is where the backend work happens.
Now, let’s create a redirect route, app/routes/$route.ts:
import { LoaderArgs, redirect } from "@remix-run/server-runtime";
import { Path } from "~/models/Path";
import { Visitor } from "~/models/Visitor";
export async function loader({ request, params }: LoaderArgs) {
  const path = await Path.where("route", params.route || "").first();
  if (!path) return redirect("/404");
  await Visitor.create({
    user_id: path.user_id,
    path_id: path.id,
    ip_address: request.headers.get("cf-connecting-ip"),
  });
  return redirect(path.url);
}
This route enables access to all URLs under the root, /, using a GET request, except for routes created within the routes folder. This implementation also grants the ability to retrieve user-requested data, including the user’s IP address, by using the request.headers.get("cf-connecting-ip") header. This feature can prove particularly advantageous in establishing unique request data.
The Superflare ORM provides a user-friendly interface for interacting with our database; however, there are certain limitations on the types of queries that can be used in the ORM. For instance, the ORM does not support the distinct query, which is essential for displaying analytical data.
Fortunately, we have the ability to access the database connection and create our own raw queries to overcome these limitations. Here’s an example of how to run custom raw queries to the D1 database:
export async function loader({ context: { auth, env } }: LoaderArgs) {
  if (!(await auth.check(User))) {
    return redirect("/login");
  }
  const user = (await auth.user(User)) as User;
  const totalPaths = await Path.where("user_id", user.id).count();
  const totalVisitor = await Visitor.where("user_id", user.id).count();
  let totalUniqueVisitor = 0;
  try {
    const query = `select COUNT(DISTINCT ip_address) AS totalUniqueVisitor from visitors where user_id = '${user.id}';`;
    console.log("query", query);
    const res = await env.DB.prepare(query).all();
    if (res.success) {
      totalUniqueVisitor = (res.results as any[])[0].totalUniqueVisitor;
      console.log("totalUniqueVisitor", totalUniqueVisitor);
      console.log("res.results", res.results);
    }
  } catch (e: any) {
    console.log("error", e);
  }
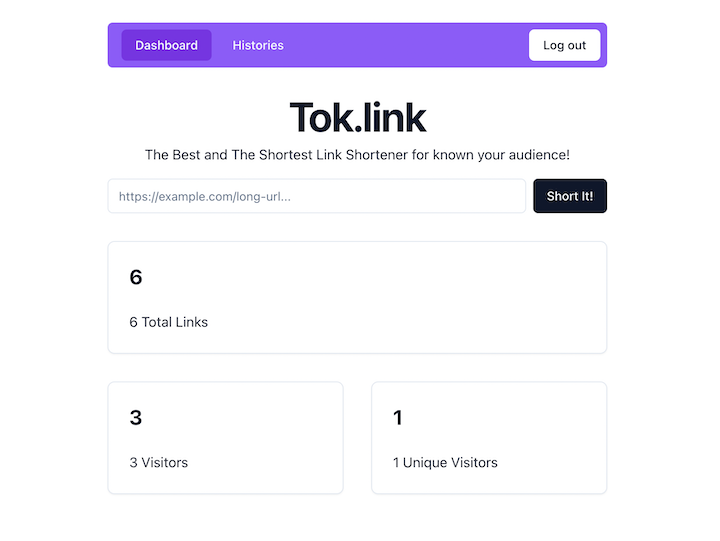
  const analytic = {
    links: {
      number: totalPaths,
      description: `${totalPaths} Total Links`,
    },
    visitor: {
      number: totalVisitor,
      description: `${totalVisitor} Visitors`,
    },
    uniqueVisitor: {
      number: totalUniqueVisitor,
      description: `${totalUniqueVisitor} Unique Visitors`,
    },
  };
  return json({
    user,
    analytic,
  });
}
Using this data, we can display analytic data:
Checking that a user is authenticated is also easy with Superflare. Here’s an example:
import { Link, useLoaderData } from "@remix-run/react";
import { LoaderArgs } from "@remix-run/server-runtime";
import { Button } from "~/components/button";
import GenerateLink from "~/components/generate-link";
import { User } from "~/models/User";
export async function loader({ context: { auth } }: LoaderArgs) {
  return {
    isAuthenticated: await auth.check(User),
  };
}
export default function Index() {
  const { isAuthenticated } = useLoaderData<typeof loader>();
  return (
    <div className="w-full h-screen grid place-content-center relative">
      <div className="absolute top-0 left-0 right-0 p-8">
        <div className="flex gap-2 container mx-auto">
          <div className="w-full">
            <a href="/" className="font-semibold text-lg">
              Tok.link
            </a>
          </div>
          <div className="flex gap-2">
            {isAuthenticated ? (
              <Link to="/dashboard">
                <Button variant="link">Dashboard</Button>
              </Link>
            ) : (
              <>
                <Link to="/login">
                  <Button variant="link">Login</Button>
                </Link>
                <Link to="/register">
                  <Button>Register</Button>
                </Link>
              </>
            )}
          </div>
        </div>
      </div>
      <GenerateLink />
    </div>
  );
}
To integrate Superflare with an existing Remix app on the Cloudflare Workers adapter, we first need to install the @superflare/remix package:
npm install @superflare/remix
Next, create a worker.ts file. We’ll use this worker to handle any incoming requests to Remix and also to serve static assets using the @awwong1/kv-asset-handler package.
Import the handleFetch function from @superflare/remix, and import your local superflare.config.ts file as config:
import { createRequestHandler } from "@remix-run/cloudflare";
import config from "./superflare.config";
import * as build from "./build";
import {
  getAssetFromKV,
  NotFoundError,
  MethodNotAllowedError,
} from "@cloudflare/kv-asset-handler";
import manifestJSON from "__STATIC_CONTENT_MANIFEST";
import { handleQueue, handleScheduled } from "superflare";
import { handleFetch } from "@superflare/remix";
let remixHandler: ReturnType<typeof createRequestHandler>;
const assetManifest = JSON.parse(manifestJSON);
export default {
  async fetch(request: Request, env: Env, ctx: ExecutionContext) {
    try {
      return await getAssetFromKV(
        {
          request,
          waitUntil(promise) {
            return ctx.waitUntil(promise);
          },
        },
        {
          ASSET_NAMESPACE: env.__STATIC_CONTENT,
          ASSET_MANIFEST: assetManifest,
        }
      );
    } catch (e) {
      if (e instanceof NotFoundError || e instanceof MethodNotAllowedError) {
        // fall through to the remix handler
      } else {
        return new Response("An unexpected error occurred", { status: 500 });
      }
    }
    if (!remixHandler) {
      remixHandler = createRequestHandler(build as any, process.env.NODE_ENV);
    }
    try {
      return handleFetch(request, env, ctx, config, remixHandler);
    } catch (reason) {
      console.error(reason);
      return new Response("Internal Server Error", { status: 500 });
    }
  }
};
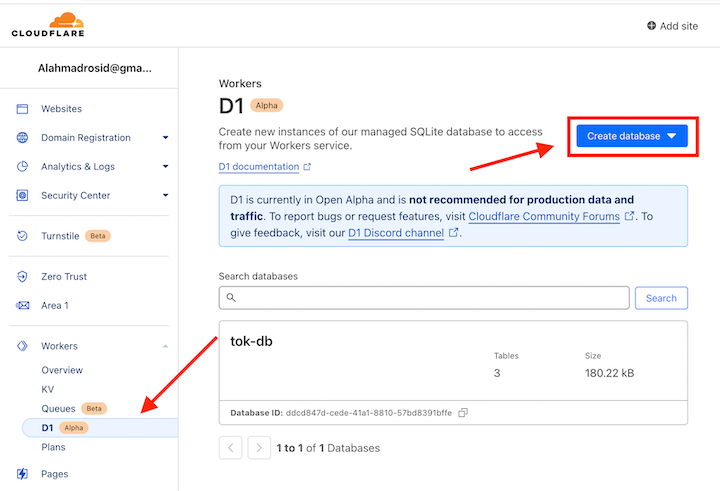
Now, create the D1 database by selecting D1 under “workers” and clicking Create database:
Next, create the wrangler.json file to store the deployment configuration:
{
  "name": "tok",
  "compatibility_flags": [
    "nodejs_compat"
  ],
  "compatibility_date": "2023-05-01",
  "site": {
    "bucket": "public"
  },
  "main": "worker.ts",
  "define": {
    "process.env.REMIX_DEV_SERVER_WS_PORT": "8002"
  },
  "d1_databases": [
    {
      "binding": "DB",
      "name": "tok-db", // create from
      "database_id": "ddcd847d-...-57bd8391bffe"
    }
  ]
}
Next, add the Cloudflare .env file, cloudflare.env.d.ts:
/// <reference types="@cloudflare/workers-types" />
/**
 * This is only used in Workers mode.
 */
declare module "__STATIC_CONTENT_MANIFEST" {
  const value: string;
  export default value;
}
declare const process: {
  env: {
    NODE_ENV: "development" | "production";
  };
};
interface Env {
  /**
   * Only used in Workers mode.
   */
  __STATIC_CONTENT: string;
  DB: D1Database;
  BUCKET: R2Bucket;
  APP_KEY: string;
  QUEUE: Queue;
  CHANNELS: DurableObjectNamespace;
}
Then, create the Superflare config file, superflare.config.ts :
import { defineConfig } from "superflare";
export default defineConfig<Env>((ctx) => {
  return {
    appKey: ctx.env.APP_KEY,
    database: {
      default: ctx.env.DB,
    },
  };
});
Now, edit the remix.env.d.ts file, like so:
/// <reference types="@remix-run/dev" />
/// <reference types="@remix-run/cloudflare" />
/// <reference types="@cloudflare/workers-types" />
import type { SuperflareAppLoadContext } from "@superflare/remix";
declare module "@remix-run/server-runtime" {
  export interface AppLoadContext extends SuperflareAppLoadContext<Env> {}
}
To deploy the Superflare project using the Remix app with Superflare, follow these steps:
APP_KEY environment variableOpen your terminal and run the following command to add the APP_KEY environment variable to your Superflare project:
npx wrangler secret put APP_KEY -j

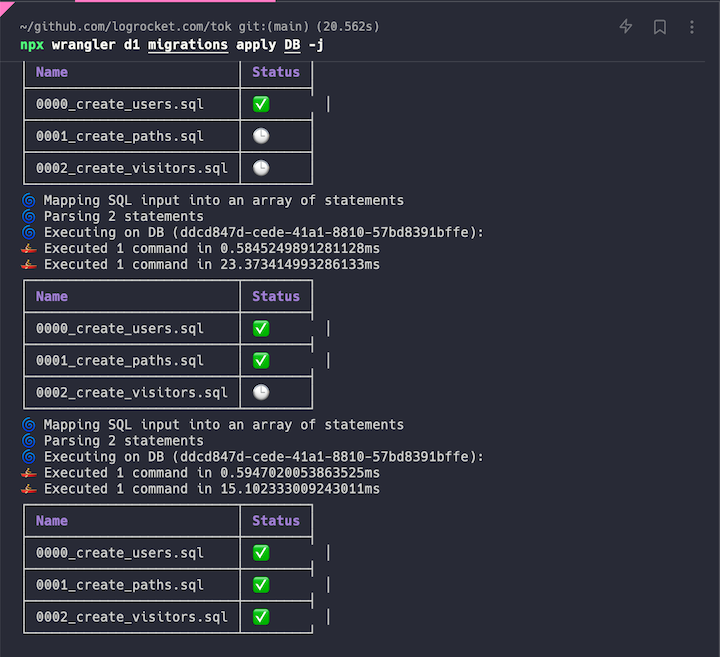
To apply the database changes to your Superflare project, run the following command in your terminal:
npx wrangler d1 migrations apply DB -j
Publish your Superflare project with the Remix app using the Wrangler CLI by running the following command in your terminal:
npx wrangler publish -j
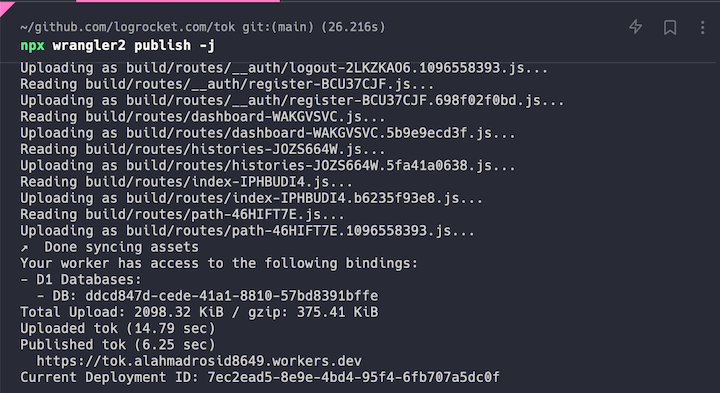
In this tutorial, we built a link shortener app with authentication and a database to demonstrate the benefits of using Cloudflare Workers with Remix and Superflare — namely, improved performance, scalability, data storage, and data integration.
The features offered by Superflare, such as authentication, ORM, and session handling, can make the development process smoother and more streamlined. Superflare is a promising toolkit for developers who are looking to build fast, efficient, and secure applications and are interested in working with Cloudflare Workers and Remix. It will be interesting to see how Superflare develops in the future.
Install LogRocket via npm or script tag. LogRocket.init() must be called client-side, not
server-side
$ npm i --save logrocket

// Code:

import LogRocket from 'logrocket';
LogRocket.init('app/id');
// Add to your HTML:

<script src="https://cdn.lr-ingest.com/LogRocket.min.js"></script>
<script>window.LogRocket && window.LogRocket.init('app/id');</script>

@container scroll-state: Replace JS scroll listeners nowCSS @container scroll-state lets you build sticky headers, snapping carousels, and scroll indicators without JavaScript. Here’s how to replace scroll listeners with clean, declarative state queries.

Explore 10 Web APIs that replace common JavaScript libraries and reduce npm dependencies, bundle size, and performance overhead.

Russ Miles, a software development expert and educator, joins the show to unpack why “developer productivity” platforms so often disappoint.

Discover what’s new in The Replay, LogRocket’s newsletter for dev and engineering leaders, in the February 18th issue.
Would you be interested in joining LogRocket's developer community?
Join LogRocket’s Content Advisory Board. You’ll help inform the type of content we create and get access to exclusive meetups, social accreditation, and swag.
Sign up now