For mobile projects, tabs play a crucial role in guiding users through an application flow. There are many variations of tabs that can be used, such as bottom or top tabs.

If you’re building your application in React Native, there are several libraries that offer the ability to add tabs for you. In this article, we’ll be taking a look at some of the popular ones, and discussing the best ways to add tabs to your mobile app.
This article focuses on tab navigation that integrates with React Navigation, one of the most common navigation libraries and the one that React recommends. Some others include react-native-router-flux or react-native-navigation, but I’ve always found React Navigation easier to use, and more extensible to build high quality native apps. Plus, it’s the most popular and has the most libraries available.
The Replay is a weekly newsletter for dev and engineering leaders.
Delivered once a week, it's your curated guide to the most important conversations around frontend dev, emerging AI tools, and the state of modern software.
To understand how these libraries work, we’ll first have to talk about navigation. In mobile apps, you have what’s called a “stack” of screens. React Navigation serves as the base library for actually pushing and clearing this stack.
Above the base navigation library you have your navigation strategy, such as drawers, stacks, or tabs. These all interact with React Navigation to push or clear screens from the stack in different ways.
For example, this is the configuration for a simple stack navigator that provides a single screen:
import * as React from 'react';
import { View, Text } from 'react-native';
import { NavigationContainer } from '@react-navigation/native';
import { createStackNavigator } from '@react-navigation/stack';

function HomeScreen() {
  return (
    <View style={{ flex: 1, alignItems: 'center', justifyContent: 'center' }}>
      <Text>Home Screen</Text>
    </View>
  );
}

const Stack = createStackNavigator();

function App() {
  return (
    <NavigationContainer>
      <Stack.Navigator>
        <Stack.Screen name="Home" component={HomeScreen} />
      </Stack.Navigator>
    </NavigationContainer>
  );
}

export default App;
You can see we create a navigation object, then create a wrapper Navigator, and under it, various screens using Stack.Screen.
This is the most basic way to represent your navigation, but is also super simple to use. This is a great solution when working with applications that are simple or have very few screens.
The first library we’ll take a look at is the Bottom Tabs Navigator. The most basic option for providing tabbed navigation, this creates “A simple tab bar on the bottom of the screen that lets you switch between different routes,” according to the React Navigation documentation.
Routes are lazily initialized, so their screen components are not mounted until they are first focused.
Using this library is very simple: make sure you have @react-navigation/native installed, then install [@react-navigation/bottom-tabs](https://github.com/react-navigation/react-navigation/tree/main/packages/bottom-tabs).
Usage is very similar to the stack navigator we saw in the previous example.
This component is highly configurable to fit your needs. You can pass in a tab bar component to handle rendering and visualizing the tab bar on the bottom.
Some other configuration options include the ability to customize the style of the default tab bar or screens or listen to different events.
These bottom tabs are super simple and plain, but also very extensible. If you’re trying to build something more advanced for your tabbed navigation, this is a great library to build around and style because it exposes almost all of the styling options to the user.
For example, you can pass in your own button using the tabBarButton prop or directly style the tab bar with the tabBarStyle prop.
This makes it really powerful to use in applications where you need a lot of customization.
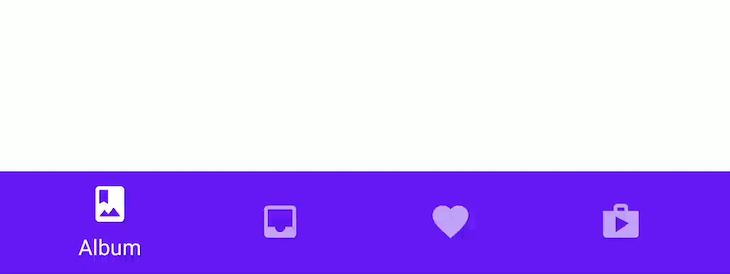
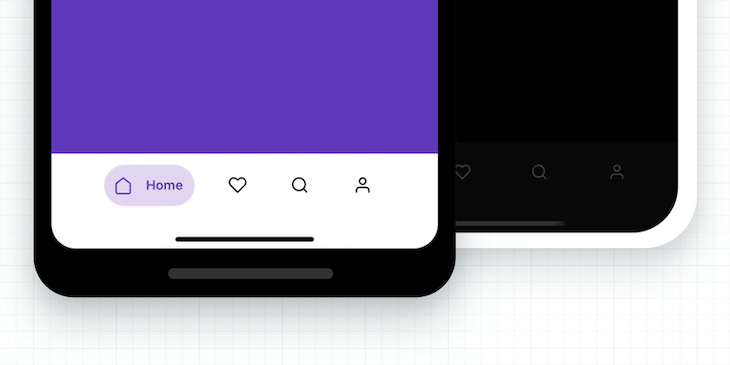
If you’re building your app with the Material Design spec in mind, the Material Bottom Tabs Navigator might be a great option for you.
This library wraps around the react-native-paper BottomNavigation component and creates a Material Design compliant navigation option that’s easy to use right out of the box!
This library is very easy to set up and use:
import { createMaterialBottomTabNavigator } from '@react-navigation/material-bottom-tabs';

const Tab = createMaterialBottomTabNavigator();

function MyTabs() {
  return (
    <Tab.Navigator>
      <Tab.Screen name="Home" component={HomeScreen} />
      <Tab.Screen name="Settings" component={SettingsScreen} />
    </Tab.Navigator>
  );
}
Because this is meant to be an easy-to-use, Material-compliant library, it doesn’t include many options to customize the style of the tabs without using the theming support that react-native-paper provides.
The Material Bottom Tabs Navigator is a great solution when you’re building a Material app, or need a solution that you can integrate with very few configurations. It integrates great with Material theming. Unfortunately, because it’s Material, you can’t customize the style as much, so it’s probably not great for an application that requires a lot of custom styling.
If a bottom positioned navigator doesn’t appeal to you and you want an out-of-the-box solution that uses a more TabView-like interface, this is the library for you!
Material Top Tabs Navigator wraps around react-native-tab-view to provide a great-looking tabbed navigator for your React Native application that aligns with the Material theme.
Using this great library is super simple, just install the dependencies:
yarn add @react-navigation/material-top-tabs react-native-tab-view@^2.16.0
Then set it up like so:
import { createMaterialTopTabNavigator } from '@react-navigation/material-top-tabs';

const Tab = createMaterialTopTabNavigator();

function MyTabs() {
  return (
    <Tab.Navigator>
      <Tab.Screen name="Home" component={HomeScreen} />
      <Tab.Screen name="Settings" component={SettingsScreen} />
    </Tab.Navigator>
  );
}
This library can be easily customized to fit whatever style or usage needs your app needs.
While top tabs aren’t great for your main navigation strategy, they can be useful for submenus or hiding away large amounts of detail that may not be initially valuable to users. Because these are styled with Material, they fit great into a Material app, but won’t be very customizable for specific designs.
If you’r looking for some more advanced functionality in your tab bar, MultiBar is a great library with a feature-packed tab bar.
You can see extended actions can be added on the advanced button, like the popout actions on the main button.
By using the MultiBarButton component you can create a series of popout actions.
While Multibar has some great additional features, the API is harder to use as a developer and a bit more intricate than the other libraries. However, the expanding multibar is a great, unique addition that packs a lot of potential for additional functionality.
If you’re looking for some more animations in your tab bar, Animated TabBar is the library for you. It integrates nicely with React Navigation, and has beautiful animations built in, making it a great drop-in solution for your app.
To install:
yarn add @gorhom/animated-tabbar
You’ll also need to install react-native-reanimated, react-native-gesture-handler, and react-native-svg for this library to work properly.
This library includes three default animations,Bubble, Flashy, and Material that are all animated and look great with the app.
If you can use one of the default animations, this is a beautiful choice for your applications. Although relatively heavyweight, it’s still optimized to run at 60fps.
It can be a bit more difficult to write your own animation styles, but this library still provides a strong base for you to do so.
The five options for tabbed navigation in this guide provide a great array of choices (some prebuilt and some meant to be more customized) to implement tabbed navigation into your React app. Happy building!

LogRocket's Galileo AI watches sessions for you and and surfaces the technical and usability issues holding back your React Native apps.
LogRocket also helps you increase conversion rates and product usage by showing you exactly how users are interacting with your app. LogRocket's product analytics features surface the reasons why users don't complete a particular flow or don't adopt a new feature.
Start proactively monitoring your React Native apps — try LogRocket for free.

Write agent-friendly API documentation with OpenAPI, clear schemas, workflow guidance, and llms.txt for safer AI automation.

Local AI proxy tutorial for detecting, masking, and rehydrating PII before prompts reach cloud LLMs.

Learn how Graph RAG uses connected knowledge structures to improve retrieval beyond simple text similarity.

Learn how sibling-index() enables clean, JavaScript-free stagger animations using native CSS.
Hey there, want to help make our blog better?
Join LogRocket’s Content Advisory Board. You’ll help inform the type of content we create and get access to exclusive meetups, social accreditation, and swag.
Sign up now

