Editor’s note: This post was updated 9 March 2022 to ensure all testing and error handling patterns are up to date, and expand the error handling options section to include more examples.

With time, more developers are using frameworks built on leading JavaScript libraries, such as React and Vue. One of these is Next.js, a framework that makes working with React even easier by offering greater scaling flexibility for applications.
Testing and error handling are two concepts that are really worth exploring when preparing to use a new framework, and it’s no different with Next.js. This is because they both ensure developers write good code, which will eventually resound in the overall software quality — testing makes developers write efficient code, which saves them hours of debugging.
Error handling, on other hand, makes our application more user-friendly. This is because developers can ensure that any error a user encounters is gracefully handled by redirecting the user to an appropriate custom error page, which greatly enhances the user experience. Next.js takes this a step further and provides APIs for proper error handling.
In this article, we will learn more about testing and error handling in Next.js. We will also look at the similarities and differences of testing and error handling in Next.js as they compare to other JavaScript libraries and frameworks.
This article aims to reveal the different ways to run tests and handle errors in a Next.js application through the following sections:
This article covers advanced Next.js topics — testing and error handling — and as a result, you need some basic knowledge of Next.js concepts to follow along.
Below are the prerequisites you should have to get the best out of this article:
Testing libraries such as Jest and Cypress can be used to perform unit testing on JavaScript and its frameworks or libraries, including Next.js.
JavaScript also provides some error handling APIs: the throw statement and the try…catch statement. These can be used within the API of a JavaScript framework or library to handle errors, such as with Next.js APIs, getStaticProps, getServerSideProps, and in Next.js middleware by using the try…catch statement. As seen below:
export const getStaticProps = async () => {
  try {
    const { data, errors } = await fetchSomeData(`https://...`); // call to get data
    if (errors || !data) {
      return { notFound: true };
    }
    return { props: { data } };
  } catch () {
    return { notFound: true };
  }
};
The getStaticProps function should return an object containing either props, redirect, or notFound. Setting the notFound prop to true in the catch block, we trigger Next.js’s internal error handling system to return a 404 page. We will elaborate on these in a subsequent section in this article.
Let’s dive deeper into testing Next.js apps in the next section.
The Next.js documentation recommends three testing libraries:
This list should come as no surprise; since Next.js is a React framework, the testing libraries are the same.
In this article, however, we will learn about testing Next.js applications using Cypress. Let’s get started in the next sub-section.
One way to run tests on a Next.js application is through Cypress, an end-to-end, JavaScript-based testing framework. First, you need to create a basic application with Next.js, then install Cypress and run tests. Begin by navigating to your terminal and creating your application:
npx create-next-app nextjs-starter-app

# then navigate to the application and begin the development server

cd nextjs-starter-app
even if there was a successfully generated page before.
# then start a development server on http://localhost:3000

npm run dev
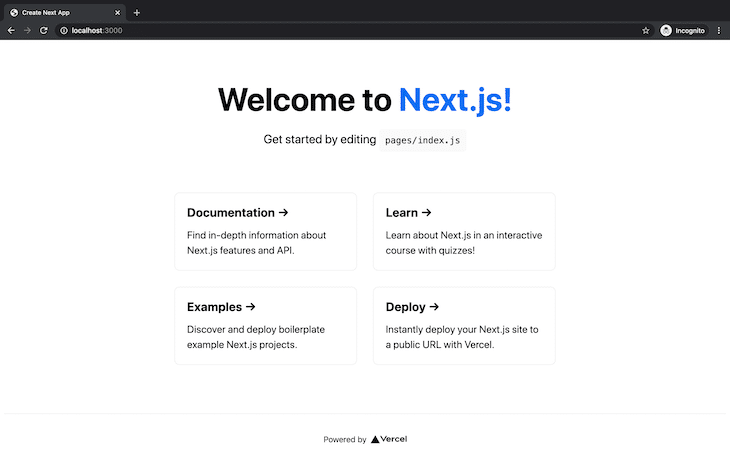
Next, open the app on http://localhost:3000. This launches a generic welcome page:
Now, install Cypress to demonstrate how basic tests can be run. Navigate back to the terminal and run a command to set up Cypress in your application:
npm install cypress --save-dev
Once this is done, you need to include a way to launch Cypress from the terminal. To do this, create a test key in the scripts object of the application’s package.json file and assign cypress open as a property:
// package.json

  "scripts": {
    "test": "cypress open"
  }
Input the following command in the terminal to launch Cypress:
npm run test
This opens up Cypress’s test suite, where you can view and run tests on your project. You’ll notice there are a handful of example tests already in place to demonstrate how Cypress works. You can learn more by running the sample integration specs seen below:

To build and run your first test, navigate to the newly created Cypress folder in your application.
Write the scripts for your tests and save them in the integrations folder. It’s recommended you delete the sample tests in the folder first. Create a file and name it deploy.spec.js.
# integration/examples/deploy.spec.js

context('Deploy', () => {
    beforeEach(() => {
      cy.visit('http://localhost:3000');
    });

    it('should click on the Deploy section in the homepage', () => {
      cy.get('h3')
        .contains('Deploy')
        .click()
    });
  });
In the code sample above, tests should carry out the following functions:
The third function exposes your test to CORS errors. To prevent this, disable web security in the cypress.json file:
{
    "chromeWebSecurity": false
}

#  Do note that this isn't advisable as a practice in production
You need to autostart your development server before executing your tests. To achieve this, navigate to the terminal and install a tool called start-server-and-test.
npm install start-server-and-test --save-dev
Next, in your package.json file, you’ll set up instructions in the scripts object. This will enable you to launch your development server first and then open Cypress:
"scripts": {
    "test": "cypress open",
    "server": "start-server-and-test dev 3000 test"
  }
Now you’re all set! Navigate to your terminal to launch your server and tests with the command npm run server. Your tests should launch just like this:
When dealing with bigger applications, you may find out that you need to test routes and endpoints. You can also achieve this with Cypress. In your application, navigate to the pages folder and create a new folder called api.
In this folder, create a file called books.js, which will store the data and functions you need for your API:
// pages/api/books.js

export default function books(req, res) {
  res.statusCode = 200;
  res.setHeader("Content-Type", "application/json");
  return res.json([
    {
      id: 1,
      book: "The Firm",
      author: "John Grisham",
    },
    {
      id: 2,
      book: "Cracking the PM interview",
      author: "Jackie Bavaro",
    },
    {
      id: 3,
      book: "Fools Die",
      author: "Mario Puzo",
    },
  ]);
}
Next, create a script for testing. Navigate to the integrations/examples folder in cypress where you’ll define the tests for your API route:
// integration/examples/books.spec.js

describe("Book test", () => {
  it("Confirms the number of books in your local library", () => {
    cy.visit("http://localhost:3000");
    cy.request("GET", "api/books").as("books");
    cy.get("@books").should((response) => {
      expect(response.status).to.eq(200);
      expect(response).to.have.property("headers");
      expect(response).to.have.property("duration");
      expect(response.body).to.have.length(3);
    });
  });
});
Basically, the test expects the following from the books endpoint’s response:
200Now, take a look. Launch your server and tests like before; you should have this result:
In the next section, we will delve into Next.js error handling in detail.
There are three kinds of errors in Next.js; we’ll cover each one below.
These are runtime errors that are thrown during development in your Next.js application. They occur as an error overlay or modal that covers the webpage as seen below:

This error is not visible in production, and it is only thrown when the development server is running. The error overlay often gives us useful tips for fixing the error, and once the development error is handled, the overlay disappears.
As a framework built on top of the React library, Next.js has access to React APIs, which means that client errors in Next.js are handled gracefully using the React Error Boundary API.
In Next.js, the ErrorBoundary component keeps track of a hasError boolean state, which tells the ErrorBoundary to either render the children components, or a fallback UI, in cases where an error occurred.
To use an ErrorBoundary component in Next.js, create a React class component as seen below:
class ErrorBoundary extends React.Component {
  constructor(props) {
    super(props)

    // Define a state variable to track whether is an error or not
    this.state = { hasError: false }
  }
  static getDerivedStateFromError(error) {
    // Update state so the next render will show the fallback UI

    return { hasError: true }
  }
  componentDidCatch(error, errorInfo) {
    // You can use your own error logging service here
    console.log({ error, errorInfo })
  }
  render() {
    // Check if the error is thrown
    if (this.state.hasError) {
      // You can render any custom fallback UI
      return (
        <div>
          <h2>Oops, there is an error!</h2>
          <button
            type="button"
            onClick={() => this.setState({ hasError: false })}
          >
            Try again?
          </button>
        </div>
      )
    }

    // Return children components in case of no error

    return this.props.children
  }
}

export default ErrorBoundary
Now, import this component into the pages/_app.js file and wrap the Component prop as seen below:
// Import the ErrorBoundary component
import ErrorBoundary from '../components/ErrorBoundary'

function MyApp({ Component, pageProps }) {
  return (
    // Wrap the Component prop with ErrorBoundary component
    <ErrorBoundary FallbackComponent={ErrorFallback}>
      <Component {...pageProps} />
    </ErrorBoundary>
  )
}

export default MyApp
These are errors that occur in Next.js data fetching methods such as getStaticProps, getServerSideProps, getStaticPaths, and in Next.js middlewares. When an error occurs in any of these APIs, we can handle the error inside a try…catch block by rendering a Next.js custom error page, as shown in our previous example.
By default, Next.js provides a static 500 page to handle these errors, which we can customize by creating custom error pages, such as a custom 404 or 500 page.
We can handle our errors more intelligently if we explore the Next.js data fetching libraries return values, as seen below:
export async function getServerSideProps(context) {
  const result = await fetchData(`https://...`) // fetch remote data
  const errorCode = result.ok ? false : result.statusCode
  const data = await result.json()

  if (!data) {
    return {
      redirect: {
        destination: '/',
        permanent: false,
      },
    }
  }

  return {
    props: {errorCode, data }, // will be passed to the page component as props
  }
}
The above error handling pattern can be used in other Next.js data fetching methods. In our code above, if the resource is not found, we redirect to a custom destination using the redirect prop.
We also returned an error object in this example, which can be used in our Next.js Error component to render a custom view depending on the error status code.
This is an advanced error handling pattern in Next.js, which we’ll learn more about it in the section below.
Nextjs provides an inbuilt Error component that handles both server-side and client-side 500 errors. To customize this component, create a pages/_error.js file with the following code:
function Error({ statusCode }) {
  return (
    <p>
      {statusCode
        ? `An error ${statusCode} occurred on server`
        : 'An error occurred on client'}
    </p>
  )
}

Error.getInitialProps = ({ res, err }) => {
  const statusCode = res ? res.statusCode : err ? err.statusCode : 404
  return { statusCode }
}

export default Error
Now, to reuse the Error component in any part of our application, we import it and use the getServerSideProps method to pre-render our error on each request:
import Error from 'next/error'

export async function getServerSideProps() {
  const result = await fetchSomeData('https://...')
  const errorCode = result.ok ? false : result.statusCode
  const data = await result.json()

  return {
    props: { errorCode, data },
  }
}

export default function Page({ errorCode, data }) {
  if (errorCode) {
    return <Error statusCode={errorCode} />
  }

  return (
      <div>...</div> // jsx code
    )
}
Next.js provides an awesome experience that is geared towards giving developers a lot of options when working with this framework. Working with Cypress equips you with methods and functions that let you freely define and alter your tests as needed. An error in Next.js can be customized as needed and imported into multiple components.
Debugging Next applications can be difficult, especially when users experience issues that are difficult to reproduce. If you’re interested in monitoring and tracking state, automatically surfacing JavaScript errors, and tracking slow network requests and component load time, try LogRocket.
LogRocket captures console logs, errors, network requests, and pixel-perfect DOM recordings from user sessions and lets you replay them as users saw it, eliminating guesswork around why bugs happen — compatible with all frameworks.
LogRocket's Galileo AI watches sessions for you, instantly identifying and explaining user struggles with automated monitoring of your entire product experience.
The LogRocket Redux middleware package adds an extra layer of visibility into your user sessions. LogRocket logs all actions and state from your Redux stores.


Modernize how you debug your Next.js apps — start monitoring for free.

Enabled React Compiler v1.0 on a production Next.js app. Here’s every warning, breakage, and silent opt-out I documented — and what actually worked.

We built the same app in TanStack Start RSC and Next.js RSC. TanStack shipped 40% less JS and built 4x faster — but Next.js is still the safer production bet.

From RSC vulnerabilities and the Vercel breach to TypeScript 7.0 Beta and AI agents — the nine frontend storylines that defined H1 2026, ranked.

AI tools generate working React code fast, but miss race conditions, empty states, debouncing, and accessibility. Here’s how to catch bugs before production.
Hey there, want to help make our blog better?
Join LogRocket’s Content Advisory Board. You’ll help inform the type of content we create and get access to exclusive meetups, social accreditation, and swag.
Sign up now

