TanStack Start is a new full-stack React framework built on Vite, Nitro, and TanStack Router. The framework is packed with features like Server Side Rendering (SSR), Server functions, API routes, and so much more.

Although TanStack Start’s development is still in its early stages, the documentation shows it is already safe to use in production.
With the benefits it presents, TanStack Start might seem like the right framework for your next project. However, choosing it comes with some downsides, including a relatively small community and less comprehensive documentation, among a few others.
This post explains how TanStack Start works and features a tutorial on how to build a simple developer portfolio — styled with Tailwind CSS — in the framework. We’ll also summarize the pros and cons of choosing TanStack Start for a project. To follow along, you need knowledge of React and TypeScript.
Here are some notable features of TanStack Start:
Because TanStack Start is a full-stack framework, using it guarantees type safety on both the client and server sections of an application. This also makes it easy for both sections to have shared types (like form validation types).
These are functions that can be invoked from either the client or the server, but will always run on the server. In TanStack Start, one can use server functions to fetch data for routes, query a database, or perform any other actions that should run on a server. It is important to note that TanStack Start allows server functions to be further extended with middleware.
With API routes, a developer can create backend APIs for applications. This means that there’s mostly no need for a separate backend server when working with TanStack Start. API routes use a file-based convention and are saved inside the /app/routes/api directory of a TanStack Start project.
TanStack Start can render applications using both SSR and static prerendering. SSR and prerendering lead to faster page loads, which can improve user experience and SEO.
TanStack Router (which is a popular alternative to React Router) handles the routing in TanStack Start. The routing library has important features such as typesafe navigation, data loading with SWR caching, and routing middleware, to mention but a few. Using TanStack Start means adopting these benefits as well.
Because Vite powers TanStack Start, the development server of the framework loads quickly. Similarly, the hot module replacement works instantly. With TanStack Start, the developer maximizes time spent building a project.
At the time of writing, there are two different ways of installing TanStack Start. You can either clone a template using degit, or set it up from scratch. This section of the article shows how to set up TanStack Start from scratch using its individual dependencies and files. In addition, it explains how the framework works with each dependency/file.
First, create a folder for the TanStack Start project, then cd into that folder:
mkdir tanstack-app
cd tanstack-app
After that, initialize npm for the project:
npm init -y
The TanStack Start documentation highly recommends building with TypeScript, so install it as a dev dependency:
npm install --save-dev typescript
Create a configuration file for the TypeScript compiler (tsconfig.json) in the root folder of the project. The TanStack documentation suggests the configuration file has at least the following options:
//tsconfig.json
{
  "compilerOptions": {
    "jsx": "react-jsx",
    "moduleResolution": "Bundler",
    "module": "ESNext",
    "target": "ES2022",
    "skipLibCheck": true,
    "strictNullChecks": true,
  }
}
Next, install the React and React DOM npm packages. They serve as the rendering engine for the user interface. Also, install their types for type safety while using the packages:
npm install react react-dom
npm install --save-dev @types/react @types/react-dom
Next, install the Vite plugin for React, together with vite-tsconfig-paths. The latter is a Vite plugin that instantly resolves path aliases:
npm install --save-dev @vitejs/plugin-react vite-tsconfig-paths
To wrap up the installations, add npm packages for TanStack Start, TanStack Router, and Vinxi. Vinxi is a tool used to build full-stack web applications (and even opinionated full-stack frameworks) with Vite. It is an important foundation of the TanStack Start framework:
The TanStack Start team has promised to develop a custom Vite plugin to replace Vinxi in the future. However, TanStack Start still relies heavily on it for now.
After the installations, open the package.json file and add the following scripts:
// package.json
{
  // ...
  "type": "module",
  "scripts": {
    "dev": "vinxi dev",
    "build": "vinxi build",
    "start": "vinxi start"
  }
}
These scripts instruct the framework to use Vinxi for starting up a development server, bundling production builds, and serving the production build. Make sure to also set "type" to "module" so that Vite can properly transpile the React code for a browser.
In the root directory, create a file app.config.ts. This config file is for initializing installed Vite plugins. Use the file to initialize the vite-tsconfig-paths plugin:
// app.config.ts
import { defineConfig } from '@tanstack/react-start/config';
import tsConfigPaths from 'vite-tsconfig-paths';

export default defineConfig({
  vite: {
    plugins: [
      tsConfigPaths({
        projects: ['./tsconfig.json'],
      }),
    ],
  },
})
With the app config done, set up the framework’s file structure. Use the file tree below as a map to create files in appropriate locations:
.
├── app/
│   ├── routes/
│   │   └── `__root.tsx`
│   ├── `client.tsx`
│   ├── `router.tsx`
│   ├── `routeTree.gen.ts`
│   └── `ssr.tsx`
├── `.gitignore`
├── `app.config.ts`
├── `package.json`
└── `tsconfig.json`
The app/router.tsx file configures TanStack Router. It imports a route tree (which is automatically generated) and allows control for options like scroll restoration. Add the following to the file and save it:
// app/router.tsx
import { createRouter as createTanStackRouter } from '@tanstack/react-router';
import { routeTree } from './routeTree.gen';

export function createRouter() {
  const router = createTanStackRouter({
    routeTree,
    scrollRestoration: true,
  });
  return router;
}

declare module '@tanstack/react-router' {
  interface Register {
    router: ReturnType<typeof createRouter>;
  }
}
In the app/ssr.tsx file, import the newly created createRouter function, alongside other server utilities from @tanstack/react-start. This file allows the framework to handle SSR, and properly serve to the client whatever route a user requests:
// app/ssr.tsx
import {
  createStartHandler,
  defaultStreamHandler,
} from '@tanstack/react-start/server';
import { getRouterManifest } from '@tanstack/react-start/router-manifest';

import { createRouter } from './router';

export default createStartHandler({
  createRouter,
  getRouterManifest,
})(defaultStreamHandler);
Likewise, import the createRouter function into the app/client.tsx. This file is the client entry point and handles any functionality related to client-side routing. It is responsible for hydrating the client-side after the user gets a resolved route from the server:
// app/client.tsx
/// <reference types="vinxi/types/client" />
import { hydrateRoot } from 'react-dom/client';
import { StartClient } from '@tanstack/react-start';
import { createRouter } from './router';

const router = createRouter();

hydrateRoot(document, <StartClient router={router} />);
With all of that done, open the __root.tsx file to set up the root route of the application. This is a route that is always rendered, so it’s a good place to set up global client configurations like default HTML meta tags, and importing a Tailwind CSS compiled file. Add the following to the file:
// app/routes/__root.tsx
import {
  Outlet,
  createRootRoute,
  HeadContent,
  Scripts,
} from '@tanstack/react-router';
import type { ReactNode } from 'react';

export const Route = createRootRoute({
  head: () => ({
    meta: [
      {
        charSet: 'utf-8',
      },
      {
        name: 'viewport',
        content: 'width=device-width, initial-scale=1',
      },
      {
        title: 'TanStack Start Starter',
      },
    ],
  }),
  component: RootComponent,
});

function RootComponent() {
  return (
    <RootDocument>
      <Outlet />
    </RootDocument>
  );
}

function RootDocument({ children }: Readonly<{ children: ReactNode }>) {
  return (
    <html>
      <head>
        <HeadContent />
      </head>
      <body>
        {children}
        <Scripts />
      </body>
    </html>
  );
}
Next, create an index route using the createFileRoute function. Because TanStack Router works with file-based routing, every route needs a new file (inside the app/rooute directory).
Create the file app/routes/index.ts as your first route. For the purpose of illustration, this route will display a h1 that says “Hello, World!”:
// app/routes/index.tsx
import { createFileRoute } from '@tanstack/react-router';

export const Route = createFileRoute('/')({
  component: Home,
});

function Home() {
  return <h1>Hello, World!</h1>;
}
Finally, start the development server from the CLI:
npm run dev
This starts a localhost server with the address: http://localhost:3000. Open that URL in the browser. If you followed the above steps accurately, you should have this output:

With that, you have created a TanStack Start project from scratch. You imported the necessary libraries and now have a better idea of how the framework uses them.
Make sure to exclude node_modules and any .env files from being tracked by Git:
# .gitignore
node_modules/
.env
This section is a tutorial that shows how to build a project with TanStack Start. The project is a simple developer portfolio. It showcases the use cases of TanStack Start’s features such as routing, SSR, data loading with route loaders, client-side navigation, and server functions. The final source code of the project can be found here on GitHub.
To use Tailwind CSS to style a TanStack Start project, install Tailwind and its Vite plugin:
npm install tailwindcss @tailwindcss/vite
Initialize the plugin in app.config.ts (the application’s config file):
// ...
import tailwindcss from '@tailwindcss/vite';
export default defineConfig({
  vite: {
    // ...
      tailwindcss(),
    ],
  },
});
Next, create a file app/styles/app.css. This file will be the main stylesheet of the application. Vite will send compiled Tailwind styles of the project into this file. Inside the file, add the following:
/* app/styles/app.css */
@import 'tailwindcss';
Finally, import the CSS file into the root route of the application. Link to the stylesheet in the head tag of the application. That way, every part of the application will have access to the compiled Tailwind styles:
//...
import appCSS from '../styles/app.css?url';

export const Route = createRootRoute({
  head: () => ({
    // ...
    links: [{ rel: 'stylesheet', href: appCSS }],
  })
  // ...
})

// ...
Now, you can use Tailwind classes in the project.
This project uses a couple of icons from the React Icons library, so install the react-icons npm package:
npm install react-icons
Create a new folder app/components for storing components of the application. The first component to create is a header that will be present in every route of the application. Create a file Header.tsx and add the following:
// app/components/Header.tsx
import { Link } from '@tanstack/react-router';

const Header = () => {
  return (
    <header className='bg-gray-100 flex justify-between px-8 py-3 items-center'>
      <h1 className='text-2xl'>
        <Link to='/'>Portfolio</Link>
      </h1>
      <ul className='flex gap-5 text-blue-900'>
        <li>
          <Link to='/'>Home</Link>
        </li>
        <li>
          <Link to='/projects'>Projects</Link>
        </li>
        <li>
          <Link to='/contact'>Contact</Link>
        </li>
      </ul>
    </header>
  );
};

export default Header;
Notice how the above snippet uses the <Link> component from TanStack Router. <Link> is used to create internal links in a TanStack Start project. Because the Header component should be present in every route, import it into the root route app/routes/__root.tsx. Notice the <main> tag and a few Tailwind styles added to the root component for styling and semantic purposes:
// app/routes/__root.tsx
// ...
import Header from '../components/Header';

// ...

function RootComponent() {
  return (
    <RootDocument>
      <Header />
      <main className='max-w-4xl mx-auto pt-10'>
        <Outlet />
      </main>
    </RootDocument>
  );
}
// ...
Create a new file inside the component folder called Hero.tsx. The file will contain a hero component for the home page of the portfolio website:
// app/components/Hero.tsx
import { FaXTwitter, FaLinkedinIn, FaGithub } from 'react-icons/fa6';

const Hero = () => {
  return (
    <div className='bg-blue-900 text-gray-50 py-10 px-15 flex gap-15 rounded-2xl items-center'>
      <div>
        <img
          src='https://avatars.githubusercontent.com/u/58449038?v=4'
          alt='Profile Picture'
          className='h-50 rounded-full'
        />
      </div>
      <div>
        <span className='text-3xl mb-3 block'>Amazing Enyichi Agu</span>
        <p className='mb-5'>generic and easily forgettable developer bio</p>
        <div className='text-2xl flex gap-3'>
          <a href='#'>
            <FaGithub />
          </a>
          <a href='#'>
            <FaXTwitter />
          </a>
          <a href='#'>
            <FaLinkedinIn />
          </a>
        </div>
      </div>
    </div>
  );
};

export default Hero;
Create another component file SkillBox.tsx. Inside the file, add the following:
// app/components/SkillBox.tsx
interface SkillBoxProps {
  children?: React.ReactNode;
}

const SkillBox = ({ children }: SkillBoxProps) => {
  return (
    <span className='px-4 py-2 text-blue-800 bg-blue-50 rounded'>
      {children}
    </span>
  );
};

export default SkillBox;
After you have created those components, navigate to the index route (index.tsx) and add the following markup:
// app/routes/index.tsx
import { createFileRoute } from '@tanstack/react-router';
import Hero from '../components/Hero';
import SkillBox from '../components/SkillBox';

export const Route = createFileRoute('/')({
  component: Home,
});

function Home() {
  return (
    <>
      <Hero />
      <div className='mt-10'>
        <h2 className='text-2xl'>Languages</h2>
        <div className='mt-2.5 flex gap-3'>
          <SkillBox>HTML</SkillBox>
          <SkillBox>CSS</SkillBox>
          <SkillBox>JavaScript</SkillBox>
          <SkillBox>TypeScript</SkillBox>
        </div>
      </div>
      <div className='mt-10'>
        <h2 className='text-2xl'>Tools</h2>
        <div className='mt-2.5 flex gap-3'>
          <SkillBox>React</SkillBox>
          <SkillBox>GraphQL</SkillBox>
          <SkillBox>Node.js</SkillBox>
          <SkillBox>Socket.io</SkillBox>
          <SkillBox>Next.js/Remix</SkillBox>
        </div>
      </div>
    </>
  );
}
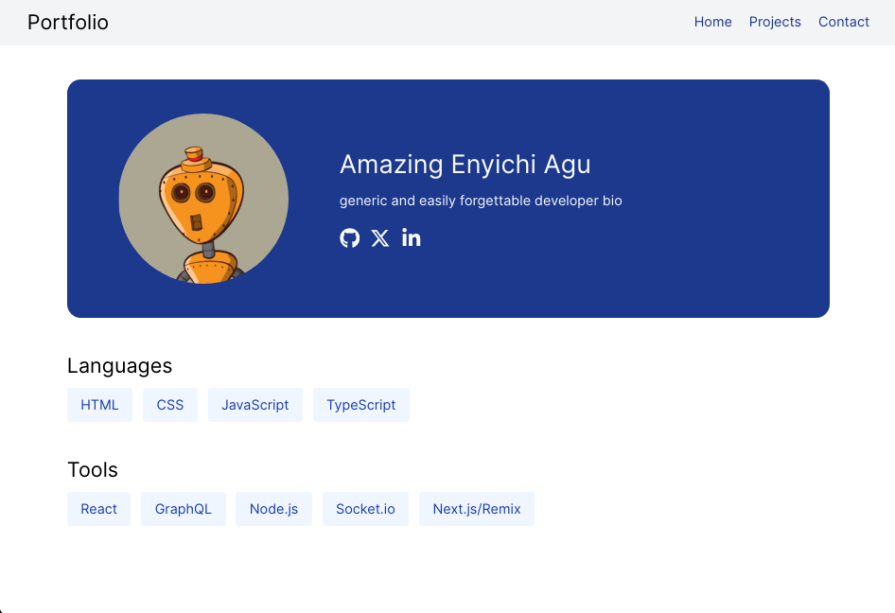
This creates a simple introduction page with a hero and lists a few developer skills. After saving all the files, the output on the browser should look like this:
The projects page is a simple page that displays some projects of the owner of the portfolio. It will make use of TanStack Start’s server function and TanStack Router’s loader. The loader displays public GitHub repositories of the author.
But first, create a component called ProjectCard.tsx. This component is a card for every listed project in the portfolio:
// app/components/ProjectCard.tsx
import { FaCodeFork, FaRegStar } from 'react-icons/fa6';

interface ProjectCardProps {
  url: string;
  projectName: string;
  language: string;
  stars: number;
  forks: number;
}

const ProjectCard = (props: ProjectCardProps) => {
  return (
    <a
      className='px-6 py-4 rounded-md bg-green-50 shadow mb-5 block'
      href={props.url}
    >
      <div className='flex justify-between mb-2'>
        <span>{props.projectName}</span>
        <div className='flex gap-3'>
          <span>
            {props.stars} <FaRegStar className='inline' />
          </span>
          <span>
            {props.forks} <FaCodeFork className='inline' />
          </span>
        </div>
      </div>
      <div>
        <span className='text-sm bg-blue-800 text-gray-50 px-1 py-0.5'>
          {props.language}
        </span>
      </div>
    </a>
  );
};

export default ProjectCard;
Next, create the project route with a server function. The route will load with whatever data the server function returns:
// app/routes/projects.tsx
import { createServerFn } from '@tanstack/react-start';
import { createFileRoute } from '@tanstack/react-router';
import ProjectCard from '../components/ProjectCard';

interface Project {
  full_name: string;
  html_url: string;
  language: string;
  stargazers_count: number;
  forks: number;
}

const getProjects = createServerFn({
  method: 'GET',
}).handler(async () => {
  const res = await fetch(
    'https://api.github.com/users/enyichiaagu/repos?sort=updated&per_page=5',
    {
      headers: {
        'X-GitHub-Api-Version': '2022-11-28',
        accept: 'application/vnd.github+json',
      },
    }
  );
  return res.json();
});

export const Route = createFileRoute('/projects')({
  component: Projects,
  loader: () => getProjects(),
});

function Projects() {
  const projects: Project[] = Route.useLoaderData();

  return (
    <>
      <h2 className='text-2xl'>Projects</h2>
      <div className='mt-2.5'>
        {projects.map(
          (
            { full_name, html_url, language, stargazers_count, forks },
            index
          ) => (
            <ProjectCard
              projectName={full_name}
              url={html_url}
              language={language}
              stars={stargazers_count}
              forks={forks}
              key={index}
            />
          )
        )}
      </div>
    </>
  );
}
Now, if the client navigates to /projects, the result should look like this:
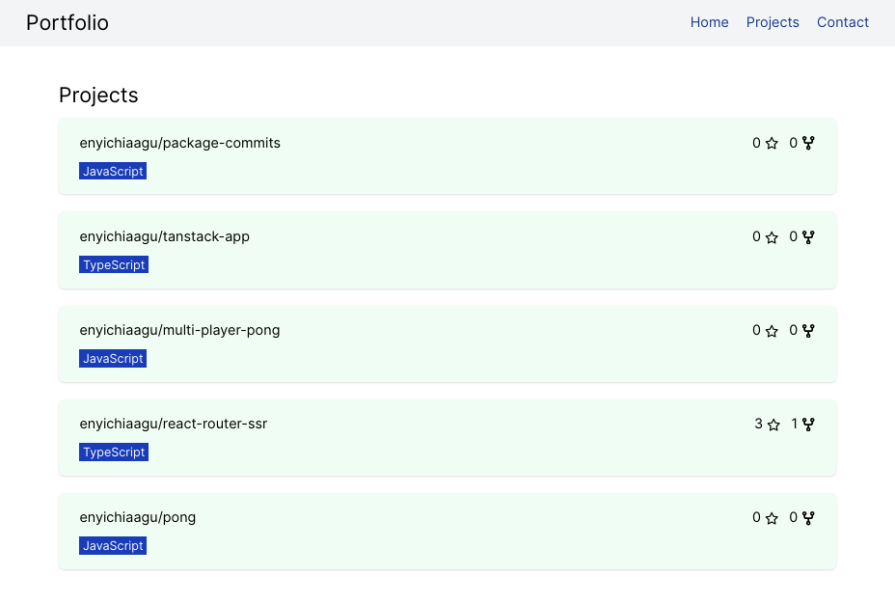
Using Server functions means that the fetch() operation happens in the server, which potentially leads to faster load times.
The final route of the project is a contact page. This page features a form that a visitor of the portfolio website can use to send the owner an email. This route uses TanStack Start’s server function to send the email with the help of Nodemailer.
In order to implement this functionality properly, you first need to install the Nodemailer library. Nodemailer allows a Node.js program to send an email:
npm install nodemailer
npm install --save-dev @types/nodemailer
After installing nodemailer, set up your credentials for sending the email with Nodemailer. Here is a useful resource to quickly set it up.
# .env
EMAIL_ADDRESS=XXXXXX
EMAIL_PASSWORD=XXXXXX
Finally, set up the contact page:
// app/routes/contact.tsx
// Imports
import { useState } from 'react';
import { createServerFn } from '@tanstack/react-start';
import { createFileRoute } from '@tanstack/react-router';
import nodemailer from 'nodemailer';
import { FaCheck } from 'react-icons/fa';

// Defining the contact route
export const Route = createFileRoute('/contact')({
  component: Contact,
});

// Creating the transporter object for nodemailer
const transporter = nodemailer.createTransport({
  host: 'smtp.gmail.com',
  secure: true,
  port: 465,
  auth: {
    user: process.env.EMAIL_ADDRESS,
    pass: process.env.EMAIL_PASSWORD,
  },
});

// Function that uses the nodemailer transporter to send the email
const sendEmailMessage = async ({ email, message }) => {
  const res = await transporter.sendMail({
    from: process.env.EMAIL_ADDRESS,
    to: process.env.EMAIL_ADDRESS,
    subject: `Message from ${email}, sent from Portfolio Website`,
    text: message,
    replyTo: email,
  });
  return res;
};

// Server function that calls that validates the input and calls the `sendEmailMessage` function
const submitForm = createServerFn({ method: 'POST' })
  .validator((data: FormData) => {
    const email = data.get('email');
    const message = data.get('message');
    if (!email || !message) {
      throw new Error('Email and Message are required');
    }
    return { email: email.toString(), message: message.toString() };
  })
  .handler(async (ctx) => {
    return await sendEmailMessage(ctx.data);
  });

// JSX for contact page
function Contact() {
  const [isSuccess, setIsSuccess] = useState<boolean>(false);
  return (
    <>
      <p className='text-2xl'>Contact Me</p>
      {isSuccess && (
        <div className='bg-green-50 text-green-900 px-6 py-3 rounded w-md mt-5'>
          <FaCheck className='inline' /> Email Sent Successfully
        </div>
      )}
      <form
        method='post'
        className='mt-5'
        onSubmit={async (event: React.FormEvent<HTMLFormElement>) => {
          event.preventDefault();
          const form: HTMLFormElement = event.currentTarget;
          const formData = new FormData(form);
          await submitForm({ data: formData });
          setIsSuccess(true);
          return form.reset();
        }}
      >
        <div className='mb-2'>
          <label htmlFor='email'>Email</label>
          <br />
          <input
            type='email'
            name='email'
            id='email'
            required
            className='border border-gray-400 w-md px-3 py-1.5'
          />
        </div>
        <div className='mb-2'>
          <label htmlFor='message'>Message</label>
          <br />
          <textarea
            name='message'
            id='message'
            placeholder='Write me a message'
            required
            className='border border-gray-400 w-md px-3 py-1.5 h-50'
          ></textarea>
        </div>
        <button className='bg-blue-900 text-gray-50 px-4 py-2 rounded'>
          Send
        </button>
      </form>
    </>
  );
}
Now, one can send emails from the portfolio’s contact page: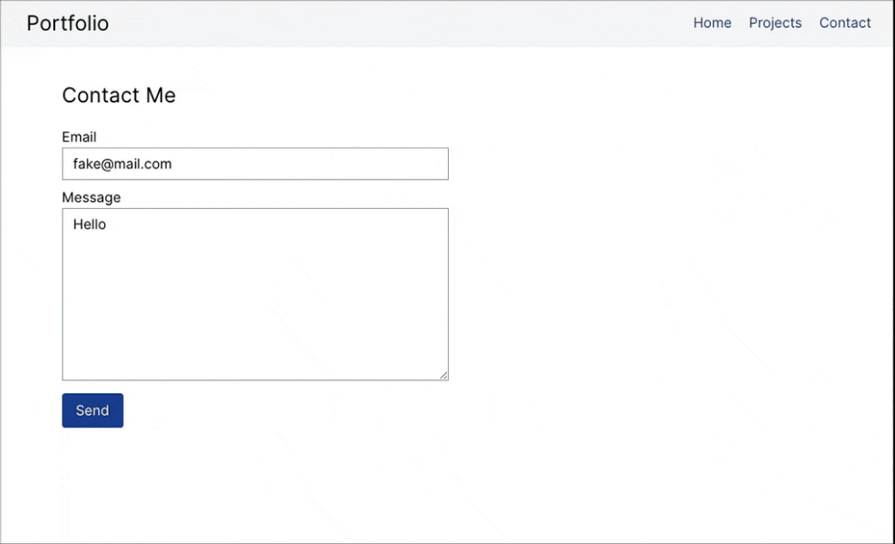
There is no doubt that TanStack Start is a promising new framework — and paradigm — for building full-stack React apps. It has many features and a strong team that has worked on other robust libraries behind it.
However, there are also a few downsides to using this framework, especially in its current state. Listed below are the pros and cons of the Tanstack Start framework.
Regardless, TanStack Start is a great framework, and most of the cons exist because the framework is still new to the landscape.
This article is just an introduction to the TanStack framework. The documentation goes into detail in explaining the numerous capabilities of the framework. But with this, you should have a good understanding of how the framework works and how to use it.
As mentioned earlier, Tanstack Start will roll out new features in the future and has huge potential. With what the team has accomplished so far, it has no doubt earned a spot as a strong alternative to Next.js and Remix/React Router.

Learn how to set up Meilisearch, index documents, and build keyword, semantic, and hybrid search with AI-powered retrieval.

Compare pnpm and npm across security defaults, disk usage, dependency strictness, and workspace policy to decide which package manager fits your project.

I migrated 20 production-style components from Tailwind to StyleX. Here’s what the data showed about LOC, CSS bundle size, build time, and type safety.

A guide for using JWT authentication to prevent basic security issues while understanding the shortcomings of JWTs.
Would you be interested in joining LogRocket's developer community?
Join LogRocket’s Content Advisory Board. You’ll help inform the type of content we create and get access to exclusive meetups, social accreditation, and swag.
Sign up now

