
Passwordless authentication can be understood as the process of verifying the identity of a user without the provision of a password. It is okay to assert that any method that verifies users without the use of a password falls under this category. Some more passwordless techniques are:

The Replay is a weekly newsletter for dev and engineering leaders.
Delivered once a week, it's your curated guide to the most important conversations around frontend dev, emerging AI tools, and the state of modern software.
Passwords are generally hard to remember and vulnerable to phishing attacks. Let’s add some numbers to it, according to Retruster statistical analysis, here’s the state of phishing attacks in 2019 alone:
The events of recent times as it relates to data breaches and phishing attacks forced us to look for more secure ways to handle authentication and identity verification. This brings us to — passwordless authentication.
According to Ant Allan, Vice President Analyst at Gartner:
By 2022, Gartner predicts that 60% of large and global enterprises, and 90% of midsize enterprises, will implement passwordless methods in more than 50% of use cases — up from 5% in 2018
This makes now a great time to start preparing for the seemingly inevitable fact that eventually, the world will go passwordless.
In this post, I intend to show you how you can implement passwordless authentication in your React Native applications using Auth0. We will start off from scratch and build out a login page that verifies a user’s identity and returns the necessary credentials needed to access the app and perform other actions:
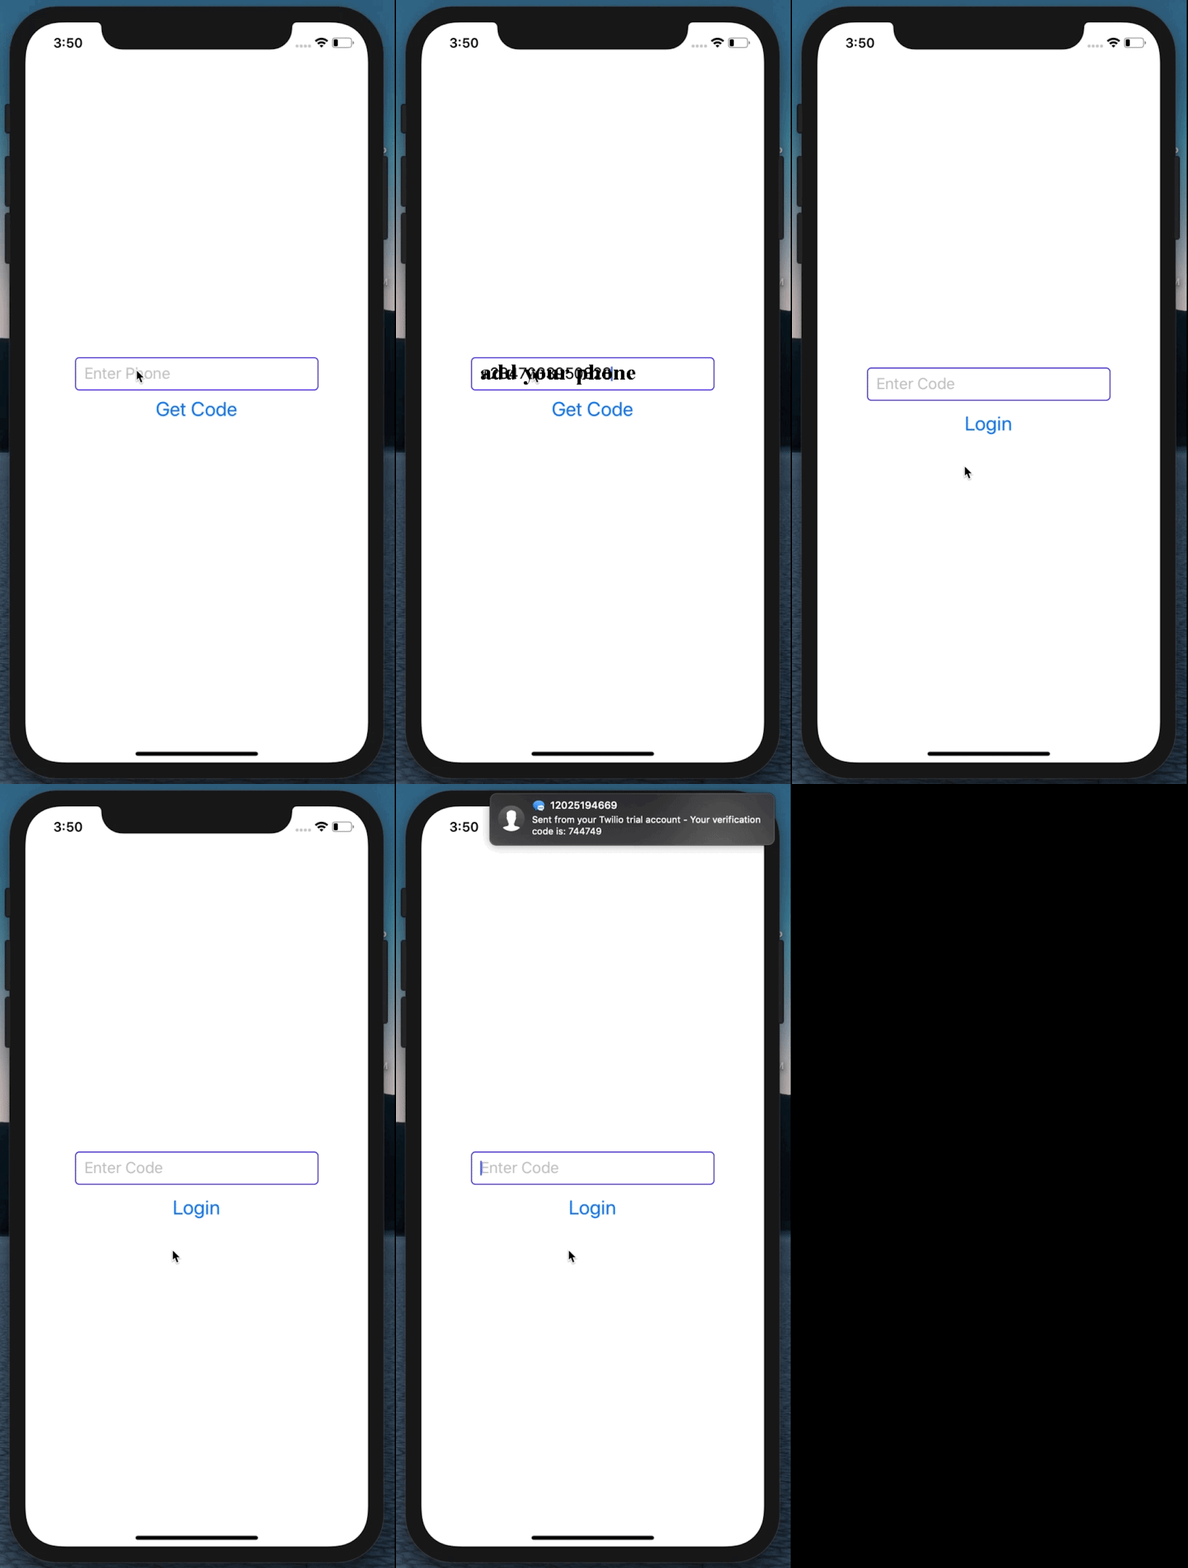
Before we jump into it, let’s clear the air on what you need to know/have before we get started!
First, let’s create a React Native project. If this is your first time working with React Native, be sure to install the required dependencies and follow these steps accordingly.
npm install -g react-native-cli
Afterward, go ahead and run these React Native commands to create and start a new project.
react-native init auth

cd auth && npx react-native run-ios // Start the iOS simulator
// OR
cd auth && npx react-native run-android // Start the android emulator
If you have Xcode or Android Studio installed then the commands above will run the project and you should have the simulator show up on the screen like this:

Here I’m using Xcode.
Now that we have the project created and running locally, let’s install some packages that we’ll need to build the app:
npm install react-native-auth0 react-native-webview
//OR
yarn add react-native-auth0 react-native-webview
cd ios && pod install
Using Auth0, here’s how the passwordless implementation will work. Auth0’s passwordless authentication flow is a two-step verification system that takes a user’s email address or phone number. For cases where you decide to authenticate by phone, you can initiate the flow by requesting for a code using the user’s phone number, an auth code will be sent to their phone number:
auth0.auth
  .passwordlessWithSMS({
    phoneNumber: '+5491159991000',
  })
  .then(console.log)
  .catch(console.error);
When authenticating with email, you can initiate the flow by requesting for a link to be sent to the user’s email address. When the user clicks on the link, it’ll take them to your auth0 domain on the browser and then redirect to your application. Consequently, you can request for a code to be sent to the email too:
auth0.auth
  .loginWithEmail({
    email: '[email protected]',
    code: '123456',//for code
    link: 'your-link.com' // for email
  })
  .then(console.log)
  .catch(console.error);
Moving forward in this post we’ll continue with the phone authentication flow.
You need to make your Android and iOS applications aware that an authentication result will be received from Auth0. This configuration makes it possible for Auth0 to communicate with your application and in the case of email link scenarios, redirect users from your browser to the app. The configuration is different for Android and iOS, but I’ll only cover iOS configuration in this tutorial. You can learn more about it and how to configure it for Android in the React Native docs.
Inside the iOS folder, find the file AppDelegate.[m] and add the following snippet to it:
#import <React/RCTLinkingManager.h>

- (BOOL)application:(UIApplication *)application openURL:(NSURL *)url
  sourceApplication:(NSString *)sourceApplication annotation:(id)annotation
{
  return [RCTLinkingManager application:application openURL:url
                      sourceApplication:sourceApplication annotation:annotation];
}
Inside the iOS folder, open the Info.plist file and locate this snippet:
<key>CFBundleIdentifier</key>
<string>$(PRODUCT_BUNDLE_IDENTIFIER)</string>
Below it, register a URL type entry by adding this exact snippet:
<key>CFBundleURLTypes</key>
<array>
    <dict>
        <key>CFBundleTypeRole</key>
        <string>None</string>
        <key>CFBundleURLName</key>
        <string>auth0</string>
        <key>CFBundleURLSchemes</key>
        <array>
            <string>$(PRODUCT_BUNDLE_IDENTIFIER)</string>
        </array>
    </dict>
</array>
Now that we are done with the application configurations, let’s build our React Native app. Before we start writing the application code, let’s set up a project in Auth0 following these steps:
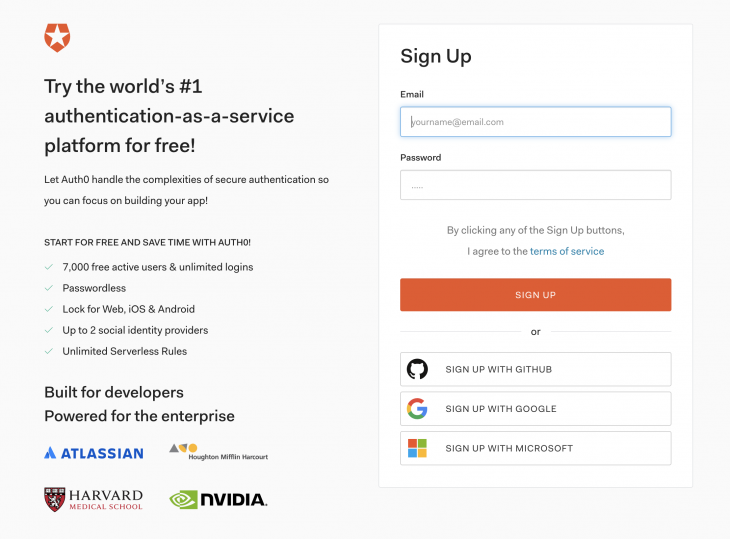
If you don’t have one yet, create a free Auth0 account here and log into your dashboard:
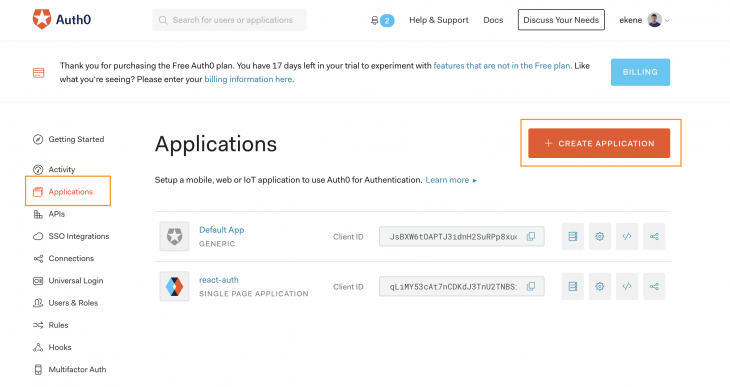
Login to your dashboard and navigate to the Applications tab on the sidebar, click the Create Application button to create a new Auth0 app:
In the next screen you select the type of application you’re building and give it a name. In our case, we are building a native mobile application and call it “React Native App”:
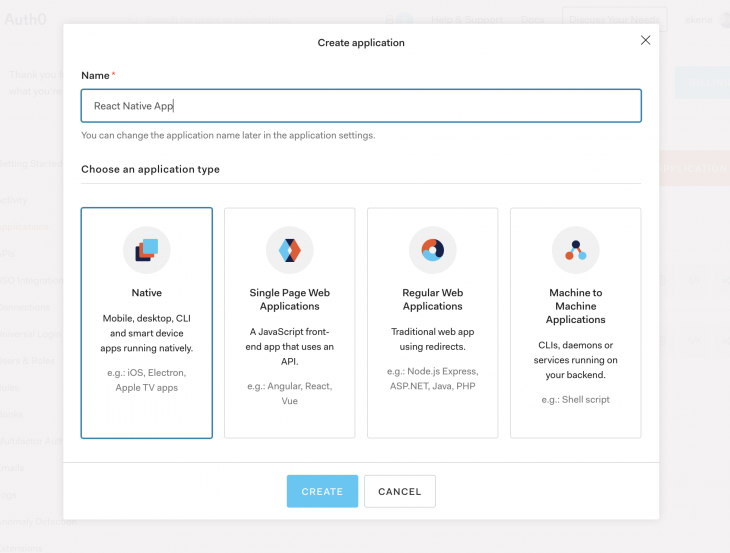
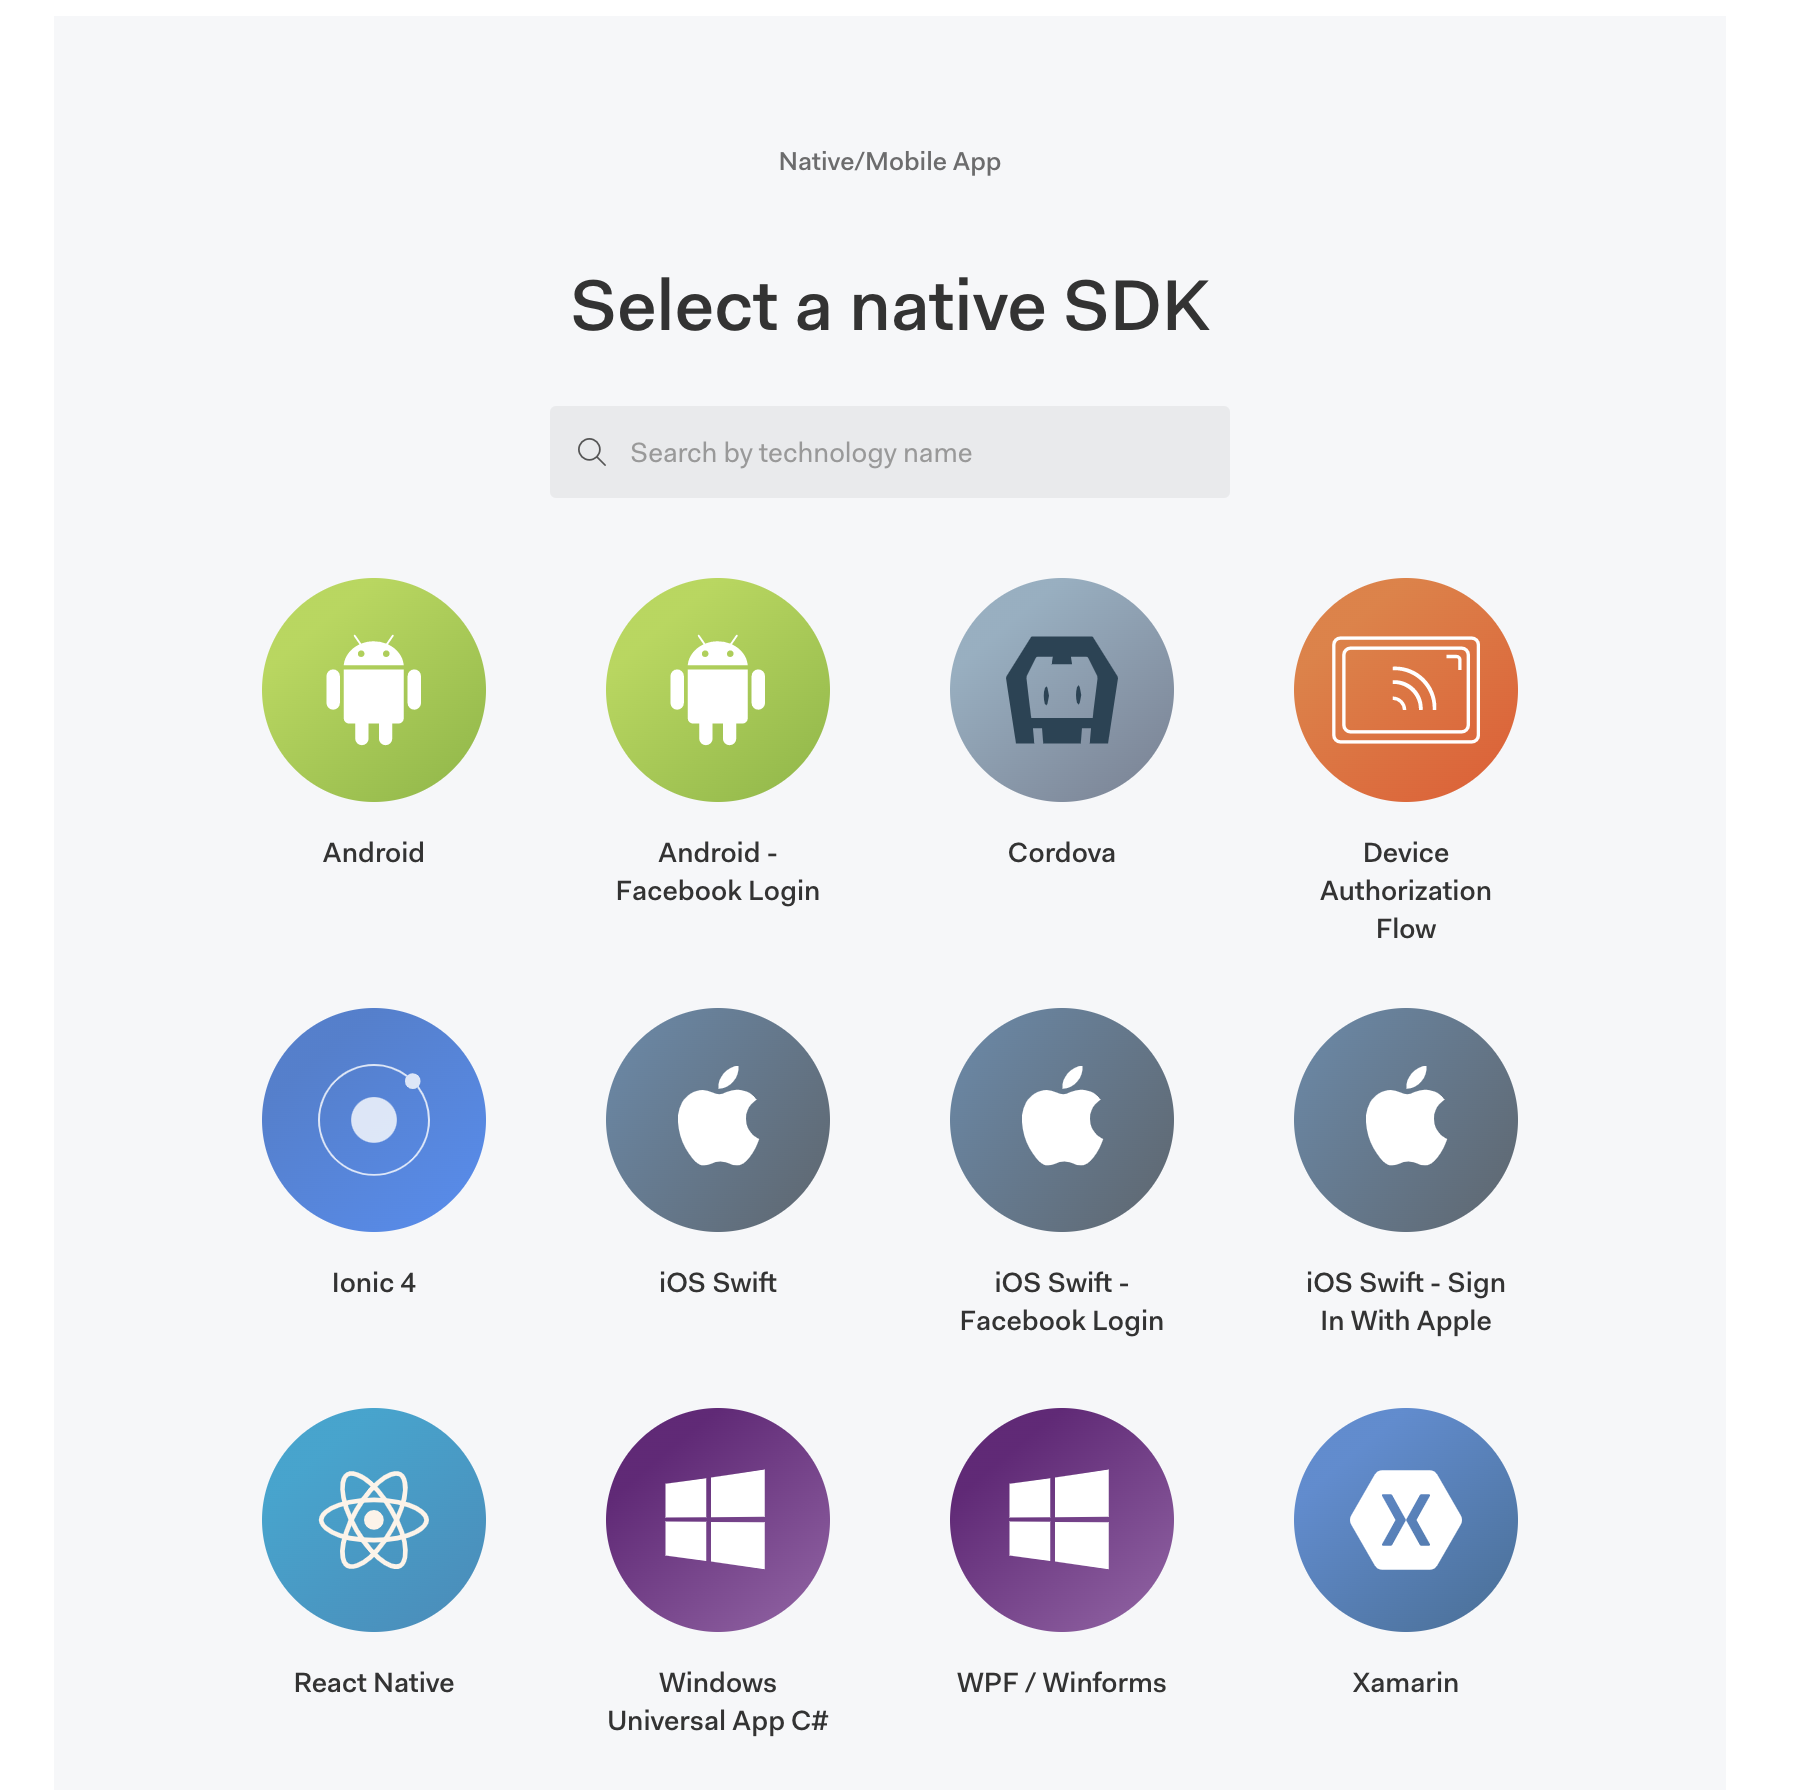
In our case, select React Native from the screen below:
Now that your application is created, navigate to the settings menu to review your applications credentials:
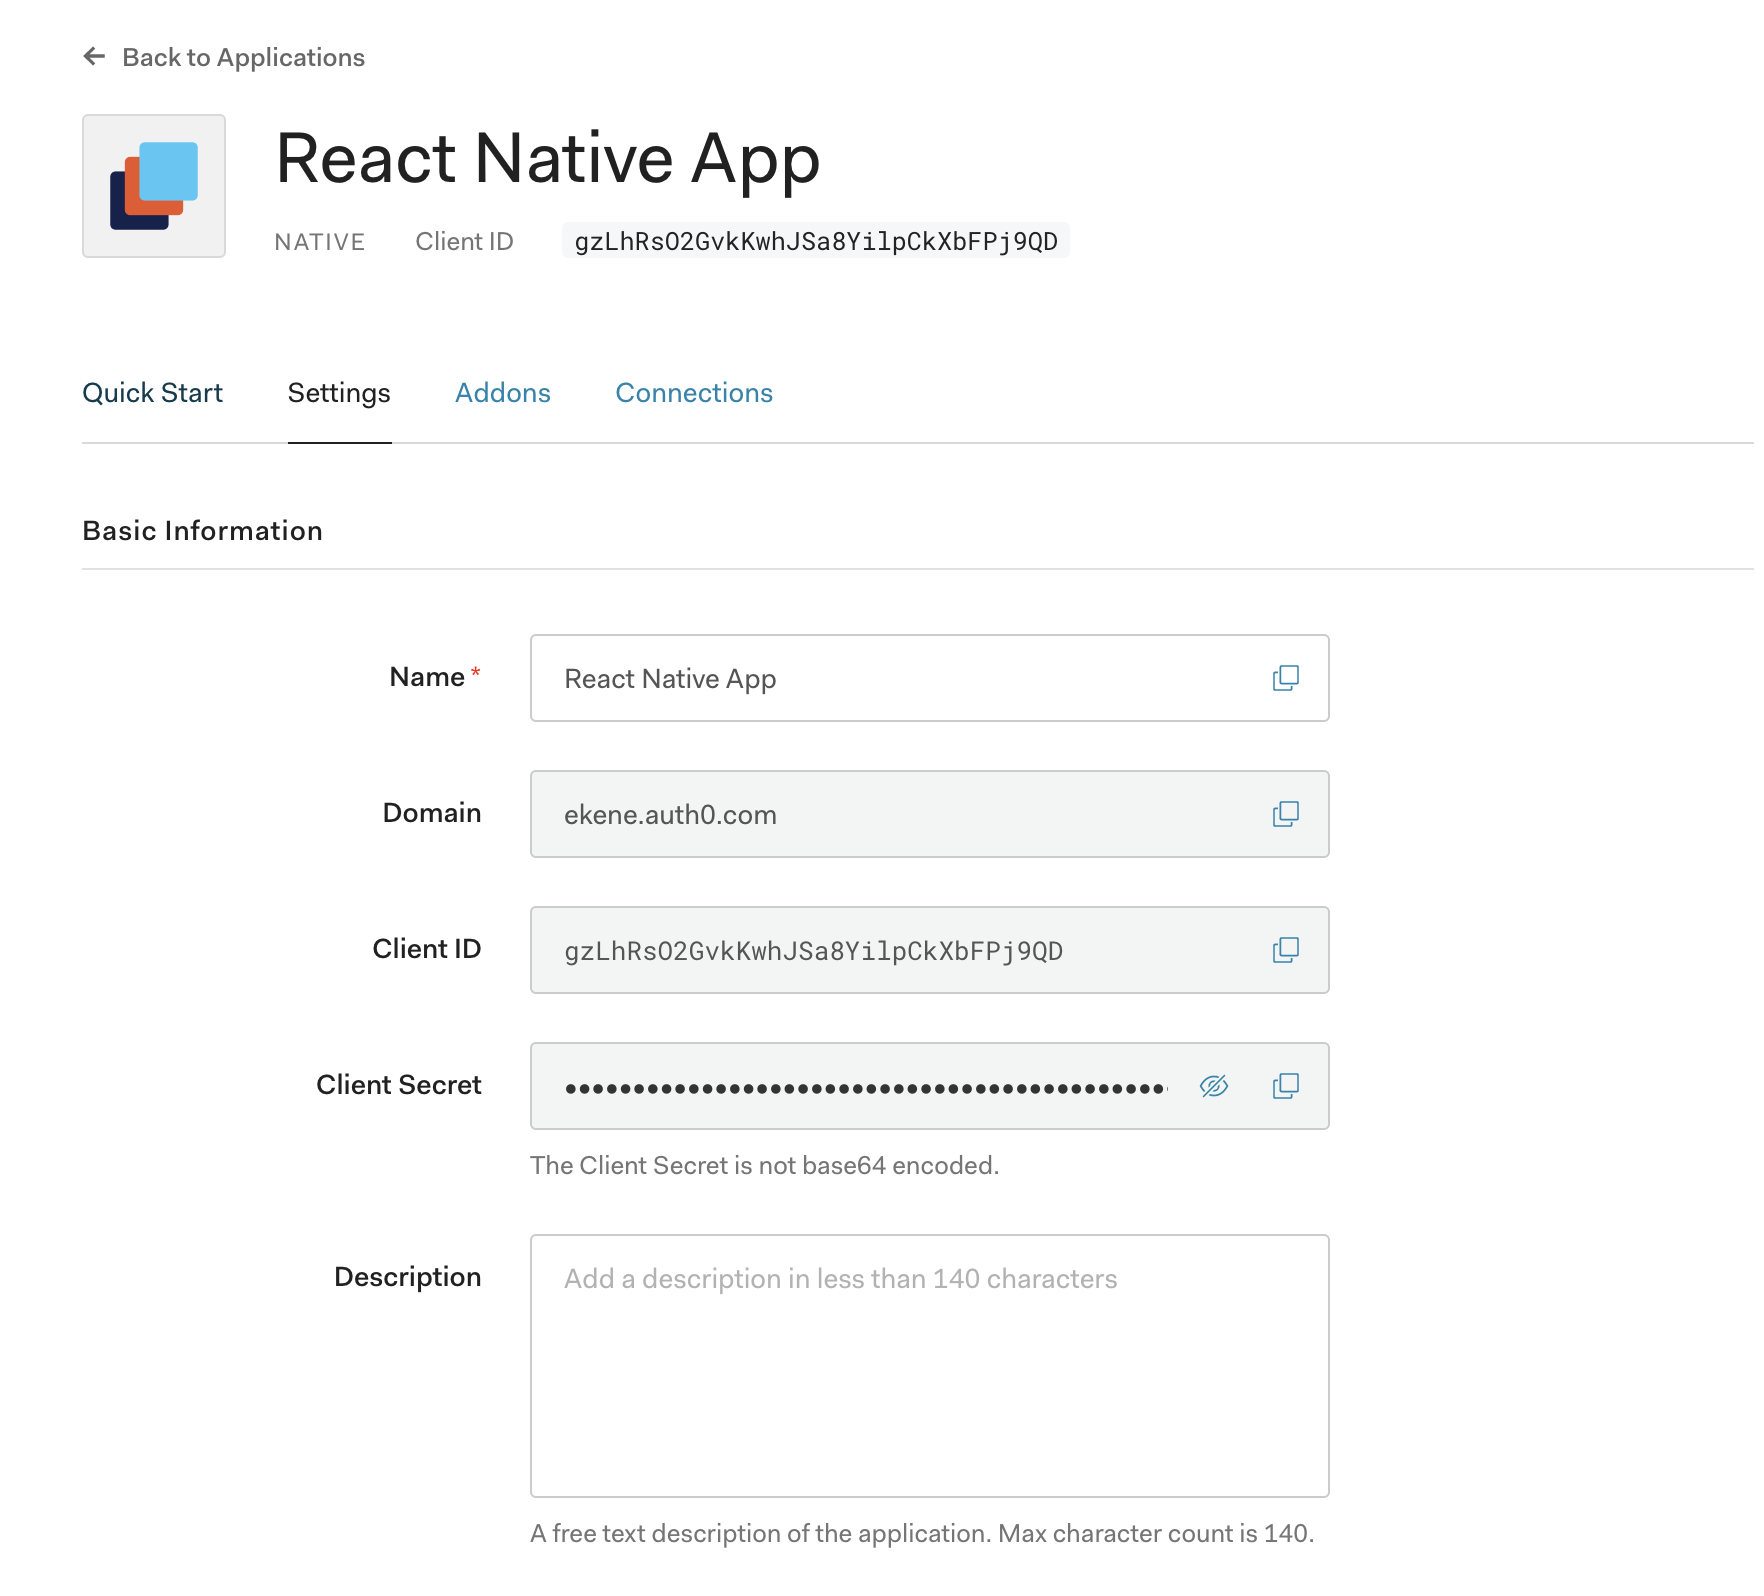
Keep these credentials safe as we’ll be needing them shortly in the app.
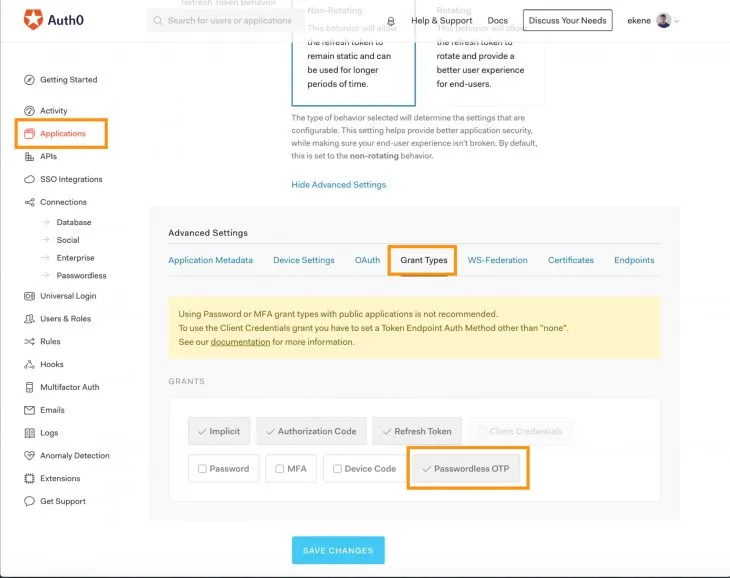
Auth0 enforces that you use appropriate grants for every authentication flow implemented. In our case, we are using the passwordless authentication flow and we need to enable that grant type on the dashboard.
To enable the passwordless grant type, select your React Native app on your dashboard, click on the Project Settings, scroll down, and expand Advanced Settings, click on the Grant Types tab and tick the passwordless grant type:
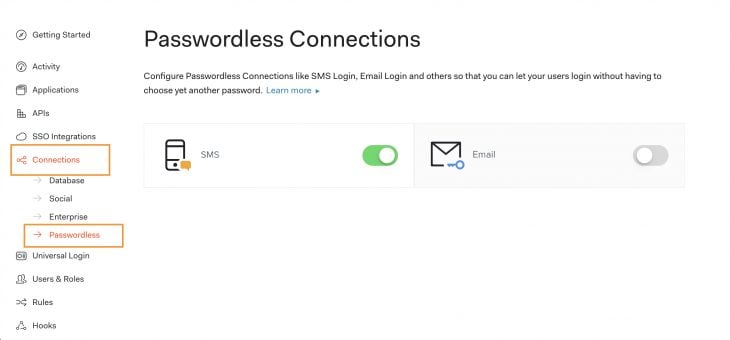
We are authenticating via phone, as a result, we need to enable an SMS connection on the application, click on the Connections tab on the sidebar and select Passwordless. Toggle the SMS button to enable SMS connection:
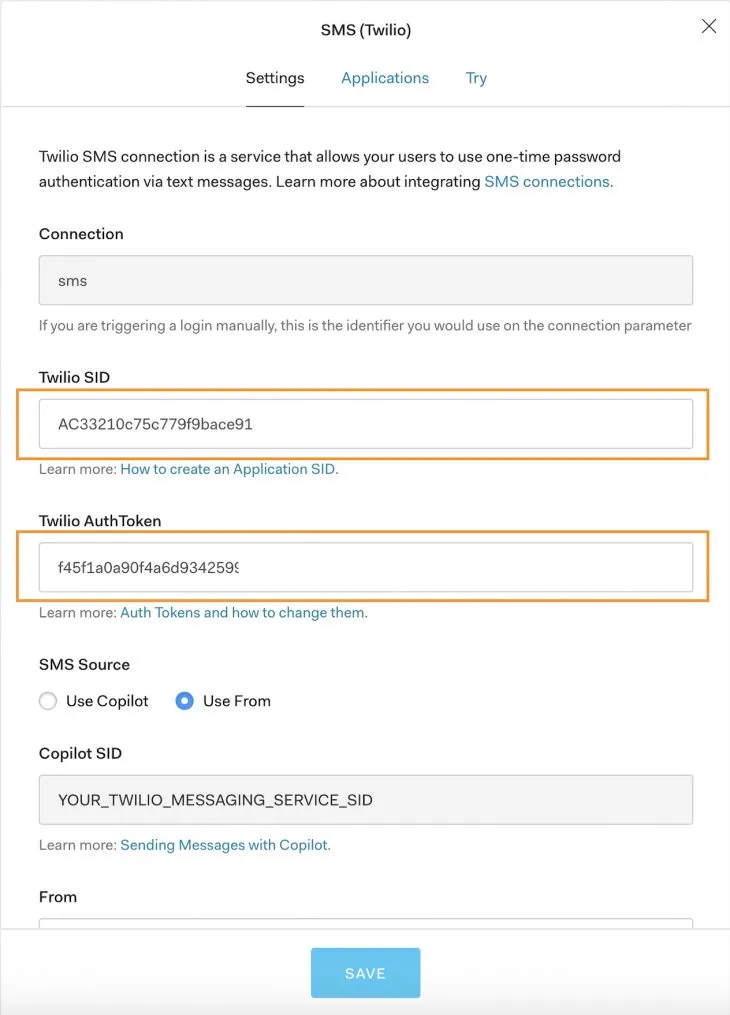
Next, click on the SMS card to configure the SMS connection with your Twilio credentials. If you don’t have a Twilio account, sign up for one here and retrieve your SSID and token:
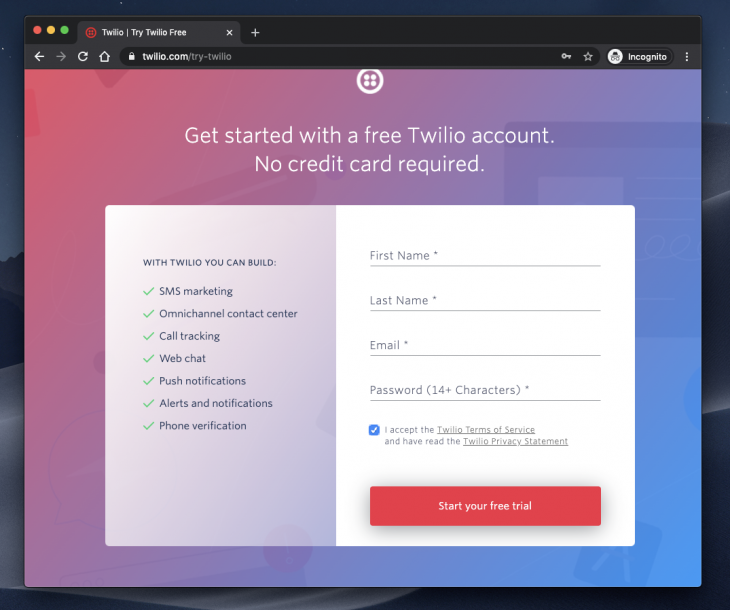
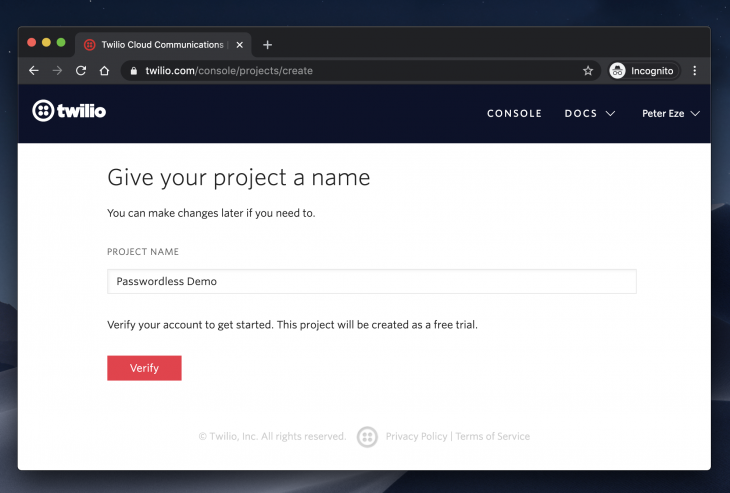
When you’ve verified your account, log in, and create a new project like so:
When you sign up on Twilio for a trial account, you will get access to about $15 you can use to purchase a mobile number of your choice to use for sending messages through your Twilio account:
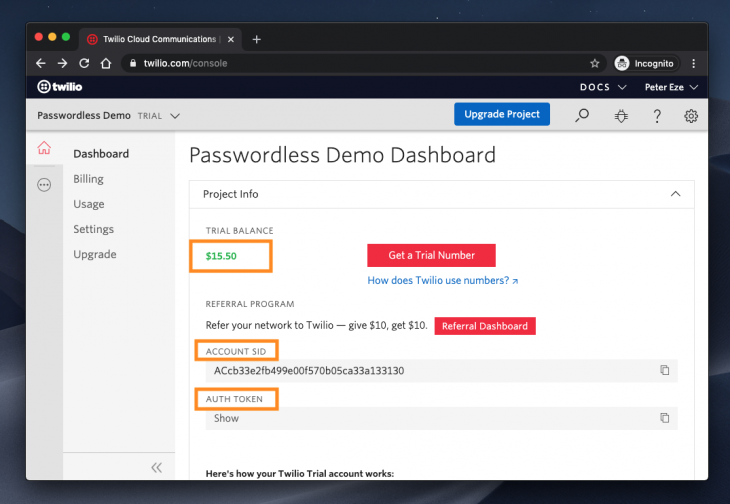
Get the number of your choice, copy your account SID and token. Go over to Auth0 and add it to your SMS config and save:
Create a new file called Auth.js. This file will host all our code implementations for this project. I’m doing this to keep everything in one place and maintain orderliness in my explanations:
import React, {Component} from 'react';
import Auth0 from 'react-native-auth0';
import {Button, View, TextInput, Modal, Text, Image} from 'react-native';
class Auth extends Component {
  constructor() {
    super();
    this.state = {
      phone: '',
      code: '',
      codeRequestSent: false,
      LogginIn: false,
      isLoggedin: false,
      accessToken: '',
      idToken: '',
    };
    this.loginUser = this.loginUser.bind(this);
    this.getLoginCode = this.getLoginCode.bind(this);
  }
  componentDidMount() {
    this.auth0 = new Auth0({
      domain: 'YOUR_AUTH0_DOMAIN',
      clientId: 'YOUR_CLIENT_ID',
    });
  }
  render(){
    return(
      <View></View>
    )
  }
}
export default Auth;
What we’ve done here is create a new instance of the client to make it available in our application. We did this in the componentDidMount() lifecycle method by initializing Auth0 and with your domain and clientID on your Auth0 dashboard. We also declared some state variables to track the values that we’ll need access to all through the app.
Before we go further, let’s refresh again on the passwordless flow we will implement in this project:
We will need two functions to implement this flow:
getLoginCode() — To send the login code to the user’s phoneloginUser() — To use the received code and log the user in:getLoginCode() {
this.setState({LogginIn: true});
this.auth0.auth
.passwordlessWithSMS({
phoneNumber: this.state.phone,
})
.then(() => {
this.setState({codeRequestSent: true});
})
.catch(console.error);
}
When the user enters their phone number on the app, we store it in the phone state variable and with it, we can request a login code using the above function. Finally, to complete the authentication, send back the received code to Auth0 like so:
loginUser() {
  this.auth0.auth
    .loginWithSMS({
      phoneNumber: this.state.phone,
      code: this.state.code,
    })
    .then(response => {
      console.log(response);
      this.setState({
        accessToken: response.accessToken,
        idToken: response.idToken,
        isLoggedin: true,
      });
    })
    .catch(console.error);
}
When the login request is successful, you can create this user’s record and perform any other user profile related functions you’ve designed for your app.
In the components render() function we display the individual screens conditionally based on the values of the variables we are tracking in state:
render() {
  const {
    codeRequestSent, LogginIn, code, isLoggedin, accessToken, idToken,
  } = this.state;
  return (
    <View>
      {!codeRequestSent ? (
        <>
          <TextInput
            placeholder="Enter Phone"
            onChangeText={text => this.setState({phone: text})}
          />
          <Button
            title={LogginIn ? 'Processing...' : 'Get Code'}
            onPress={this.getLoginCode}
          />
        </>
      ) : (
        <>
          <TextInput
            placeholder="Enter Code"
            value={code}
            onChangeText={text => this.setState({code: text})}
          />
          <Button title="Login" onPress={this.loginUser} />
          <View>
            <Modal transparent={true} visible={isLoggedin}>
              <View>
                <View>
                  <Text> Login Successful 👍🏼🎉</Text>
                  <Text> Here are your details:</Text>
                  <Text> Access Token: {' ' + accessToken}</Text>
                  <Text>
                    Id Token:
                    {' ' + idToken.length > 25
                      ? `${idToken.substring(0, 25)}...`
                      : idToken}
                  </Text>
                  <Button title="Logout" onPress={this.logout} />
                </View>
              </View>
            </Modal>
          </View>
        </>
      )}
    </View>
  );
}
Let’s not forget that this is also the case for email passwordless login. Maybe we’ll cover that flow in detail on the next post. But generally, it’s the same flow — the user gets an email with a link or code depending on your specifications and also uses it to log in.
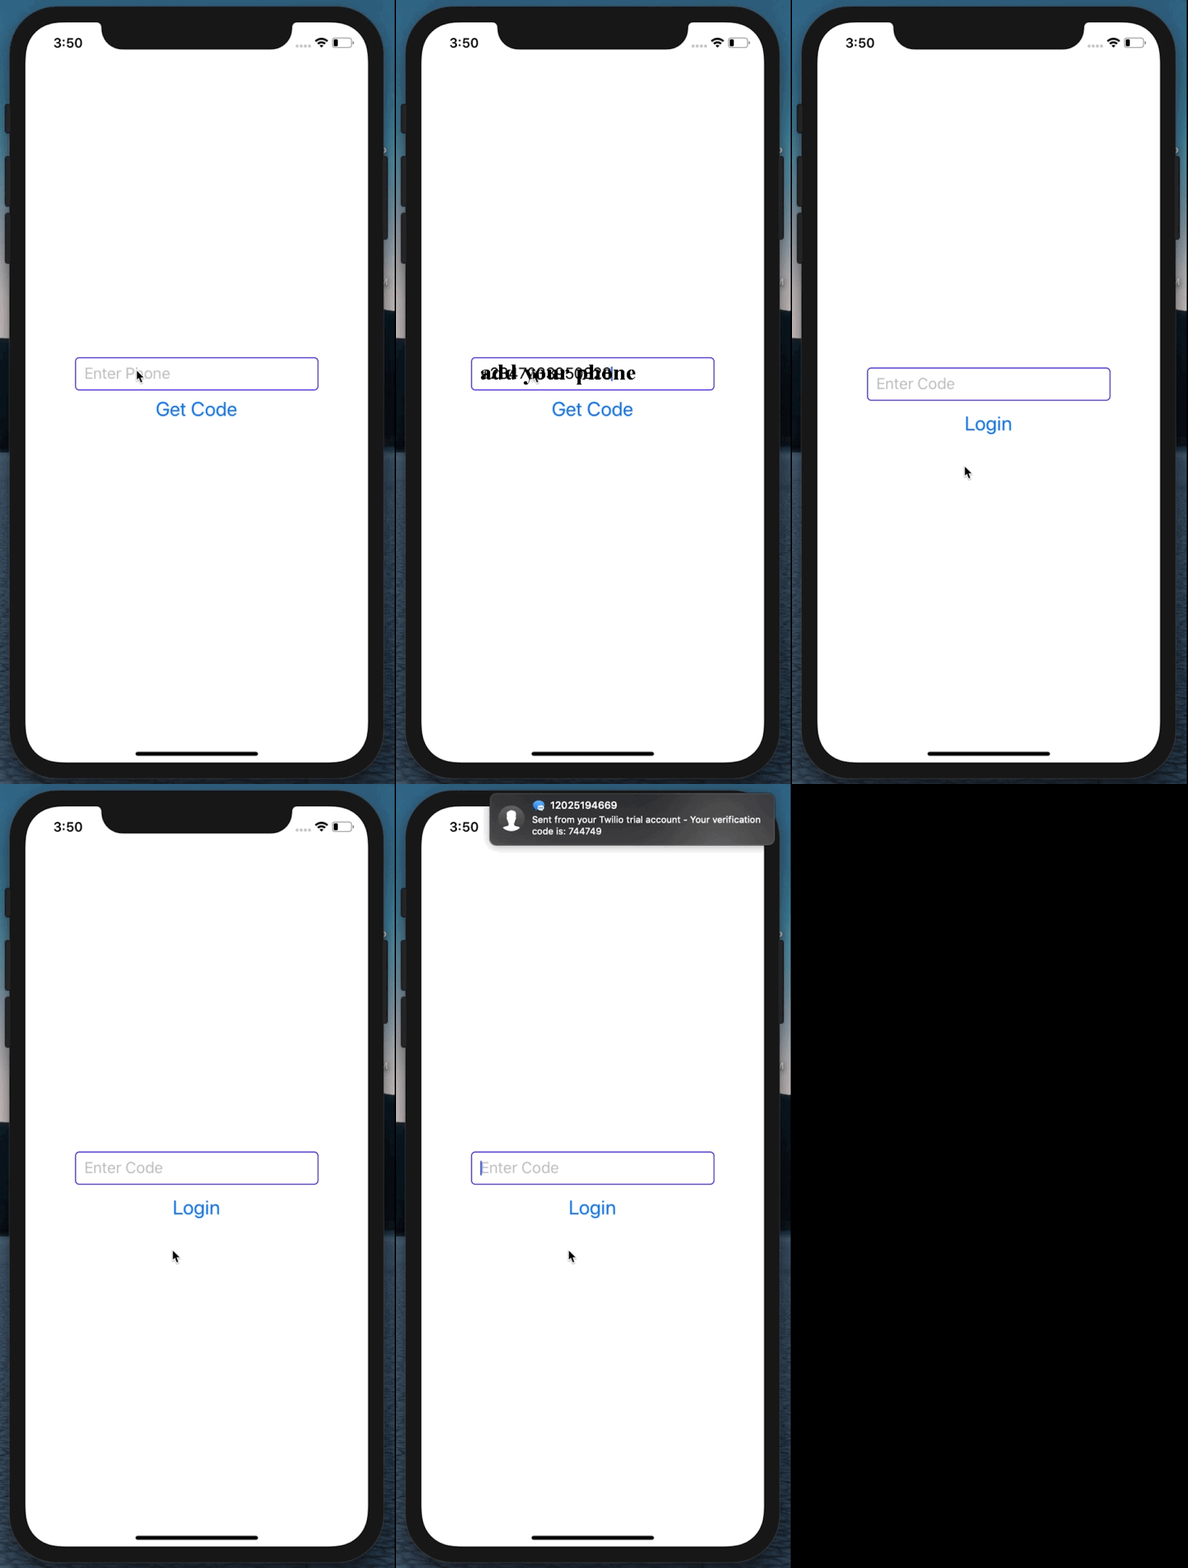
In this post, we’ve gone over the concepts involved in implementing passwordless authentication with Auth0 and Twilio in a React Native application. It gave us the opportunity to explore the possibilities of having a secured authentication system without all the hassles that come from dealing with passwords. The possibilities are endless and I can’t wait to see what you build with it. The source code is available on this repository.

LogRocket's Galileo AI watches sessions for you and and surfaces the technical and usability issues holding back your React Native apps.
LogRocket also helps you increase conversion rates and product usage by showing you exactly how users are interacting with your app. LogRocket's product analytics features surface the reasons why users don't complete a particular flow or don't adopt a new feature.
Start proactively monitoring your React Native apps — try LogRocket for free.

React Server Components and the Next.js App Router enable streaming and smaller client bundles, but only when used correctly. This article explores six common mistakes that block streaming, bloat hydration, and create stale UI in production.

Gil Fink (SparXis CEO) joins PodRocket to break down today’s most common web rendering patterns: SSR, CSR, static rednering, and islands/resumability.

@container scroll-state: Replace JS scroll listeners nowCSS @container scroll-state lets you build sticky headers, snapping carousels, and scroll indicators without JavaScript. Here’s how to replace scroll listeners with clean, declarative state queries.

Explore 10 Web APIs that replace common JavaScript libraries and reduce npm dependencies, bundle size, and performance overhead.
Would you be interested in joining LogRocket's developer community?
Join LogRocket’s Content Advisory Board. You’ll help inform the type of content we create and get access to exclusive meetups, social accreditation, and swag.
Sign up now
2 Replies to "Implementing secure passwordless authentication in React Native apps with Auth0"
Thanks Peter, great reading! I would like to use it for my app but with 2 steps verification- the user will enter his email >> validate the email on our DB >> send verification code to the user phone number (stored on the DB). What will be the best practice?
Throws: “this.auth0.auth.passwordlessWithSMS is not a function”