
Gatsby is one of the most popular React-based frameworks for creating websites and apps. Although hailed for its speed in any deployment environment, Kyle Mathews (CEO, Gatsby) recently warned that build time could be negatively impacted with the release of incremental builds on Gatsby Cloud.

If you’ve used Gatsby, or any other SSG for that matter, you know that as sites get larger, build times tend to increase. This is a result of increased application size, which is dependent on the amount of content it accommodates and how much rendering must take place. There are many ways to try to optimize site performance, one of which is through using a backend-only (referred to as “headless”) content management system.
In this article, we will discuss using the headless CMS, Sanity, with Gatsby to improve site efficiency, productivity, and speed through a structured approach to content management.
The Replay is a weekly newsletter for dev and engineering leaders.
Delivered once a week, it's your curated guide to the most important conversations around frontend dev, emerging AI tools, and the state of modern software.
Gatsby is data-source agnostic, meaning you can import data from anywhere: APIs, databases, CMSs, static files, and even multiple sources at once. In this article, we will use Sanity CMS as our data repository.
Sanity treats content like data and offers a concise number of features to manage images (Image Pipeline), text (Portable Text), and design, all with the goal of taking a structured approach to content that improves web app performance. Sanity also offers Sanity Studio, a fully functional, customizable, and extendable editor built with React.js for developers.
In the following sections, we will build a frontend Gatsby-powered web application and a headless CMS backend that is fully responsible for content management. In the end, you will learn how to manage content with Sanity and how to import the content as data by connecting Sanity to Gatsby through an API.
To get started with Sanity, you can either use the Sanity CLI or any of the starter projects.
Before attempting to install the Sanity CLI, make sure you have Node and npm installed. Then, make sure you have a Sanity account (or create one).
When you are ready to install, run the following command in your terminal to globally install the Sanity CLI:
npm install -g @sanity/cli
This will install the necessary tooling necessary for working with Sanity through the CLI.
After the Sanity CLI has been installed, run the following command to create a new Sanity project:
>sanity init
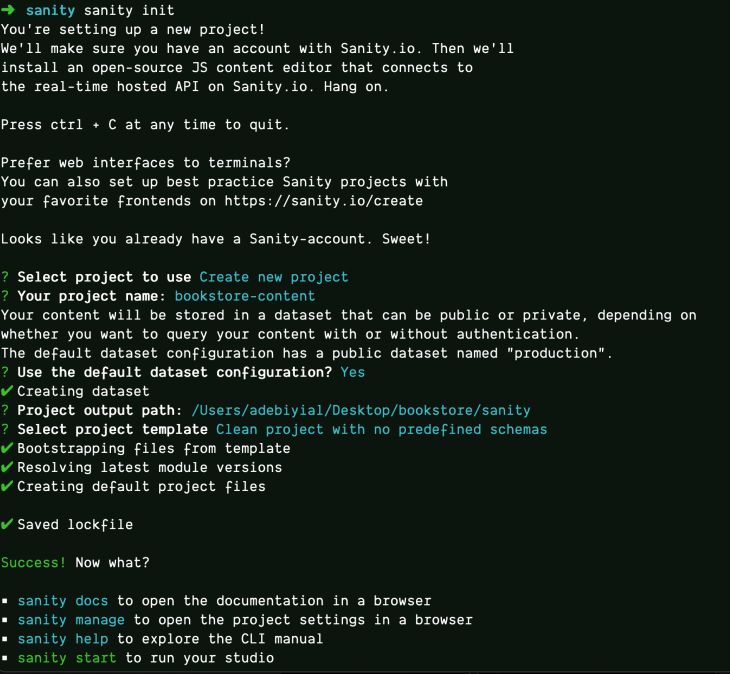
When this command is run, you will see an output similar to the image below that will walk you through an interactive Q&A session for project creation.
Follow the pattern below when prompted:
At the root of the project, start Sanity Studio by running the command (on port 3333)
sanity start -p 3333
The project should now be running on http://localhost:3333
Note: You might be asked to log in depending on whether you want to query your content with or without authentication.
At this point, your schema will be empty:
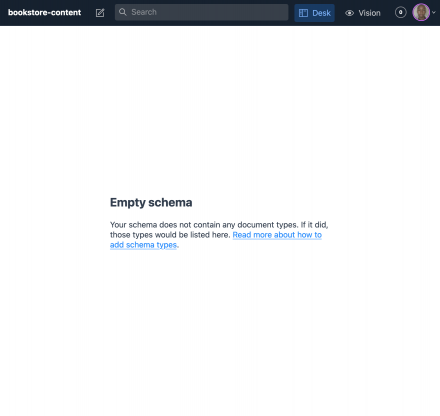
Schemas are at the core of structured content modeling in Sanity and refer to the field types that a document is made up of (document, image, object, reference, etc.)
For our example, we will create a book schema that has properties including: name, title, type, author, and release date.
To create our book schema, create a books.js file in the schema folder as follows:
// schemas are basically objects
export default {
   // The identifier for this document type used in the api's
  name: 'book',

  // This is the display name for the type
  title: 'Books',

  // Schema type of Document
  type: 'document',

  fields: [
    {
      name: 'name',
      title: 'Book Name',
      type: 'string',
      description: 'Name of the book',
    },
  ]
}
The fields property is an array of object(s) where we define the properties for our schema. The first field specifies the book name with a string type.
Now that the book schema has been created, it should be added to the list of schemas in schema.js
// Default imports from Sanity
import schemaTypes from 'all:part:@sanity/base/schema-type';
import createSchema from 'part:@sanity/base/schema-creator';

// Import the book schema
import book from './book';

export default createSchema({
  name: 'default',
  types: schemaTypes.concat([
    /* Append to the list of schemas */
    book
  ]),
});
Now that you have created your schemas, Sanity Studio should be up and running with updated changes.
Remember, there are three important features of Sanity Studio:
To publish, go ahead and create a document:
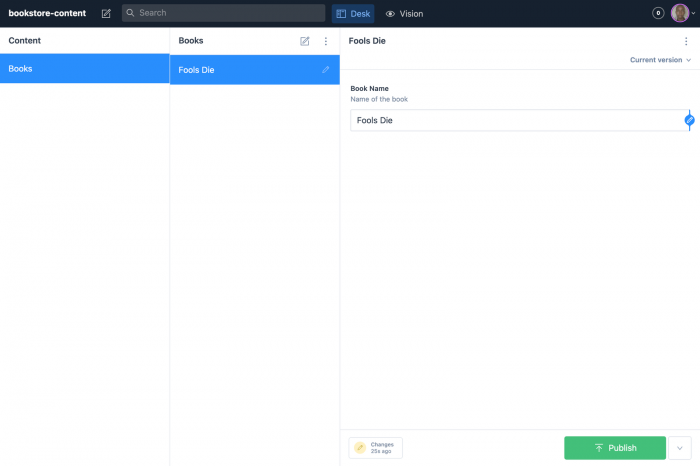
We can get more detailed by creating more fields. In the example below, we will add author, release date, and category to our existing fields array in schema.js:
{
  name: 'author',
  title: 'Author Name',
  type: 'string',
  description: 'Name of the author',
},
{
  name: 'releaseDate',
  title: 'Release Date',
  type: 'date',
  options: {
    dateFormat: 'YYYY-MM-DD',
    calendarTodayLabel: 'Today',
  },
  description: 'Release Date of the book',
},
{
  name: 'category',
  title: 'Book Category',
  type: 'array',
  description: 'Category of the Book',
  of: [
    {
      type: 'reference',
      to: [
        {
          type: 'category',
        },
      ],
    },
  ],
},
In the block above, release date is assigned with the property of to Date type. On the other hand, category is a Reference type assigned with the of property to category; however, category, which is in itself an array of objects, does not yet have a schema created.
To create the category schema, we will follow the same approach as we did for the book schema.
First, create category.js in the schema folder with the content:
export default {
  name: 'category',
  title: 'Categories',
  type: 'document',
  fields: [
    {
      name: 'category',
      title: 'Book Category',
      type: 'string',
      description: 'Category of Book',
    },
  ],
};
Second, import and append it to the list of schemas in schema.js
// Sanity default imports
import book from './book';
import category from './category';

export default createSchema({
  name: 'default',
  types: schemaTypes.concat([
    /* Append to the list of schemas */
    book,
    category,
  ]),
});
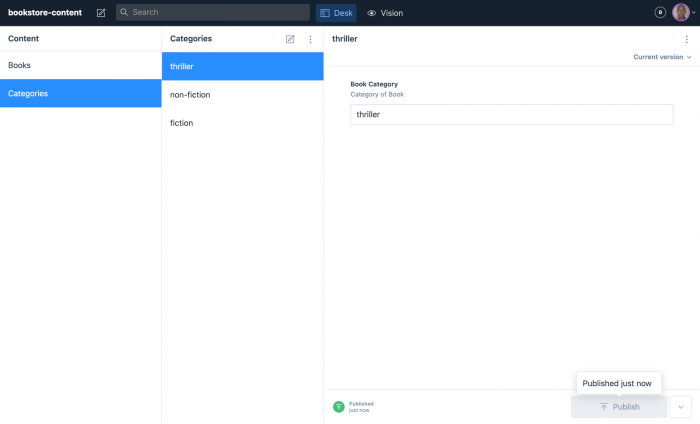
Finally, go ahead and create different documents for Categories. In this example, I have chosen thriller, non-fiction, and fiction.
Sanity exposes your content as data over an API and makes it accessible through a query language similar to GraphQL known as GROQ (Graph Oriented Query language).
Since Gatsby data layer is powered by GraphQL, it is easy to instruct Sanity to make our data accessible through it. To do this, run the command below and affirm to the question: Do you want to use GraphQL playground?
sanity graphql deploy
You will then be presented with a deployment URL to GraphQL playground where you can query your Sanity content.
You can run the query to get all books using allBook as follows:
query {
  allBook {
    name
  }
}
Note, as your work through your project and make changes to your schema, remember to re-deploy to keep your changes updated.
If you are still with me, then you are ready to import the data into Gatsby.
Before we proceed, here are a few Gatsby nuances to be familiar with:
npm packages are to Node projects. You will install plugins to use with your Gatsby app to avoid rewriting code for commonly used functionalities.gatsby-config.js : this is the configuration file for Gatsby, much like .gitignore file for git, .eslintrc for ESlint, or .prettierrc for Prettier.gatsby-browser.js: this is an interface between your Gatsby site and the browser. Whenever we install a Gatsby plugin, we will configure it in gatsby-config.js.To create a new Gatsby app, you need to have the Gatsby CLI installed:
npm install -g gatsby-cli // Installs the gatbsy CLI globally
Then, create a new Gatsby site named gatsby:
gatsby new gatsby // Creates a new gatbsy site named gatsby
Change directory into the new gatsby site:
cd gatsby // Switch directory into the new gatsby site
Finally, run the site:
gatsby develop -p 3000 // Instruct Gatsby to run on port 3000
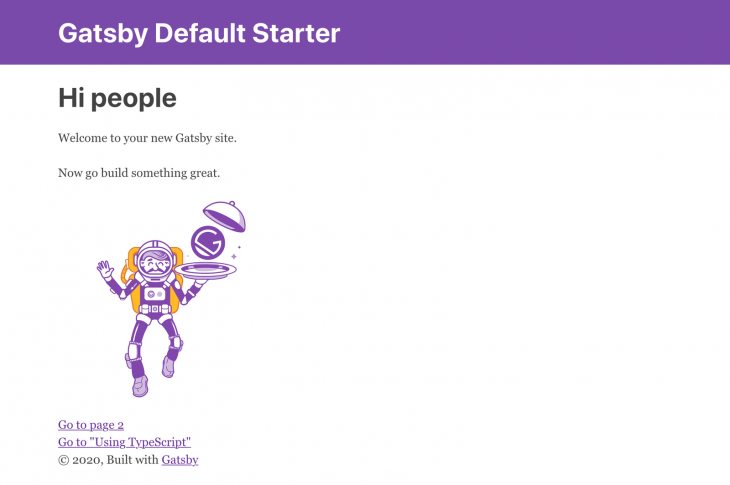
If all went well, the site should be running on http://localhost:3000:
GraphiQL, the default IDE for exploring your Gatsby GraphQL operations, should also be found at http://localhost:3000/_graphql
Fetching data in Gatsby deserves a dedicated topic on its own, but what is most important to note for this article is that Gatsby is data-source agnostic, and can therefore load data from anywhere.
For the purpose of this tutorial, we will be sourcing data into Gatsby’s GraphQL data layer, then querying that data. This can be done either manually or through a plugin. For our purposes, we will use the Sanity CMS plugin.
gatsby-source-sanity is a plugin that helps pull data from Sanity into Gatsby. In your Gatsby app, run the command to install it:
npm install gatsby-source-sanity
Then configure it in gatsby-config.js plugins array:
plugins: [
  {
    resolve: 'gatsby-source-sanity',
  },
  // other plugins
]
You can specify a list of options — required and optional — for the plugin needs. Some of these options are specific to each project and can be found in the Sanity dashboard, while some, like watchMode, aren’t.
Update the plugin configuration with:
plugins: [
  {
    resolve: 'gatsby-source-sanity',
    options: {
      projectId: 'your-project-id',
      dataset: 'your-dataset-name',
      watchMode: true, // Updates your pages when you create or update documents
      token: 'your-token',
    },
  },
]
See the output in the example below:
projectId → uniquely identifies a Sanity projectdataset → in this case, productiontoken → read-token, queries the project API (The token is a sensitive data and shouldn’t be hard-coded. Instead, read from an Gatsby’s environmental variable.)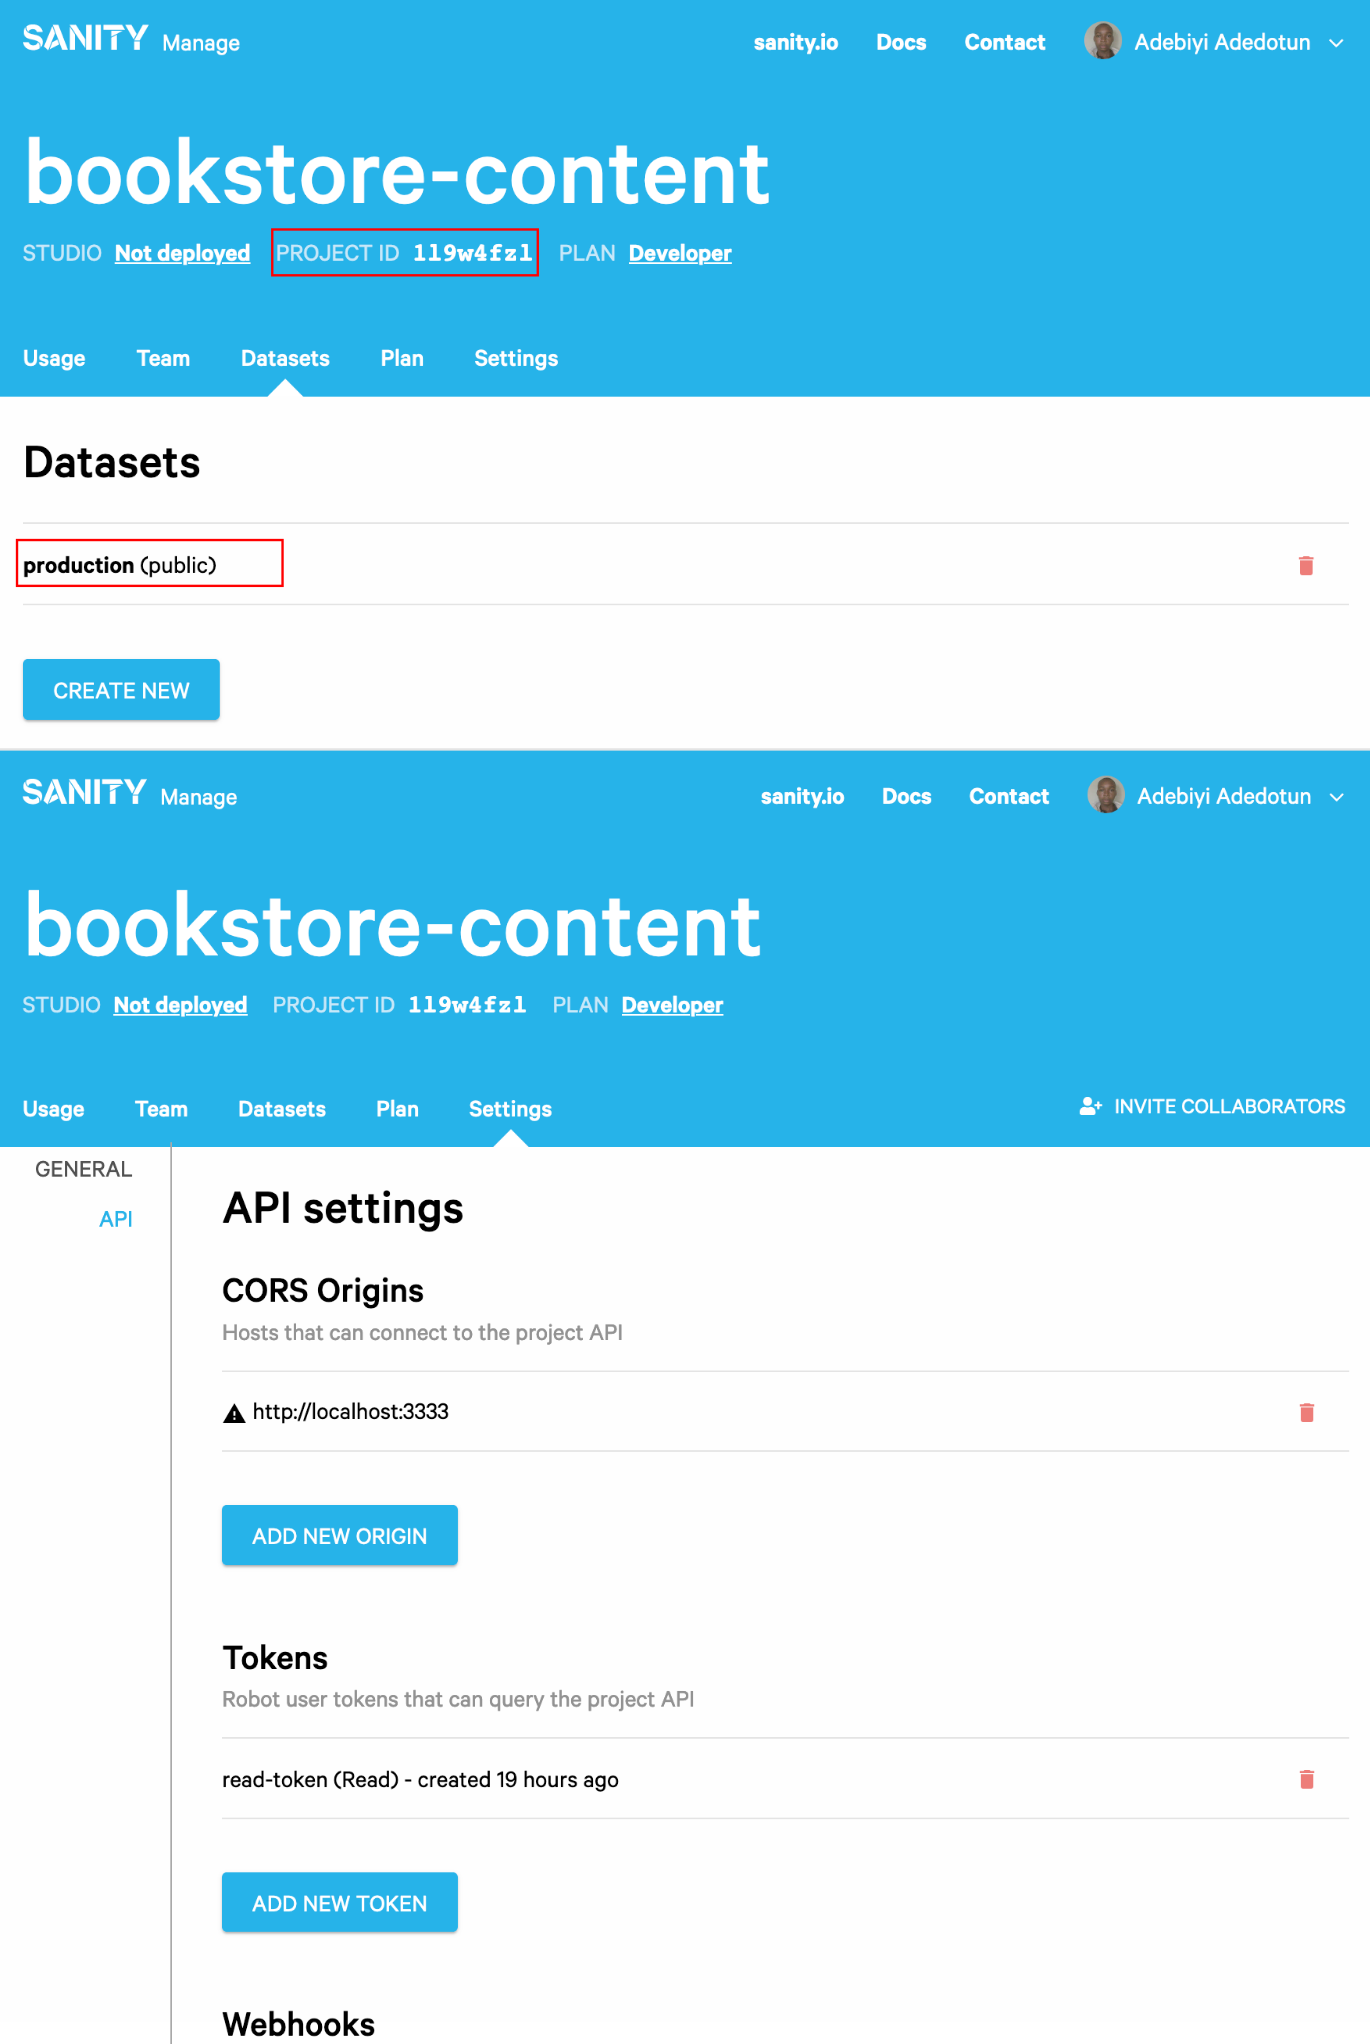
With all the credentials set, restart your Gatsby server then navigate to GraphiQL to run the following query to get all created books:
query {
  allSanityBook {
    nodes {
      name
    }
  }
}
Querying data can be done with Page Query, or Static Query (through the StaticQuery higher-order component or useStaticQuery hook.) The major difference is that page queries are used in pages, while static queries are used for non-page components.
Querying the Sanity data in index.js with page query updates index.js to:
import React from 'react';
import { graphql } from 'gatsby';

// Queried data gets passed as props
export default function IndexPage({ data }) {
  const books = data.allSanityBook.nodes
  return <h1>Index Page</h1>
}

// Query data
export const query = graphql`
  query BooksQuery {
    allSanityBook {
      nodes {
        name
      }
    }
  }
`
Querying the data is done by first importing graphql from gatbsy, then writing the query as a named export. The returned data from the query is then passed as a prop to the default exported component in the page, in this case, IndexPage. The variable books holds the array of books that can subsequently be used in the page as is done below, or passed to another component.
The final update of index.js is:
import React from 'react'
import { graphql } from 'gatsby'

export default function IndexPage({ data }) {
  const books = data.allSanityBook.nodes

  return (
    <div className="books-wrap">
      <div className="container">
        <h1 className="heading">Books</h1>
        <ul className="books">
          {books.map(book => (
            <li className="book-item" key={book.name}>
              <h2 className="title">{book.name}</h2>
              <p className="author">Author: {book.author}</p>
              <p className="release-date">Release Date: {book.releaseDate}</p>
              <span className="category">Category: {book.category[0].category}</span>
            </li>
          ))}
        </ul>
      </div>
    </div>
  )
}

export const query = graphql`
  query BooksQuery {
    allSanityBook {
      nodes {
        name
        author
        releaseDate
        category {
          category
        }
      }
    }
  }
Here is what the final output should look like:
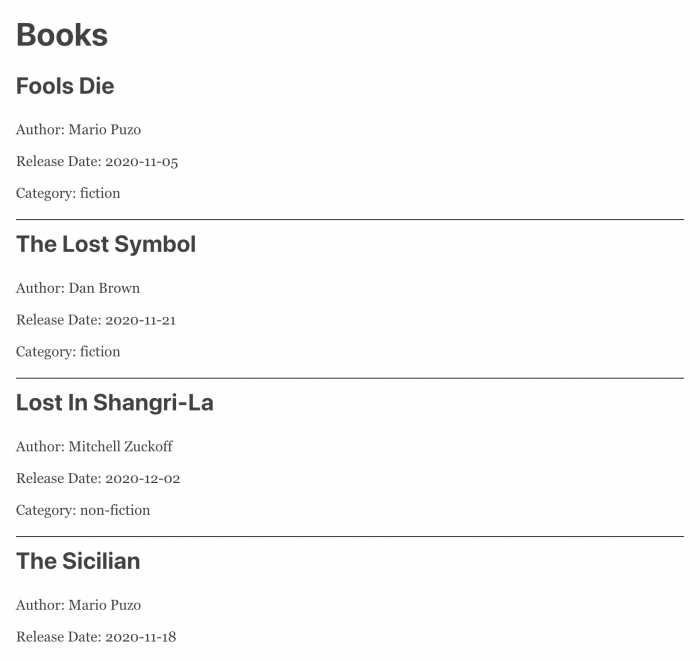
Grab the complete code here.
Content is what makes websites and apps come to life, but it must be modeled and managed appropriately to avoid negatively impacting build speed and efficiency. Developers can use Sanity CMS with Gatsby to decrease build time and optimize web performance through a programmable modern platform that treats content like data.
Install LogRocket via npm or script tag. LogRocket.init() must be called client-side, not
server-side
$ npm i --save logrocket

// Code:

import LogRocket from 'logrocket';
LogRocket.init('app/id');
// Add to your HTML:

<script src="https://cdn.lr-ingest.com/LogRocket.min.js"></script>
<script>window.LogRocket && window.LogRocket.init('app/id');</script>

React Server Components and the Next.js App Router enable streaming and smaller client bundles, but only when used correctly. This article explores six common mistakes that block streaming, bloat hydration, and create stale UI in production.

Gil Fink (SparXis CEO) joins PodRocket to break down today’s most common web rendering patterns: SSR, CSR, static rednering, and islands/resumability.

@container scroll-state: Replace JS scroll listeners nowCSS @container scroll-state lets you build sticky headers, snapping carousels, and scroll indicators without JavaScript. Here’s how to replace scroll listeners with clean, declarative state queries.

Explore 10 Web APIs that replace common JavaScript libraries and reduce npm dependencies, bundle size, and performance overhead.
Hey there, want to help make our blog better?
Join LogRocket’s Content Advisory Board. You’ll help inform the type of content we create and get access to exclusive meetups, social accreditation, and swag.
Sign up now