Editor’s note: This article was last updated by Yan Sun on 21 August 2024 to introduce Angular 18’s unified control state change events and to include frequently asked questions about reactive forms in Angular, along with their answers.

If you’re making a web app, you will need to capture information from your user sooner or later. Fortunately, reactive forms in Angular allow you to create clean forms without using too many directives. They also reduce the need for end-to-end testing as validating your forms is very easy.
Put simply, form controls in Angular give the developer all the control, and nothing is implicit anymore — every choice about inputs and controls must be made intentionally and explicitly. In this tutorial, we’ll show you how to divide form controls by form groups to create clusters that provide a platform to easily access the template element as groups. To illustrate the concept of form groups in Angular, we’ll walk through the process of building a reactive form so that you can fully understand how to set it up.
To follow along, download the starter project on GitHub and open it in VS Code. If you haven’t already, you’ll want to update to the most recent version at the time of writing, Angular v18.
The Replay is a weekly newsletter for dev and engineering leaders.
Delivered once a week, it's your curated guide to the most important conversations around frontend dev, emerging AI tools, and the state of modern software.
In Angular, form controls are fundamental building blocks. They hold both data values and validation rules for individual form elements. Every form input should be bound to a corresponding form control to enable data tracking and validation.
Form groups wrap a collection of form controls. Just as the control gives you access to the state of an element, the group gives you the same access but to the state of the wrapped controls. Every form control in the form group is connected to the appropriate form control in the component code.
FormControl and FormGroup in AngularFormControl is a class in Angular that tracks the value and validation status of an individual form control. Along with FormGroup and FormArray, it is one of the three essential building blocks in Angular forms. As an extension of AbstractControl, FormControl provides access to the value, validation status, user interactions, and relevant events.
A FormGroup in Angular is a container that aggregates multiple FormControl instances. It tracks the values and validation states of the child from controls, organizing them into a single object using their respective names as keys. It calculates its status by reducing the status values of its children so that if one control in a group is invalid, the entire group is rendered invalid.
Before Angular 14, you couldn’t specify a type for a FormControl. This could lead to confusion at runtime over what type was expected to be in a form.
Since Angular 14, FormControl is strongly typed by default. This allows you to specify the expected data type when creating a FormControl. We’ll demonstrate this with a form example in a moment.
To use FormGroup in your Angular component, begin by importing it inside a component.
To see how this works, open the employee.component.ts file and paste the code block below:
import { Component, OnInit } from '@angular/core';
import { FormControl, FormGroup } from '@angular/forms'
@Component({
  selector: 'app-employee',
  templateUrl: './employee.component.html',
  styleUrls: ['./employee.component.css']
})
export class EmployeeComponent implements OnInit {
  bioSection = new FormGroup({
    firstName: new FormControl<string>(''),
    lastName: new FormControl<string>(''),
    age: new FormControl<number|null>(null)
  });
  constructor() { }
  ngOnInit() {
  }
}
Here, the form group was imported and initialized to group some form controls that compose the bio section of the form. To link the group to the view, we need to associate the model to the view with the form group name, like this:
<form [formGroup]="bioSection">
  <label>
    First Name:
    <input type="text" [formControl]="bioSection.controls.firstName" >
  </label>
  <label>
    Last Name:
    <input type="text" [formControl]="bioSection.controls.lastName">
  </label>
  <label>
    Age:
    <input type="text" [formControl]="bioSection.controls.age">
  </label>
  <button type="submit">Submit Application</button>
</form>
We reference the FormGroup created in code, and then directly specify the control to use in the FormControl directive.
Your app.component.html file should look like this:
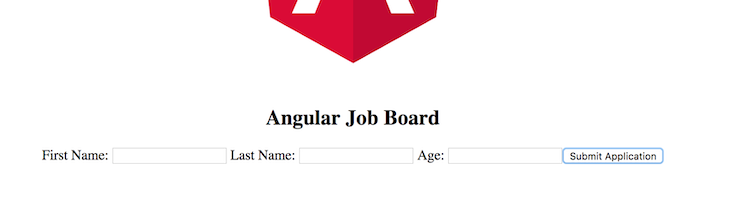
<div style="text-align:center">
  <h2>Angular Job Board </h2>
  <app-employee></app-employee>
</div>
Now run your application in development with this command:
ng serve
It should look like this:
Having a form is useful, but without ensuring the quality of the data, we risk receiving information that is invalid or doesn’t make sense in the given context.
Angular provides an array of built-in validators, so we don’t need to create our own for many common scenarios. In this case, let’s validate that the entered first name and last name are at least three characters long, and the entered age is greater than 18:
// employee.component.ts
bioSection = new FormGroup({
  firstName: new FormControl<string>('', [
    Validators.minLength(3),
    Validators.required
  ]),
  lastName: new FormControl<string>('', [Validators.minLength(3), Validators.required]),
  age: new FormControl<number|null>(null, [Validators.min(18), Validators.required])
});
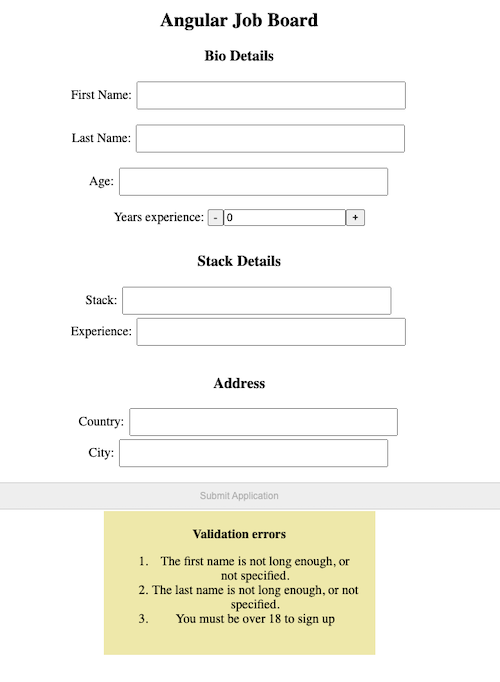
Now, we need to update our HTML template to show what validation errors are on the form, and we also want to prevent submission of the form unless the validation issues are resolved. Our updated form disables the submission button unless the form is valid, and gives feedback to the user to explain what is wrong with the form:
<form [formGroup]="bioSection" style="display: flex; flex-direction: column">
  <label>
    First Name:
    <input type="text" [formControl]="bioSection.controls.firstName">
  </label>
  <label>
    Last Name:
    <input type="text" [formControl]="bioSection.controls.lastName">
  </label>
  <label>
    Age:
    <input type="number" [formControl]="bioSection.controls.age">
  </label>
  <!-- The disabled attribute controls prevents submission if the form is not valid -->
  <button type="submit" [disabled]="!bioSection.valid">Submit Application</button>
</form>
<div style="width: 100%;">
  @if (!bioSection.valid){ <!-- If the form is not valid... -->
    <div style="width: 300px; margin: auto; padding: 20px; background-color: palegoldenrod">
      <b>Validation errors</b>
      <ol>
        <!-- For each control, check that the given parameters have been met-->
        @if (bioSection.controls.firstName.errors?.['minlength'] ?? bioSection.controls.firstName.errors?.['required']){
          <li>The first name is not long enough, or not specified.</li>
        }
        @if (bioSection.controls.lastName.errors?.['minlength'] ?? bioSection.controls.lastName.errors?.['required']){
          <li>The last name is not long enough, or not specified.</li>
        }
        @if (bioSection.controls.age.errors?.['min'] ?? bioSection.controls.age.errors?.['required']){
          <li>You must be over 18 to sign up</li>
        }
      </ol>
    </div>
  }
</div>
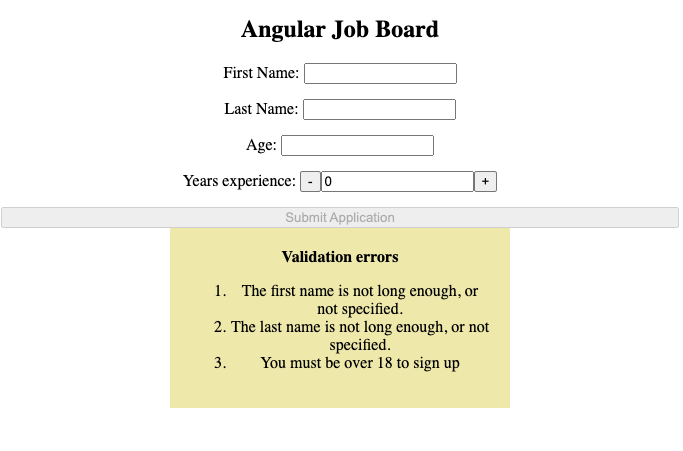
The result of this is a form that only accepts valid input and rejects invalid input:
Angular has many useful controls that are easily added to forms via FormControl. But, sometimes you need to use a specific type of control in your form that isn’t included out of the box in Angular. Fortunately, creating a custom form control is straightforward, and we can reuse it throughout our application. For this example, let’s create a stepper FormControl.
First, let’s create the custom-stepper component. Execute ng generate component CustomStepper to let the Angular CLI generate the skeleton of the component.
Next, let’s design a simple stepper in the HTML markup. The stepper will have an input box, with a plus and minus button on either side to allow the user to increase or decrease the number in the input box. Additionally, if the user enters a value into the box, we want to notify the form that the value has been updated:
<div class="stepper">
  <button (click)="decrement()">-</button>
  <input type="number" [(ngModel)]="value" (input)="updateValue($event)" />
  <button (click)="increment()">+</button>
</div>
Let’s quickly review what’s happening here:
input element is bound to the value property in the component. When it changes, updateValue is called with the new valueNow, let’s dive into the component. First, we need to tell Angular that this component provides a ControlValueAccessor so it can appropriately use and register the form control within this component. Update the providers array to include this information:
@Component({
  selector: 'app-custom-stepper',
  templateUrl: './custom-stepper.component.html',
  styleUrls: ['./custom-stepper.component.css'],
  providers: [
  // Include the NG_VALUE_ACCESSOR
    {
      provide: NG_VALUE_ACCESSOR,
      useExisting: forwardRef(() => CustomStepperComponent),
      multi: true,
    },
  ],
})
Next, we need to implement ControlValueAccessor on this component:
export class CustomStepperComponent implements ControlValueAccessor  {
  // ...component code...
}
This requires the implementation of three functions:
writeValue(value): Writes a new value to the form control, which is controlled by the current form control. If the form is updated programmatically, this function will be executed to make the custom field reflect the value in the modelregisterOnChange(function): Sets up a callback function that is called when the value changes within the UI. This function will ultimately propagate the new value within the form to the underlying data model for the formregisterOnTouched(function): Sets up a function that is called when the form control loses focus. Again, this will propagate the new value to the underlying data model for the formsetDisabledState(boolean) (Optional): This will be called when the control is disabled in the form itself. If false is passed, the control should be made inoperable to the user, while true should make the control active againAs well as this functionality, we also need to implement the code that is native to the stepper itself, such as increasing and decreasing numbers when the plus or minus buttons are pressed. Once we have done this, our component code will look like the following:
import { Component, forwardRef } from '@angular/core';
import { ControlValueAccessor, NG_VALUE_ACCESSOR } from '@angular/forms';

@Component({
  selector: 'app-custom-stepper',
  templateUrl: './custom-stepper.component.html',
  styleUrls: ['./custom-stepper.component.css'],
  providers: [
    {
      provide: NG_VALUE_ACCESSOR,
      useExisting: forwardRef(() => CustomStepperComponent),
      multi: true,
    },
  ],
})
export class CustomStepperComponent implements ControlValueAccessor {
  value: number | null = null;
  onChange: any = () => {};
  onTouch: any = () => {};

  // -- ControlValueAccessor implementation --
  // Called when the form data model is updated programmatically
  writeValue(value: number): void {
    this.value = value;
  }

  // Called when the form control is updated by the user
  registerOnChange(fn: any): void {
    this.onChange = fn;
  }

  // Called when the form control loses focus
  registerOnTouched(fn: any): void {
    this.onTouch = fn;
  }

  // Called when the form control is disabled in code
  setDisabledState(isDisabled: boolean): void {
    // You can implement this method if your control needs to be disabled
  }

  // -- Internal Stepper Implementation --
  // Increase stepper by one
  increment(): void {
    // Increments the value by 1 if it is not null, otherwise sets the value to 1.
    this.updateValue(this.value !== null ? this.value + 1 : 1);
  }

  // Decrease stepper by one
  decrement(): void {
    this.updateValue(this.value !== null ? this.value - 1 : -1);
  }

  // Handles setting the new value and notifying the form of the change
  updateValue(newValue: number | null): void {
    if (newValue !== this.value) {
      this.value = newValue;
      this.onChange(newValue);
      this.onTouch();
    }
  }
}
Finally, within employee.component.html, we can add a reference to our custom control. We’ll also need to add a yearsExperience property to our FormGroup in the component code:
<label>
  Years experience:
  <app-custom-stepper [formControl]="bioSection.controls.yearsExperience"></app-custom-stepper>
</label>
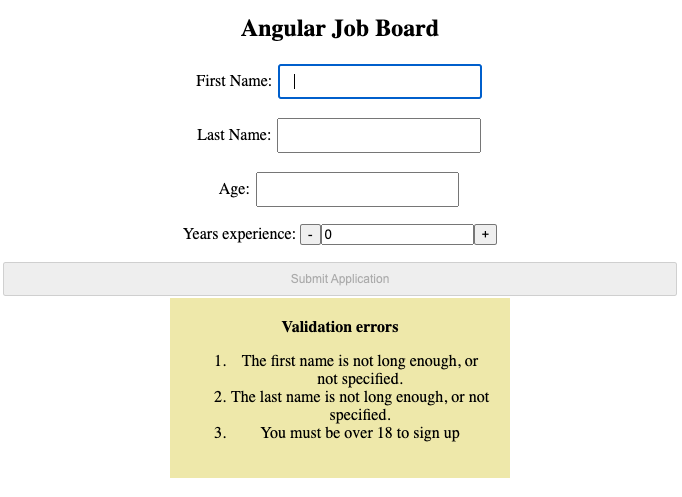
The result is our brand new stepper control being available in the UI:
Now would be a good time to apply some styling so our UI doesn’t look so chaotic. Apply the following rules in the employee.component.css file:
You can style your component with the style instructions below:
input[type=text] {
    width: 30%;
    padding: 8px 14px;
    margin: 2px;
    box-sizing: border-box;
  }
  button {
      font-size: 12px;
      margin: 2px;
      padding: 8px 14px;
  }
The Angular reactive forms API makes it possible to nest a form group inside another form group. To illustrate the nested form groups, copy the code block below into the employee.component.ts file:
import { Component, OnInit } from '@angular/core';
import { FormControl, FormGroup } from '@angular/forms'
@Component({
  selector: 'app-employee',
  templateUrl: './employee.component.html',
  styleUrls: ['./employee.component.css']
})
export class EmployeeComponent implements OnInit {
bioSection = new FormGroup({
  firstName: new FormControl<string>('', [
    Validators.minLength(3),
    Validators.required
  ]),
  lastName: new FormControl<string>('', [Validators.minLength(3), Validators.required]),
  age: new FormControl<number>(null, [Validators.min(18), Validators.required]),
  yearsExperience: new FormControl<number>(0),
  stackDetails: new FormGroup({
    stack: new FormControl<string>(''),
    experience: new FormControl<string>('')
  }),
  address: new FormGroup({
    country: new FormControl<string>(''),
    city: new FormControl<string>('')
  })
});

constructor() { }
ngOnInit() {
  }
  callingFunction() {
    console.log(this.bioSection.value);
   }
}
The main form group wrapper is the bio section, inside of which both the stack details group and the address group are nested. As you can see, nested form groups are not defined by the assignment statement, but rather with the colon, just like a form control.
Reflecting this in the view will look like this:
// copy inside the employee.component.html file
<form [formGroup]="bioSection" (ngSubmit)="callingFunction()">
    <h3>Bio Details
</h3>
  <label>
    First Name:
    <input type="text" formControlName="firstName">
  </label> <br>
<label>
    Last Name:
    <input type="text" formControlName="lastName">
  </label> <br>
<label>
    Age:
    <input type="text" formControlName="age">
  </label>
<div [formGroup]="bioSection.controls.stackDetails">
  <h3>Stack Details</h3>

  <label>
    Stack:
    <input type="text" formControlName="stack" [formControl]="bioSection.controls.stackDetails.controls.stack">
  </label> <br>

  <label>
    Experience:
    <input type="text" formControlName="experience" [formControl]="bioSection.controls.stackDetails.controls.experience">
  </label>
</div>


<div [formGroup]="bioSection.controls.address">
  <h3>Address</h3>

  <label>
    Country:
    <input type="text" [formControl]="bioSection.controls.address.controls.country">
  </label> <br>

  <label>
    City:
    <input type="text" formControlName="city" [formControl]="bioSection.controls.address.controls.city">
  </label>
</div>
<button type="submit">Submit Application</button>
</form>
If you run the application, you should see something like this in your browser:
Occasionally, you may not know all of the data that you want to present to the user when you build the application. You might want to perform an asynchronous operation to retrieve the data, such as retrieving it from an API.
Fortunately, that’s a fairly easy thing to do within Angular forms. Let’s set up a sample scenario to demonstrate this. Within our employee.component.ts file, we will specify a long list of programming languages:
programmingLanguages = [
  'JavaScript',
  'Python',
  'Java',
  'C#',
  'C++',
  'Ruby',
  'Swift',
  'Kotlin',
  'TypeScript',
  'HTML',
  'CSS',
  'PHP',
  'Go',
  'Rust',
  'Objective-C',
  'Scala',
  'Shell',
  'PowerShell',
  'Perl',
  'Lua',
  'Haskell',
  'Dart',
  'Groovy',
  'R',
  'MATLAB',
  'CoffeeScript',
  'F#',
  'Clojure',
  'Elixir',
  'Julia',
  'Haxe',
  'Fortran',
  'Ada',
  'COBOL',
  'Lisp',
  'Scheme',
  'Prolog',
  'Bash',
  'Assembly',
  'Smalltalk',
  'Erlang',
  'OCaml',
  'VHDL',
  'Verilog',
  'PL/I',
  'Ada',
  'ABAP',
  'ActionScript'
];
Next, we need to define two interfaces: one for the current “state” that our query is in, and another for a list of languages:
export interface LanguageResponse {
  state: LanguageResponseState,
  languages: Array<string>
}

export enum LanguageResponseState {
  EMPTY,
  LOADING,
  LOADED,
}
Now, let’s use a signal to handle the asynchronous data within our template. When we initialize the signal, it will be in the EMPTY state as no data would have been loaded into it at that time:
filteredLanguages = signal<LanguageResponse>({state: LanguageResponseState.EMPTY, languages: []});
Within our ngOnInit() function, we want to subscribe to the values that the FormGroup emits. However, we don’t want to hit our API every single time someone enters a new key in the form.
To prevent excessive search requests, we’ll implement debouncing by subscribing to the FormGroup, then piping it through a debounce operator to ensure that the search runs half a second after the form finishes being updated:
ngOnInit() {
  this.bioSection.valueChanges.pipe(debounceTime(500)).subscribe(async x => {
    if (x.languageSearch){ // if a language is specified
      await this.searchForLanguage(x.languageSearch) // search for language
    }
    else{ // if no language is being searched for, reset back to "empty" state
      this.filteredLanguages.set({
        state: LanguageResponseState.EMPTY,
        languages: []
      })
    }
  })
}

  async searchForLanguage(search: string) {
    // set signal to "loading" state
    this.filteredLanguages.set({state: LanguageResponseState.LOADING, languages: []});
    // wait 2 seconds to simulate a web API call
    await new Promise(resolve => setTimeout(resolve, 2000));
    // set results to matching languages
    this.filteredLanguages.set({
      state: LanguageResponseState.LOADED,
      languages: this.programmingLanguages.filter(x => x.toLowerCase().indexOf(search.toLowerCase()) !== -1)
    });
  }
}
Now, we’ll need a search box and a list to select languages from in our HTML document. Fortunately, the new control flow syntax in Angular 17 makes this very easy:
<label>
  Language:
  <input [formControl]="bioSection.controls.languageSearch" >
</label>

@if (filteredLanguages().state === response.EMPTY){
  Please specify a language to search for.
}
@if (filteredLanguages().state === response.LOADING){
  Loading languages...
} @else if (filteredLanguages().state === response.LOADED){
  <select size="5">
    @for (language of filteredLanguages().languages; track language)
    {
      <option>{{language}}</option>
    } @empty {
      <p>No languages match...</p>
    }
  </select>
}
This is the result:
After completing and submitting the form, you will observe the input results returned in the browser console. The code used in this tutorial is available on GitHub.
FormControl to a FormGroupTo add, update, or remove controls in FormGroup, use the following commands:
addControl(): Adds a control and updates its value and validityremoveControl(): Removes a controlsetControl(): Replaces an existing controlcontains(): Checks for enabled controls associated with a given nameregisterControl(): Registers a control but, unlike the other methods, does not update its value and validityFormGroup valueIn Angular, you can set values to individual form groups or set all FormGroup values at once. To modify specific values within a FormGroup, use the patchValue method:
this.myFormGroup.patchValue({
  formControlName1: myValue1,
  // formControlName2: myValue2
});
You don’t need to supply all values here. Fields untouched will be unaffected. To set all FormGroup values simultaneously, use setValue:
this.myFormGroup.setValue({
  formControlName1: myValue1,
  formControlName2: myValue2
});
FormBuilder in Angular?Setting up form controls can be tedious, especially if you’re working with a very long form. Angular’s FormBuilder helps you streamline the process of building advanced forms while avoiding repetition.
Put simply, FormBuilder provides syntactic sugar that eases the burden of creating instances of FormControl, FormGroup, or FormArray and reduces the boilerplate code required to build complex forms.
For a deeper dive and examples of how to build complex forms, check out this Angular FormBuilder tutorial.
When dealing with large forms, performance optimization becomes crucial. Here are some techniques to consider.
OnPush detection strategiesBy default, Angular checks for changes in all the components on every change detection cycle. For large forms, this can lead to unnecessary slowness. We can use the OnPush change detection strategy to minimize the number of checks Angular performs. The OnPush strategy in Angular optimizes performance by only checking a component when its input properties change.
In case the form fields require asynchronous processes like calling external APIs, consider debouncing value changes. Debouncing delays the execution of actions until user input has stabilized, preventing unnecessary processing and improving responsiveness.
trackBy with form arraysWhen using FormArray to handle dynamic lists, we can use trackBy with *ngFor to prevent Angular from re-rendering the entire list when only a single item changes. A trackBy function is a pure function that returns a unique identifier that Angular can use to determine whether an item has changed.
Before Angular 18, we needed to manage multiple event streams for different control state changes, like statusChanges and valueChanges updates, separately. This often led to complex and error-prone code.
Angular 18 introduced a new enhancement to reactive forms: unified control state change events. This feature simplifies how reactive forms handle state changes in form controls.
Now, a new events property is added to the AbstractControl class. This observable streamlines the tracking of form control changes, providing a unified way to monitor value updates, validation status, and other relevant events:
FormSubmittedEvent: Triggered when the form is submittedFormResetEvent: Triggered when the form is resetTouchChangeEvent: Triggered when the control’s touched status changesValueChangeEvent: Triggered when the control’s value changesPristineChangeEvent: Triggered by the control’s pristine state changesStatusChangeEvent: Triggered when the control’s validation status changesWith the new unified event, we can use one method to subscribe to all the control state changes. For example, we can add the following code to employee.component.ts:
  ngOnInit() {
    this.bioSection.get('firstName')?.events.subscribe((event) => {
      console.log(event);
    });
  }
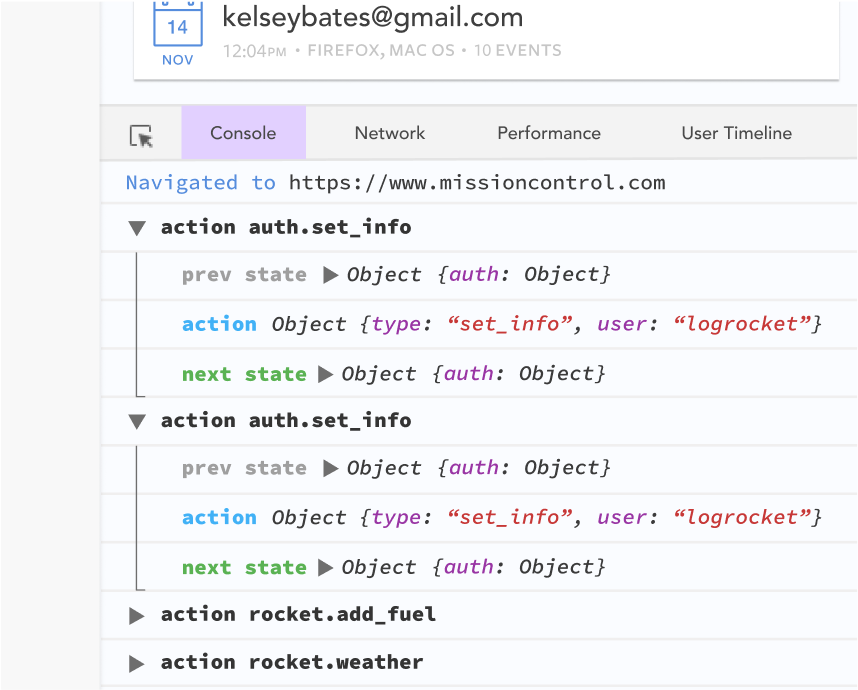
The above example allows us to listen for changes in the firstName control’s value, validation status, and other events. If we enter a value into the firstName input, we can observe the console output like the one below:

By providing a single events observable to track the value, validation status, and other relevant changes, the new feature makes it easier to work with those events reactively.
Here are some commonly asked questions about Angular reactive forms.
FormControlName and FormControl?FormControlName is a directive that connects a form control instance (FormControl) to a template element in the HTML. FormControl represents a single form control, encapsulating its value, validation status, and user interactions.
We can use either of them to represent a form control in an HTML template:
// Use FormControl
<input type="text" [formControl]="bioSection.controls.firstName">

// use FormControlName
<form [formGroup]="bioSection">
    <input type="text" formControlName="firstName">
</form>
Please note that FormControlName must be used with a parent formGroup directive.
FormControl, FormGroup, and FormArray?FormControl, FormGroup, and FormArray are basic building blocks that represent different aspects of the Angular reactive form:
FormControl: Manages the value and validation of a single-form elementFormGroup: A container that groups multiple FormControl instances together. It allows us to manage a collection of related form controls as a single unitFormArray: A container similar to FormGroup but specifically designed for managing an array of form controls. It’s ideal for cases where we have repeating elements in the form.FormGroup based on other controls?To apply conditional validation on some properties based on some other form values, we can use the new unified control state change events. For example, let’s say we want to ensure that the licenseNumber field becomes required only if the age field exceeds 18:
  ngOnInit() {
    this.bioSection.get('age')?.events.subscribe((event) => {
      if (parseInt(event.source.value as string) > 18) {
        this.bioSection.get('licenseNumber')?.addValidators(Validators.required);
      } else {
        this.bioSection.get('licenseNumber')?.removeValidators(Validators.required);
      }
      this.bioSection.get('licenseNumber')?.updateValueAndValidity();
    });
  }
Here, we subscribe to the events observable of the age control within the bioSection FormGroup. When the value of age is greater than 18, we add the required validator to the licenseNumber control. Note that we call updateValueAndValidity to update the validation status of the licenseNumber control to reflect the changes made to its validators.
In this tutorial, we covered everything you need to know about form controls in Angular, including how to use FormControl, how to group form controls with FormGroup, and why it’s critical to capture controls’ collective instances at once.
Debugging Angular applications can be difficult, especially when users experience issues that are difficult to reproduce. If you’re interested in monitoring and tracking Angular state and actions for all of your users in production, try LogRocket.
LogRocket lets you replay user sessions, eliminating guesswork by showing exactly what users experienced. It captures console logs, errors, network requests, and pixel-perfect DOM recordings—compatible with all frameworks.
With Galileo AI, you can instantly identify and explain user struggles with automated monitoring of your entire product experience.
The LogRocket NgRx plugin logs Angular state and actions to the LogRocket console, giving you context around what led to an error, and what state the application was in when an issue occurred.
Modernize how you debug your Angular apps — start monitoring for free.

When should you move API logic out of Next.js? Learn when Route Handlers stop scaling and how ElysiaJS helps.

Explore how Dokploy streamlines app deployment with Docker, automated builds, and simpler infrastructure compared to traditional CI/CD workflows.

A side-by-side look at Astro and Next.js for content-heavy sites, breaking down performance, JavaScript payload, and when each framework actually makes sense.

AI-generated tests can speed up React testing, but they also create hidden risks. Here’s what broke in a real app.re
Hey there, want to help make our blog better?
Join LogRocket’s Content Advisory Board. You’ll help inform the type of content we create and get access to exclusive meetups, social accreditation, and swag.
Sign up now

