Editor’s note: This React boilerplate article was last updated on 13 March 2023 to define the criteria for the best boilerplates and include a section on the Razzle boilerplate. Check out this article for information on the top React Native boilerplates.

Recently, React has become one of the most loved frontend frameworks of all time. This means that more developers are building projects in React than ever before.
Non-opinionated by design, the React library benefits from the use of boilerplates, pieces of code that act as a logical starting point while beginning development with any technology. In this article, we will look at five boilerplates for React and explore their strengths and weaknesses.
Jump ahead:
The Replay is a weekly newsletter for dev and engineering leaders.
Delivered once a week, it's your curated guide to the most important conversations around frontend dev, emerging AI tools, and the state of modern software.
Choosing a React boilerplate requires careful consideration and, most importantly, a solid understanding of the underlying technology — React. Speed and developer experience are general concerns when picking a boilerplate. Still, you should examine each boilerplate listed to see if it satisfies any extra interests you may have — for example, TypeScript support.
Some criteria that can justify the quality of a React boilerplate includes:
Vite is a relatively new frontend development tool for JavaScript projects that has gained traction among developers. It is well known for its lightning-fast development experience, fast build times, hot module replacement (HMR), and other developer-friendly features. Created and maintained by Evan You of Vue.js and other Vite maintainers, Vite uses esbuild — an extremely fast bundler for the web written in Go — under the hood as a faster alternative to bundlers like webpack or Parcel.
Vite is not only limited to React and can be used to bootstrap projects using several popular frontend frameworks like Vue, Svelte, Preact, and more. It also provides opt-in TypeScript support.
Let’s see how to set up a new Vite application.
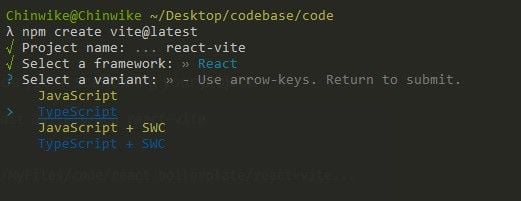
For the scope of this article, we will be creating only React projects with these tools. Run the following command from your preferred directory in your terminal:
npm create vite@latest
This will begin the installation process and guide you in scaffolding your project. Name your project and select React as the framework with a variant of your choice. Here we’ll set it up with TypeScript:
When the installation is complete, you should see the instructions below:
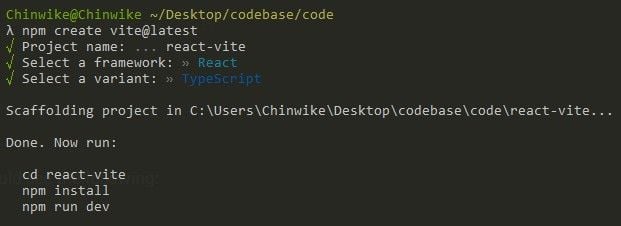
The commands above will navigate you into the project directory. Install the project dependencies with npm install and spin up a dev server on localhost:5173:
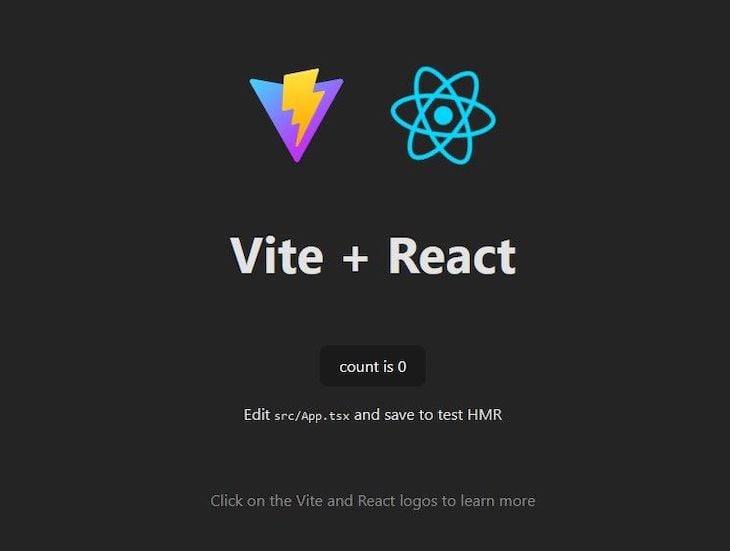
And as quick as that, you have a new React project to work with! Do note that in order for the dev script to run properly, we need to be on the latest build version of Node.js that supports worker_threads. Otherwise, we get this error while trying to run the dev script:
Cannot find module 'worker_threads'
You can use nvm to install the latest version of npm and to manage previously installed versions.
Vite is different from the other boilerplate tools in this list because it was built keeping the developer experience (DX) in mind.
Vite supports an extensive set of features, however, the main problem that Vite set out to solve is the issue that most bundling tools (think Parcel) face at scale: when the code base grows to a decent size, the bundler takes several minutes to spin up a local instance of a dev server.
Even with optimizations like hot module replacement (HMR) in place, it still takes several seconds for a code update to reflect onto the UI as a live preview in case a critical file is modified.
Vite solves these problems by:
library code and source code and by pre-building the library code using esbuildWhile the development server does not bundle code, the production scripts still build a bundle using Rollup that is highly optimized.
Strong points:
Weak points:
Therefore, if you are looking for something that is on the bleeding edge as far as developer experience, future-proofing, and performance enhancements are concerned, Vite is the best boilerplate for you.
Create React App (CRA) is an open source tool built for easily creating new React projects. It is maintained and recommended by the React team at Facebook. As per the official documentation site:
Create React App is a comfortable environment for learning React, and is the best way to start building a new single-page application in React.
Create React App (CRA) has many built-in features that make the development process faster and more efficient. Here are some of the benefits of using CRA:
Let’s now see how to create a React project with CRA.
In order to set up a new app using create-react-app, run the following command:
npx create-react-app my-app
The npx command used here is different from the npm commands. npx stands for node package execute, which gets automatically installed onto the system with npm version 5.2.0 or higher. The specialty of the npx command is that it can execute any package from the npm repository without the need for installing the package beforehand.
That command creates a new folder called my-app in the current directory and sets up a React project inside that folder.
In order to run a development server and work on the app, we use the command:
npm start
![]()
When satisfied with the code changes, we can use:
>npm run build
This generates an optimized build folder that can be deployed wherever we want to host our app.
--template flag:npx create-react-app my-app –template [template-name]typescript template:npx create-react-app my-app –template typescriptnode-sassWhile the simplicity that Create React App brings to the table is much appreciated, there are some scenarios in which we need additional control over our codebase and its features.
To handle such scenarios, Create React App provides us with the ability to eject dependencies. We can customize the build tool or other configurations by running the script:
npm run eject
This one-way operation removes the single react-scripts dependency that did all the heavy lifting behind the scenes. It also brings back all the dependencies and transitive dependencies like webpack and Babel into the package.json where the user can have full control over them.
Dependencies before ejecting:
"dependencies": {
"@testing-library/jest-dom": "^5.11.4",
"@testing-library/react": "^11.1.0",
"@testing-library/user-event": "^12.1.10",
"papercss": "^1.8.2",
"react": "^17.0.1",
"react-dom": "^17.0.1",
"react-scripts": "4.0.2",
"web-vitals": "^1.0.1"
},
Dependencies after ejecting:
"dependencies": {
"@babel/core": "7.12.3",
"@pmmmwh/react-refresh-webpack-plugin": "0.4.3",
"@svgr/webpack": "5.5.0",
"@testing-library/jest-dom": "^5.11.4",
"@testing-library/react": "^11.1.0",
"@testing-library/user-event": "^12.1.10",
"@typescript-eslint/eslint-plugin": "^4.5.0",
"@typescript-eslint/parser": "^4.5.0",
"babel-eslint": "^10.1.0",
"babel-jest": "^26.6.0",
"babel-loader": "8.1.0",
"babel-plugin-named-asset-import": "^0.3.7",
"babel-preset-react-app": "^10.0.0",
"bfj": "^7.0.2",
"camelcase": "^6.1.0",
"case-sensitive-paths-webpack-plugin": "2.3.0",
"css-loader": "4.3.0",
"dotenv": "8.2.0",
"dotenv-expand": "5.1.0",
"eslint": "^7.11.0",
"eslint-config-react-app": "^6.0.0",
"eslint-plugin-flowtype": "^5.2.0",
"eslint-plugin-import": "^2.22.1",
"eslint-plugin-jest": "^24.1.0",
"eslint-plugin-jsx-a11y": "^6.3.1",
"eslint-plugin-react": "^7.21.5",
"eslint-plugin-react-hooks": "^4.2.0",
"eslint-plugin-testing-library": "^3.9.2",
"eslint-webpack-plugin": "^2.1.0",
"file-loader": "6.1.1",
"fs-extra": "^9.0.1",
"html-webpack-plugin": "4.5.0",
"identity-obj-proxy": "3.0.0",
"jest": "26.6.0",
"jest-circus": "26.6.0",
"jest-resolve": "26.6.0",
"jest-watch-typeahead": "0.6.1",
"mini-css-extract-plugin": "0.11.3",
"optimize-css-assets-webpack-plugin": "5.0.4",
"pnp-webpack-plugin": "1.6.4",
"postcss-flexbugs-fixes": "4.2.1",
"postcss-loader": "3.0.0",
"postcss-normalize": "8.0.1",
"postcss-preset-env": "6.7.0",
"postcss-safe-parser": "5.0.2",
"prompts": "2.4.0",
"react": "^17.0.1",
"react-app-polyfill": "^2.0.0",
"react-dev-utils": "^11.0.2",
"react-dom": "^17.0.1",
"react-refresh": "^0.8.3",
"resolve": "1.18.1",
"resolve-url-loader": "^3.1.2",
"sass-loader": "^10.0.5",
"semver": "7.3.2",
"style-loader": "1.3.0",
"terser-webpack-plugin": "4.2.3",
"ts-pnp": "1.2.0",
"url-loader": "4.1.1",
"web-vitals": "^1.0.1",
"webpack": "4.44.2",
"webpack-dev-server": "3.11.0",
"webpack-manifest-plugin": "2.2.0",
"workbox-webpack-plugin": "5.1.4"
}
It is usually not very common to eject from Create React App but it is good to have that option if you know what you are doing.
Strong points:
Weak points:
However, if you are looking for a trusted way to get started with React development without the hassle of having to do things yourself, then Create React App is the tool to use.
Create Next App is a modern solution for bootstrapping simple and advanced React apps using the Next.js framework. Next.js shines in a case where your app requires advanced rendering techniques like server-side rendering, static site generation, or even incremental static regeneration. Next.js can also be used to build single page applications (SPAs) like Vite and CRA.
At the time of writing, the current version of Next.js (Next 13) has had some major changes, giving developers a choice between two variants:
pages directoryapp directory for file-based routing while implementing React Server ComponentsDepending on when you read this, the App router may be stable and widely adopted for creating new Next.js apps. But for this tutorial, we’ll go ahead with the stable version.
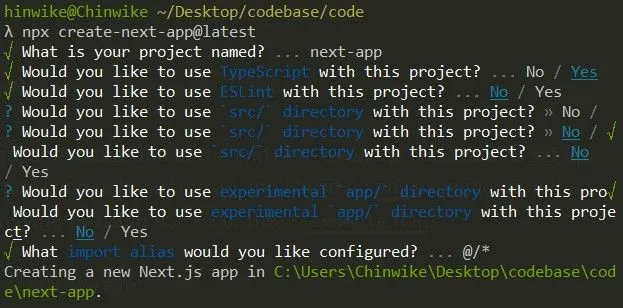
Run the following command in your terminal:
# Next 13 stable
npx create-next-app@latest
#or
# Next 13 App router
npx create-next-app@latest --experimental-app
This will start the interactive CLI — similar to what we saw with create-vite — to help you easily scaffold your new Next project:
In the end, a new Next.js project should be set up. There are also options to bootstrap an app based on any example from the official documentation page by using the -e or the --example flag.
To start the dev server, run:
npm run dev
This brings up the homepage of the dev server:
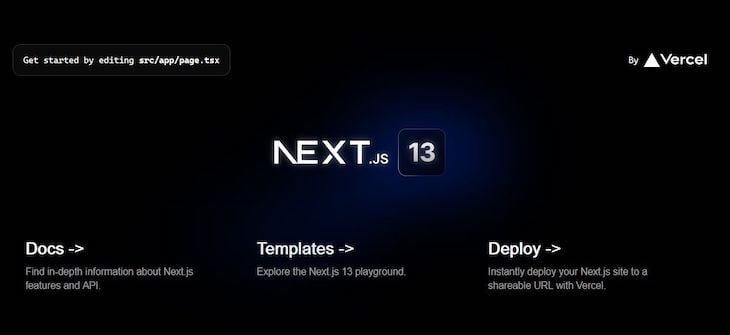
Create Next App creates a folder structure that looks something like this:
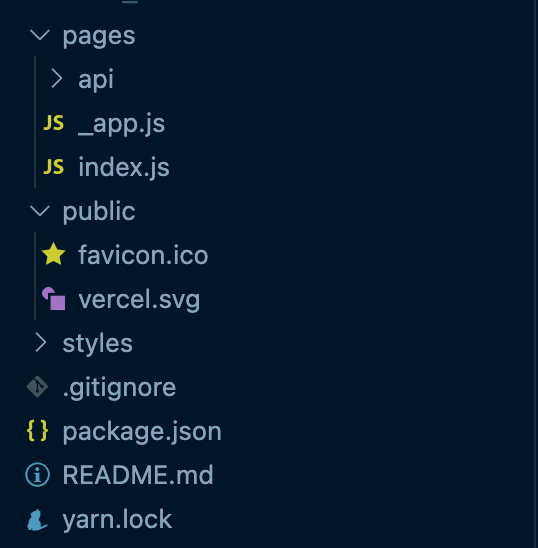
Any JavaScript or TypeScript file created in the pages directory creates a route in the Next.js app with the same name as that of the file. Any required assets (like images) are to be placed inside of the public folder. CSS and Less are supported by default.
getStaticProps() methodgetServerSideProps() methodN.B., If you end up going the Next App router way, keep in mind that getStaticPaths, getStaticProps, and getServerSideProps have all been dropped and replaced with a new technique to achieve the same thing.
Strong points:
Weak points:
With that in mind, if you’re looking to build a static site, a server-rendered site, or a basic one, then Next.js is your tool. It is also well-maintained and integrates well with other modern frontend tools — like Tailwind CSS and Tanstack Query. You won’t be disappointed taking this route.
React Starter Kit describes itself as the web’s most popular Jamstack frontend template (boilerplate) for building web applications with React. The homepage also mentions that React Starter Kit is highly opinionated, which means that it has already selected the tech stack for us, including GraphQL, MaterialUI, Firebase Auth, TypeScript, Vite, and more.
In order to get started with the boilerplate, we need to clone the latest repository and use that as the starting point:
$ git clone https://github.com/kriasoft/react-starter-kit.git my-react-app
Then, move into the created folder and install the dependencies:
cd my-react-app
$ yarn install
Start the dev server as follows:
yarn start
That brings up the boilerplate homepage:
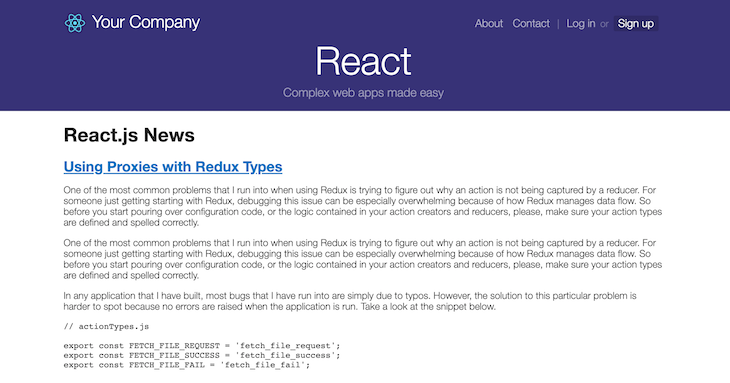
The main feature of this boilerplate is that it is highly feature-packed yet highly customizable. In addition to the exhaustive file structure that we get at repo setup:
.
├── /build/ # The folder for compiled output
├── /docs/ # Documentation files for the project
├── /node_modules/ # 3rd-party libraries and utilities
├── /public/ # Static files which are copied into the /build/public folder
├── /src/ # The source code of the application
│ ├── /components/ # React components
│ ├── /data/ # GraphQL server schema and data models
│ ├── /routes/ # Page/screen components along with the routing information
│ ├── /client.js # Client-side startup script
│ ├── /config.js # Global application settings
│ ├── /server.js # Server-side startup script
│ └── ... # Other core framework modules
├── /test/ # Unit and end-to-end tests
├── /tools/ # Build automation scripts and utilities
│ ├── /lib/ # Library for utility snippets
│ ├── /build.js # Builds the project from source to output (build) folder
│ ├── /bundle.js # Bundles the web resources into package(s) through Webpack
│ ├── /clean.js # Cleans up the output (build) folder
│ ├── /copy.js # Copies static files to output (build) folder
│ ├── /deploy.js # Deploys your web application
│ ├── /postcss.config.js # Configuration for transforming styles with PostCSS plugins
│ ├── /run.js # Helper function for running build automation tasks
│ ├── /runServer.js # Launches (or restarts) Node.js server
│ ├── /start.js # Launches the development web server with "live reload"
│ └── /webpack.config.js # Configurations for client-side and server-side bundles
├── Dockerfile # Commands for building a Docker image for production
├── package.json # The list of 3rd party libraries and utilities
└── yarn.lock # Fixed versions of all the dependencies
And the number of scripts that we get out of the box:
// package.json
"scripts": {
    "start": "vite serve",
    "build": "vite build",
    "preview": "vite preview",
    "test": "vitest",
    "coverage": "vitest --coverage",
    "deploy": "yarn workspace edge deploy",
    "app:start": "yarn workspace app start",
    "app:build": "yarn workspace app build",
    "app:preview": "yarn workspace app preview",
    "app:deploy": "yarn workspace app deploy"
  },
The library also provides several recipes, which are like official guides that explain solutions to common problems while working with react-bootstrap, which makes it super handy.
Strong points:
Weak points:
With the advanced features React Starter Kit offers, you may like to try this out for building large-scale applications. However, this tool can be overwhelming if you’re just starting to learn React.
Razzle is a tool for building server-rendered universal JavaScript applications with no configuration. It is built on top of popular frontend frameworks like React, Vue, and Preact, and allows developers to easily create server-rendered applications that can be easily deployed to various hosting environments.
To get started with Razzle, run the the following command in a terminal:
npx create-razzle-app razzle-app
This command will automatically install the project’s dependencies for you. Next, move into the created folder and run the development server:
cd my-app
yarn start
N.B., you may run into some issues with Webpack while trying to run the dev server 'ERR_OSSL_EVP_UNSUPPORTED'. This is a hashing error as Node no longer supports md4 as a hash function. In this case, start the server this way:
NODE_OPTIONS=--openssl-legacy-provider yarn start
This brings up the homepage of the dev server:
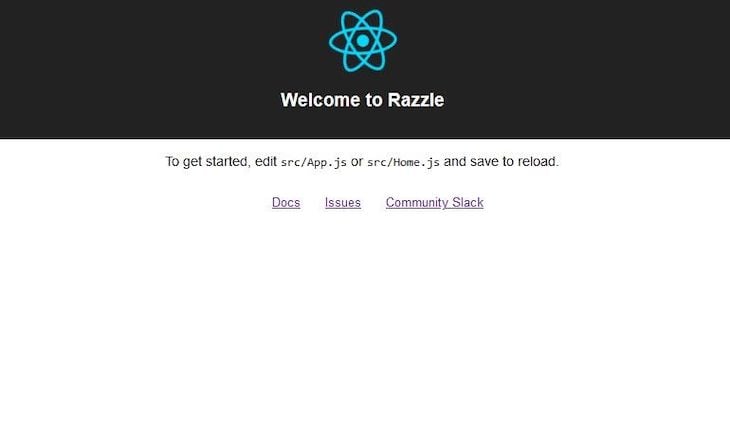
.babelrc and razzle.config.jsrazzle testStrong points
Weak points
With that, we wrap up the roundup for top React boilerplates in 2023. As we can see, each one of them comes with its own set of strengths and weaknesses. This means the choice that you will make will vary greatly based on the use case at hand and the desired end result. Luckily, you are not short of choices.
Install LogRocket via npm or script tag. LogRocket.init() must be called client-side, not
server-side
$ npm i --save logrocket

// Code:

import LogRocket from 'logrocket';
LogRocket.init('app/id');
// Add to your HTML:

<script src="https://cdn.lr-ingest.com/LogRocket.min.js"></script>
<script>window.LogRocket && window.LogRocket.init('app/id');</script>

When should you move API logic out of Next.js? Learn when Route Handlers stop scaling and how ElysiaJS helps.

Explore how Dokploy streamlines app deployment with Docker, automated builds, and simpler infrastructure compared to traditional CI/CD workflows.

A side-by-side look at Astro and Next.js for content-heavy sites, breaking down performance, JavaScript payload, and when each framework actually makes sense.

AI-generated tests can speed up React testing, but they also create hidden risks. Here’s what broke in a real app.re
Would you be interested in joining LogRocket's developer community?
Join LogRocket’s Content Advisory Board. You’ll help inform the type of content we create and get access to exclusive meetups, social accreditation, and swag.
Sign up now

