One of the most important parts of every ecommerce solution is the cart functionality. It is crucial to make it possible for users to conveniently add and remove items from their cart.

In a previous post, I showed you how to build a fast ecommerce site using SvelteKit and the Shopify Storefront API. But we didn’t touch on how to manage the cart in that post. That’s what we’ll do in this one — show you how to add and remove products from a cart via the Shopify Storefront cart API.
Here’s a quick refresher: the site we are talking about is currently deployed here on Netlify and hosted on GitHub. Have a look and play around with it for a bit if you want. When you’re done, come back let’s jump right in.
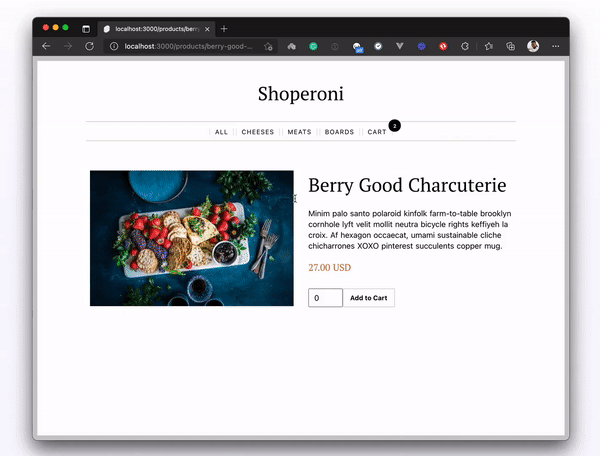
Looking at our deployed site, we can see in the product details page that we can click a button to add the product to the cart. This seems like a very good candidate for serverless functions, but Svelte also offers API routes and we’ll be using it for this project.
With Svelte API routes, we can set up an add-to-cart endpoint that we can post our product details to whenever a user clicks the Add To Cart button. The endpoint will receive the data and make a POST request to Shopify to either create a cart with the product or add the product to a cart (if one exists).
In the src/routes folder, create a new folder called api. In it, we can create our first endpoint called add-to-cart.js and set it up like so:
// src/routes/api/add-to-cart
import { createCartWithItem } from './utils/createCartWithItem';
import { addItemToCart } from './utils/addItemToCart';

export async function post(request) {
    let { cartId, itemId, quantity } = JSON.parse(request.body);
    quantity = parseInt(quantity);
    if (cartId) {
        console.log('Adding item to existing cart...');
        const shopifyResponse = await addItemToCart({
            cartId,
            itemId,
            quantity
        });
        return {
            statusCode: 200,
            body: JSON.stringify(shopifyResponse.cartLinesAdd.cart)
        };
    } else {
        console.log('Creating new cart with item...');
        const createCartResponse = await createCartWithItem({
            itemId,
            quantity
        });
        return {
            statusCode: 200,
            body: JSON.stringify(createCartResponse.cartCreate.cart)
        };
    }
}
The logic here is straightforward. When the Add To Cart button is clicked, we get the necessary details (cartId, itemId, and quantity) from the product page and post them to this endpoint. Then in the endpoint above, we receive the data and check if a valid cartId is present in the request body.
I used utility functions here (createCartWithItem and addItemToCart) to speed things along. Feel free to look them up to get a better understanding of what we did there.
Now that we’ve set up an endpoint to receive our product data and add it to the cart, we can go back into the product page and define an addToCart function to post data to this endpoint:
//src/routes/products/[handle].svelte
<script context="module">
    import { getProductDetails } from '../../../store';
    export async function load(ctx) {
        // ...
    }
</script>

<script>
    // ...
    let quantity = 0;
    let selectedProduct = productVariants[0].id;
        const addToCart = async () => {
        // add selected product to cart
        try {
            const addToCartResponse = await fetch('/api/add-to-cart', {
                method: 'POST',
                body: JSON.stringify({
                    cartId: localStorage.getItem('cartId'),
                    itemId: selectedProduct,
                    quantity: quantity
                })
            });
            const data = await addToCartResponse.json();
            // save cart to localStorage
            localStorage.setItem('cartId', data.id);
            localStorage.setItem('cart', JSON.stringify(data));
            location.reload();
        } catch (e) {
            console.log(e);
        }
    };
    function price(itemPrice) {
        const amount = Number(itemPrice).toFixed(2);
        return amount + ' ' + 'USD';
    }
</script>
<main>
<!-- page content -->
</main>
All we did here is add the addToCart() function to this file. We already know what the function should do and that’s precisely what we’ve set it up to do: collect the itemId, cartId, and the selected quantity of the product and post it to our add-to-cart endpoint.
If the cartId is null — as I expect it to be when a user clicks that button the first time — a new cart will be created and saved to localStorage. So let’s test this out:
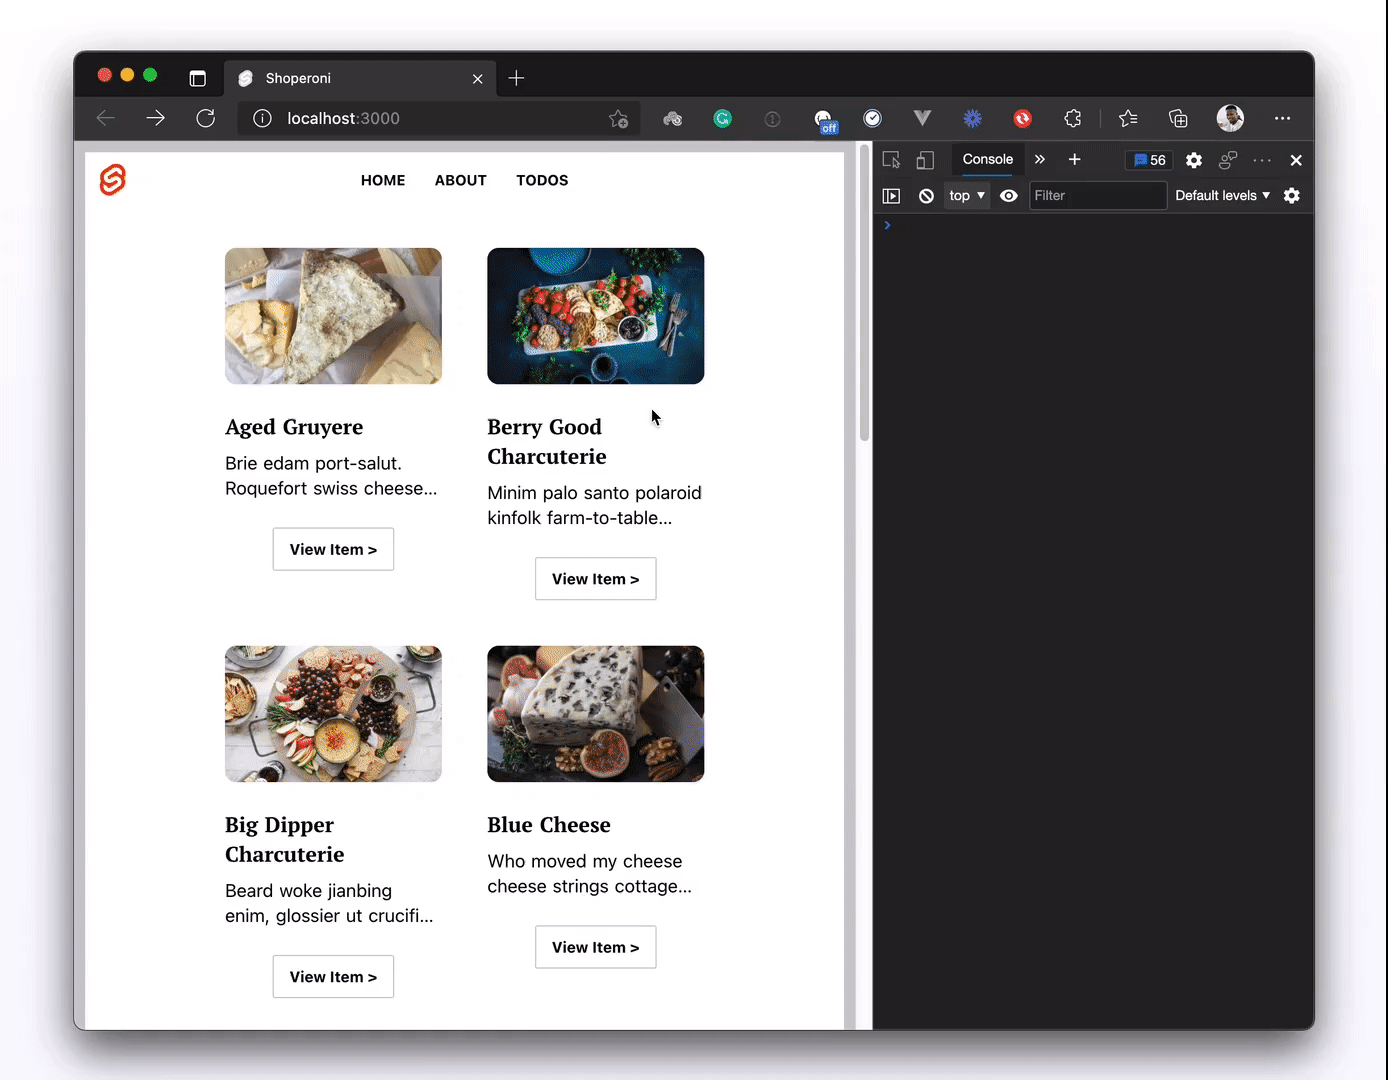
Annnnnnnnnnnd, yes! We are successfully adding items to the cart, yay! But it’s not so obvious yet. Logging the response to the console is not exactly useful to a user, so let’s create a Header component to make it obvious when an item has been added to the cart:
// src/components/Header.svelte
<script>
    import { onMount } from 'svelte';
    let count;
    import '../../src/app.css';
    let cart;
    onMount(() => {
        cart = JSON.parse(localStorage.getItem('cart'));
        if (cart) {
            count = cart.lines.edges.length;
        }
    });
</script>
<section>
    <header class="app-header">
        <h1>Shoperoni</h1>
        <nav class="main-nav">
            <ul>
                <li class="main-nav-item">
                    <a href="/">All</a>
                </li>
                <li class="main-nav-item">
                    <a href="/?type=cheese">Cheeses</a>
                </li>
                <li class="main-nav-item">
                    <a href="/?type=meat">Meats</a>
                </li>
                <li class="main-nav-item">
                    <a href="/?type=boards">Boards</a>
                </li>

                <li class="main-nav-item">
                        <div class="cart-size">{count || 0}</div>
                        <a href="/cart">Cart</a>
                </li>
            </ul>
        </nav>
    </header>
</section>
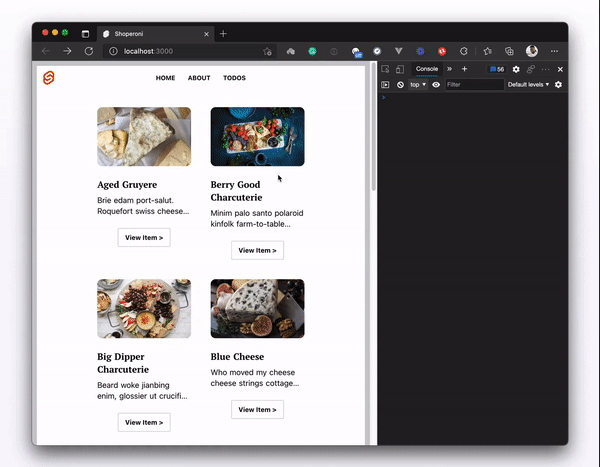
This is the <Header/> component that will display our navigation items at the top of the page. Within the component, we added a cart item to the navbar. The cart count will increment/decrement with respect to the number of items in the cart (from localStorage).
Now we just need to update our src/routes/__layout.svelte file to import and use the new Header component:
// src/routes/__layout.svelte
<script>
    import Header from '../components/Header.svelte';
    import '../app.css';
</script>
<Header />
<main>
    <slot />
</main>
Testing this out on the browser, we should get the desired experience:
At this point, we probably need to view the cart when we add items to it, right? Let’s create a cart.svelte page in the src/routes folder and set it up like so:
// src/routes/cart.svelte
<script>
    import CartTable from '../components/CartTable.svelte';
    import CartTotal from '../components/CartTotal.svelte';
    import { onMount } from 'svelte';
    let cart;
    let cartItems = [];
    onMount(() => {
        // get cart details from localStorage
        cart = JSON.parse(localStorage.getItem('cart'));
        cartItems = cart.lines.edges;
    });
</script>
<section>
    <main class="cart-page">
        <article class="cart-page-content">
            <h1>Your Cart</h1>
            {#if cartItems.length > 0}
                <CartTable />
                <CartTotal />
            {:else}
                <section v-else>
                    <p class="cart-page-message">Your cart is empty, fill it up!</p>
                    <a href="/" class="cart-page-button is-dark"> Back to Products </a>
                </section>
            {/if}
        </article>
    </main>
</section>
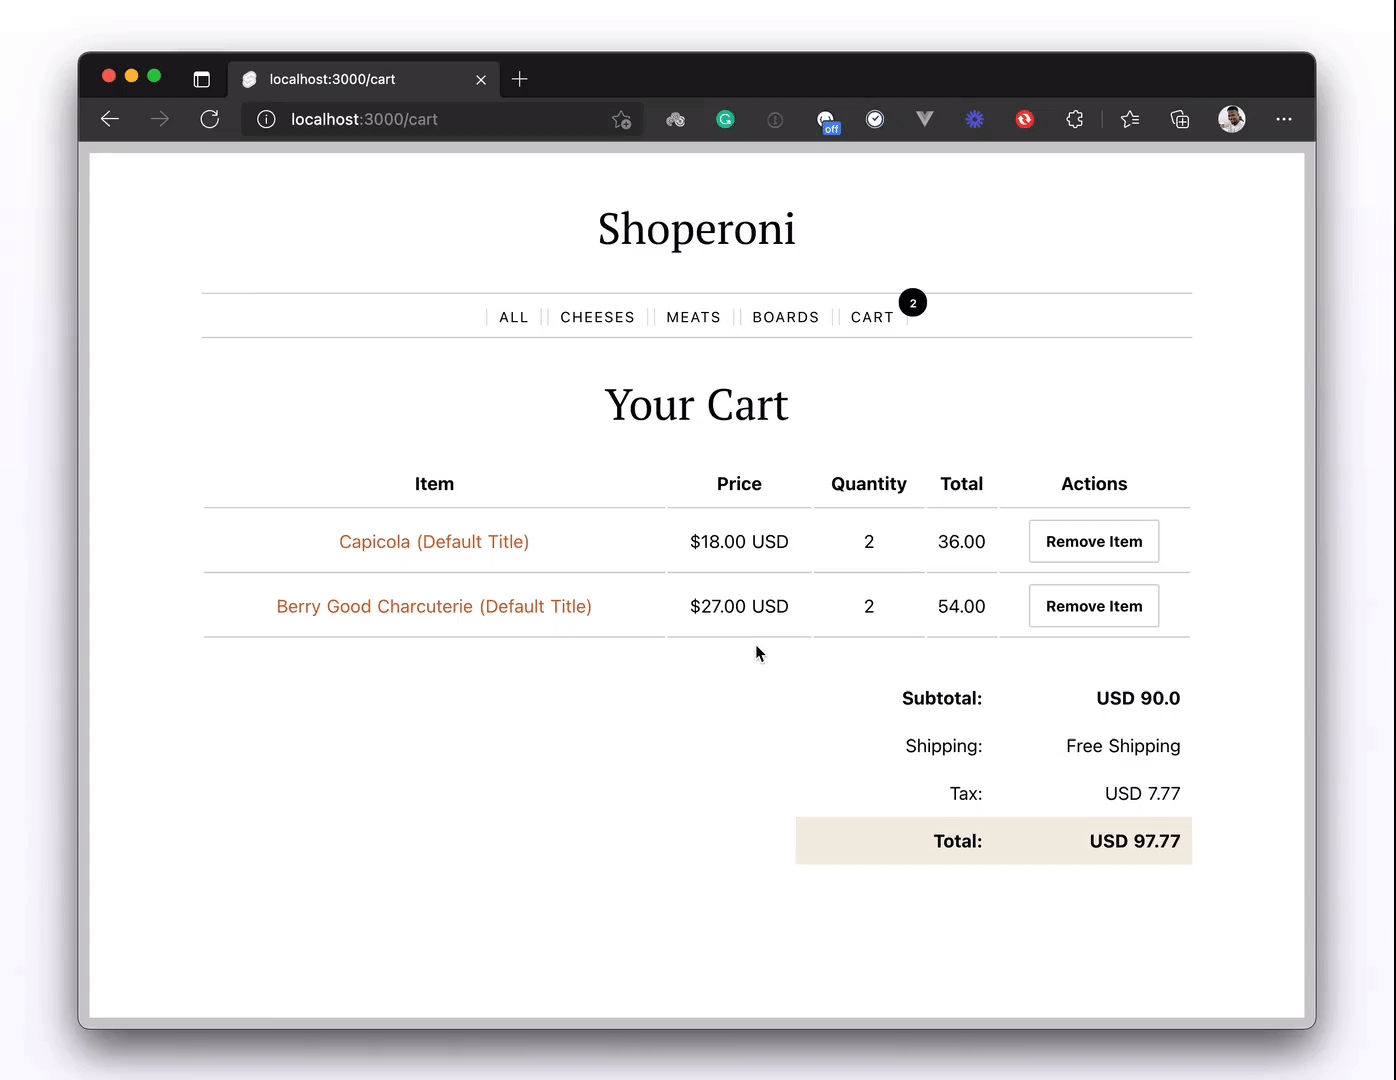
On this cart page, when the components mount, we get our cart data from localStorage and save it into the cart variable we declared. Then in the page content, we’ll conditionally show the items in the cart if there are any. Otherwise, we just tell users to add items to the cart.
And with that, we’ve successfully set up our cart page. If you noticed that we used new components here, good eye! You can access them here: CartTable component and CartTotal component.
I’m striving to keep this post within a reasonable length, so I’ll not be diving into utility functions and components in detail. I’ve provided links to the project repository and also to the direct files we accessed in these snippets so that it’s easy for you to quickly look them up if you want to.
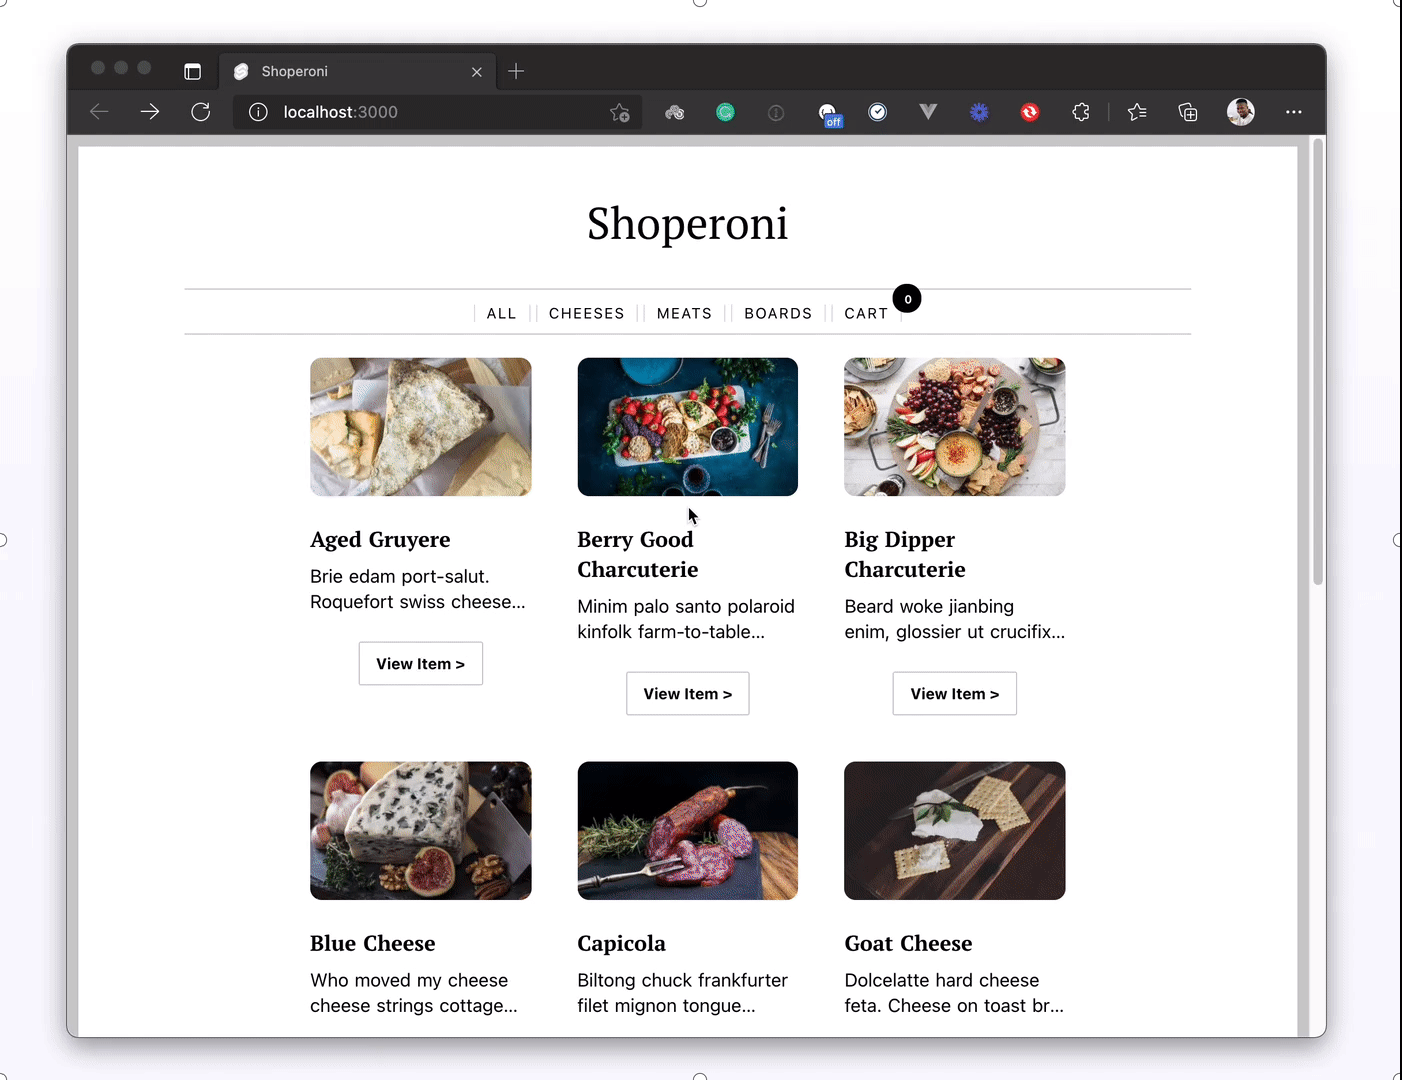
Let’s check back on the browser for our cart page implementation:

It looks like our cart is working correctly, and the only thing left is to remove items from the cart.
This would be the reverse of what we did to add items to the cart. When a user clicks the Remove Item button, we’ll make a post request to our /remove-from-cart endpoint and update the cart in localStorage with the new response. Let’s create the endpoint in the api folder:
// src/routes/api/remove-from-cart
import { removeItemFromCart } from './utils/removeItemFromCart';
export async function post(request) {
    const { cartId, lineId } = JSON.parse(request.body);
    try {
        const shopifyResponse = await removeItemFromCart({
            cartId,
            lineId
        });
        return {
            statusCode: 200,
            body: JSON.stringify(shopifyResponse.cartLinesRemove.cart)
        };
    } catch (error) {
        console.log('There was an error removing-item-from-cart');
        console.log(error);
    }
}
Like the other utility functions we’ve used so far, you can find the removeItemFromCart() function here for your use. Looks like we are all set with removing items from the cart, except we haven’t hooked it up to our Remove Item button. To do that, we need to trigger that post request when the button is clicked from our CartTable component:
//src/components/CartTable.svelte
<script>
    import { formatCurrency } from '../utils/currency';
    import { onMount } from 'svelte';
    let cartItems = [];
    let cart;
    onMount(() => {
        cart = JSON.parse(localStorage.getItem('cart'));
        cartItems = cart.lines.edges;
    });
    function itemTotal(price, quantity) {
        const totalPrice = Number(price) * Number(quantity);
        return totalPrice.toFixed(2);
    }
    async function removeItem(lineId) {
        // remove item from Shopify cart
        const removeItemFromCart = await fetch('/api/remove-from-cart', {
            method: 'POST',
            body: JSON.stringify({
                cartId: localStorage.getItem('cartId'),
                lineId
            })
        })
            .then((res) => res.json())
            .then((data) => data);
        // update localStorage;
        localStorage.setItem('cartId', removeItemFromCart.id);
        localStorage.setItem('cart', JSON.stringify(removeItemFromCart));
        location.reload();
    }
</script>
<section>
    <!-- other page content -->
    <td class="cart-table-cell">
        <button on:click={removeItem(item.id)}>Remove Item</button>
    </td>
</section>
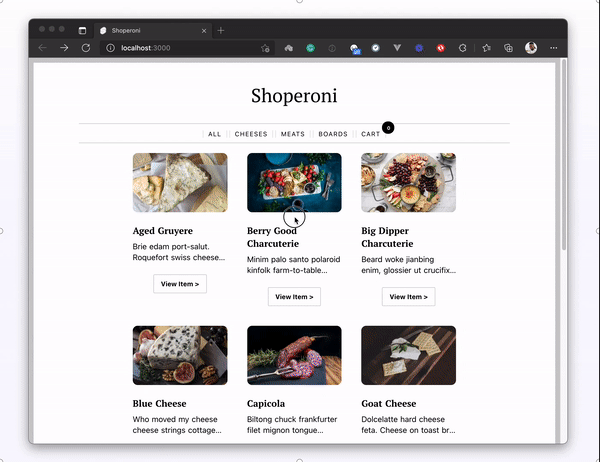
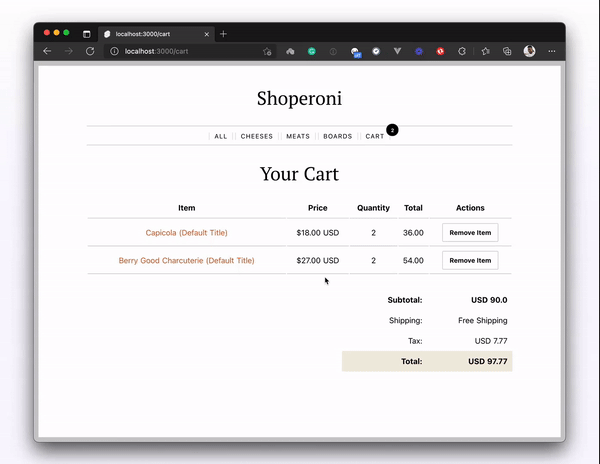
And now if we click on the Remove Item button, we should see that the item gets removed from the cart:
And with that, we come to the end of our mini Shopify and SvelteKit adventure. I hope you enjoyed the process as much as I did building it.
If you have any issues, feel free to open an issue or even better, send a PR on the project repository. The demo is also hosted here on Netlify if you’d like to explore the site.
LogRocket lets you replay user sessions, eliminating guesswork around why users don't convert by showing exactly what users experienced. It captures console logs, errors, network requests, and pixel-perfect DOM recordings — compatible with all frameworks.
LogRocket's Galileo AI watches sessions for you, instantly identifying and explaining user struggles with automated monitoring of your entire product experience.
Start proactively monitoring your ecommerce apps — try LogRocket for free.

We built the same app in TanStack Start RSC and Next.js RSC. TanStack shipped 40% less JS and built 4x faster — but Next.js is still the safer production bet.

From RSC vulnerabilities and the Vercel breach to TypeScript 7.0 Beta and AI agents — the nine frontend storylines that defined H1 2026, ranked.

AI tools generate working React code fast, but miss race conditions, empty states, debouncing, and accessibility. Here’s how to catch bugs before production.

Learn how to use Gemini CLI subagents to delegate frontend, backend, testing, and docs tasks to specialized agents with guardrails and clear ownership.
Would you be interested in joining LogRocket's developer community?
Join LogRocket’s Content Advisory Board. You’ll help inform the type of content we create and get access to exclusive meetups, social accreditation, and swag.
Sign up now

