Editor’s note: This article was last updated by Nwani Victory on 15 July 2024 to include information on managing HTTP headers and cookies, handling concurrency with HTTP requests, and using third-party libraries for HTTP requests.

HTTP, or hypertext transfer protocol, is a communication protocol that ensures the transfer of data between a client and a server. A perfect instance of an HTTP client-server interaction is when you open your browser and type in a URL. Your browser acts as a client and fetches resources from a server, which it then displays.
In web development, cases where we need to fetch resources are very common. You might be making a weather application and need to fetch the weather data from an API. In such a case, using your browser as a client would no longer be possible from within your application. So you have to set up an HTTP client within your application to handle the making of these requests.
Most programming languages have various structures in place for setting up HTTP clients to make requests. In the following sections, we will take a hands-on approach to exploring how you can make HTTP requests in Golang, or Go, as I will refer to the language for the rest of the article.
The Replay is a weekly newsletter for dev and engineering leaders.
Delivered once a week, it's your curated guide to the most important conversations around frontend dev, emerging AI tools, and the state of modern software.
To follow this article you will need:
The first request we will be making is a GET request. The HTTP GET method is used to request data from a specified source or server. The GET method is mostly used when data needs to be fetched.
For the sake of clarity, it is important to note that the HTTP methods, as seen in this article, are always capitalized.
For our example, we will be fetching some example JSON data from https://jsonplaceholder.typicode.com/posts using the GET method.
The first step in making an HTTP request with Go is to import the net/http package from the standard library. This package provides us with all the utilities we need to make HTTP requests with ease. We can import the net/http package and other packages we will need by adding the following lines of code to a main.go file that we create:
import (
   "io/ioutil"
   "log"
   "net/http"
)
The net/http package we imported has a Get function used for making GET requests. The Get function takes in a URL and returns a response of type pointer to a struct and an error. When the error is nil, the response returned will contain a response body and vice versa:
resp, err := http.Get("https://jsonplaceholder.typicode.com/posts/1")
if err != nil {
   log.Fatalln(err)
}
To make the request, we invoke the Get function, passing in a URL string (https://jsonplaceholder.typicode.com/posts) as seen above. The values returned from the invocation of this function are stored in two variables typically called resp and err.
Although the resp variable contains our response, if we print it out we would get a load of incoherent data, which includes the header and properties of the request made. To get the response we are interested in, we have to access the Body property on the response struct and read it before finally printing it out to the terminal. We can read the response body using the ioutil.ReadMe function.
Similar to the Get function, the ioutil.ReadMe function returns a body and an error. It is important to note that the response Body should be closed after we are done reading from it to prevent memory leaks.
The defer keyword, which executes resp.Body.Close() at the end of the function, is used to close the response body. We can then print out the value of the response to the terminal. As good programmers, it is important to handle possible errors, so we use an if statement to check for any errors and log the error if it exists:
package main

import (
   "io/ioutil"
   "log"
   "net/http"
)

func main() {
   resp, err := http.Get("https://jsonplaceholder.typicode.com/posts")
   if err != nil {
      log.Fatalln(err)
   }
//We Read the response body on the line below.
   body, err := io.ReadAll(resp.Body)
   if err != nil {
      log.Fatalln(err)
   }
//Convert the body to type string
   sb := string(body)
   log.Printf(sb)
}
At this point, we are all set and can execute the file containing our code. If everything went well, you will notice that some JSON data similar to the image below gets printed to the terminal:
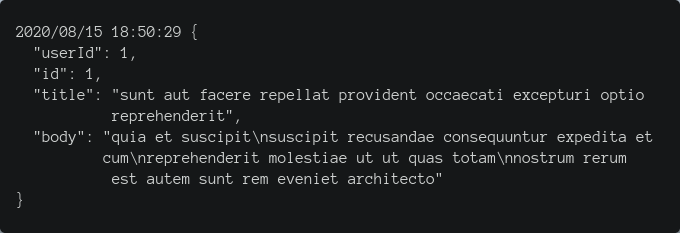
Congratulations, you have just made your first HTTP request with Go. Now that we have seen how we can fetch resources from a server using the HTTP GET method, we will look at how to post resources to a server next.
The HTTP POST method is used to make requests that usually contain a body. It is used to send data to a server; the data sent is usually used to create or update resources.
A clear instance where a POST request is used is when a user tries to create a social media account and they are required to provide their data (name, email, and password). This data is then parsed and sent as a POST request to a server, which then creates and saves the user. Just like with the GET method seen above, Go’s net/http package also provides functionality for making POST requests through the Post function. The Post function takes three parameters:
io.ReaderThe Post function returns a response and an error. For us to invoke the Post function, we have to convert our request body to the accepted type. For this example, we will make a post request to https://postman-echo.com/post and pass in JSON data containing a name and an email.
To get started, we convert our JSON data to a type that implements the io.Reader interface the Post function expects. This is a two-part step:
io.Reader interface. We simply use the NewBuffer function for this, passing in the encoded JSON data as an argument. The NewBuffer function returns a value of type buffer, which we can then pass onto the Post function:
postBody, _ := json.Marshal(map[string]string{
   "name":  "Toby",
   "email": "[email protected]",
})
responseBody := bytes.NewBuffer(postBody)
Now that we have all the arguments the Post function requires, we can invoke it, passing in https://postman-echo.com/post as the URL string, application/JSON as the content type, and the request body returned by the NewBuffer function as the body.
The values returned by the Post function are then assigned to resp and err representing the response and error, respectively. After handling the error, we read and print in the response body as we did for the Get function in the previous section. At this point, your file should look like this:
import (
   "bytes"
   "encoding/json"
   "io/ioutil"
   "log"
   "net/http"
)

func main() {
//Encode the data
   postBody, _ := json.Marshal(map[string]string{
      "name":  "Toby",
      "email": "[email protected]",
   })
   responseBody := bytes.NewBuffer(postBody)
//Leverage Go's HTTP Post function to make request
   resp, err := http.Post("https://postman-echo.com/post", "application/json", responseBody)
//Handle Error
   if err != nil {
      log.Fatalf("An Error Occured %v", err)
   }
   defer resp.Body.Close()
//Read the response body
   body, err := ioutil.ReadAll(resp.Body)
   if err != nil {
      log.Fatalln(err)
   }
   sb := string(body)
   log.Printf(sb)
}
When the file is executed, if everything works well, we should have the response printed out. Amazing, right? We just made a post request with Go using the net/http package, which provides functionality that makes HTTP requests easier. In the next section, we will work on a project, to help us see HTTP requests being used in a real-life scenario.
Headers are crucial in network requests, containing additional data about the resource being fetched and the request’s originator. For most API services, the request rate limit and authentication details are specified in the request headers.
Go’s HTTP client provides developers with the option to add headers to their network requests to pass additional information such as authentication tokens or keys, TTL values, and location.
To specify a request header, you will use the NewRequest() function from the net/http package. The NewRequest function allows you to modify a request’s cookies and headers, and specify an optional request body.
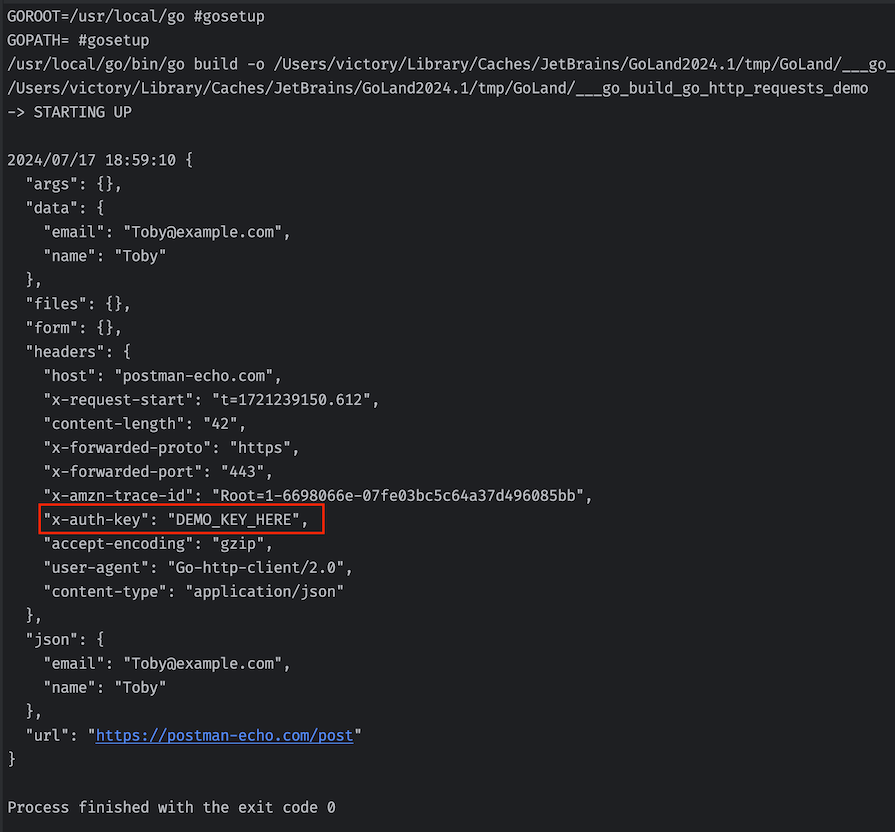
The following code block shows a modification of the initial POST request to specify a header with X-Auth-Key with the value DEMO_KEY_HERE. Notice that the http.Post() function was replaced with the NewRequest() function:
import (
   "bytes"
   "encoding/json"
   "io/ioutil"
   "log"
   "net/http"
)

func main() {
  postBody, _ := json.Marshal(map[string]string{
    "name":  "Toby",
    "email": "[email protected]",
  })

  responseBody := bytes.NewBuffer(postBody)
    //Leverage Go's HTTP Post function to make request
    resp, err := http.NewRequest(http.MethodPost, "https://postman-echo.com/post", responseBody)
    resp.Header.Add("X-Auth-Key", "DEMO_KEY_HERE")

    response, err := http.DefaultClient.Do(resp)

    //Handle Error
    if err != nil {
        log.Fatalf("An Error Occured %v", err)
    }
    defer response.Body.Close()
    //Read the response body
    body, err := ioutil.ReadAll(response.Body)
    if err != nil {
        log.Fatalln(err)
    }
    sb := string(body)
    log.Printf(sb)

}
Executing this request, you will find the API x-auth-key value in the JSON output as highlighted in the following image:
In this section, we will build a cryptocurrency price checker CLI tool! This exercise aims to show you a real-life use case for HTTP requests. The tool we are building will check the price of whatever cryptocurrency the user selects in the specified fiat currency.
We will use the crypto market cap and pricing data provided by Nomics to get the price of the cryptocurrencies in real time! To get started, create the needed files and folders to match the tree structure below:
├── model/
│   ├── crypto-model.go
├── client/
│   ├── crypto-client.go
└── main.go
In the crypto-model file, we create a struct that models the data received from the API. This struct includes only the specific data we need/intend to work with. Next, we create a function called TextOutput, which is a receiver that belongs to the Cryptoresponse struct we created up above.
The purpose of the TextOutput function is to format the data received from the API to plain text, which is easier to read than JSON (which we receive from the server). We use the fmt.Sprintf function to format the data:
package model

import (
   "fmt"
)

// Cryptoresponse is exported, it models the data we receive.
type Cryptoresponse []struct {
   Name              string    `json:"name"`
   Price             string    `json:"price"`
   Rank              string    `json:"rank"`
   High              string    `json:"high"`
   CirculatingSupply string    `json:"circulating_supply"`
}

//TextOutput is exported,it formats the data to plain text.
func (c Cryptoresponse) TextOutput() string {
p := fmt.Sprintf(
  "Name: %s\nPrice : %s\nRank: %s\nHigh: %s\nCirculatingSupply: %s\n",
  c[0].Name, c[0].Price, c[0].Rank, c[0].High, c[0].CirculatingSupply)
   return p
}
Now that the crypto-model file is ready, we can move on to the crypto-client file, which is the most relevant to us. In the crypto-client file, we create a FetchCrypto function that takes in the name of the cryptocurrency and fiat currency as parameters.
Note that we capitalize the first letter of the function name. This is to ensure it is exported.
In the FetchCrypto function, we create a variable called URL. The variable is a concatenation of the URL string provided by the Nomics API and the various variables that will be passed into our application.
Remember how our application takes in the name of the desired cryptocurrency and the preferred fiat currency? These are the variables that are then used to build our URL string. Our URL string will look like this:
URL := "...currencies/ticker?key=3990ec554a414b59dd85d29b2286dd85&interval=1d&ids="+crypto+"&convert="+fiat
After setting up the URL, we can then use the Get function we saw above to make a request. The Get function returns the response and we handle the error elegantly. To get the data we want, in the format we want, we have to decode it! To do so, we use the Json.NewDecoder function that takes in the response body and a decode function, which takes in a variable of type cryptoresponse, which we created in the crypto-model file.
Lastly, we invoke the TextOutput function on the decoded data to enable us to get our result in plaintext:
package client

import (
   "encoding/json"
   "fmt"
   "log"
   "net/http"

   "github.com/Path/to/model"
)

//Fetch is exported ...
func FetchCrypto(fiat string , crypto string) (string, error) {
//Build The URL string
   URL := "https://api.nomics.com/v1/currencies/ticker?key=3990ec554a414b59dd85d29b2286dd85&interval=1d&ids="+crypto+"&convert="+fiat
//We make HTTP request using the Get function
   resp, err := http.Get(URL)
   if err != nil {
      log.Fatal("ooopsss an error occurred, please try again")
   }
   defer resp.Body.Close()
//Create a variable of the same type as our model
   var cResp model.Cryptoresponse
//Decode the data
   if err := json.NewDecoder(resp.Body).Decode(&cResp); err != nil {
      log.Fatal("ooopsss! an error occurred, please try again")
   }
//Invoke the text output function & return it with nil as the error value
   return cResp.TextOutput(), nil
}
From what we have above, the application is coming together nicely. However, if you try to run the file above, you will encounter a couple of errors. This is because we are not invoking the FetchCrypto function and so the value of the fiat and crypto parameters are not provided. We will put all the various parts of our application together in the main.go file we created. Because our application is a command-line tool, users will have to pass in data through the terminal. We will handle that using Go’s flag package.
In the main function, we create two variables: fiatcurrency and nameofcrypto. These variables both invoke the flag.string function, passing in:
Next, we invoke the FetchCrypto function we defined in the crypto-client file and pass in the fiatcurrency and nameofcrypto variables. We can then print the result of the call to FetchCrypto:
package main

import (
    "flag"
    "fmt"
    "log"

    "github.com/path/to/client"
)

func main() {
    fiatCurrency := flag.String(
      "fiat", "USD", "The name of the fiat currency you would like to know the price of your crypto in",
    )

    nameOfCrypto := flag.String(
      "crypto", "BTC", "Input the name of the CryptoCurrency you would like to know the price of",
    )
    flag.Parse()

    crypto, err := client.FetchCrypto(*fiatCurrency, *nameOfCrypto)
    if err != nil {
        log.Println(err)
      }

  fmt.Println(crypto)
}
At this point, we are good to go. If we run the command go run main.go -fiat=EUR -crypto=ETH, we will get an output similar to the image below:
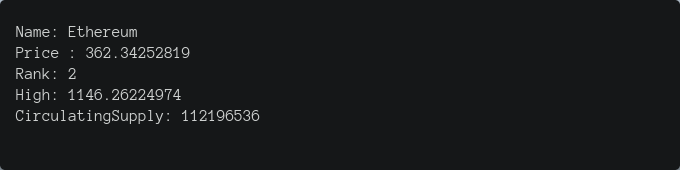
This shows our application is working fine, which is pretty awesome! We have an application that fetches data from a remote server using the HTTP protocol.
Faster and more efficient task processing through concurrency is one of Go’s key features. Developers leverage Golang’s concurrent design for applications such as microservices, real-time monitors, and chat apps that make multiple requests simultaneously.
Go offers various concurrency mechanisms for developers to use based on their needs. These include goroutines and WaitGroups, channels, Mutexes, Worker Pools, and more. It is important to know these mechanisms in-depth as each has its own advantages and disadvantages.
For example, while goroutines are the simplest concurrent mechanism to use, they are ideal for quick scripts with minimal complexity and little need for synchronization. On the other hand, worker pools are efficient for large tasks with better ways to manage resources, but they are complex to implement.
The following code block demonstrates the launching of multiple requests with goroutines to make them run concurrently:
package main

import (
    "fmt"
    "io/ioutil"
    "net/http"
)

func retrievePost(url string, ch chan []byte) {
    client := &http.Client{}
    req, err := http.NewRequest("GET", url, nil)

    if err != nil {
       ch <- nil
       return
    }
    resp, err := client.Do(req)
    if err != nil {
       ch <- nil
       return
    }
    defer resp.Body.Close()
    body, err := ioutil.ReadAll(resp.Body)
    if err != nil {
       ch <- nil
       return
    }
    ch <- body
}

func main() {
    ids := []int{1, 2, 3, 4, 5, 6, 7, 8, 9, 10}
    responses := make(chan []byte, len(ids))
    for _, id := range ids {
       go retrievePost(fmt.Sprintf("https://postman-echo.com/post/%d", id), responses)
    }

    for i := 0; i < len(ids); i++ {
       data := <-responses
       if data == nil {
          fmt.Println("Error fetching a URL")
       } else {
          fmt.Println(string(data)) // Process the response data
       }
    }
}
The code above iterates over an array containing numerical IDs of posts and launches the retrievePost() function as a Goroutine over each iteration using the go keyword. The code has minimal error handling and uses a WaitGroup to wait for all the goroutines to finish before continuing the main function.
In addition to the net/http package, there are other community-managed libraries within the Go ecosystem for making network requests. Third-party libraries such as Resty, Sling, and Gentleman add new features and improve the developer experience of writing code for network requests. A practical example from third-party libraries is the feature to automatically marshal and unmarshal the data within request bodies.
Let’s look more closely at the Resty, Sling, and Gentleman libraries and check out code samples for how to make requests with them:
The Sling library simplifies HTTP requests in Go by using a syntax with a preference for function chaining and other features to avoid code duplication. Sling allows setting a base URL and header values without creating a factory function.
With four lines of code, the following block demonstrates a network request in Go. The code block makes a GET request to the /posts endpoint of the Postman Echo service and checks for any error from the network request:
base := sling.New().Base("https://postman-echo.com")

resp, err := base.New().Get("/posts").ReceiveSuccess(post)

if err != nil { log.Fatalf("Request failed: %s\n", err) }

defer resp.Body.Close()
Resty is a feature-rich HTTP client library for making network requests in Go. Its supported features increase development speed as developers do not need to reimplement them. Some highly used features include support to marshal and unmarshal data in JSON and XML formats, retry mechanisms, request redirect policies, and quick mocks for unit testing.
The following code demonstrates a familiar GET request with the Resty library but this time with a retry logic in use. The retry count after a failed request is set to 3 with an interval between each retry attempt:
client := resty.New()

client.SetRetryCount(3).

SetRetryWaitTime(2 * time.Second).

SetRetryMaxWaitTime(10 * time.Second)

resp, err := client.R().SetResult(post).Get("https://postman-echo.com")

if err != nil { log.Fatalf("Request failed: %s\n", err) }
Gentleman is another highly extensible but complex request library for Go. At the core, it is lightweight, with features for making basic HTTP requests. To use additional features such as auto retries, file upload, redirects, logging, and debugging, you need to install its supported plugins, introducing new overheads to your application.
The following code block shows a GET request being made to the /posts endpoint of the Postman Echo service. The code also sets the request headers to contain an Authorization header with a demo bearer token:
client := gentleman.New()

client.URL("https://postman-echo.com")

req := client.Request().Path("/posts").Method("GET")

req.Use(headers.Set("Authorization", "Bearer MY_DEMO_TOKEN"))

res, err := req.Send()
In this article, we discussed how to make HTTP requests in Go, and we built a CLI tool for checking the prices of cryptocurrencies. I highly recommend checking out the source code and documentation of the net/http package to explore the other amazing functionalities it provides.
Install LogRocket via npm or script tag. LogRocket.init() must be called client-side, not
server-side
$ npm i --save logrocket

// Code:

import LogRocket from 'logrocket';
LogRocket.init('app/id');
// Add to your HTML:

<script src="https://cdn.lr-ingest.com/LogRocket.min.js"></script>
<script>window.LogRocket && window.LogRocket.init('app/id');</script>

Learn how to build advanced Next.js forms with rule engines, client-side previews, Server Actions, and server-validated form logic.

AI is reshaping engineering teams emotionally as well as technically. A CTO shares insights on fear, trust, burnout, identity, and leading through AI change.

Learn what context rot is, why AI agent sessions degrade over time, and how to fix it with compaction, prompt anchoring, context files, plan files, and RAG.

Learn about TypeScript v6’s breaking changes, new ES2025 features, and deprecated options. A complete migration guide from v5 to prepare for v7.
Hey there, want to help make our blog better?
Join LogRocket’s Content Advisory Board. You’ll help inform the type of content we create and get access to exclusive meetups, social accreditation, and swag.
Sign up now

