The Replay is a weekly newsletter for dev and engineering leaders.
Delivered once a week, it's your curated guide to the most important conversations around frontend dev, emerging AI tools, and the state of modern software.
Feathers is a lightweight web framework built over Express for creating applications. Feathers can be used with JavaScript or TypeScript. Users say prototype applications can be built in a matter of minutes with FeathersJS, and production ready applications in a matter of days.

For those of you that are curious about why you should consider trying out new tools, here are a couple of reasons you should give FeathersJS a shot:
In this article, we will be building a simple prototype version of an API with authentication in minutes using FeathersJS and an in-memory database called NeDB. Now let’s go ahead and ensure we have all the prerequisites installed so we can get to the fun stuff:
The only step to installing and setting up FeathersJS is to install the CLI application globally by running the following command:
npm install -g @feathersjs/cli
With these simple steps, we will get our authentication API up and running:
mkdir api-app && cd api-app
The command above basically creates a folder where our API will live, and it changes your current directory to that folder:
feathers generate app
After running this command, you will be asked a couple of questions to determine how your API will be built and what technologies it will use. Here are the options I went with:
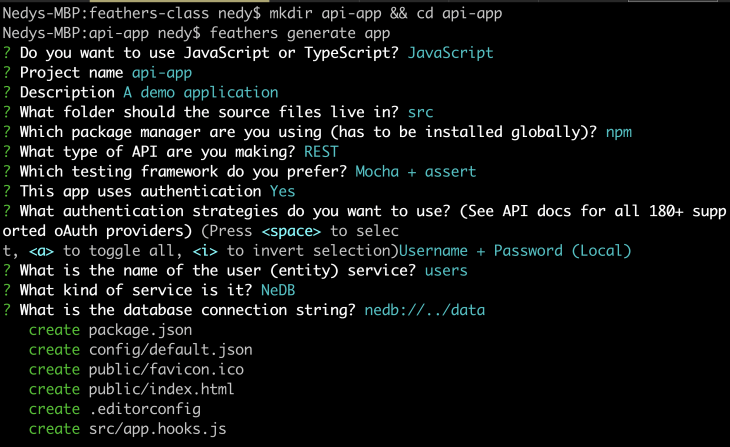
Voilà! Our API is ready.
After installation, you can open your preferred REST API client and test this out. Run the command below to start up the API server:
npm start
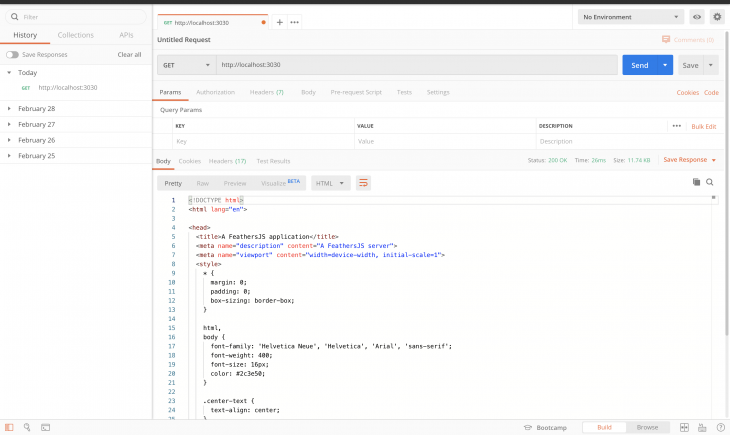
If you try visiting the base route http:localhost:3030 in your REST API client, you should see this response:
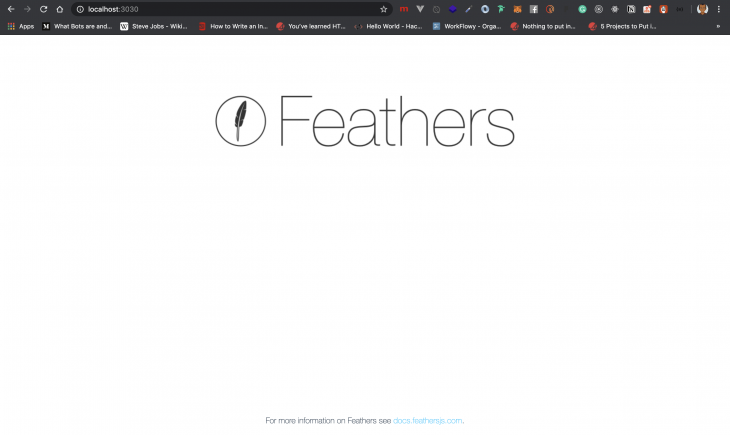
Or, if you try visiting that route with your browser, you would be greeted with this page:
At this point, registration, authentication, and authorization is pretty much set up. You can sign up by sending a POST request with your details to the /users route.
You can log in via the /authentication route, and a token will be returned in the response. This token can then be used as an authorization method to access other routes, such as sending a GET request to /users to retrieve all users.
Now that we have authentication all set up, let’s create a new service that performs CRUD operations on contacts (i.e., creates, reads, updates, and deletes contacts). In a typical REST API CRUD project, we would have to write each method to handle each of the CRUD operations. Well, not with FeathersJS.
With FeathersJS, a single command creates a service that performs all the CRUD operations on a model, and the code is abstracted. Let me show you.
In your terminal, run the command below:
feathers generate service
You will be asked a couple of questions here. For the purposes of this article, these are the options I went with:
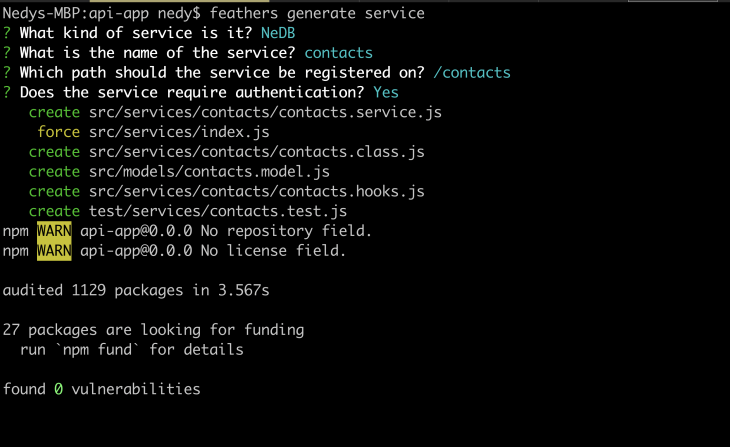
Once all the packages are installed, you can go ahead and perform all CRUD operations on the contacts service via the /contacts route. But before we do that, let’s take a look at the generated files.
/src/models/contacts.model.js)This is where we would define our schema and model to shape what data we collect and how it is stored in the database. NeDB, on the other hand, does not support schemas, so our model files looks like this:
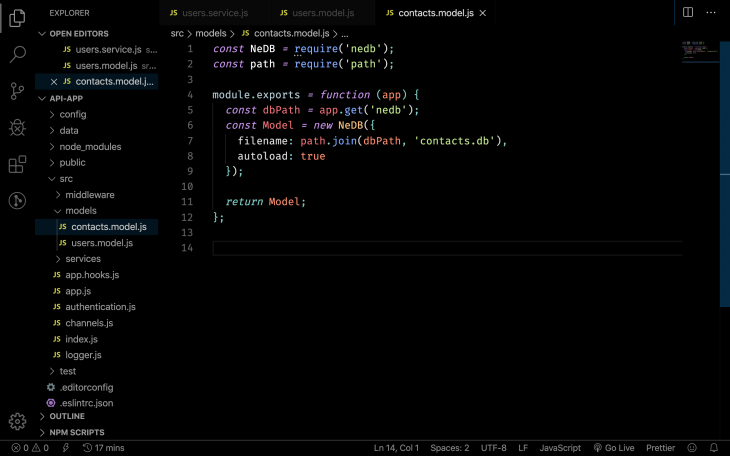
In a situation where a database that allows schema (such as MongoDB or Postgres) is used, this is the schema that would be defined.
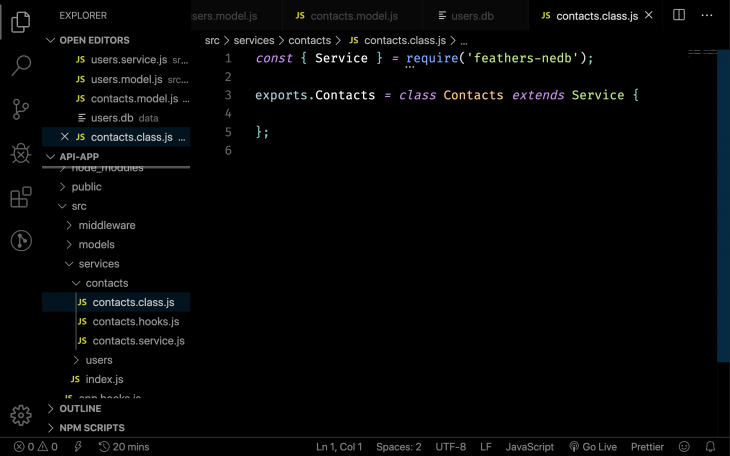
/src/services/contact/contacts.class.js)This is where the CRUD methods are written, but in this case, this file is next to empty. This is because the CRUD methods are abstracted, and the file just instantiates the contact class, which extends the service class.
/src/services/contact/contacts.hooks.js):This is what determines the workflow of our CRUD operations. This is what a typical hooks file looks like:
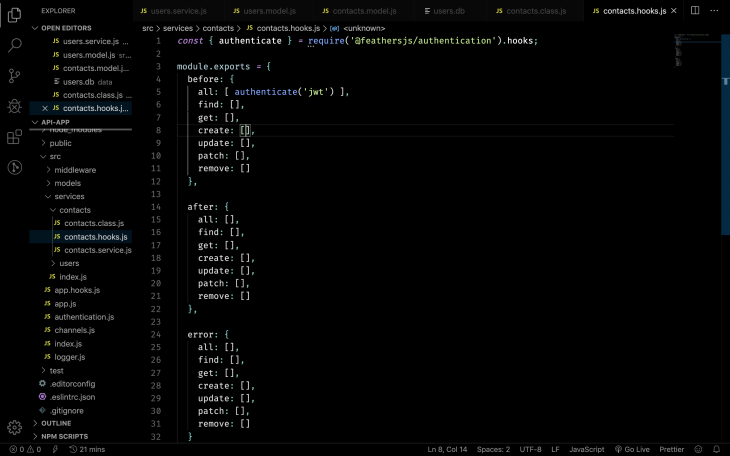
We can see that before: {all: has authenticate('jwt'). This means that before you perform any CRUD operations on the contacts service, you must provide a token. In other words, you must be logged in.
Hooks functions can be used before, after, or when an error occurs during a CRUD operation. For instance, if you want to validate that the contacts contain a full name, email, and phone number on creation, this would be done in the before hook and it would look something like this:
before: {
  all: [ authenticate('jwt') ],
  find: [],
  get: [],
  create: [ function(context) {
    // perform validation
    return context;
  }],
  update: [],
  patch: [],
  remove: []
},
If you also wish to do something after the data has been created, read, updated, or deleted, you will have to write that function in the after the hook. For instance, if you want to send mail to the contact’s mail, it would look something like this:
after: {
  all: [],
  find: [],
  get: [],
  create: [ function(context) {
    // send email function
    return context;
  }],
  update: [],
  patch: [],
  remove: []
},
Same thing goes if you want to handle an error gotten in a certain manner. For instance, if you want to use an error logger like Sentry, that would be added in the error hooks.
/src/services/contact/contacts.service.js)This is where the single route service is defined, hooks and model are registered, and the service is initialized. It looks somewhat like this:
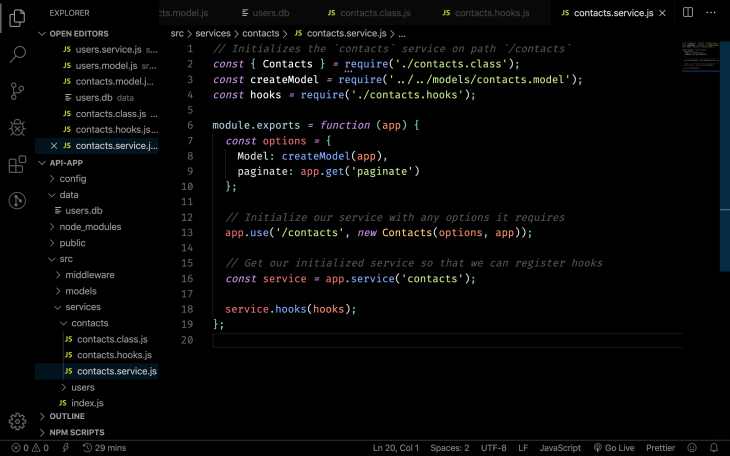
The code is pretty small. This is due to the fact that FeathersJS handles a lot of the lifting behind the scenes by means of abstraction.
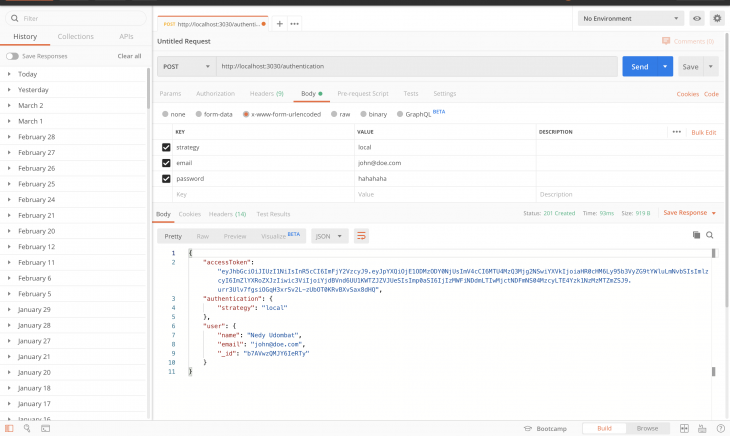
Note that FeathersJS uses different strategies to handle authentication, such as local, JWT, OAuth, Google, GitHub, etc. When trying to make a POST request to /authentication, you have to specify the strategy.
For example, here’s a POST request to the /authentication route to log in (generate an access token):
FeathersJS really makes it easy for us to prototype applications in minutes.
To build a production-ready application, you might need to opt for a more robust database such as MongoDB or Postgres as opposed to NeDB.
You might also want to check out their well written documentation for more on FeathersJS abilities and their Awesome Feathers page for all things Feathers.
There’s no doubt that frontends are getting more complex. As you add new JavaScript libraries and other dependencies to your app, you’ll need more visibility to ensure your users don’t run into unknown issues.
LogRocket is a frontend application monitoring solution that lets you replay JavaScript errors as if they happened in your own browser so you can react to bugs more effectively.

LogRocket works perfectly with any app, regardless of framework, and has plugins to log additional context from Redux, Vuex, and @ngrx/store. Instead of guessing why problems happen, you can aggregate and report on what state your application was in when an issue occurred. LogRocket also monitors your app’s performance, reporting metrics like client CPU load, client memory usage, and more.
Build confidently — start monitoring for free.

Local AI proxy tutorial for detecting, masking, and rehydrating PII before prompts reach cloud LLMs.

Learn how Graph RAG uses connected knowledge structures to improve retrieval beyond simple text similarity.

Learn how sibling-index() enables clean, JavaScript-free stagger animations using native CSS.

useEffect breaks AI streaming responses in ReactSee why useEffect breaks AI streaming in React, and how moving stream state outside React fixes flicker and stale updates.
Hey there, want to help make our blog better?
Join LogRocket’s Content Advisory Board. You’ll help inform the type of content we create and get access to exclusive meetups, social accreditation, and swag.
Sign up now

