
Wasp, or Web Application Specification, is a declarative full-stack framework introduced in 2020 with the primary goal of addressing the complexities inherent in modern web development. Traditionally, developers had to be concerned about setting up authentication, managing databases, client-to-server connections, etc., but repetitive tasks take time away from actually developing the software.

Wasp takes care of this so that developers can write less code and focus more on the business logic of their applications. Developers can define their application structure and functionalities within a simple configuration file (main.wasp) using a domain-specific language (DSL) that Wasp understands.
Wasp then generates the boilerplate code for the frontend (React), backend (Node.js), and data access layer (Prisma). This reduces the cognitive load, minimizes the risk of inconsistencies, and promotes better maintainability of the codebase.
In this article, we will explore how Wasp simplifies full-stack development by building a demo application to demonstrate Wasps’s features, including setting up authentication and database handling.
The Replay is a weekly newsletter for dev and engineering leaders.
Delivered once a week, it's your curated guide to the most important conversations around frontend dev, emerging AI tools, and the state of modern software.
At the heart of Wasp’s architecture lies the Wasp Compiler (built with Haskell), which is responsible for processing the Wasp domain-specific language (DSL) and generating the full source code for your web application in the respective stacks.
Here is a diagrammatic representation of how it works:
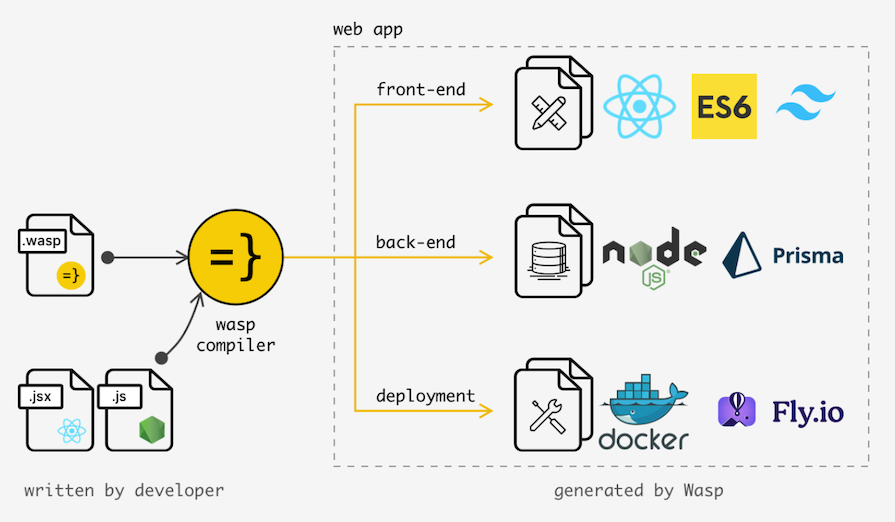
You might be asking, is Wasp not just another frontend framework? Yes, but it easily separates itself from the rest. Unlike Next.js, Nuxt.js, and Gatsby, which mainly focus on frontend development, Wasp is truly full-stack. It comes repacked with all your frontend and backend/database needs taken care of so that you don’t have to integrate them separately.
Additionally, Wasp is being developed to be framework agnostic, so there should be more support for other frameworks and tools in the future.
In this section, you will build a Google Keeps-like app to demonstrate how a basic CRUD application can be built with Wasp.
To get the most from this tutorial, you‘ll need the following:
You can find the code files for this tutorial on GitHub.
You’ll need to install the Wasp onto your local machine to get started.
For Linux/macOS, open your terminal and run the command below:
curl -sSL https://get.wasp-lang.dev/installer.sh | sh
You might encounter an error when trying to install Wasp on the new Apple silicon Macbooks because the Wasp binary is built for x86 and not for arm64 (Apple Silicon). Hence to proceed, you will have to install Rosetta. Rosetta helps Apple silicon Macs to run apps built for intel Macs.
To quickly mitigate this issue, run the following command:
softwareupdate --install-rosetta
If you plan to work with Wasp on a Windows PC, it is recommended to do so with Windows Subsystem for Linux (WSL):
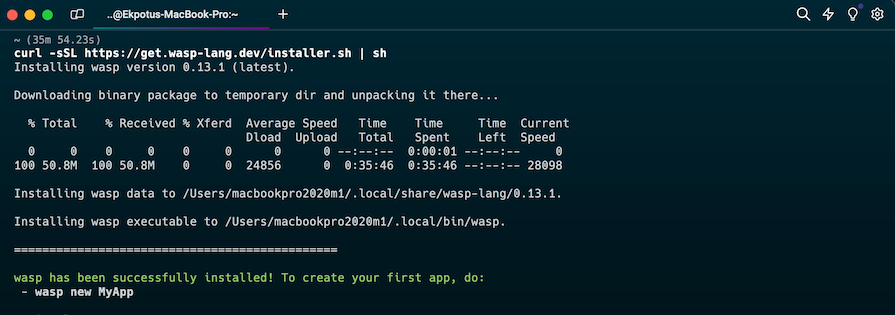
It may take a while to install. For context, it took approximately 35 minutes to install completely on my M1 Macbook.
Run the following command to start your new Wasp project:
wasp new
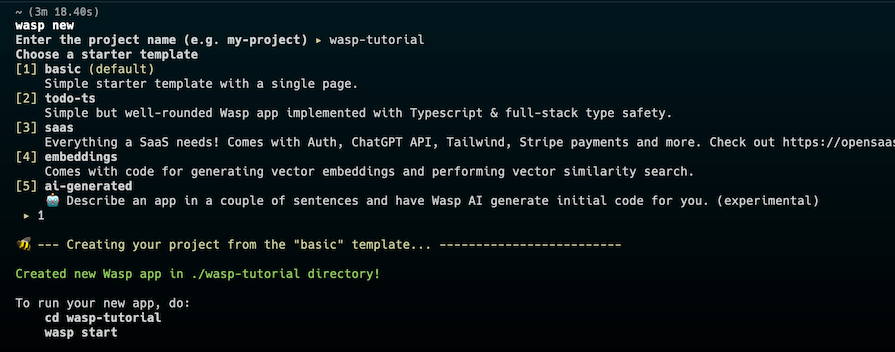
cd <your-project-name>
wasp start
Now your Wasp project should be running on localhost:3000:
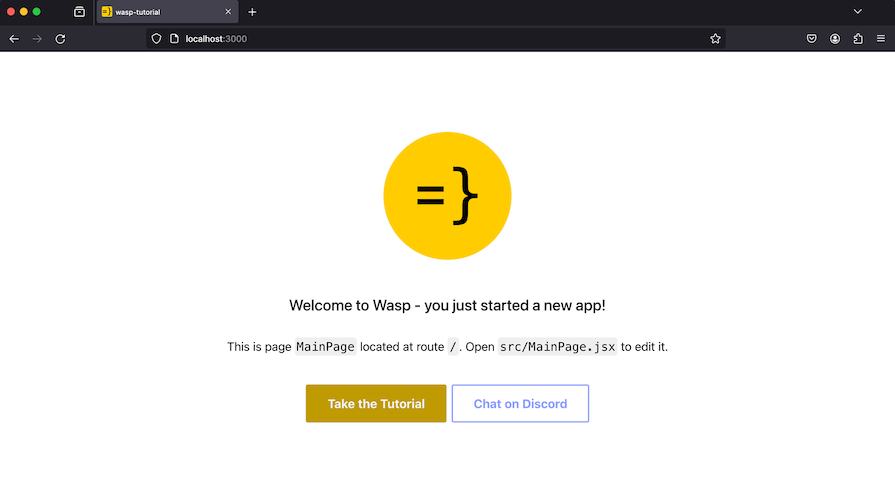
This is what the folder structure should look like:
├── .wasp
├── public
├── src
│   ├── Main.css
│   ├── MainPage.jsx
│   ├── vite-env.d.ts
│   └── waspLogo.png
├── .gitignore
├── .waspignore
├── .wasproot
├── main.wasp
├── package.json
├── package-lock.json
├── tsconfig.json
├── vite.config.ts
To add Tailwind CSS to your Wasp project, follow these steps. First, create a tailwind.config.cjs file in the root directory, then add the following code to it:
## ./tailwind.config.cjs
const { resolveProjectPath } = require('wasp/dev');
/** @type {import('tailwindcss').Config} */
module.exports = {
  content: [resolveProjectPath('./src/**/*.{js,jsx,ts,tsx}')],
  theme: {
    extend: {},
  },
  plugins: [],
};
Next, create a postcss.config.cjs file with the code below:
module.exports = {
  plugins: {
    tailwindcss: {},
    autoprefixer: {},
  },
};
Next, update the src/Main.css file to include the Tailwind directives:
@tailwind base;
@tailwind components;
@tailwind utilities;
Make sure you use the .cjs file extension and not .js so that the files can be detected by Wasp. Also, to make sure that your changes get picked up by Wasp, consider restarting Wasp using the wasp start command.
Now your Wasp project is all set to use Tailwind CSS.
To set up the schema for your database, you have to make use of Wasp Entities. Entities are how you define where data gets stored in your database. This is usually done using the Prisma Schema Language (PSL) and is defined between the {=psl psl=} tags.
In your main.wasp file, add the following code:
// ...
entity Note {=psl
    id          Int     @id @default(autoincrement())
    title       String
    description String
psl=}
This code defines a Prisma schema for a Note entity with three fields: id, title, and description. The id field is the primary key and will be automatically generated.
Next up, you have to update the schema to include this newly added entity. To do this, run the code below:
wasp db migrate-dev
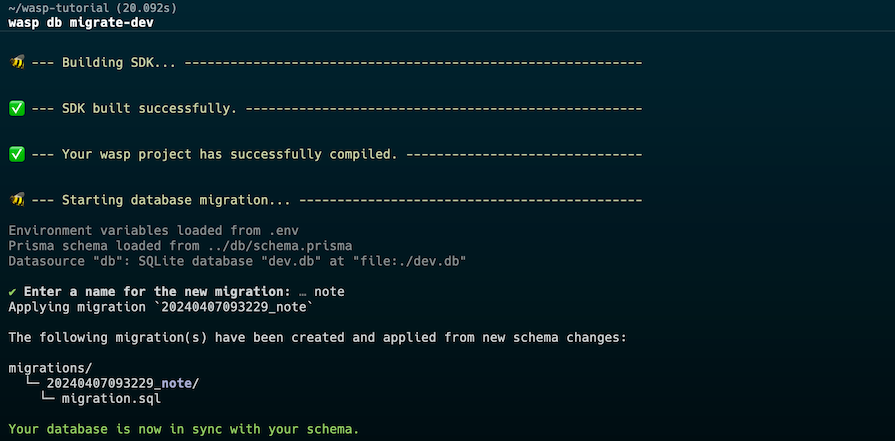
Don’t forget to stop Wasp from running before running this command. Also, anytime you make changes to your entity definition, you have to run the command so that it syncs.
Now let’s take a look at our database. In your terminal, run the following code:
wasp db studio
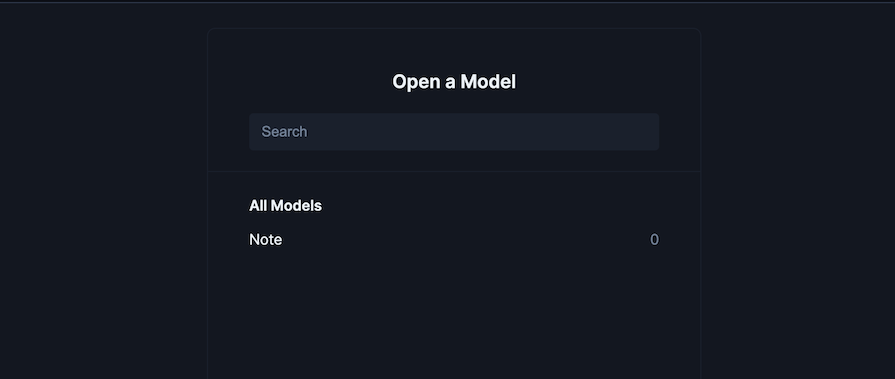
Click on the Note model:

This is where the records of our database will be stored.
Wasp offers two main types of operations when interacting with entities: queries and actions. Queries allow you to request data from the database, while actions allow you to create, modify, and delete data.
First, you have to declare your query in the main.wasp file like so:
...
query getNotes {
  fn: import { getNotes } from "@src/queries",
  entities: [Note]
}
After declaring the query, create a file called queries.js in the ./src directory and add the following code:
export const getNotes = async (args, context) => {
  return context.entities.Note.findMany({
    orderBy: { id: 'asc' },
  });
};
This code exports a function called getNotes, which fetches a list of notes from our database in ascending order.
The UI will be divided into two components: AddNote.jsx and Notes.jsx .
This is the code for the AddNote.jsx component:
export default function AddNote() {
  return (
       <form className='max-w-xl mt-20 mx-auto' onSubmit={handleSubmit}>
      <div className='w-full px-3'>
        <input
          type='text'
          name='title'
          placeholder='Enter note title'
          className='focus:shadow-soft-primary-outline text-sm leading-5.6 ease-soft block w-full appearance-none rounded border border-solid border-gray-300 bg-white bg-clip-padding px-3 py-2 font-normal text-gray-700 outline-none transition-all placeholder:text-gray-500 focus:border-fuchsia-300 focus:outline-none'
        ></input>
        <br />
        <textarea
          rows='4'
          name='description'
          placeholder='Enter note message'
          className='resize-none appearance-none block w-full bg-gray-200 text-gray-700 border border-gray-200 rounded py-3 px-4 mb-3 leading-tight focus:outline-none focus:bg-white focus:border-gray-500'
        ></textarea>
      </div>
      <div className='flex justify-between w-full px-3'>
        <div className='md:flex md:items-center'></div>
        <button
          className='shadow bg-indigo-600 hover:bg-indigo-400 focus:shadow-outline focus:outline-none text-white font-bold py-2 px-6 rounded'
          type='submit'
        >
          Add Note
        </button>
      </div>
    </form>
  );
}
The following is the code for the Notes.jsx component:
import { getNotes, useQuery} from 'wasp/client/operations';

export default function Notes() {
  const { data: notes, isLoading, error } = useQuery(getNotes);
  return (
    <div className='container px-0 py-0 mx-auto'>
      {notes && <Note notes={notes} />}
      {isLoading && 'Loading...'}
      {error && 'Error: ' + error}
    </div>
  );
}

export function Note({ notes }) {
  if (!notes?.length) return <div>No Note Found</div>;

  return (
  <div className='flex flex-wrap -m-4 py-6'>
      {notes.map((note, idx) => (
        <div className='p-4 md:w-1/3' note={note} key={idx}>
          <div className='h-full border-2 border-gray-200 border-opacity-60 rounded-lg overflow-hidden'>
            <div className='p-6'>
              <h1 className='title-font text-lg font-medium text-gray-900 mb-3'>
                {note.title}
              </h1>
              <p className='leading-relaxed mb-3'>{note.description}</p>
              <div className='flex items-center flex-wrap '>
                <a
                  className='text-indigo-500 inline-flex items-center md:mb-2 lg:mb-0'
                  onClick={() => removeNote(note.id)}
                >
                  Delete note
                </a>
              </div>
            </div>
          </div>
        </div>
      ))}
    </div>
  );
}
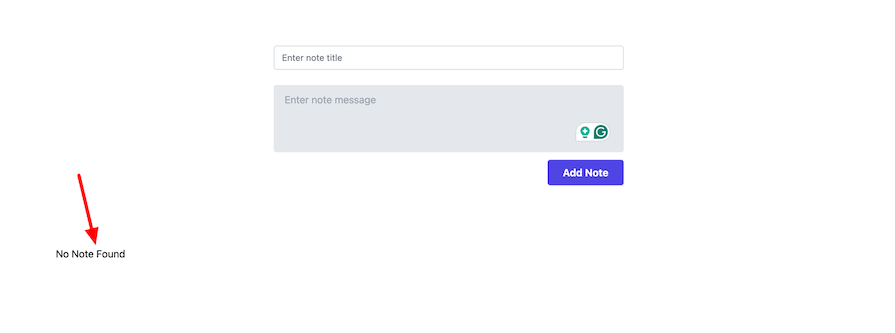
In this code, we invoked our query using the useQuery Hook to fetch any note available in our database. The Note component takes a notes prop and maps over the array of notes to render each note as a card with a title, description, and delete button.
You will see that it shows No Note Found. This is because the database is empty as we are yet to add a record to it:
As stated earlier, this would be accomplished using actions. Just like queries, we have to declare an action first.
Modify the main.wasp file as so:
...
action createNote {
  fn: import { createNote } from "@src/actions",
  entities: [Note]
}
Now create a actions.js file in the ./src directory with the code below:
export const createNote = async (args, context) => {
  return context.entities.Note.create({
    data: { title: args.title, description: args.description },
  });
};
This function createNote takes in two arguments: args and context, and creates a new note in the database with the given title and description, which are extracted from the args object.
In your AddNote.jsx component, add the following code:
import { createNote } from 'wasp/client/operations';

export default function AddNote() {
  const handleSubmit = async (event) => {
    event.preventDefault();
    try {
      const target = event.target;
      const title = target.title.value;
      const description = target.description.value;
      target.reset();
      await createNote({ title, description });
    } catch (err) {
      window.alert('Error: ' + err.message);
    }
  };
...
Here, we import the createNote action (operation) and set up a function to submit the titles and descriptions obtained from the inputs to our database while resetting the input fields to empty.
As usual, we have to declare the delete action in the main.wasp file:
action deleteNote {
  fn: import { deleteNote } from "@src/actions",
  entities: [Note]
}
Then, update our actions file with this code:
...
export const deleteNote = async (args, context) => {
  return context.entities.Note.deleteMany({ where: { id: args.id } });
};
Next up, modify the Notes.jsx with the code below:
...
export function Note({ notes }) {
  if (!notes?.length) return <div>No Note Found</div>;

  const removeNote = (id) => {
    if (!window.confirm('Are you sure?')) return;
    try {
      // Call the `deleteNote` operation with this note's ID as its argument
      deleteNote({ id })
        .then(() => console.log(`Deleted note ${id}`))
        .catch((err) => {
          throw new Error('Error deleting note: ' + err);
        });
    } catch (error) {
      alert(error.message);
    }
  };
...
Essentially, we created a removeNote function to handle deleting notes by their IDs. And that’s it! Go ahead and test it out.
Now you have your app fully functional, let’s add user authentication to allow users to sign in to create notes and show notes belonging to the logged-in user.
Begin by creating a User entity in the main.wasp file:
// ...
entity User {=psl
    id       Int    @id @default(autoincrement())
psl=}
Still in your main.wasp file, add the auth configuration. In our case, we would make use of sign-in by usernameAndPassword:
app wasptutorial {
  wasp: {
    version: "^0.13.1"
  },
  title: "wasptutorial",
  auth: {
    userEntity: User,
    methods: {
      // Enable username and password auth.
      usernameAndPassword: {}
    },
    onAuthFailedRedirectTo: "/login"
  }
}
Run wasp db migrate-dev to sync these changes.
Next, you need to create routes for both sign-in and login. Modify the main.wasp file with the code below:
// main.wasp
...
route SignupRoute { path: "/signup", to: SignupPage }
page SignupPage {
  component: import { SignupPage } from "@src/SignupPage"
}

route LoginRoute { path: "/login", to: LoginPage }
page LoginPage {
  component: import { LoginPage } from "@src/LoginPage"
}
In the ./src directory, create LoginPage.jsx and SignupPage.jsx files:
In LoginPage.jsx, add this code:
import { Link } from 'react-router-dom'
import { LoginForm } from 'wasp/client/auth'

export const LoginPage = () => {
  return (
    <div style={{ maxWidth: '400px', margin: '0 auto' }}>
      <LoginForm />
      <br />
      <span>
        I don't have an account yet (<Link to="/signup">go to signup</Link>).
      </span>
    </div>
  )
}
In SignupPage.jsx, add this code:
import { Link } from 'react-router-dom'
import { SignupForm } from 'wasp/client/auth'

export const SignupPage = () => {
  return (
    <div style={{ maxWidth: '400px', margin: '0 auto' }}>
      <SignupForm />
      <br />
      <span>
        I already have an account (<Link to="/login">go to login</Link>).
      </span>
    </div>
  )
}
Because you do not want unauthorized users to have access to the main page, you will need to restrict it. To do so, modify the main.wasp file as follows:
// ...
page MainPage {
  authRequired: true,
  component: import { MainPage } from "@src/MainPage"
}
Setting authRequired to true will make sure that all unauthenticated users will be redirected to the login page we just created.
Now, try accessing the main page at localhost:3000. You should be redirected to /login:
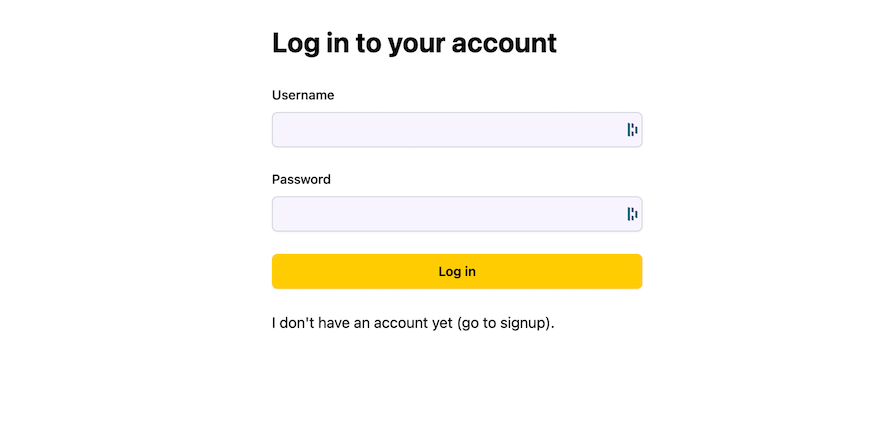
Because we do not have a user account in our database at this time, you’ll have to sign up to create one.
At this point, you might notice that all logged-in users are seeing the same notes. To address this, you should ensure that each user can only view notes that they have created.
In your main.wasp file, modify the User and Note entities as follows:
// ...
entity User {=psl
    id       Int    @id @default(autoincrement())
    notes    Note[]
psl=}

entity Note {=psl
    id          Int     @id @default(autoincrement())
    title       String
    description String
    user        User?   @relation(fields: [userId], references: [id])
    userId      Int?
psl=}
Here, we defined a one-to-many relationship between the users and notes to match each user to their notes. Don’t forget to run wasp db migrate-dev for these changes to be reflected.
Go to your queries.js file and modify the code to forbid non-logged-in users and only request notes belonging to individual logged-in users:
import { HttpError } from 'wasp/server';
export const getNotes = async (args, context) => {
  if (!context.user) {
    throw new HttpError(401);
  }
  return context.entities.Note.findMany({
    where: { user: { id: context.user.id } },
    orderBy: { id: 'asc' },
  });
};
We also want only logged users to be able to create notes. Modify actions.js like so:
import { HttpError } from 'wasp/server';
export const createNote = async (args, context) => {
  if (!context.user) {
    throw new HttpError(401);
  }
  return context.entities.Note.create({
    data: {
      title: args.title,
      description: args.description,
      user: { connect: { id: context.user.id } },
    },
  });
};
...
The Logout button will be in the header component. Create a Header.jsx file with the code below:
export default function Header() {
  return (
    <header className=' body-font'>
      <div className='container mx-auto flex flex-wrap p-5 flex-col md:flex-row items-center'>
        <a className='flex title-font font-medium items-center text-gray-900 mb-4 md:mb-0'>
          <svg
            xmlns='http://www.w3.org/2000/svg'
            fill='none'
            stroke='currentColor'
            strokeLinecap='round'
            strokeLinejoin='round'
            strokeWidth='2'
            className='w-10 h-10 text-white p-2 bg-indigo-500 rounded-full'
            viewBox='0 0 24 24'
          >
            <path d='M12 2L2 7l10 5 10-5-10-5zM2 17l10 5 10-5M2 12l10 5 10-5'></path>
          </svg>
          <span className='ml-3 text-xl'>Noteblocks</span>
        </a>
        <nav className='md:mr-auto md:ml-4 md:py-1 md:pl-4 md:border-l md:border-gray-400 flex flex-wrap items-center text-base justify-center'>
          <a className='mr-5 hover:text-gray-900'>Home</a>
        </nav>
        <button
          className='inline-flex text-white items-center bg-indigo-600 hover:bg-indigo-400  border-0 py-1 px-3 focus:outline-nonerounded text-base mt-4 md:mt-0'
          onClick={logout}
        >
          Log Out
          <svg
            fill='none'
            stroke='currentColor'
            strokeLinecap='round'
            strokeLinejoin='round'
            strokeWidth='2'
            className='w-4 h-4 ml-1'
            viewBox='0 0 24 24'
          >
            <path d='M5 12h14M12 5l7 7-7 7'></path>
          </svg>
        </button>
      </div>
    </header>
  );
}
At the top, include this import:
import { logout } from 'wasp/client/auth';
...
Now, head to the MainPage.jsx file and import the Header component. And just like that, we have the logout functionality. Don’t forget to test out the logout functionality on the app.
With the Wasp CLI, you can deploy the React frontend, Node.js backend (server), and PostgreSQL database generated by the Wasp compiler to Fly.io with a single command.
Before you can deploy to Fly.io, you should install flyctl on your machine. Find the the version for your operating system from the flyctl documentation and install it. Note that all plans on Fly.io require you to add your card information or deployment will not work.
Until now, we have been working with the default SQLite database, which is not supported in production. For production, we have to switch to using PostgreSQL.
Go to your main.wasp file and add the following code:
app MyApp {
  title: "My app",
  // ...
  db: {
    system: PostgreSQL,
    // ...
  }
}
At this point, we don’t need the SQLite DB migrations and we can get rid of them by running these commands:
rm -r migrations/wasp clean
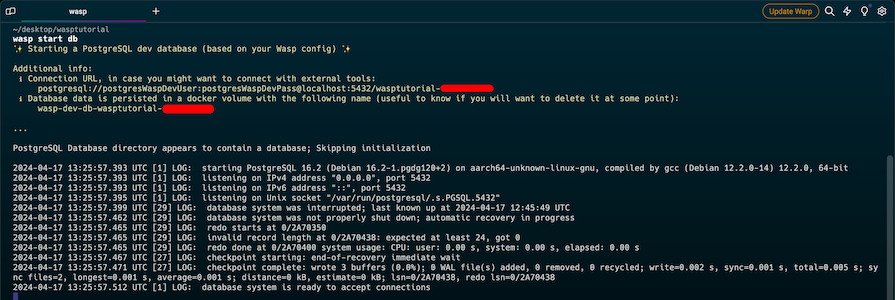
To run the PostgreSQL DB, ensure Docker is running. Next, create a .env.server file in the root directory and add your database URL, which can be retrieved by starting the database with the wasp start db command.
Once added, re-run the wasp start db and your database will be up and running. While the database is running, open another terminal and run wasp db migrate-dev to sync these changes:
Once all that is set, run the following command:
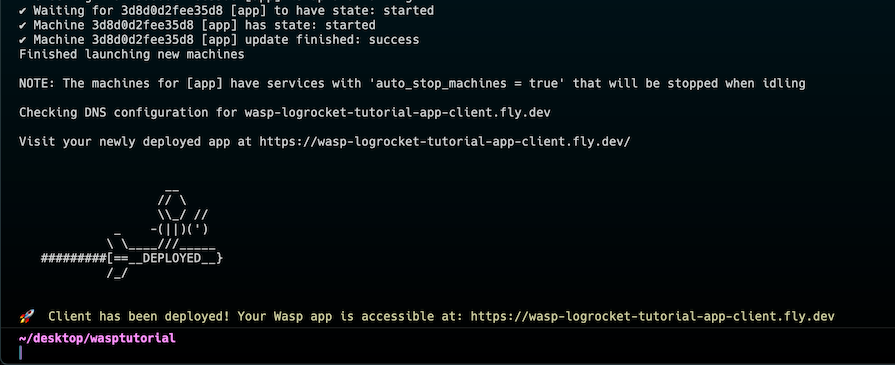
wasp deploy fly launch wasp-logrocket-tutorial-app mia
Congratulations! Your app is now fully deployed:
The Wasp framework offers a great solution that can potentially make building for the web much easier. As the Wasp framework continues to evolve and gain popularity, it will likely be adopted by teams of all sizes seeking an efficient and robust full-stack development experience.

Explore how the Universal Commerce Protocol (UCP) allows AI agents to connect with merchants, handle checkout sessions, and securely process payments in real-world e-commerce flows.

React Server Components and the Next.js App Router enable streaming and smaller client bundles, but only when used correctly. This article explores six common mistakes that block streaming, bloat hydration, and create stale UI in production.

Gil Fink (SparXis CEO) joins PodRocket to break down today’s most common web rendering patterns: SSR, CSR, static rednering, and islands/resumability.

@container scroll-state: Replace JS scroll listeners nowCSS @container scroll-state lets you build sticky headers, snapping carousels, and scroll indicators without JavaScript. Here’s how to replace scroll listeners with clean, declarative state queries.
Would you be interested in joining LogRocket's developer community?
Join LogRocket’s Content Advisory Board. You’ll help inform the type of content we create and get access to exclusive meetups, social accreditation, and swag.
Sign up now