Kubernetes has already won the container orchestration battle. But the war developers still need to overcome with Kubernetes is its complexity. This is where KubeVela comes into play.
KubeVela makes deploying applications to Kubernetes much easier. Rather than knowing about service, deployment, pods, and horizontal pod scaling, you can specify a much lighter configuration. Let’s dive deeper on how.
KubeVela is an open source tool that abstracts away the complicated Kubernetes artifacts from developers — and, to a point, platform builders — to create a simpler deployment experience.
As a software engineer, Kubernetes artifacts can be overwhelming at first. This is where KubeVela acts as a much-needed bridge that allows developers to worry less about the underlying artifacts. KubeVela helps both developers and platform builders by providing a good framework that provides a user-friendly yet highly extensible platform.
Its tagline is “Make shipping applications more enjoyable,” and I think it lives up to that slogan. KubeVela is based on the Open Application Model (OAM) specification, which puts the focus squarely on the application rather than the container or orchestrator.
Kubernetes artifacts like service, deployment, horizontal pod scaler, etc. look daunting at first glance, but after some time, one gets used to them. There are many great tools to deploy applications to Kubernetes and abstract away the inner details of Kubernetes artifacts.
Some of these useful tools include Helm, Skaffold, and Draft, to name a few. We can find a good comparison of these types of tools in this helpful post.
Still, none of these tools are geared towards both developers and platform operators in the same way KubeVela is. KubeVela gives a user-friendly and simple way to define applications that can be easily deployed and updated on any Kubernetes cluster.
In this demo, we will deploy a simple Node.js Express application that has already been dockerized, and the Docker image is available on Docker Hub.
Before jumping in and defining the KubeVela app file, let’s first clear up some prerequisites:
We will run this demo on the local kind Kubernetes cluster. Per its readme, kind is “a tool for running local Kubernetes clusters using Docker container ‘nodes.’ ”
Let’s go ahead and set up our local Kubernetes cluster using kind. We’ll outline the steps below.
Depending on your operating system, you might have a different way to install the kind CLI. I am using a Mac, so I ran the following command:
brew install kind
You will be able to find your OS-specific command to install kind on its installation page.
Before proceeding, make sure your ports 80 and 443 are open on your local machine. This means you will need to stop any servers like Apache or NGINX occupying port 80. Also, check that you don’t have any other services taking up port 80 locally like an NGINX proxy, which could be running as a Docker container, too.
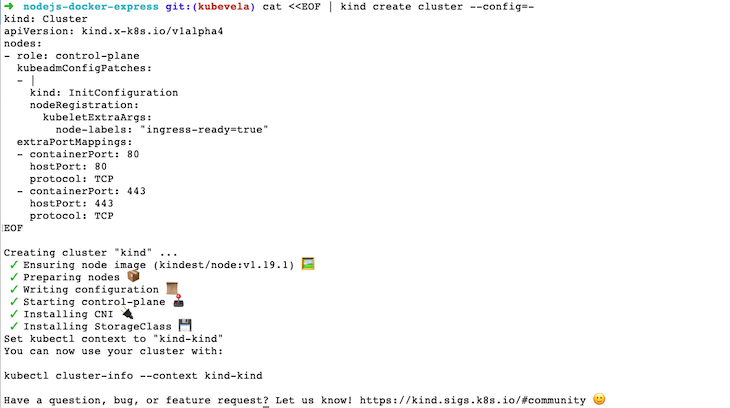
To create our local Kubernetes cluster with kind, we will execute the following command:
cat <<EOF | kind create cluster --config=-
kind: Cluster
apiVersion: kind.x-k8s.io/v1alpha4
nodes:
- role: control-plane
  kubeadmConfigPatches:
  - |
    kind: InitConfiguration
    nodeRegistration:
      kubeletExtraArgs:
        node-labels: "ingress-ready=true"
  extraPortMappings:
  - containerPort: 80
    hostPort: 80
    protocol: TCP
  - containerPort: 443
    hostPort: 443
    protocol: TCP
EOF
This creates a kind Kubernetes cluster with ports 80 and 443 from the container mapping to your local machine.
It should take a couple of minutes and come back with an output like below:
For the next step, we will configure our kubectl to use the Kubernetes cluster we just created by running:
kubectl cluster-info --context kind-kind
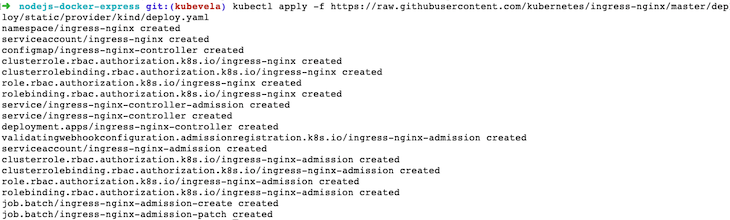
Up next, we will install Ingress in our Kubernetes cluster with kind by running:
kubectl apply -f https://raw.githubusercontent.com/kubernetes/ingress-nginx/master/deploy/static/provider/kind/deploy.yaml
The above command will show us something like below:
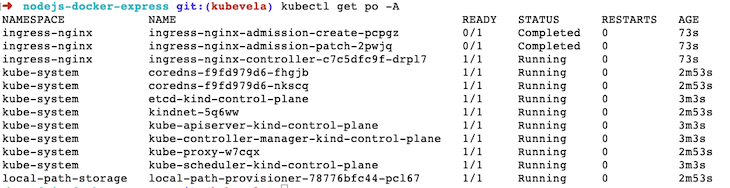
To quickly check whether we have any pods running on the newly created Kubernetes cluster, we can run:
kubectl get po -A
It will show us pods running on all namespaces like below:
Hurray, our Kubernetes cluster is up and running. The next step is to install KubeVela — let’s go.
Now that we have our kind Kubernetes cluster running locally inside a Docker container (try docker ps to check), we will proceed to install KubeVela. To install KubeVela with Helm, run the following command:
helm repo add kubevela https://kubevelacharts.oss-cn-hangzhou.aliyuncs.com/core && helm repo update
It will show us the following output:

To make things easier, we have clubbed together two commands. The first gets the Helm chart for KubeVela, and the second updates the help repo.
For the next step, we will again run two commands together:
kubectl create namespace vela-system && helm install -n vela-system kubevela kubevela/vela-core --set installCertManager=true
These two commands show us an output like below:
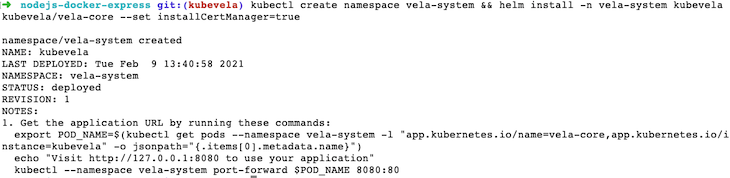
The first command here creates the vela-system namespace in our Kubernetes cluster. The second command installs the KubeVela Helm chart in the vela-system namespace created in the previous command with cert-manager.
As per the KubeVela installation documentation, KubeVela relies on cert-manager to create certificates for webhooks.
At this juncture, if we run kubectl get po -n vela-system to verify whether KubeVela is running properly, it will show us one pod whose name starts with kubevela-veal-core- running. Now we know that KubeVela is installed on our Kubernetes cluster and running successfully.
In the next step, we will install the vela CLI.
To install the vela CLI on a Mac I ran the following command:
curl -fsSl https://kubevela.io/install.sh | bash
Depending on your operating system, you can find the relevant command to get the CLI on this page.
To verify that your vela CLI is installed properly, run vela version, and you should see an output like below:

We will use the vela CLI to create a vela.yaml file that defines how the app should be deployed on Kubernetes. Time to play around with the vela CLI now.
Consequently, we will “Velaize” our existing Node.js express demo application that has already been dockerized. To make things simpler I have pushed the application to Docker Hub. As you might already be aware, to deploy our application, the container should be pushed to a container registry. We will be using Docker Hub as our container registry for this demo.
To try the demo app on your Kubernetes cluster, you can go to an empty folder and run:
vela init
It will ask you some questions like the name of the app, name of the service, workload type, and Docker image for the service. Fill it up like below; the main thing here is the image of the service, which points to geshan/nodejs-docker-express, hosted on Docker Hub:
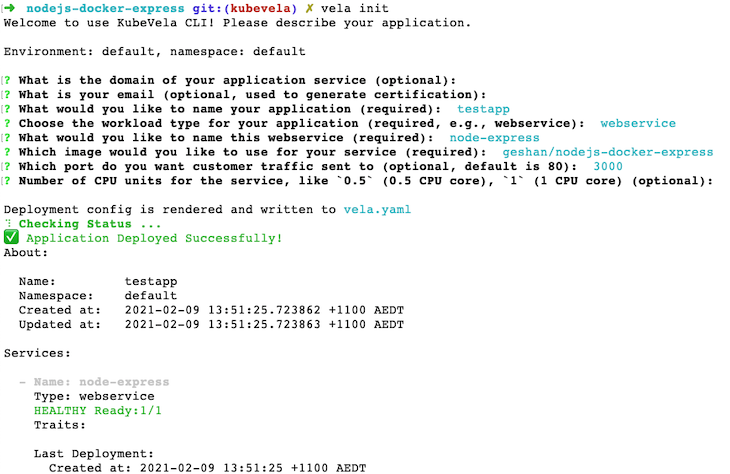
Our Node.js application will run on port 3000, and by default, the latest tag for the Docker image will be pulled in and deployed to Kubernetes by KubeVela.
Run vela status testapp to view the status of the app as follows:
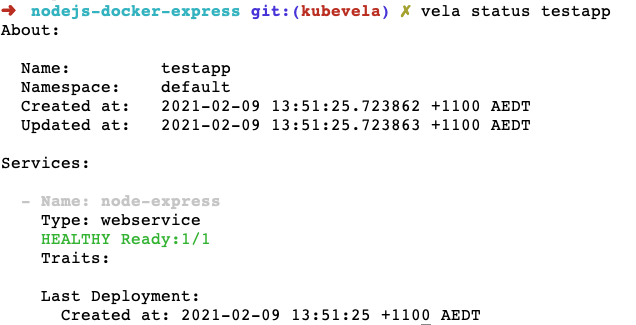
Another way to quickly check it is by running kubectl get po, which should show a pod running.
The vela init command has created a vela.yaml file with the following contents:
createTime: "2021-02-09T13:51:25.723862+11:00"
name: testapp
services:
  node-express:
    image: geshan/nodejs-docker-express
    port: 3000
    type: webservice
updateTime: "2021-02-09T13:51:25.723863+11:00"
To test the Node.js Express app running on your local K8s cluster deployed with KubeVela, run the following command:
vela port-forward testapp
It will show an output like below:

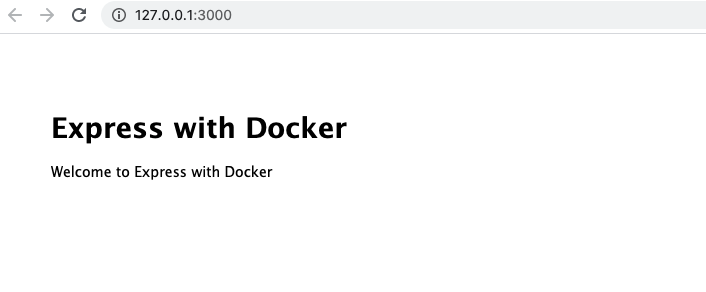
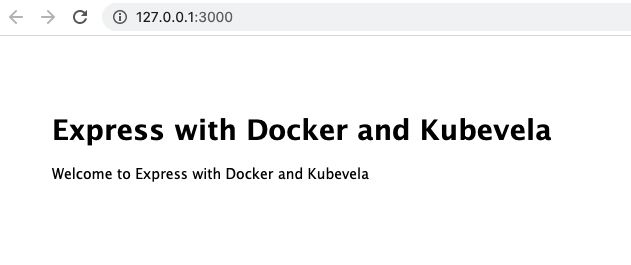
Now, we can hit https://127.0.0.1:3000 on the browser to see our app running in the Kubernetes cluster on the container as follows:
Furthermore, when the Docker image changes and updates are pushed on the Docker image registry, we can run vela up to redeploy the application.
For demo purposes, I am going to change the message from “Welcome to Express with Docker” to “Welcome to Express with Docker and KubeVela” and push it as a new Docker tag called kubevela. By default, until now, it was taking the latest tag.
Then, we will change the tag in the vela.yaml file, as below:
createTime: "2021-02-09T13:51:25.723862+11:00"
name: testapp
services:
  node-express:
    image: geshan/nodejs-docker-express:kubevela
    port: 3000
    type: webservice
updateTime: "2021-02-09T13:51:25.723863+11:00"
The change is adding the tag to the Docker image as image: geshan/nodejs-docker-express:kubevela. Given the tag is available, we can do:
vela up
vela status testapp #confirm the app is up and healthy
vela port-forward testapp
Then, we can see the new changes on the browser at: http://127.0.0.1:3000 as follows:
There you have it! We ran a small Node.js Express app that had been previously dockerized on a local Kubernetes (kind) cluster with KubeVela. I think it was much easier than dabbling with service, deployment, and other Kubernetes artifacts.
The local Kubernetes cluster should be treated as your playground for the proof of concept. We can realize the ease and flexibility KubeVela adds when we want to deploy our containerized apps to production-grade Kubernetes clusters.
As this is an intro post, I decided not to dive deeper into the routing and auto-scaling parts. There are some alternative commands to add these capabilities, too. I would leave it up to you to explore these powers of KubeVela.
We have seen how to deploy a Node.js Express app to Kubernetes using KubeVela. KubeVela makes it easy and a lot more user-friendly to deploy any containerized application into Kubernetes. I would recommend trying KubeVela if you and your team are venturing into the Kubernetes landscape for its ease of use and flexible architecture.
Install LogRocket via npm or script tag. LogRocket.init() must be called client-side, not
server-side
$ npm i --save logrocket

// Code:

import LogRocket from 'logrocket';
LogRocket.init('app/id');
// Add to your HTML:

<script src="https://cdn.lr-ingest.com/LogRocket.min.js"></script>
<script>window.LogRocket && window.LogRocket.init('app/id');</script>
Would you be interested in joining LogRocket's developer community?
Join LogRocket’s Content Advisory Board. You’ll help inform the type of content we create and get access to exclusive meetups, social accreditation, and swag.
Sign up now
Not sure if low-code is right for your next project? This guide breaks down when to use it, when to avoid it, and how to make the right call.

Compare Firebase Studio, Lovable, and Replit for AI-powered app building. Find the best tool for your project needs.

Discover how to use Gemini CLI, Google’s new open-source AI agent that brings Gemini directly to your terminal.

This article explores several proven patterns for writing safer, cleaner, and more readable code in React and TypeScript.


