Managing software infrastructure is always a challenge. Kubernetes (also known as K8s) is an excellent platform that leverages containers to manage all stages of your project pipeline. It was originally an internal project at Google called Borg before it was made open source. Today, developers around the world use K8s with the backing of the open source community.

We’ll cover some tools you can use with K8s to both build and manage your infrastructure. But first, let’s define what Kubernetes actually is and quickly review the following topics.
Since many of these tools require having an existing cluster to work with, we’ll walk through a basic setup using the Google Cloud Kubernetes Engine (GKE) as well.
All code that is used in this post can be found in my GitHub repo.
Kubernetes manages applications that are deployed in containers. Containers provide mobility and fine-grained control over applications in all stages of the product lifecycle.
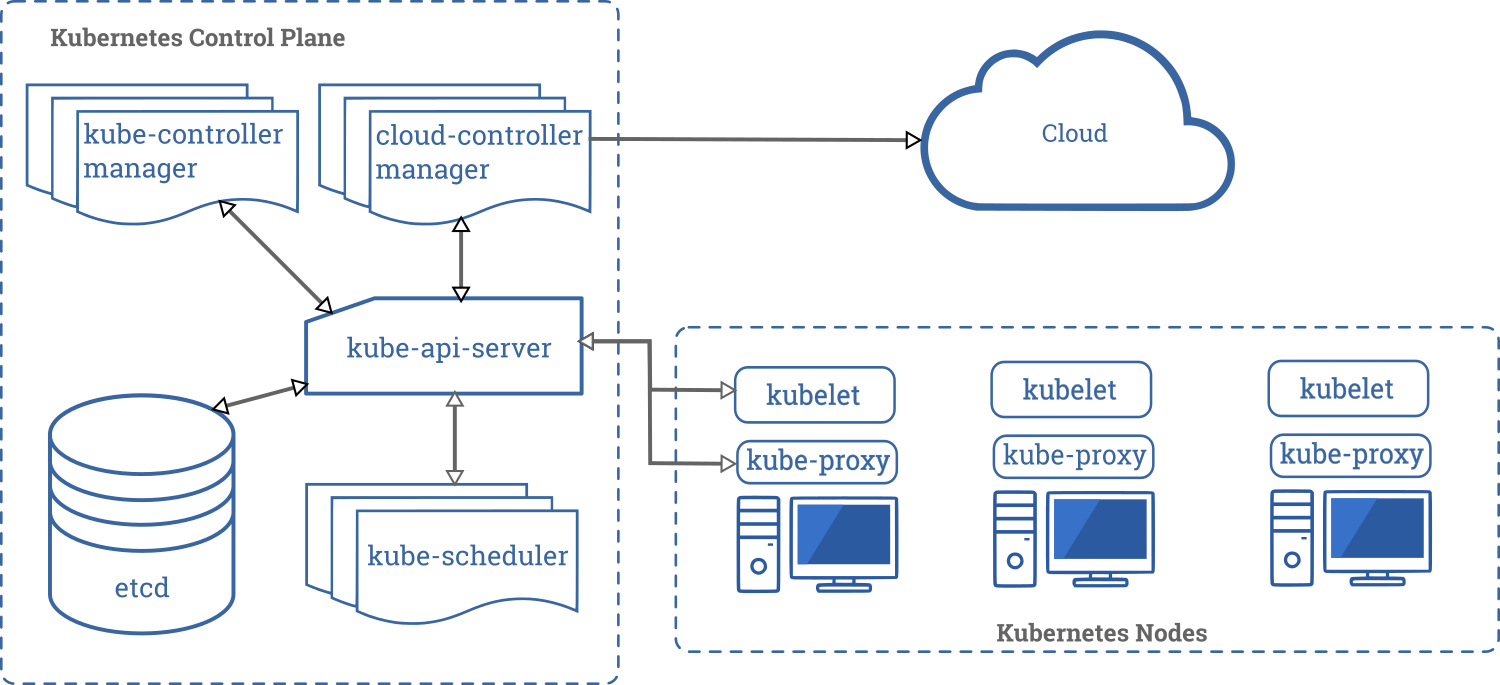
K8s itself operates with a control plane and worker nodes, as you see in the following diagram.

(Source: Kubernetes official documentation)
The elements within the control plane do the work of managing the infrastructure itself. This is where the actual management occurs. Using the various tools I’m about to describe, you pass commands to the different components within the control plane to apply changes and functionality to the nodes.
The elements within the worker nodes handle the actual running of the application. Each node contains pods where your application will run in containers.
All of this together forms a K8s cluster. Typically, you’ll have a master node that has the elements in the control plane, and then you’ll have worker nodes where the actual application containers run.
Two other terms you often hear when working with Kubernetes are deployment and service. Deployments refer to configurations that make up a cluster. This is normally in the form of a config YAML file, but there are other ways to create deployments using docker images and other resources. Services refer to an abstract representation of an application running in a container within a node.
To really see K8s tools in action, it helps to have a working cluster that you can interact with. In my GitHub repo, I’ve included both instructions for building a cluster with Google Cloud Kubernetes Engine and Minikube.
Once you have these set up, you can use these examples to test the tools I’ll cover in this article. It also helps to have kubectl already installed.
kubectl enables you to:
If you want to first create a cluster, you can apply a deployment via a YAML file, like this:
> kubectl apply -f deployment.yaml

deployment.extensions/helloworld-gke created
Once you’ve created a deployment, you can get the status of the clusters running.
> kubectl get deployments

NAME             READY   UP-TO-DATE   AVAILABLE   AGE
helloworld-gke   1/1     1            1           11s
Below are some other tasks you can accomplish with kubectl.
Get information about the pods in a cluster:
➜  google-cloud git:(master) ✗ kubectl get pods
NAME                               READY   STATUS    RESTARTS   AGE
helloworld-gke2-554f48b47b-69lbc   1/1     Running   0          6m5s
➜  google-cloud git:(master) ✗
Create a service via a config file:
> kubectl apply -f service.yaml

service/hello created
Get information about a service:
> kubectl get services

NAME         TYPE           CLUSTER-IP     EXTERNAL-IP   PORT(S)        AGE
hello        LoadBalancer   10.31.247.92   <pending>     80:32294/TCP   31s
kubernetes   ClusterIP      10.31.240.1    <none>        443/TCP        122m
View logs within one of your pods:
➜  google-cloud git:(master) ✗ kubectl logs helloworld-gke2-554f48b47b-69lbc

> [email protected] start /usr/src/app
> node index.js

Hello world listening on port 8080
Hello world received a request.
There are a lot more options with kubectl. For more, check out the K8s cheat sheet.
kubefedWhile kubectl enables you to interact with your cluster as a whole, kubefed enables you to interact with a cluster via a control pane.
As I stated earlier, a control plane is the part of K8s that manages a cluster’s worker nodes. In a larger application, you may have multiple clusters that need to be managed.
kubefed enables you to interact with the cluster (or clusters) from a higher level of federated control. This is particularly good when considering security options, such as setting up TLS for your clusters.
The following example command deploys a federation control plane with the name fellowship, a host cluster context rivendell, and the domain suffix example.com.
Some examples include adding a control plane with a cluster.
kubefed init fellowship \
    --host-cluster-context=rivendell \
    --dns-provider="google-clouddns" \
    --dns-zone-name="example.com."
This example (copied from the K8s reference docs) deploys a federated control plane with the name of fellowship and context of rivendell. With kubefed, a host-cluster controls the rest of the clusters in your federated system.
It’s also possible to add clusters to a control plane. Once you’ve created a control plane, you can add a cluster with something like this:
kubectl create clusterrolebinding <your_user>-cluster-admin-binding --clusterrole=cluster-admin --user=<your_user>@example.org --context=<joining_cluster_context>
kubefed works with kubectl and is very powerful. Refer to the K8s docs for more info.
Often while working with K8s, you’ll want to test something out on an individual pod before you apply it to an entire cluster. Minikube is a tool that allows you to build a one-node cluster on your local machine. Here you can test out what your nodes would look like with various configuration changes. The advantage is that you can easily create containers without being concerned about impacting a larger cluster.
Setting up Minikube will depend on the hardware you are using. The steps below work for a Mac, but you can check the docs for a more detailed walkthrough.
The first step to set up Minikube is to verify that virtualization is available on your machine.
sysctl -a | grep -E --color 'machdep.cpu.features|VMX'
You should see something like this:
machdep.cpu.features: FPU VME DE PSE TSC MSR PAE MCE CX8 APIC SEP MTRR PGE MCA CMOV PAT PSE36 CLFSH DS ACPI MMX FXSR SSE SSE2 SS HTT TM PBE SSE3 PCLMULQDQ DTES64 MON DSCPL VMX SMX EST TM2 SSSE3 FMA CX16 TPR PDCM SSE4.1 SSE4.2 x2APIC MOVBE POPCNT AES PCID XSAVE OSXSAVE SEGLIM64 TSCTMR AVX1.0 RDRAND F16C
Next, you’ll want to install it with brew.
brew install minikube
Confirm installation with the following.
minikube start
Once the console output finishes, you can verify that your cluster is working correctly with the minikube status. You should see something similar to the following.
➜  ~ minikube status
host: Running
kubelet: Running
apiserver: Running
kubeconfig: Configured
Now that Minikube is installed, you can create a one-node cluster. You can either do this with images from a Docker registry or locally built images.
Note that Minikube runs entirely in a VM. When you stop Minikube, you are basically shutting down the VM.
To create deployments against your locally running Minikube, you can either pull a Docker registry image or use the local Docker daemon in your Minikube VM.
In my GitHub repo, I included a sample project in the minikube directory. The process looks like like this:
cd minikubeminikube starteval $(minikube docker-env)docker build -t helloworld-minikubeimage-pull-policy)
kubectl run helloworld-minikube --image=helloworld-minikube:latest --image-pull-policy=Never
kubectl expose deployment helloworld-minikube --type=NodePort --port=808
➜ minikube git:(master) ✗ minikube service helloworld-minikube --url
http://192.168.64.6:32100
➜ minikube git:(master) ✗ curl http://192.168.64.6:32100
Hello World from your local minikube!%
The cool part about this setup is that you can just use local images; you don’t have to actually push it into a registry.
Overall, the primary advantage of using Minikube is that you can experiment and learn without worrying about the confines of a larger system. For more information, check out my GitHub project and the K8s docs on Minikube.
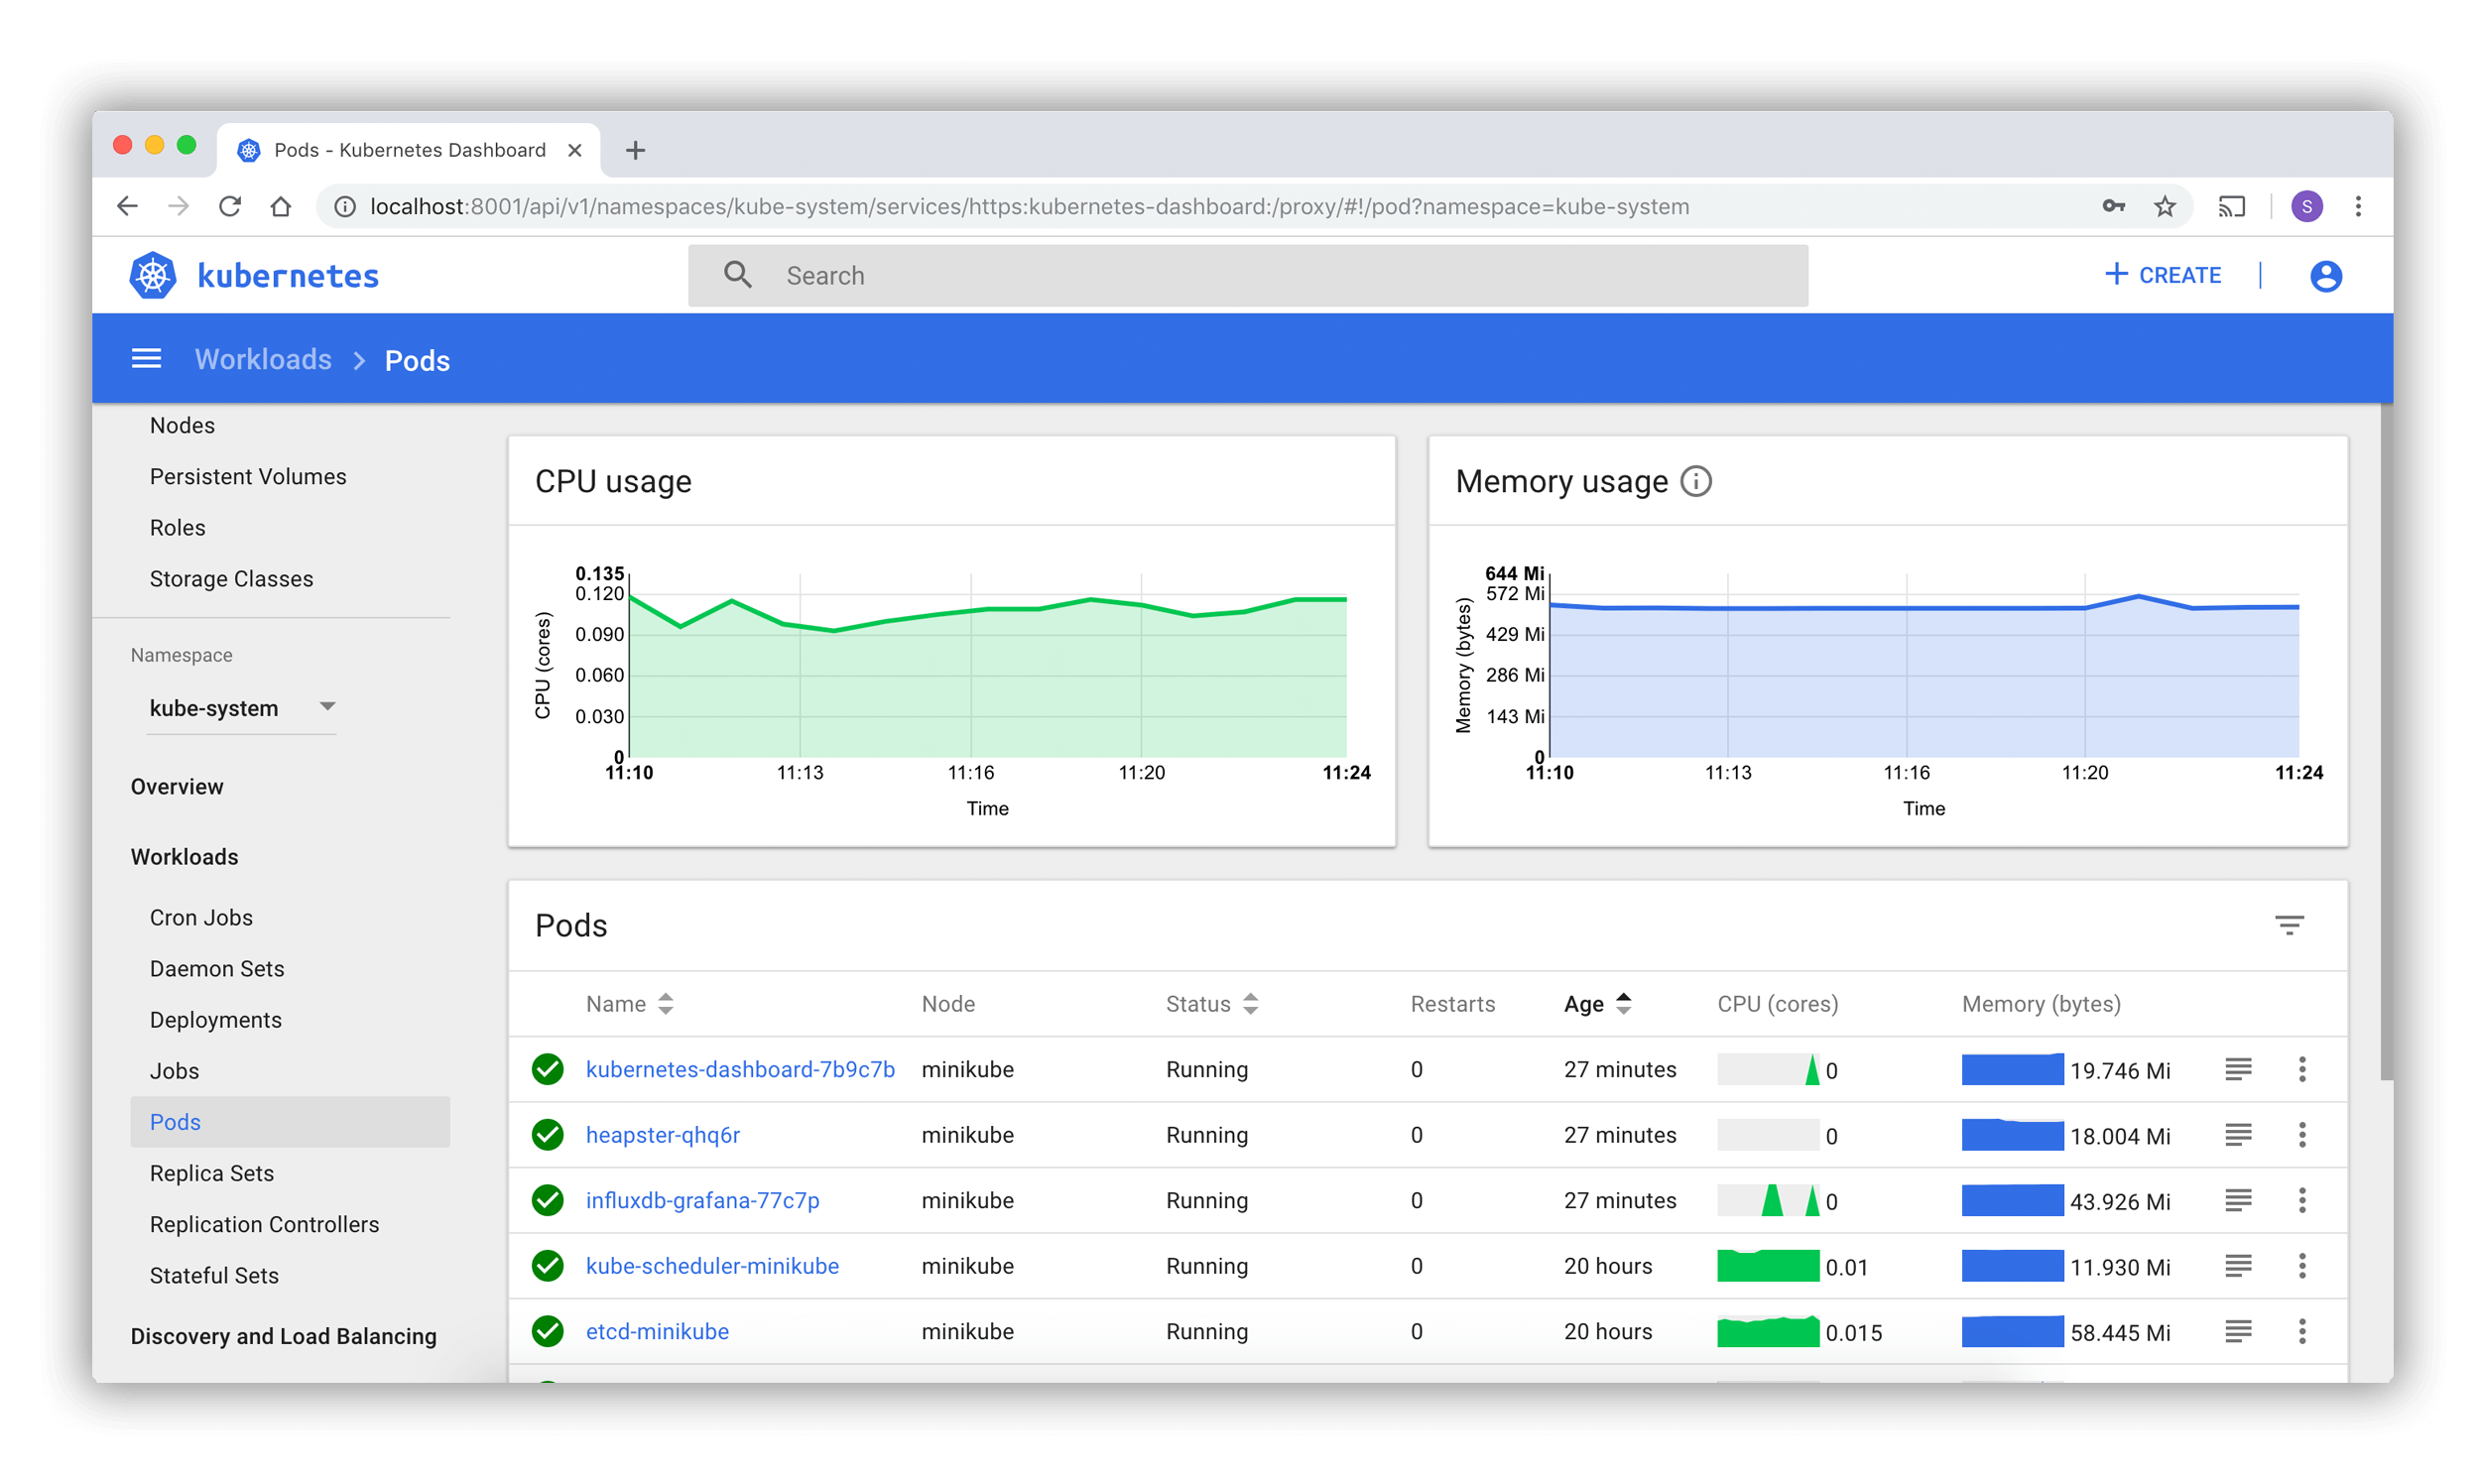
When working with K8s, it’s helpful to have a single source of information on your cluster. Dashboard is a web interface that lets you monitor the state of your cluster, and it can be run both locally and in deployed environments. You can run the Dashboard in your hosted instances as well as a local setup such as Minikube. Dashboard is a very nice way to quickly see the state of your cluster and its nodes.
To deploy the dashboard locally on top of your running clusters, just run the following with kubectl.
kubectl apply -f https://raw.githubusercontent.com/kubernetes/dashboard/v2.0.0-beta8/aio/deploy/recommended.yaml
Then, run the kubectl proxy.
kubectl proxy
Next, you can access the dashboard via the following URL on your local machine:
http://localhost:8001/api/v1/namespaces/kubernetes-dashboard/services/https:kubernetes-dashboard:/proxy/
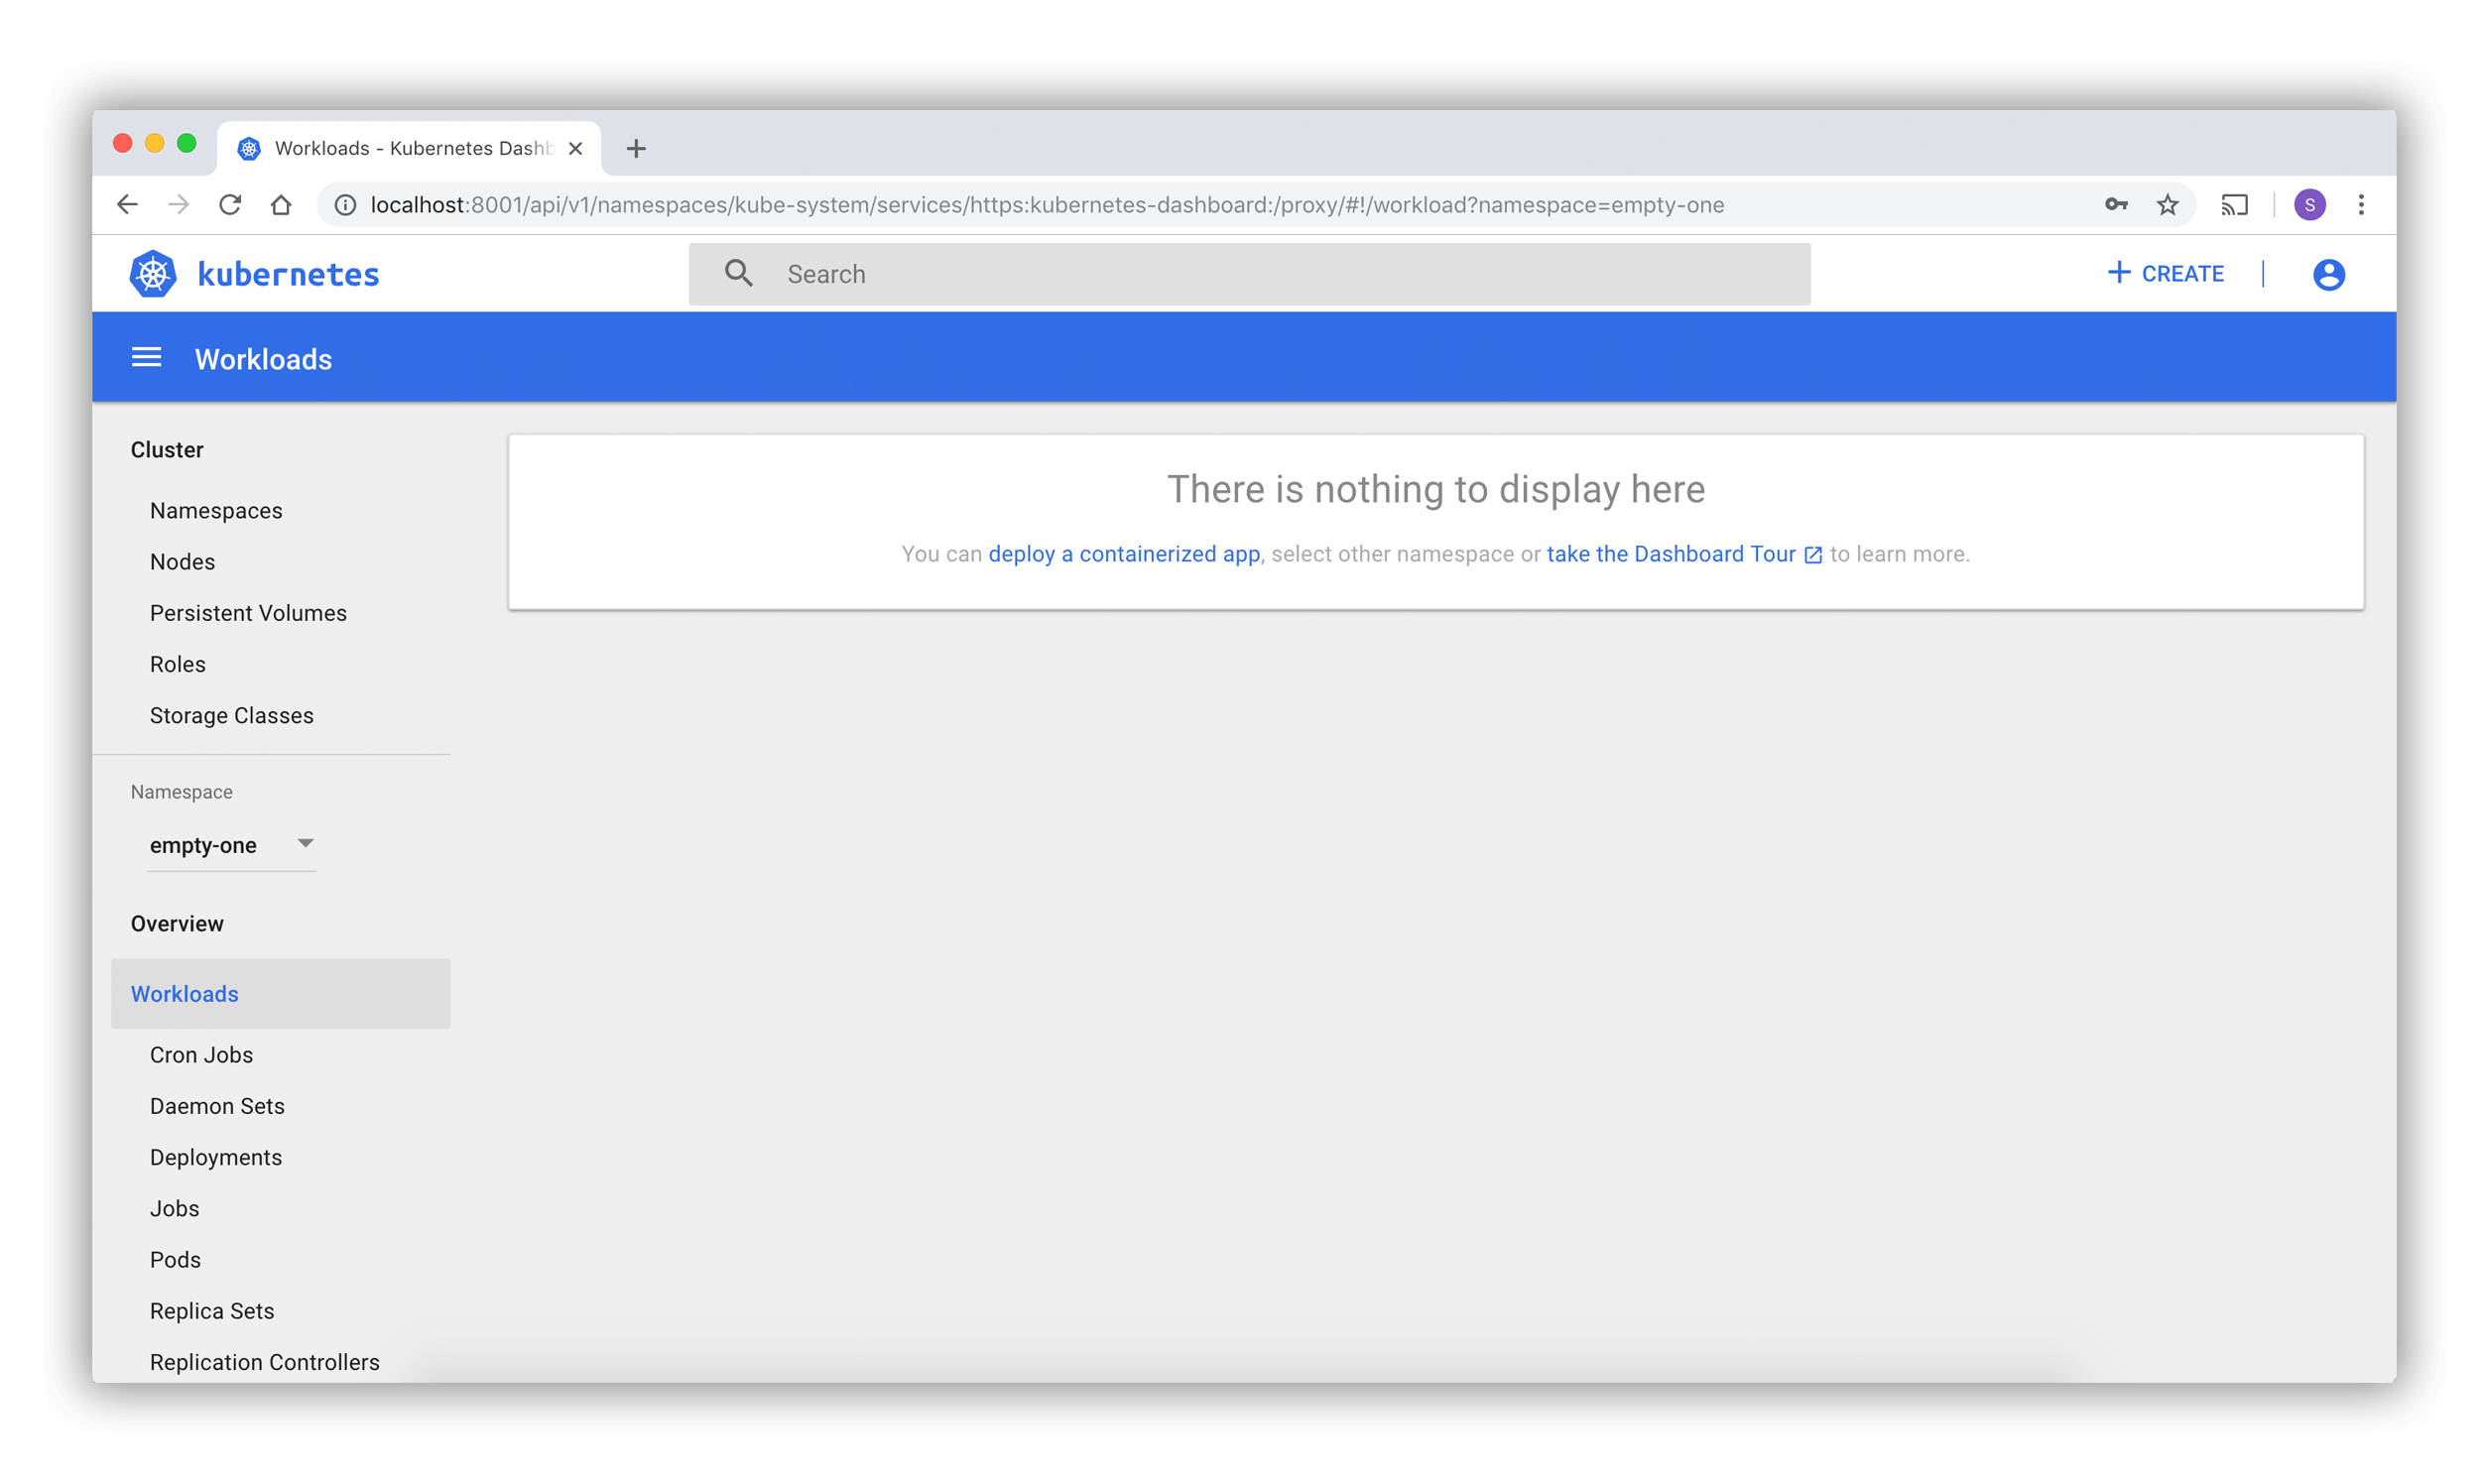
You should see the following output.


(Source: Kubernetes official documentation)
From here, you can access logs and many other features.
Developers within the K8s community are working on several additional tools beyond what we’ve covered here. I’ll briefly describe a few.
Helm allows you to manage packages used by your K8s infrastructure. These are called “charts,” and they enable you to abstract away package management. The nice part about Helm is that you can use preconfigured packages, or you can package up your existing applications.
If you’re familiar with Docker but not K8s, Kompose enables you to convert a Dockerfile into a K8s config file for deployments. There are a lot of cool things you can do with this.
kubeadmIf you want a general-purpose way to build clusters on your infrastructure, kubeadm is the way to go. Using K8s tools including kubeadm, kubelet and kubectl, you can quickly create a cluster.
Istio is a very popular open-source framework that is now available to manage message passing in your clusters. Istio does what a lot of the tools I’ve described in this post already do: if you set up Istio to work with your cluster, you’ll have a convenient third-party tool that can streamline communication between your cluster and nodes.
There are many other open-source projects that help with K8s. Typically, you see these in the form of either frameworks that can run in your control plane or SDKs that enable your containers to communicate with one another. The popularity and community behind K8s make working with this framework both fun and exciting.
I hope you’ve been able to learn something from the tools I’ve shown here. I highly recommend checking out the K8s GitHub repo to learn more about what the open source community is doing. There is a lot of cool things going on, and it’ll be exciting to see how Kubernetes evolves in 2020.
Install LogRocket via npm or script tag. LogRocket.init() must be called client-side, not
server-side
$ npm i --save logrocket

// Code:

import LogRocket from 'logrocket';
LogRocket.init('app/id');
// Add to your HTML:

<script src="https://cdn.lr-ingest.com/LogRocket.min.js"></script>
<script>window.LogRocket && window.LogRocket.init('app/id');</script>
Would you be interested in joining LogRocket's developer community?
Join LogRocket’s Content Advisory Board. You’ll help inform the type of content we create and get access to exclusive meetups, social accreditation, and swag.
Sign up now
A breakdown of the wrapper and container CSS classes, how they’re used in real-world code, and when it makes sense to use one over the other.

This guide walks you through creating a web UI for an AI agent that browses, clicks, and extracts info from websites powered by Stagehand and Gemini.

This guide explores how to use Anthropic’s Claude 4 models, including Opus 4 and Sonnet 4, to build AI-powered applications.

Which AI frontend dev tool reigns supreme in July 2025? Check out our power rankings and use our interactive comparison tool to find out.