Editor’s note: This post was updated on 20 March 2023 to provide updated information on PhantomJS, Nightmare, Headless Chrome, and Puppeteer, as well as include information on Selenium, Playwright, and Cypress.
Headless testing is a way of running browser UI tests without the “head”, which in this case means that there’s no browser UI, or GUI of any sort. This is useful since when running tests, especially in a CI environment, nobody is “watching” the visuals, so there’s no need to have the extra overhead of the browser GUI.
One of the biggest reasons for using a headless browser or carrying out headless testing is performance since this enables you to run tests more quickly in a real browser environment. Headless browsers avoid draw operations, which handle rendering of the UI and its various pixels on the screen. With headless testing, we ignore those draw operations; the headless engines just run the same tests in the background without a need for a user interface.
In this article, we’ll explore the benefits of headless testing, investigate seven headless testing tools, and consider the advantages and disadvantages of headless browsers.
Let’s get started!
Jump ahead:
The Replay is a weekly newsletter for dev and engineering leaders.
Delivered once a week, it's your curated guide to the most important conversations around frontend dev, emerging AI tools, and the state of modern software.
By using headless testing, you’re guaranteed a more lightweight, less resource-intensive, and scripted automation that executes quickly. Instead of going through each page and checking for errors manually, you can write a UI test and integrate it into your build process, then run it in the background.
Headless testing helps you to fix some of the potential quirks that would have been a problem for your users. It helps to make sure that an app can be shipped with little or minimal bugs.
Lastly, with headless testing, you can generate screenshots and PDFs of websites, scrape content from websites, automate form submission, and simulate keyboard input.
N.B., due to the lack of active contribution, PhantomJS development is suspended until further notice; this does not affect its existing features although it may stop working correctly (or may not work at all) in more recent versions of macOS
PhantomJS is a headless WebKit scriptable with a JavaScript API. It has fast and native support for various web standards.
This headless testing tool is suitable for headless website testing, screen capturing, page automation and network monitoring.
One major use case of PhantomJS is headless testing of web applications. It is suitable for general command line-based testing, within a pre-commit hook, and as part of a continuous integration system.
PhantomJS supports headless testing with the use of CasperJS. CasperJS is a navigation scripting and testing tool for PhantomJS. It allows you to build full navigation scenarios using high-level functions and a straightforward interface to accomplish all sizes of tasks.

CasperJS comes with a basic testing suite that allows you to run full-featured tests and also allows you to capture data from web pages simply that don’t contain APIs by web scraping.
N.B., CasperJS is no longer actively maintained or developed, and it may not work properly with the latest versions of Chrome and Firefox
To get started with PhantomJS and CasperJS, you’ll first have to install PhantomJS globally:
# To install PhantomJS, run the command below
brew install phantomjs
Create a project folder to carry out the tests in. In that folder, initialize npm with npm init -y. Next, add CasperJS to the project:
npm i casperjs
Now, let’s use CasperJS to scrape Google and display the results from a Google search in the terminal.
Create a file named caspergoogle.js and add the following code:
var casper = require('casper').create();
var searchTerm = 'web scraping'; // The search term to use
casper.start('https://www.google.com/search?q=' + encodeURIComponent(searchTerm), function() {
  this.echo('Results for "' + searchTerm + '":\n');
});
casper.waitForSelector('.g', function() {
  var results = this.evaluate(function() {
    var resultsElements = document.querySelectorAll('.g');
    return Array.prototype.map.call(resultsElements, function(element) {
      var titleElement = element.querySelector('.rc .r a');
      var title = titleElement.innerText;
      var url = titleElement.href;
      var description = element.querySelector('.s .st').innerText;
      return { title: title, url: url, description: description };
    });
  });
  results.forEach(function(result) {
    console.log('Title: ' + result.title);
    console.log('URL: ' + result.url);
    console.log('Description: ' + result.description);
    console.log('\n');
  });
});
casper.run();
In the code block above, we use CasperJS to launch a headless browser, navigate to Google search page with the specified search term, wait for the search results to appear, extract the search results, and display them in the terminal. You can customize the search term by changing the searchTerm variable in the script.
We created a new CasperJS object instance, followed by the searchTerm variable which specifies the search term to be used. The casper.start() method launches a Google search for the specified search term while the casper.waitForSelector() method waits for the page to load the search results. The this.evaluate() method extracts the search results from the page and the extracted results are saved in the variable results.
The results.forEach() method iterates through each search result in the terminal and displays its title, URL, and description.
Finally, the script is executed using the casper.run() method.
Run the following command to see the output from your code:
casperjs caspergoogle.js
If everything works fine, you should see the results from the Google search displayed nicely in your terminal.
Nightmare is a high-level browser automation library from Segment. Nightmare exposes a few simple methods that mimic user actions (like goto, type and click), with an API that feels synchronous for each block of scripting, rather than deeply nested callbacks.
It was originally designed for automating tasks across sites that don’t have APIs but is most often used for UI testing and crawling.
To start using Nightmare, you’ll have to install the Nightmare package:
npm i nightmare
Let’s write a basic test using Nightmare. This test checks if a website loads successfully or not. To do this, we’ll need Mocha. Mocha is a JavaScript testing framework that runs on Node.js and on the browser.

Install Mocha and Nightmare as development dependencies with the commands below:
npm install --save-dev mocha
npm install --save-dev nightmare
Include Mocha as a test script in your package.json file:
"scripts": { "test": "mocha" }
In the same folder, create a file named test.js and add the following code:
const Nightmare = require("nightmare");
describe("Load a Page", function () {
  // Recommended: 5s locally, 10s to remote server, 30s from airplane
  this.timeout('30s')
  let nightmare = null;
  beforeEach(() => {
    nightmare = new Nightmare();
  });
  describe("/ (Home Page)", () => {
    it("should load without error", (done) => {
      // your actual testing urls will likely be `http://localhost:port/path`
      nightmare
        .goto("https://www.goal.com/en-ng")
        .end()
        .then(function (result) {
          done();
        })
        .catch(done);
    });
  });
  describe("/live-scores (Live score Page)", () => {
    it("should navigate to /live-scores page and load without error", (done) => {
      // your actual testing urls will likely be `http://localhost:port/path`
      nightmare
        .goto("https://www.goal.com/en-ng")
        .end()
        .then(function (result) {
          done();
        })
        .catch(done);
    });
  });
});
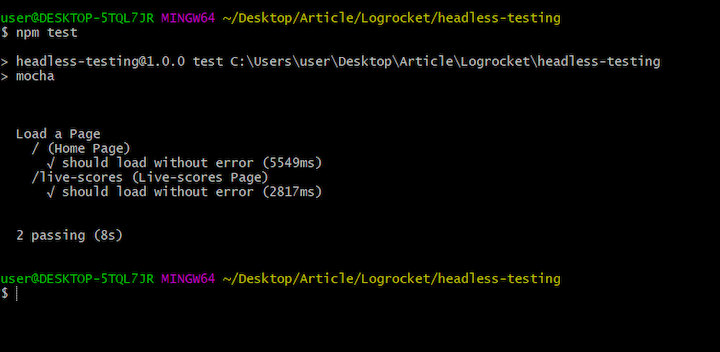
In the code block above, we wrote a test that checks if a website is loaded successfully without any errors. In the second describe() block, we wrote a test case in which we use Nightmare to navigate the site and check for errors.
Run your test with the following command:
npm test
If everything works fine, you should have the following results:
Headless Chrome is an implementation that allows us to run the Chrome browser in a headless environment so as to aid with automated tests. It is available in versions of Google Chrome 59 and higher.
Headless Chrome brings all modern web platform features provided by Chromium and the Blink rendering engine to the command line. It’s a way of interacting with websites without having to actually have a window up on the screen.
It’s very easy to get started with Headless Chrome; all you need is a terminal and the latest version of Chrome:
chrome --headless --disable-gpu
There’s a possibility that the command above will return a chrome command notfound error. To fix that, you’ll need to create an alias for your Chrome installation.
Run the command below to add the chrome command as an alias:
## For MacOS
## Use this for Google Chrome
alias chrome="/Applications/Google\ Chrome.app/Contents/MacOS/Google\ Chrome"
## Use this for Chrome Canary
alias chrome-canary="/Applications/Google\ Chrome\ Canary.app/Contents/MacOS/Google\ Chrome\ Canary"
## Use this for Chromium
alias chromium="/Applications/Chromium.app/Contents/MacOS/Chromium"
Let’s carry out some basic tasks with Headless Chrome.
Here’s how you’d create a PDF of a particular page:
chrome --headless --disable-gpu --print-to-pdf https://www.logrocket.com/
This should generate a PDF file, titled output.pdf, of the entire website.
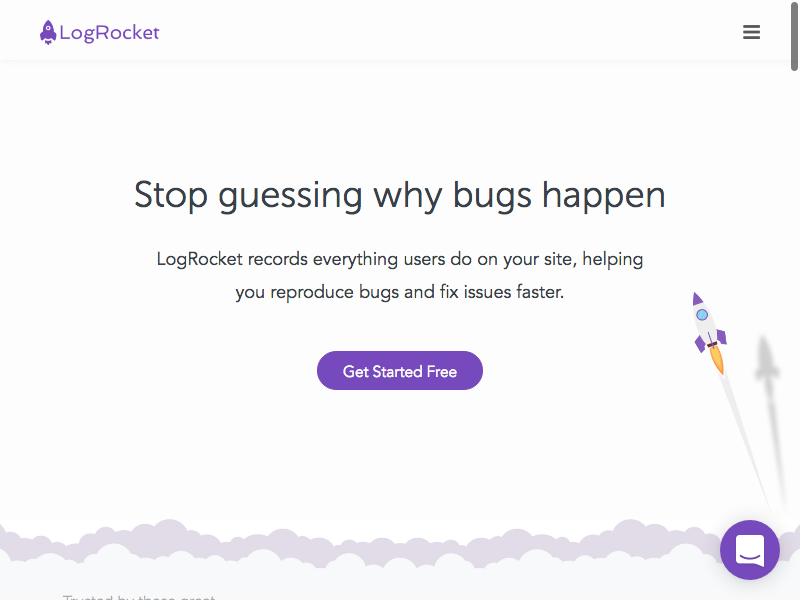
Here’s how you’d take screenshots:
chrome --headless --disable-gpu --screenshot https://www.logrocket.com/
This should generate a screenshot, titled screenshot.png, of the visible viewport of the website:
To take a screenshot with a custom size, you easily add the --window-size flag to the command. To take a screenshot with a custom size, you easily add the --window-size flag to the command:
chrome --headless --disable-gpu --screenshot --window-size=1280,1696 https://www.logrocket.com/
If you’d like to take Headless Chrome a step further and carry out tasks/tests programmatically, by writing Node.js code, this is where Puppeteer comes in.
Puppeteer is a Node.js library developed by the Chrome team. It provides a high-level API to control Headless Chrome. It’s similar to other automated testing libraries like Phantom and NightmareJS above, but it only works with the latest versions of Chrome (Chrome 59+).
The Puppeteer API can be used to take screenshots, create PDFs, navigate pages, and fetch information from pages.
We’ll write some example code to see Puppeteer in action.
To take a screenshot, start by installing Puppeteer with the npm package:
npm i puppeteer
Next, create a JavaScript file in which we’ll write code to demonstrate Puppeteer, you can name it puppeteer.js. Edit the newly created file with the code below:
The code block above helps to take a screenshot of a particular site (in this case, LogRocket.com) using Puppeteer. The entire code is wrapped in an async function and a browser is launched. A page is then created and we use the goto() function to navigate to the website we’d like to take a screenshot of.
If you’d like a full-page screenshot, you can easily do that by setting fullPage to be true inside the page.screenshot() function, like so:
await page.screenshot({ path: 'https://logrocket.com', fullPage: true})
Run the command node puppeteer.js in your terminal and you should see a screenshot titled LR.png in your project directory:
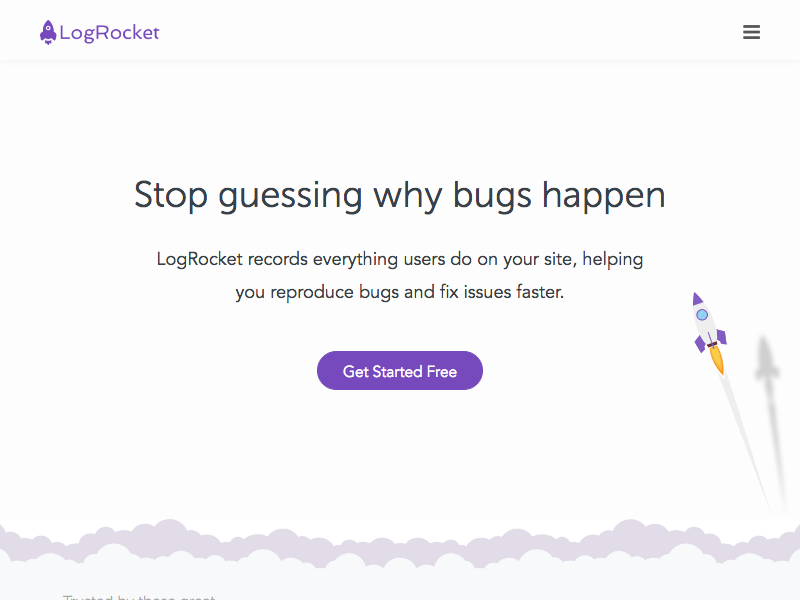
Screenshot from Puppeteer code
To generate a PDF, create a JavaScript file, puppeteerpdf.js, in the same folder and edit with the following code:
The code block above helps to generate a PDF of a site using Puppeteer. The entire code is wrapped in an async function and a browser is launched. A page is then created and we use the goto() function to navigate to the website we’d like to generate a PDF of.
The waitUntil: 'networkidle' line of code means that the navigation of the site is only considered to be finished when the network activity stays “idle” for at least networkIdleTimeout ms (which defaults to 1000ms). The page.pdf() function creates the PDF file.
Now, run the following command in your terminal:
node puppeteerpdf.js
You should see a PDF file, titled YE.pdf, in your project directory.
The last thing we’ll do with Puppeteer is programmatically navigate to a page, automate a form submission as well as keyboard input, and then display the results from the form submission.
Start by creating a file named puppeteersearch.js and add the following code:
In the code block above, Puppeteer launches a headless browser and navigates to google.com. We then define the query to be typed using the page.type()function and simulate a click using the page.click() function.
The page.waitForSelector() function is used to wait for a selector to check if the desired content is loaded. In this case, the h3 a selector is used:

The page.evaluate() function allows us to run scripts in the context of the page. The function above gets all the links from the Google search result and stores them in an array.
Finally, we log the result to the console. Run the command node puppeteersearch.js and you should see the results from the automated Google search in your terminal.
Selenium provides tools for developing robust, browser-based regression automation suites and tests by providing a collection of language-specific bindings for driving a browser the way it was designed to be driven.
Selenium WebDriver is a popular testing framework that supports several programming languages and browsers, including JavaScript (through the WebDriverJS package) and Google Chrome.
In order to set up headless browser testing with Selenium using JavaScript and Google Chrome,
you’ll have to install selenium-webdriver and chromedriver.
Create a new folder for your project and initialize it with npm init. Then, install the selenium-webdriver and chromedriver packages with the following command:
npm install selenium-webdriver chromedriver
Next, you’ll need to set up Selenium with Headless Chrome.
Start by creating a JavaScript file, test.js, and import the following modules:
const { Builder, By, Key, until } = require('selenium-webdriver');
const chrome = require('selenium-webdriver/chrome');
Then, add the following to configure the Chrome browser to run in headless mode:
const chromeOptions = new chrome.Options();
chromeOptions.addArguments('--headless');
Next, add the following to create a WebDriver instance using the Headless Chrome configuration:
async function createDriver() {
  return await new Builder()
    .forBrowser('chrome')
    .setChromeOptions(chromeOptions)
    .build();
}
Now you can write tests using the headless WebDriver instance. Here’s a simple example that navigates to a website and logs the page title to the console:
async function main() {
  const driver = await createDriver();

  try {
    await driver.get('https://www.goal.com/en-ng');
    const title = await driver.getTitle();
    console.log('Page title:', title);
  } finally {
    await driver.quit();
  }
}

main();
Save your JavaScript file and execute it with the following command:
node test.js
If everything is set up correctly, the test will run using Headless Chrome, and the page title will be printed to the console.
Modern web apps can now be tested end-to-end with Playwright. Chromium, WebKit, and Firefox are just a few of the modern rendering engines that this testing tool supports.
Playwright supports headless or headed, locally or on CI, cross-platform testing on Windows, Linux, and macOS. Because of its cross-language support, its API can be integrated with TypeScript, JavaScript, Python, .NET, and Java.
Playwright is compatible with Test for Mobile Web, Emulation of Mobile Safari, and Google Chrome for Android on mobile devices natively. Desktop and the cloud both use the same rendering engine.
In order to set up headless browser testing with Playwright using JavaScript and Google Chrome,
install the playwright package, like so:
npm install playwright
Next, you’ll need to set up Playwright with Headless Chrome.
To start, create a JavaScript file test.js and import the following module:
const { chromium } = require('playwright');
Then, add the code snippet below to create a browser instance and a context with the Headless Chrome configuration:
async function main() {
  const browser = await chromium.launch({ headless: true });
  const context = await browser.newContext();
  const page = await context.newPage();
}
Now you can write tests using the headless browser instance.
Add the code below to the main function:
await page.goto('https://www.goal.com/en-ng');
const title = await page.title();
console.log('Page title:', title);

await browser.close();
The above snippet navigates to a website and logs the page title to the console then close the browser after the tests are finished.
Save your JavaScript file and execute it with the following command:
node test.js
If everything is set up correctly, the test will run using Headless Chrome, and the page title will be printed to the console.
You can run headless browser testing with other browsers such as Firefox and Safari by using the appropriate Playwright APIs (e.g., firefox and webkit).
Cypress is a popular end-to-end testing framework specifically designed for fast, easy, and reliable web testing for any applications or components that run in a browser. It has inbuilt support for headless browser testing and supports JavaScript for writing tests.
This headless browser testing tool has no servers, drivers, or other dependencies to install or configure, making it easy to set up.
Cypress reduces the number of inconsistent test results that are frequently present in other testing frameworks and ensures more reliable results by isolating the state of each test and clearing the state of the browser before the next test runs.
In order to set up headless browser testing with Cypress using JavaScript and Google Chrome,
you’ll have to install the Cypress package like so:
npm install cypress
Next, initialize Cypress to create a new configuration file and example tests:
npx cypress open
Cypress will create a new cypress.json file and a cypress folder containing example tests.
Now, create a new test file inside the cypress/integration folder (e.g., my_test.spec.js) and add the following:
describe('My Test', () => {
  it('Checks the page title', () => {
    cy.visit('https://www.goal.com/en-ng');
    cy.title().should('eq', 'Football news');
  });
});
Using the Cypress API, in the above code we’ve written a test that navigates to a website and checks the page title.
By default, Cypress runs with Electron as the browser. To use Headless Chrome, you can configure it in the cypress.json file:
{
  "baseUrl": "http://localhost:8080",
  "video": false,
  "browser": "chrome",
  "chromeWebSecurity": false
}
To run your tests using Headless Chrome, run the following command:
npx cypress run --headless --browser chrome
Cypress will run the tests in headless mode using Chrome, and the test results will be printed to the console.
Cypress requires a running server to test a web application. If you see a message like “Cypress failed to verify that your server is running” this means that your server is not running, or that Cypress is looking for the server at the wrong address. So, before running any Cypress tests, ensure that your web application server is running.
You can run headless browser testing with other browsers, such as Firefox, by specifying the appropriate --browser flag value (e.g., --browser firefox).
Headless browsers bring a range of benefits to the table, making them an attractive option for various testing scenarios. Some key advantages include:
Although headless browsers offer several advantages, there are also some limitations to be aware of:
In this article, we demonstrated the benefits of headless testing for developers. We also explored several headless testing tools and looked at examples for each.
Headless testing can be a very useful tool in web development. With headless testing, you can generate screenshots and PDFs of websites, scrape content from websites, automate form submissions, and simulate keyboard input.
Headless testing allows you to test any tasks or behaviors that would be possible in a full-fledged browser, without needing the browser’s GUI.
 Monitor failed and slow network requests in production
Deploying a Node-based web app or website is the easy part. Making sure your Node instance continues to serve resources to your app is where things get tougher. If you’re interested in ensuring requests to the backend or third-party services are successful, try LogRocket.

LogRocket lets you replay user sessions, eliminating guesswork around why bugs happen by showing exactly what users experienced. It captures console logs, errors, network requests, and pixel-perfect DOM recordings — compatible with all frameworks.
LogRocket's Galileo AI watches sessions for you, instantly identifying and explaining user struggles with automated monitoring of your entire product experience.
LogRocket instruments your app to record baseline performance timings such as page load time, time to first byte, slow network requests, and also logs Redux, NgRx, and Vuex actions/state. Start monitoring for free.

Learn how to use Gemini CLI subagents to delegate frontend, backend, testing, and docs tasks to specialized agents with guardrails and clear ownership.

Learn how next-browser gives AI agents runtime context for debugging Next.js apps, including React props, hydration, PPR, forms, and performance.

Build dynamic LLM routing in Next.js with OpenRouter, TanStack AI, task classification, model fallbacks, and cost-aware routing.

TSRX adds first-class control flow, conditional hooks, and scoped styles to React via a TypeScript compiler extension — no new framework required.
Would you be interested in joining LogRocket's developer community?
Join LogRocket’s Content Advisory Board. You’ll help inform the type of content we create and get access to exclusive meetups, social accreditation, and swag.
Sign up now

