To handle issues specific to frontend developers like speed, accessibility, and optimization, Next.js, Nuxt.js, and Scully were introduced to complement React, Vue, and Angular, respectively. SvelteKit is a framework for building high-performance web apps that was introduced to complement Svelte, building on its predecessor, Sapper.

In this article, we’ll cover how to test applications built with SvelteKit, covering areas like unit testing and end-to-end testing. Let’s get started!
TL;DR: You can view the code sample for this test project on GitHub.
To begin, we’ll create a new SvelteKit app. In your terminal, run the following commands:
# start up a Svelte app
npm init svelte@next my-app

# navigate to the app
cd my-app

# install dependencies
npm install

#start up the development server
npm run dev
The code above generates a barebones Svelte app that looks like the image below:
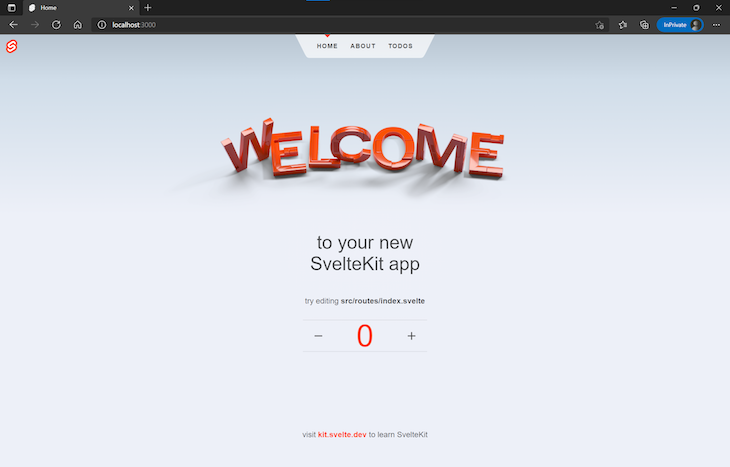
Our newly created app has three components, the homepage index.svelte, an about page about.svelte, and a todos page todo/index.svelte, seen above the welcome banner.
To increase our app’s complexity and create more scenarios for testing, let’s add an additional component to our application that will fetch and display a collection of gift card data from Reloadly, a gift card service provider. Navigate to the src/routes folder and create the gift card component with the code below:
// src/routes/giftcards.svelte

<svelte:head>
    <title>Giftcards</title>
</svelte:head>

<script>
    import { onMount } from 'svelte';
    const accessToken = 'Bearer ACCESS_TOKEN'
    let results = [];
    onMount(() => {
        getGiftCards();
    })
    let headers = {
        'Accept' : 'application/com.reloadly.giftcards-v1+json',
        'Authorization' : accessToken
    }
    const getGiftCards = async () => {
      const res = await fetch('https://giftcards.reloadly.com/countries/es/products', {
            method: 'GET',
            headers: headers
        });
        const json = await res.json();
        results = json
    };

</script>
In the code snippet above, first, we specify the gift card component’s header with the <svelte:head> element. Next, we make an HTTP GET request to Reloadly to fetch the list of gift cards we’ll need for our app.
When we make the request, we’ll need an access token from Reloadly. To get the access token, create a Reloadly account by following the short steps in this Quickstart guide.
Finally, to wrap up our gift card component, let’s use an each block to parse through the data we received:
// src/routes/giftcards.svelte

<main class= 'response'>
    {#each results as result}
    <div class="data">
        <img class="product_image" src="{result.logoUrls[0]}" alt="gift card images" width="200px"/>
        <p class="product_name">{result.productName}</p>
        <p class="currency_code">Currency: {result.recipientCurrencyCode}</p>
        <p class="redeem_instructions">Redeem Instructions: {result.redeemInstruction.concise}</p>
    </div>
    {/each}
</main>
Now that our gift card component is ready, we should have a UI similar to the following:
reloadly-svelte-giftcard-component
Uploaded by Raphael Ugwu on 2021-10-24.
The video above shows our UI organized to display the different gift certificates, including the currency, currently set to USD, and the link containing instructions to redeem.
To simplify our code, we left out the CSS styling, but you can access and modify it if you wish.
For our first testing use case, we’ll cover unit testing, which will allow us to test each component individually. We’ll use Svelte Testing Library, a lightweight library for testing Svelte components, and Jest, a JavaScript testing framework. Let’s begin by installing both:
npm install --save-dev @testing-library/svelte jest
To use Jest in Svelte, first, we’ll need to install the following dependencies:
npm install --save-dev svelte-jester babel-jest @testing-library/jest-dom
svelte-jester: a dependency that compiles Svelte componentsbabel-jest: Jest’s babel.transform for ES6 modulesjest-dom: a dependency that provides a set of custom Jest matchers that extend JestAfter installing our dependencies, we’ll specify a few changes in our package.json file. For one, when we run tests via npm, we’ll use Jest. Additionally, any code that isn’t native JavaScript, in our case, Svelte and ES6, will be transformed, allowing Jest to access it:
{
  "scripts": {
    "test": "jest src",
    "test:watch": "npm run test -- --watch"
  },
  "jest": {
    "transform": {
       "^.+\\.js$": "babel-jest",
      "^.+\\.svelte$": "svelte-jester"
    },
    "moduleFileExtensions": ["js", "svelte"]
  }
}
Next, create a .babelrc file in the root folder of your project and add the configuration below:
{
  "presets": [["@babel/preset-env", {"targets": {"node": "current"}}]]
}
With our configurations completed, let’s perform a unit test on one of our components. In the lib folder where we placed the Counter component, create a test file called counter.spec.js and add the following code:
// src/lib/counter.spec.js
import '@testing-library/jest-dom';
import { render } from "@testing-library/svelte";
import Counter from "./counter.svelte";
describe("counter component", () => {
test("should confirm there are no images in the counter ", () => {
const { container } = render(Counter);
expect(container).not.toContainHTML("![]() ");
});
});
");
});
});
The code snippet above tests the Counter component for the absence of the <img/> element. In the video below, we’re running a unit test to specify that the Counter component doesn’t have any images with the npm run test command.
unit-testing-svelte-with-jest
Uploaded by Raphael Ugwu on 2021-10-25.
You can go ahead and run unit tests on the other components in our application to ensure they’re working as expected.
Now that we’ve completed our unit tests, let’s cover end-to-end testing, which will give us some insight as to how our application will work under real-life circumstances. For end-to-end testing, we’ll use Cypress, a JavaScript-based testing framework. First, let’s install Cypress with the following command in our terminal:
npm install cypress --save-dev
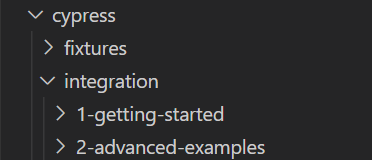
Installing Cypress creates an additional folder in your project with the following set of demo test suites:
Once installation is complete, launch Cypress via the terminal with the following command:
npx cypress open
The command above launches Cypress’ test suite, which looks like the image below:
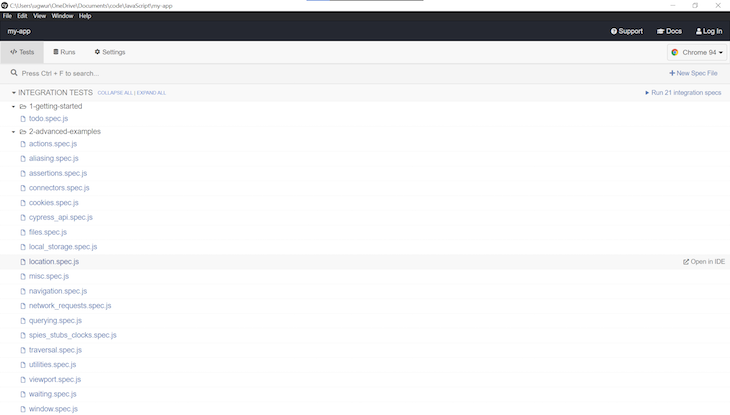
In the image above, we can see that the demo test suite is created upon installation. Let’s delete both existing folders and create our own test suite. Navigate to the cypress/integration folder, delete both existing folders, and create a new folder called giftcards.
In this folder, create a test file called giftcards.spec.js. In this file, we’ll define tests for the gift card component:
// cypress/integration.giftcards/giftcards.spec.js

const baseUrl = 'http://localhost:3000/giftcards';
describe('GiftCard Test', () => {
    it('Confirms gift card data', () => {
        cy.visit(baseUrl)
        cy.get('.data').children().should('have.length', 336)
        cy.get('.product_name').contains('Amazon Spain')
        cy.get('.currency_code').should(($currency_code) => {
            expect($currency_code).to.have.length(84)
            expect($currency_code).to.contain('EUR')
            expect($currency_code).to.contain('USD')
            expect($currency_code).to.not.contain('GBP')
        })
    })
  })
In the code snippet above, we used a number of commands in Cypress’ API to specify our end-to-end testing. Basically, our test suite:
Amazon Spain in our gift card collectionFinally, let’s save and relaunch the test suite.
end to end testing in svelte with cypress
Uploaded by Raphael Ugwu on 2021-10-25.
Integrated tests are an important and necessary part of every project, ensuring your application will function as anticipated after it is deployed. Thankfully, as we’ve demonstrated in this tutorial, testing your SvelteKit application is fairly simple and straightforward. We covered some fundamentals for testing applications in SvelteKit, including unit testing with Jest and Svelte Testing Library and end-to-end testing with Cypress.
I hope you enjoyed this tutorial! If you recommend any other frameworks for testing Svelte and SvelteKit applications, be sure to leave a comment below.
Install LogRocket via npm or script tag. LogRocket.init() must be called client-side, not
server-side
$ npm i --save logrocket

// Code:

import LogRocket from 'logrocket';
LogRocket.init('app/id');
// Add to your HTML:

<script src="https://cdn.lr-ingest.com/LogRocket.min.js"></script>
<script>window.LogRocket && window.LogRocket.init('app/id');</script>

Learn how to protect full-stack projects from NPM supply chain attacks with a practical security checklist.

Explore 15 essential MCP servers for web developers to enhance AI workflows with tools, data, and automation.

Learn how contrast-color() automatically picks accessible text colors using native CSS, without JavaScript.

Learn how to build a harness-style AI workflow using Claude Code with specialized Dev, QE, and Ops subagents, gated handoffs, MCP telemetry, and LEARNING.md.
Would you be interested in joining LogRocket's developer community?
Join LogRocket’s Content Advisory Board. You’ll help inform the type of content we create and get access to exclusive meetups, social accreditation, and swag.
Sign up now

