In this tutorial, we will build a mobile application with Expo that will integrate with the Firebase authentication module. By the end, we will have a running mobile application with the following functionalities:

The source code for this tutorial is available on GitHub. Feel free to jump to the parts you’re interested in most with the links below:
Before we get started with the Firebase integration, we need to set up our project with the Expo CLI.
If you don’t have it installed on your system, you will have to run:
npm install --global expo-cli
Once you have that installed, you can create a new project with the following command. Note that our project name is expo-with-firebase-auth-demo, but you can name it differently.
expo init expo-with-firebase-auth-demo
Before the project is ready to go, Expo will ask you to provide the template you want and will offer the following options:

Personally, I always go with blank (TypeScript). You can choose blank, of course, but why not try TypeScript? It’s awesome.
After making your selection, you will be ready to continue installing the additional packages we will need.
For those additional libraries, run:
expo install @react-navigation/native @react-navigation/stack firebase dotenv react-native-elements expo-constants
Note that we purposely installed the package firebase, which is the JavaScript SDK, instead of the react-native-firebase. This is due to the library’s limitations with the Expo Go app. You can read more about this on the Expo official documentation or the Firebase docs.
Next, we will set up the cloud project on Firebase.
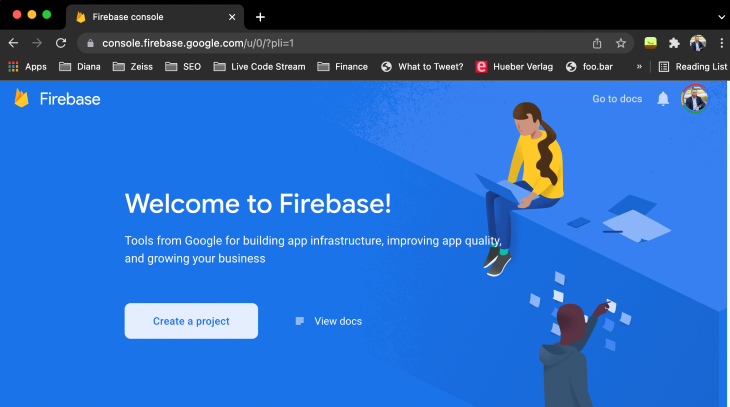
To get started, you’re going to need a Firebase project. If you don’t have a Firebase account yet, visit https://firebase.google.com/ and create one. After that, log in to your Firebase console and create a new Project using the “Create a project” button.
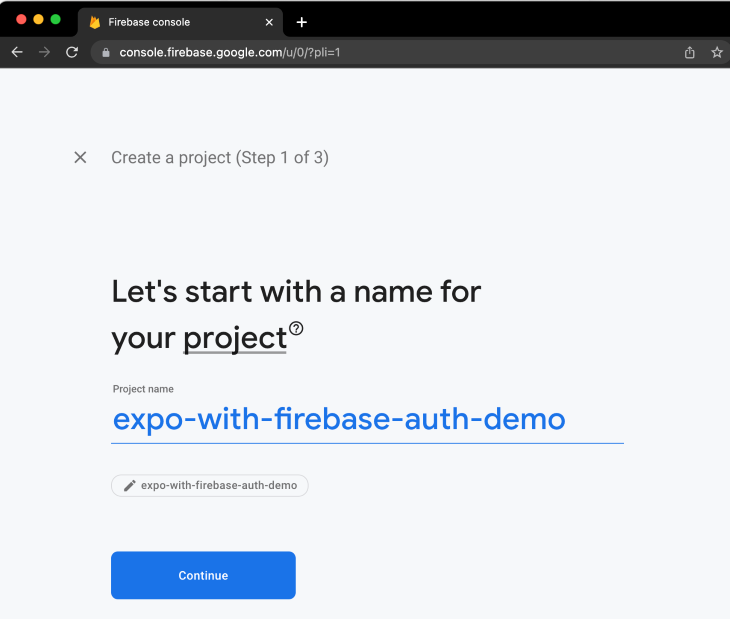
Next, add the name of the new Firebase project. Note that it does not have to be the same as the Expo project name, and then click Continue.
In this step, you can decide if you want to opt-in for Google Analytics. Even though it provides some interesting functionality for projects, we don’t need it for our demo, so I’ll disable it.
Once done, click on Create project.

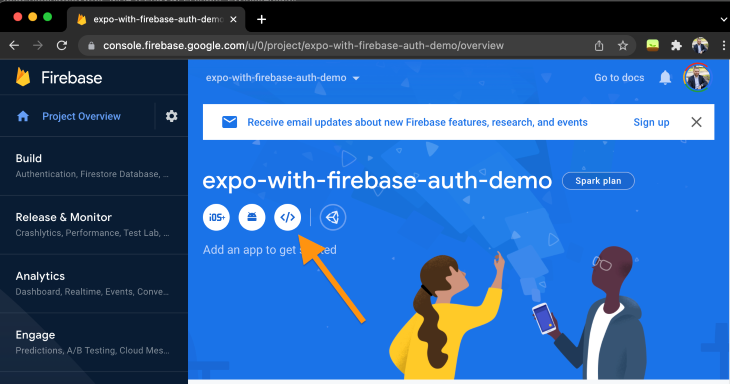
Once on your project screen, you need to set up an app. Remember that a Firebase project can host multiple apps, including websites, unity, and mobile apps.
Click the Web project app to create a new web project. We have to select the web option instead of the native options because we used the Firebase JS SDK.
Enter the application details and ensure that Firebase hosting is disabled. Once completed, click on Register app.
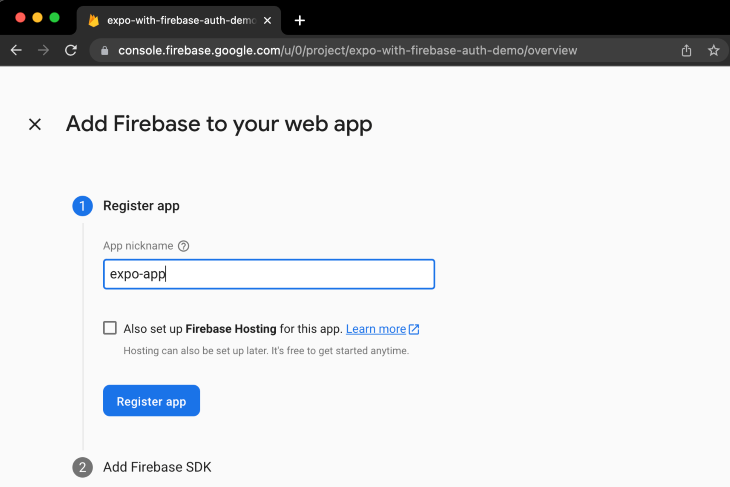
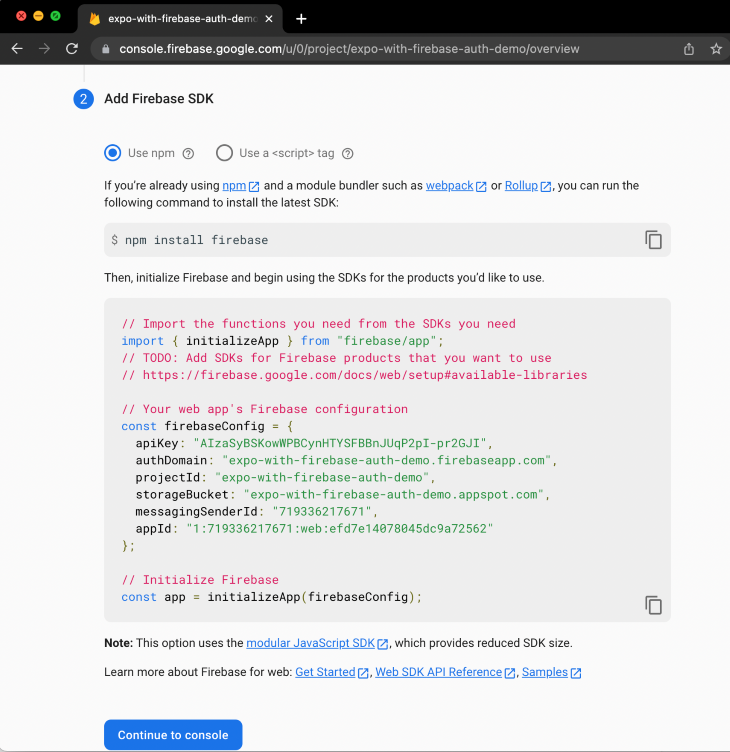
You will receive instructions on the screen with your setup configuration, including your application keys. These keys are not your private keys, but they are required for accessing backend services because they allow you to integrate your code with the Firebase cloud.
It is not a good idea to leave them plain in the code, but for now, we won’t focus on this. Copy the given code and save it. We will come back to this topic when we set our environment variables.
Now that the app is ready, we can start adding Firebase services, such as authentication.
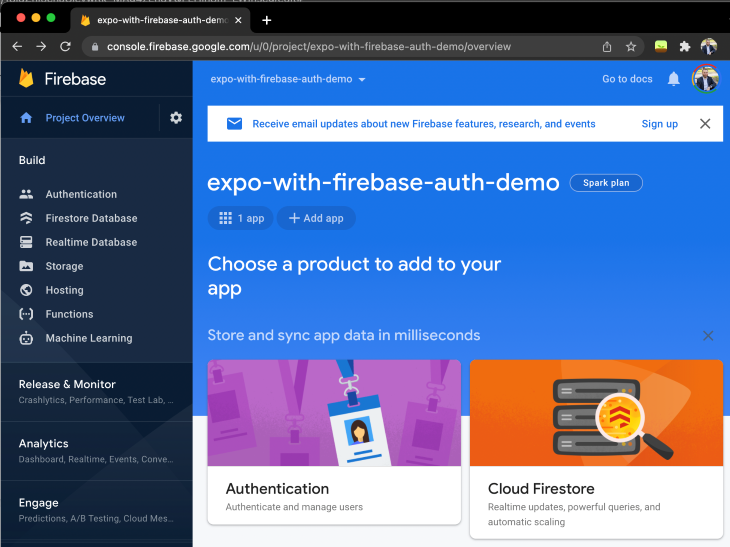
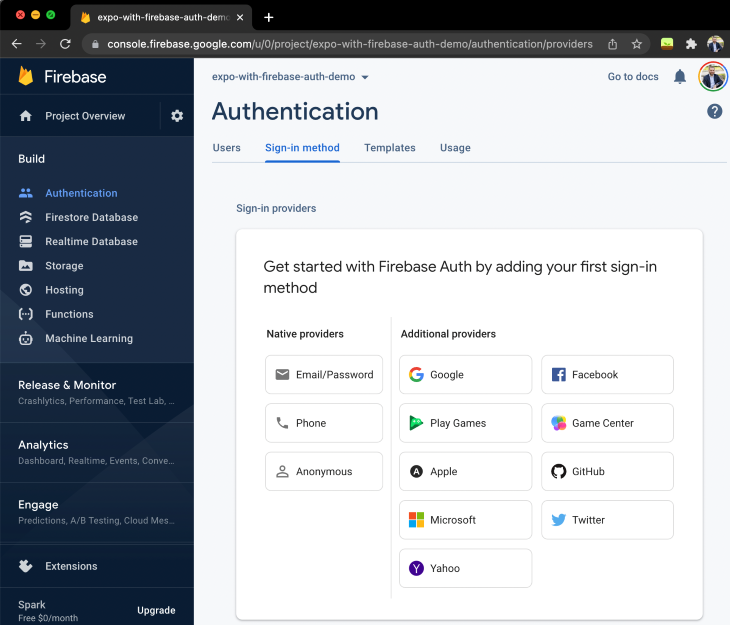
You can access the Authentication service from the Build menu on the left or the Products sections on the main screen. Once there, click Get started and select your preferred sign-in method.
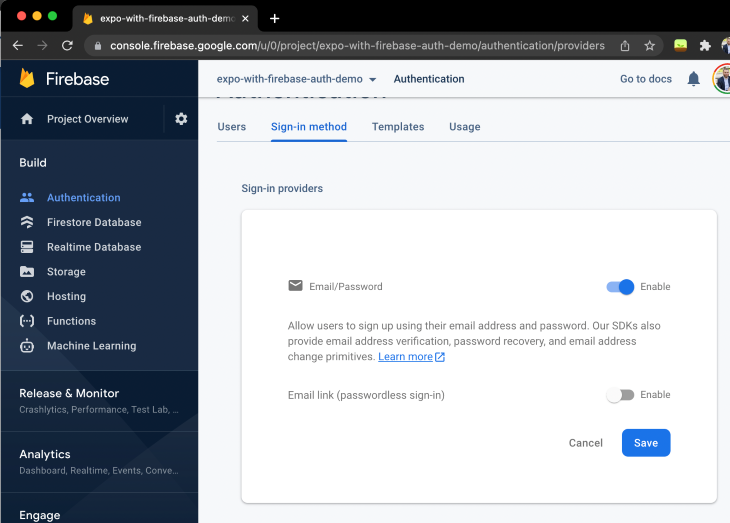
We will use the email/password provider for our demo today, but feel free to explore more options. Firebase offers a wide range of options here.
Once you select a provider, simply enable it and, if required, follow the instructions to set it up and save your changes.
It’s time to set up the Firebase SDK. For that, we’ll add the Firebase setup code provided above into our application. Let’s create a folder on the application source called config and add a file called firebase.ts.
In there, we are going to paste the configuration code.
// Import the functions you need from the SDKs you need
import { initializeApp } from "firebase/app";
// TODO: Add SDKs for Firebase products that you want to use
// https://firebase.google.com/docs/web/setup#available-libraries

// Your web app's Firebase configuration
const firebaseConfig = {
  apiKey: "AIzaSyBSKowWPBCynHTYSFBBnJUqP2pI-pr2GJI",
  authDomain: "expo-with-firebase-auth-demo.firebaseapp.com",
  projectId: "expo-with-firebase-auth-demo",
  storageBucket: "expo-with-firebase-auth-demo.appspot.com",
  messagingSenderId: "719336217671",
  appId: "1:719336217671:web:efd7e14078045dc9a72562"
};

// Initialize Firebase
const app = initializeApp(firebaseConfig);

export default app;
If we leave this as is, however, our keys and sensitive settings could be exposed. Instead, we will use environment variables to exclude this information from our commits.
First, move the configuration into an .env file located at the root of your project:
FIREBASE_API_KEY=AIzaSyBSKowWPBCynHTYSFBBnJUqP2pI-pr2GJI
FIREBASE_AUTH_DOMAIN=expo-with-firebase-auth-demo.firebaseapp.com
FIREBASE_PROJECT_ID=expo-with-firebase-auth-demo
FIREBASE_STORAGE_BUCKETt=expo-with-firebase-auth-demo.appspot.com
FIREBASE_MESSAGING_SENDER_ID=719336217671
FIREBASE_APP_ID=1:719336217671:web:efd7e14078045dc9a72562
You should, of course, provide the values from your own project instead of using mine.
Don’t forget to add this file to your .gitignore. Otherwise, it could be committed and pushed by accident.
Unlike what we can do with CRA, some additional configuration in Expo is required before accessing those values.
app.json to app.config.js. That way, we can access the variable process.export default at the start of itimport 'dotenv/config‘ at the beginning of the file"extra": {
firebaseApiKey: process.env.FIREBASE_API_KEY,
firebaseAuthDomain: process.env.FIREBASE_AUTH_DOMAIN,
firebaseProjectId: process.env.FIREBASE_PROJECT_ID,
firebaseStorageBucket: process.env.FIREBASE_STORAGE_BUCKET,
firebaseMessagingSenderId: process.env.FIREBASE_MESSAGING_SENDER_ID,
firebaseAppId: process.env.FIREBASE_APP_ID
}
In the end, your file should look like this:
import 'dotenv/config';
export default {
"expo": {
"name": "expo-with-firebase-auth-demo",
"slug": "expo-with-firebase-auth-demo",
"version": "1.0.0",
"orientation": "portrait",
"icon": "./assets/icon.png",
"splash": {
"image": "./assets/splash.png",
"resizeMode": "contain",
"backgroundColor": "#ffffff"
},
"updates": {
"fallbackToCacheTimeout": 0
},
"assetBundlePatterns": [
"**/*"
],
"ios": {
"supportsTablet": true
},
"android": {
"adaptiveIcon": {
"foregroundImage": "./assets/adaptive-icon.png",
"backgroundColor": "#FFFFFF"
}
},
"web": {
"favicon": "./assets/favicon.png"
},
"extra": {
      firebaseApiKey: process.env.FIREBASE_API_KEY,
      firebaseAuthDomain: process.env.FIREBASE_AUTH_DOMAIN,
      firebaseProjectId: process.env.FIREBASE_PROJECT_ID,
      firebaseStorageBucket: process.env.FIREBASE_STORAGE_BUCKET,
      firebaseMessagingSenderId: process.env.FIREBASE_MESSAGING_SENDER_ID,
      firebaseAppId: process.env.FIREBASE_APP_ID
    }
}
}
Now, all the keys inside the extra section of the object are accessible app-wide, thanks to the already installed package expo-constants.
The last step is to re-work the firebase.ts configuration file to use the new constants instead of hardcoding those keys. The change is as simple as changing the values for the constants with the names defined on your config file.
The new firebase.ts file should look like this:
// Import the functions you need from the SDKs you need
import { initializeApp } from "firebase/app";
import Constants from 'expo-constants';

// TODO: Add SDKs for Firebase products that you want to use
// https://firebase.google.com/docs/web/setup#available-libraries

// Your web app's Firebase configuration
const firebaseConfig = {
  apiKey: Constants.manifest?.extra?.firebaseApiKey,
  authDomain: Constants.manifest?.extra?.firebaseAuthDomain,
  projectId: Constants.manifest?.extra?.firebaseProjectId,
  storageBucket: Constants.manifest?.extra?.firebaseStorageBucket,
  messagingSenderId: Constants.manifest?.extra?.firebaseMessagingSenderId,
  appId: Constants.manifest?.extra?.firebaseAppId,
};

// Initialize Firebase
const app = initializeApp(firebaseConfig);

export default app;
It’s time to layout our application navigation and user flows, considering the two different states in the application: the logged in and logged out conditions.
Here’s how our navigation will work:
Let’s focus on programming the helpers and navigation. We will first create screen placeholders to get everything in the right place.
Let’s create a new folder called screens and a file for each of our screens. For now, all of them will have the same design. We will fix that later.
Your folder structure looks like this:

Each file will contain the following code:
import { StatusBar } from 'expo-status-bar';
import React from 'react';
import { StyleSheet, Text, View } from 'react-native';

export default function HomeScreen() {
  return (
    <View style={styles.container}>
      <Text>Home screen!</Text>
      <StatusBar style="auto" />
    </View>
  );
}

const styles = StyleSheet.create({
  container: {
    flex: 1,
    backgroundColor: '#fff',
    alignItems: 'center',
    justifyContent: 'center',
  },
});
Just make sure to rename the components appropriately.
First, we have to identify if a user is authenticated or not, so we will build a custom hook that will carry out that information, together with the user information, in case there’s one logged in.
Create a folder named utils, and inside there a new folder hooks, under which we are going to place a new file, useAuthentication.ts.
The code for that file is this:
import React from 'react';
import { getAuth, onAuthStateChanged, User } from 'firebase/auth';

const auth = getAuth();

export function useAuthentication() {
  const [user, setUser] = React.useState<User>();

  React.useEffect(() => {
    const unsubscribeFromAuthStatuChanged = onAuthStateChanged(auth, (user) => {
      if (user) {
        // User is signed in, see docs for a list of available properties
        // https://firebase.google.com/docs/reference/js/firebase.User
        setUser(user);
      } else {
        // User is signed out
        setUser(undefined);
      }
    });

    return unsubscribeFromAuthStatuChanged;
  }, []);

  return {
    user
  };
}
By calling onAuthStateChanged, we subscribe to an event that triggers every time the authorization state changes, such as when a user logs in or logs out of the application.
We use this event to capture the user information and set it properly into the hook state, to then provide it back to the components that may need it.
Once the authentication utils are good to go, we can build the navigation stack for both authenticated and unauthenticated users.
We will split all the navigation logic into three files:
index that will handle app-wide navigation for all statesauthStack that includes all stacks for unauthenticated usersuserStack for logged-in usersLet’s start with authStack.tsx. Create this new file under the navigation folder on the root directory of the project, which will have to create that folder as well. There, place the following code:
import React from 'react';
import { NavigationContainer } from '@react-navigation/native';
import { createStackNavigator } from '@react-navigation/stack';

import WelcomeScreen from '../screens/Welcome';
import SignInScreen from '../screens/SignInScreen';
import SignOutScreen from '../screens/SignUpScreen';

const Stack = createStackNavigator();

export default function AuthStack() {
  return (
    <NavigationContainer>
      <Stack.Navigator>
        <Stack.Screen name="Welcome" component={WelcomeScreen} />
        <Stack.Screen name="Sign In" component={SignInScreen} />
        <Stack.Screen name="Sign Up" component={SignOutScreen} />
      </Stack.Navigator>
    </NavigationContainer>
  );
}
Next, let’s work out the userStack.tsx file:
import React from 'react';
import { NavigationContainer } from '@react-navigation/native';
import { createStackNavigator } from '@react-navigation/stack';

import HomeScreen from '../screens/Home';

const Stack = createStackNavigator();

export default function UserStack() {
  return (
    <NavigationContainer>
      <Stack.Navigator>
        <Stack.Screen name="Home" component={HomeScreen} />
      </Stack.Navigator>
    </NavigationContainer>
  );
}
Finally, we connect the two using the index.tsx file.
import React from 'react';
import { useAuthentication } from '../utils/hooks/useAuthentication';
import UserStack from './userStack';
import AuthStack from './authStack';

export default function RootNavigation() {
  const { user } = useAuthentication();

  return user ? <UserStack /> : <AuthStack />;
}
This latest component uses the useAuthentication hook to determine whether we have a logged-in user or not, and based on that, it loads one of the two application stacks.
Lastly, we need to connect our main App.tsx with the navigation, and although we don’t have the screens yet, we should see the default Welcome screen loaded, as we are not logged in.
import React from 'react';
import './config/firebase';
import RootNavigation from './navigation';

export default function App() {
  return (
    <RootNavigation />
  );
}
Up to this point, we can run the application to make sure everything is working properly by running:
expo start
After running the project on your device, simulator, or web, you should see something like this:
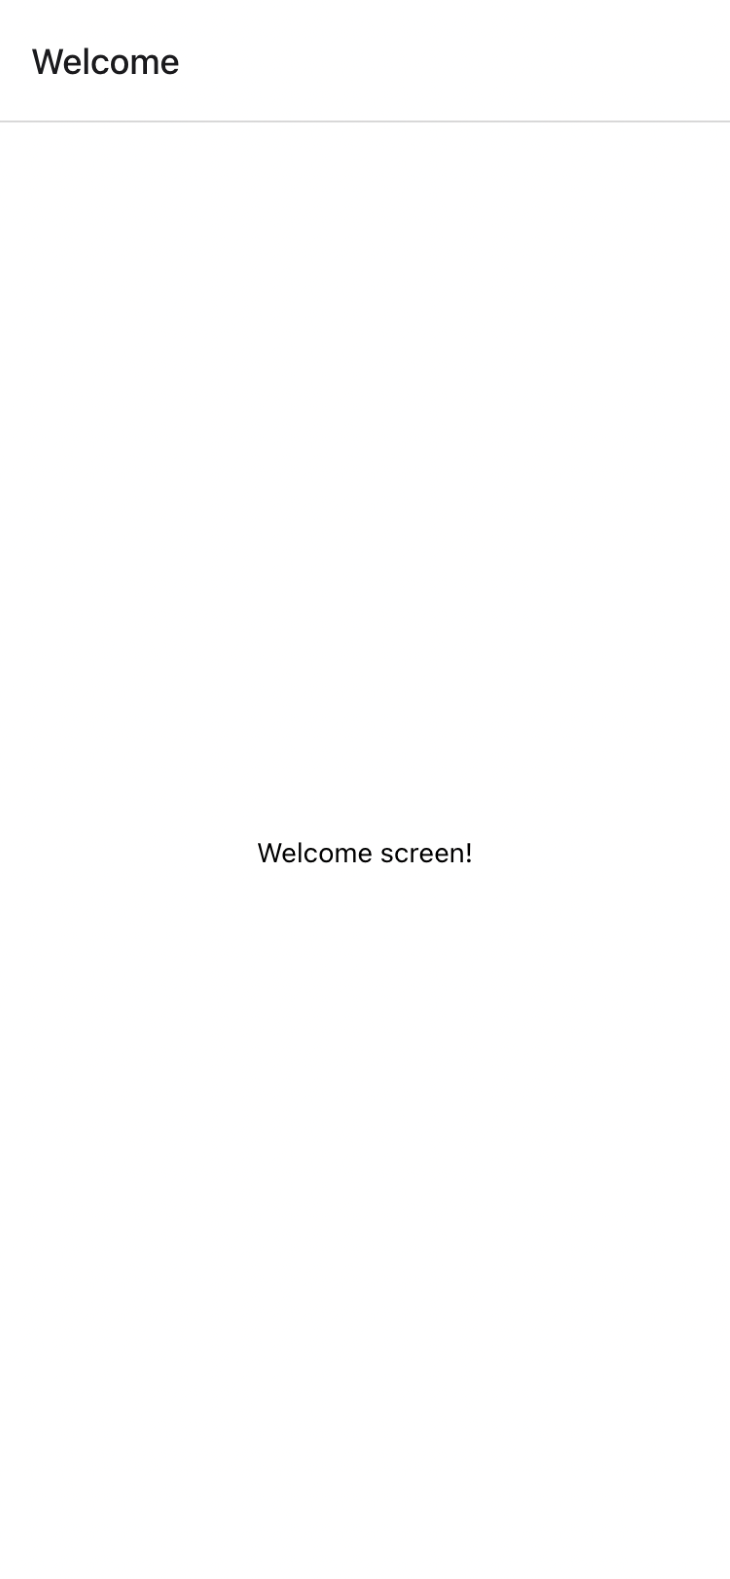
Not very impressive, but we will work on the screens next.
Building the screens is undoubtedly one of the most important aspects of an application. For the sake of this tutorial, we will build the basics and focus less on the overall design.
We need to set up our UI library, which we already installed at the beginning of the tutorial, but there are some missing configuration steps that we need to account for.
We won’t create a custom theme here, but we do need to import the library’s default one. Return to App.tsx and add the theme provider as detailed in the official documentation.
For now, simply wrap all components in App.tsx into the theme provider as follows:
import React from 'react';
import { ThemeProvider } from 'react-native-elements';
import './config/firebase';
import RootNavigation from './navigation';

export default function App() {
  return (
    <ThemeProvider>
      <RootNavigation />
    </ThemeProvider>
  );
}
Our welcome screen looks great, but it is not functional. We need to add a way for users to jump into the login screen or the sign-up screen using the Button component from React Native elements.
We need to add buttons, which will navigate to different screens on the stack.
Here is an example of what one of the buttons looks like:
import React from 'react';
import { StyleSheet, Text, View } from 'react-native';
import { StackScreenProps } from '@react-navigation/stack';
import { Button } from 'react-native-elements';

const WelcomeScreen: React.FC<StackScreenProps<any>> = ({ navigation }) => {
  return (
    <View style={styles.container}>
      <Text>Welcome screen!</Text>

      <View style={styles.buttons}>
        <Button title="Sign in" buttonStyle={styles.button} onPress={() => navigation.navigate('Sign In')} />
        <Button title="Sign up" type="outline" buttonStyle={styles.button} onPress={() => navigation.navigate('Sign Up')} />
      </View>
    </View>
  );
}

const styles = StyleSheet.create({
  container: {
    flex: 1,
    paddingTop: 20,
    backgroundColor: '#fff',
    alignItems: 'center',
    justifyContent: 'center',
  },

  buttons: {
    flex: 1,
  },

  button: {
    marginTop: 10
  }
});

export default WelcomeScreen;
Here is the result:
The sign-up screen is a bit more complex and interesting, as we need to integrate the logic to create a user on Firebase.
We’ll start designing the screen, then we’ll add logic to make it work like magic. The screen contains two input elements, one for the email and one for the password. It also has a signup button and can display an error message in case something goes wrong.
Here is the screen design:
import React from 'react';
import { StyleSheet, Text, View } from 'react-native';
import Icon from 'react-native-vector-icons/FontAwesome';
import { Input, Button } from 'react-native-elements';
import { StackScreenProps } from '@react-navigation/stack';

const SignUpScreen: React.FC<StackScreenProps<any>> = ({ navigation }) => {
  const [value, setValue] = React.useState({
    email: '',
    password: '',
    error: ''
  })

  function signUp() {
    if (value.email === '' || value.password === '') {
      setValue({
        ...value,
        error: 'Email and password are mandatory.'
      })
      return;
    }

    setValue({
      ...value,
      error: ''
    })
  }

  return (
    <View style={styles.container}>
      <Text>Signup screen!</Text>

      {!!value.error && <View style={styles.error}><Text>{value.error}</Text></View>}

      <View style={styles.controls}>
        <Input
          placeholder='Email'
          containerStyle={styles.control}
          value={value.email}
          onChangeText={(text) => setValue({ ...value, email: text })}
          leftIcon={<Icon
            name='envelope'
            size={16}
          />}
        />

        <Input
          placeholder='Password'
          containerStyle={styles.control}
          value={value.password}
          onChangeText={(text) => setValue({ ...value, password: text })}
          secureTextEntry={true}
          leftIcon={<Icon
            name='key'
            size={16}
          />}
        />

        <Button title="Sign up" buttonStyle={styles.control} onPress={signUp} />
      </View>
    </View>
  );
}

const styles = StyleSheet.create({
  container: {
    flex: 1,
    paddingTop: 20,
    backgroundColor: '#fff',
    alignItems: 'center',
    justifyContent: 'center',
  },

  controls: {
    flex: 1,
  },

  control: {
    marginTop: 10
  },

  error: {
    marginTop: 10,
    padding: 10,
    color: '#fff',
    backgroundColor: '#D54826FF',
  }
});

export default SignUpScreen;
Next, let’s start using the auth service from Firebase from our code.
We need to update our firebase.ts config file because we never specified we want to use authentication. All we have to do is to import firebase/auth at the beginning of the file, right before importing Constants. The import section of the file looks like this:
// Import the functions you need from the SDKs you need
import { initializeApp } from "firebase/app";
import 'firebase/auth';
import Constants from 'expo-constants';
Next, let’s update the code of the SignUpScreen to make use of this library.
Let’s start with the imports and local objects. Each time we want to access the Firebase service, we need to import its config and any modulus we want to use. In our case:
import { getAuth, createUserWithEmailAndPassword } from 'firebase/auth';

const auth = getAuth();
Next, we will make use of the function createUserWithEmailAndPassword to create a user on Firebase during the sign-up process. If successful, we will send the user to the login screen. If not, we will show an error message with the details.
Update the signUp function as follows:
async function signUp() {
  if (value.email === '' || value.password === '') {
    setValue({
      ...value,
      error: 'Email and password are mandatory.'
    })
    return;
  }

  try {
    await createUserWithEmailAndPassword(auth, value.email, value.password);
    navigation.navigate('Sign In');
  } catch (error) {
    setValue({
      ...value,
      error: error.message,
    })
  }
}
The sign-in screen looks pretty much the same as our sign-up screen. The code is 95% the same, with the exception that instead of calling createUserWithEmailAndPassword, we call signInWithEmailAndPassword.
Here is the code:
import React from 'react';
import { StyleSheet, Text, View } from 'react-native';
import Icon from 'react-native-vector-icons/FontAwesome';
import { Input, Button } from 'react-native-elements';
import { getAuth, signInWithEmailAndPassword } from 'firebase/auth';

const auth = getAuth();

const SignInScreen = () => {
  const [value, setValue] = React.useState({
    email: '',
    password: '',
    error: ''
  })

  async function signIn() {
    if (value.email === '' || value.password === '') {
      setValue({
        ...value,
        error: 'Email and password are mandatory.'
      })
      return;
    }

    try {
      await signInWithEmailAndPassword(auth, value.email, value.password);
    } catch (error) {
      setValue({
        ...value,
        error: error.message,
      })
    }
  }

  return (
    <View style={styles.container}>
      <Text>Signin screen!</Text>

      {!!value.error && <View style={styles.error}><Text>{value.error}</Text></View>}

      <View style={styles.controls}>
        <Input
          placeholder='Email'
          containerStyle={styles.control}
          value={value.email}
          onChangeText={(text) => setValue({ ...value, email: text })}
          leftIcon={<Icon
            name='envelope'
            size={16}
          />}
        />

        <Input
          placeholder='Password'
          containerStyle={styles.control}
          value={value.password}
          onChangeText={(text) => setValue({ ...value, password: text })}
          secureTextEntry={true}
          leftIcon={<Icon
            name='key'
            size={16}
          />}
        />

        <Button title="Sign in" buttonStyle={styles.control} onPress={signIn} />
      </View>
    </View>
  );
}

const styles = StyleSheet.create({
  container: {
    flex: 1,
    paddingTop: 20,
    backgroundColor: '#fff',
    alignItems: 'center',
    justifyContent: 'center',
  },

  controls: {
    flex: 1,
  },

  control: {
    marginTop: 10
  },

  error: {
    marginTop: 10,
    padding: 10,
    color: '#fff',
    backgroundColor: '#D54826FF',
  }
});

export default SignInScreen;
Let’s keep this simple and only provide a way to log out.
Similar to the sign-up screen, first we will build the screen, then the sign-out function.
Here is the code for the HomeScreen component design:
import React from 'react';
import { StyleSheet, Text, View } from 'react-native';
import { useAuthentication } from '../utils/hooks/useAuthentication';
import { Button } from 'react-native-elements';

export default function HomeScreen() {
  const { user } = useAuthentication();

  return (
    <View style={styles.container}>
      <Text>Welcome {user?.email}!</Text>

      <Button title="Sign Out" style={styles.button} />
    </View>
  );
}

const styles = StyleSheet.create({
  container: {
    flex: 1,
    backgroundColor: '#fff',
    alignItems: 'center',
    justifyContent: 'center',
  },
  button: {
    marginTop: 10
  }
});
Now, let’s write the signOut function by replacing the button code for the following:
<Button title="Sign Out" style={styles.button} onPress={() => signOut(auth)} />
And that’s it!
The code to integrate Firebase authentication into an Expo app is rather simple, as most of the work goes into designing the screens. With Firebase, it’s easy to get started and build secure applications.
Today, we just built a minimum prototype, but Firebase offers many more authentication options and services, so explore it even further to build great products — it is free to get started! Thanks for reading!
Install LogRocket via npm or script tag. LogRocket.init() must be called client-side, not
server-side
$ npm i --save logrocket

// Code:

import LogRocket from 'logrocket';
LogRocket.init('app/id');
// Add to your HTML:

<script src="https://cdn.lr-ingest.com/LogRocket.min.js"></script>
<script>window.LogRocket && window.LogRocket.init('app/id');</script>

Learn how to protect full-stack projects from NPM supply chain attacks with a practical security checklist.

Explore 15 essential MCP servers for web developers to enhance AI workflows with tools, data, and automation.

Learn how contrast-color() automatically picks accessible text colors using native CSS, without JavaScript.

Learn how to build a harness-style AI workflow using Claude Code with specialized Dev, QE, and Ops subagents, gated handoffs, MCP telemetry, and LEARNING.md.
Hey there, want to help make our blog better?
Join LogRocket’s Content Advisory Board. You’ll help inform the type of content we create and get access to exclusive meetups, social accreditation, and swag.
Sign up now

