In this article, we’ll be describing how you can implement biometric authentication using facial recognition and Touch ID in Flutter applications.

To this end, we’ll be using a plugin called local_auth, which is developed by the Flutter team. This plugin provides the means to perform local, on-device authentication of users. With the plugin, we will implement local authentication in our Flutter applications, using both facial recognition and fingerprint scanning.
In this tutorial, we will cover:
local_auth plugin and how its usedBiometric authentication is a type of multifactor authentication (MFA) that uses data derived from a device user’s biological traits, such as facial characteristics, voice recognition, and fingerprints, to facilitate access and better secure personal information and sensitive assets.
One advantage of adopting biometric authentication in applications is that the verification of the user is fully conducted locally on a physical device, removing the possibility of sensitive information being transmitted and potentially exposed via third-party servers.
Aside from effectively verifying users’ identities, it also serves as an additional layer of security over traditional sign-in methods like password credentials.
If you wish to follow along with this tutorial, I recommend you have the following set up:
This tutorial was verified with Flutter v2.5.1 and Android Studio v3.5.
So, with all that out the way, let’s get started.
To get started with our tutorial, let’s create a new Flutter project. Do this by running the following command on your terminal:
$ flutter create local_auth_example
Next, we need to add the local_auth plugin as a dependency to our project. Run the following commands in your terminal to get and install the local_auth plugin in your project.
$ flutter pub add local_auth
$ flutter pub get
Now that we have installed the required dependency, let’s get on with building the UI of our application.
Our application will consist of two screens: the LoginScreen, where we will authenticate the users, and the PrivateScreen, which the users will be able to view after a successful authentication.
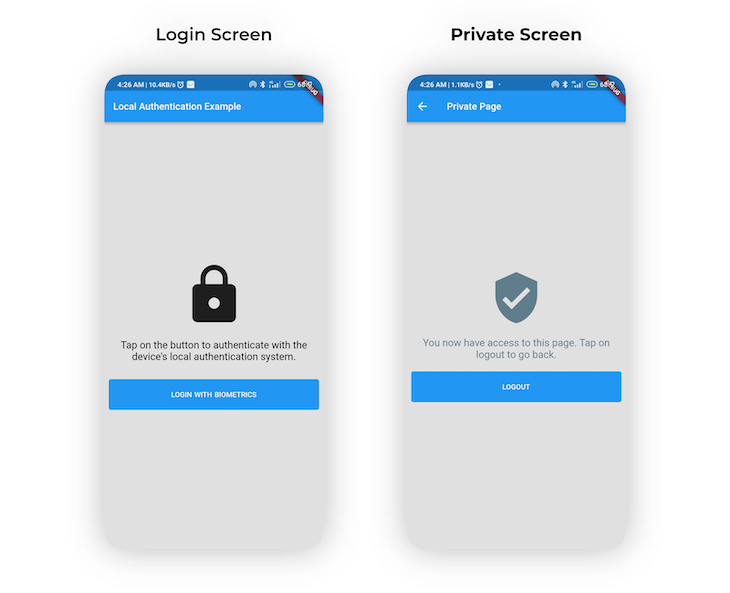
Let’s get started by building the LoginScreen.
As shown in the code snippet below, the LoginScreen comprises of an Icon, a Text, and a Button in which we will implement our biometric functionality.
//...

class LoginScreen extends StatelessWidget {
  const LoginScreen({Key? key}) : super(key: key);
  @override
  Widget build(BuildContext context) {
    var size = MediaQuery.of(context).size;
    return Scaffold(
      backgroundColor: Colors.grey.shade300,
      appBar: AppBar(title: const Text('Local Authentication Example')),
      body: Center(
        child: Padding(
          padding: const EdgeInsets.all(8.0),
          child: Column(
            mainAxisAlignment: MainAxisAlignment.center,
            children: <Widget>[
              Icon(Icons.lock, size: size.width * 0.3),
              const SizedBox(height: 20),
              const Text(
                  'Tap on the button to authenticate with the device\'s local authentication system.',
                  textAlign: TextAlign.center,
                  style: TextStyle(
                    fontSize: 21,
                    color: Colors.black,
                  )),
              const SizedBox(height: 30),
              SizedBox(
                width: size.width,
                child: TextButton(
                  onPressed: () {
                   //implement biometric auth here
                  },
                  style: TextButton.styleFrom(
                    padding: const EdgeInsets.all(20),
                    backgroundColor: Colors.blue,
                    shadowColor: const Color(0xFF323247),
                  ),
                  child: Row(
                    mainAxisAlignment: MainAxisAlignment.center,
                    children: const [
                      Text(
                        'LOGIN WITH BIOMETRICS',
                        style: TextStyle(
                          fontSize: 15,
                          color: Colors.white,
                          fontWeight: FontWeight.w600,
                          wordSpacing: 1.2,
                        ),
                      ),
                    ],
                  ),
                ),
              )
            ],
          ),
        ),
      ),
    );
  }
}
The PrivateScreen also consists of an Icon, a Text, and a Button for handling a user logging out, as shown in the code snippet below.
//...

class PrivateScreen extends StatelessWidget {
  const PrivateScreen({Key? key}) : super(key: key);
  @override
  Widget build(BuildContext context) {
    return Scaffold(
      backgroundColor: Colors.grey.shade300,
      appBar: AppBar(title: const Text('Private Page')),
      body: Center(
        child: Padding(
          padding: const EdgeInsets.all(8.0),
          child: Column(
            mainAxisAlignment: MainAxisAlignment.center,
            children: <Widget>[
              const Icon(Icons.verified_user,
                  size: 100, color: Colors.blueGrey),
              const SizedBox(height: 20),
              const Text(
                  'You now have access to this page. Tap on logout to go back.',
                  textAlign: TextAlign.center,
                  style: TextStyle(
                    fontSize: 21,
                    color: Colors.blueGrey,
                  )),
              const SizedBox(height: 20),
              SizedBox(
                width: MediaQuery.of(context).size.width,
                child: TextButton(
                  onPressed: () {
                    Navigator.pop(context);
                  },
                  style: TextButton.styleFrom(
                    padding: const EdgeInsets.all(20),
                    backgroundColor: Colors.blue,
                    shadowColor: const Color(0xFF323247),
                  ),
                  child: Row(
                    mainAxisAlignment: MainAxisAlignment.center,
                    children: const [
                      Text(
                        'LOGOUT',
                        style: TextStyle(
                          fontSize: 15,
                          color: Colors.white,
                          fontWeight: FontWeight.w600,
                          wordSpacing: 1.2,
                        ),
                      ),
                    ],
                  ),
                ),
              )
            ],
          ),
        ),
      ),
    );
  }
}
local_auth plugin overviewBefore we move on to the implementation of biometric authentication in our app, let’s take a look at the primary features provided by the local_auth plugin, which include the following:
We can check whether the device hardware supports biometric authentication. To do this, we’ll use the isDeviceSupported method provided by the local_auth plugin.
//initialize the Local Authentication plugin
LocalAuthentication _localAuthentication = LocalAuthentication();
//check if device supports biometrics authentication.
bool isBiometricSupported = await _localAuthentication.isDeviceSupported();
The isDeviceSupported async method returns a bool, indicating whether the user’s device supports biometric authentication. In cases where biometric support is not available on the user’s device, you should consider enabling alternative methods of authentication, such as a PIN.
The getAvailableBiometrics method provided by the local_auth plugin can be used to retrieve a list of biometric types supported by the user’s device.
List<BiometricType> biometricTypes =
      await _localAuthentication.getAvailableBiometrics();
The following biometric types are currently supported by the plugin:
To authenticate users using biometrics or PIN, we use the authenticate method provided by the plugin.
await _localAuthentication.authenticate(
     localizedReason: 'To continue, you must complete the biometrics',
);
The authenticate method has some optional parameters which are used to change some specific settings, of which the following are examples:
Future<bool> authenticate({
  required String localizedReason,
  bool useErrorDialogs,
  bool stickyAuth,
  bool biometricOnly ,
})
String localizedReasonThis is the message to be shown to the user while prompting them for authentication.

bool biometricOnlyWhen set to true, non-biometric local authentication methods such as PIN and passcode are disabled.
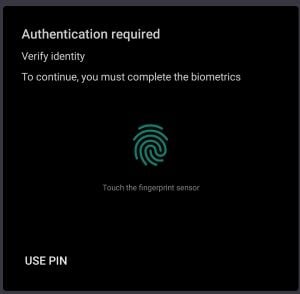
(Note: When the option is set to false, the image shows that the “USE PIN” button is present.)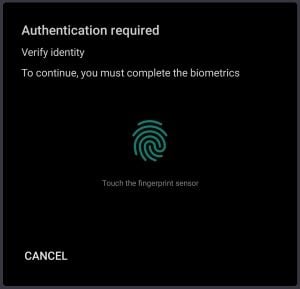
(Note: when the option is set to false, the image shows that the “USE PIN” button is removed.)
bool useErrorDialogsWhen this parameter is set to true, the plugin checks to see whether a user fingerprint record exists on the device. If no fingerprint is registered, the plugin will attempt to direct the user to the settings to create one.
stickyAuthUnder normal circumstances, the authentication process is terminated when the app is minimized or moved to the background. If stickyAuth is set to true, the authentication process is resumed when the app is brought back into focus.
In our implementation, we will first check to see if the device supports biometric authentication, then limit the user to only using biometrics to authenticate; after successful authentication, we will grant the user access to the next screen.
To start with, create a new file named auth.dart and paste the following code inside it:
import 'package:flutter/services.dart';
import 'package:local_auth/local_auth.dart';

class AuthService {
  static Future<bool> authenticateUser() async {
    //initialize Local Authentication plugin.
    final LocalAuthentication _localAuthentication = LocalAuthentication();
    //status of authentication.
    bool isAuthenticated = false;
    //check if device supports biometrics authentication.
    bool isBiometricSupported = await _localAuthentication.isDeviceSupported();
    //check if user has enabled biometrics.
    //check
    bool canCheckBiometrics = await _localAuthentication.canCheckBiometrics;

  //if device supports biometrics and user has enabled biometrics, then authenticate.
    if (isBiometricSupported && canCheckBiometrics) {
      try {
        isAuthenticated = await _localAuthentication.authenticate(
            localizedReason: 'Scan your fingerprint to authenticate',
            biometricOnly: true,
            useErrorDialogs: true,
            stickyAuth: true);
      } on PlatformException catch (e) {
        print(e);
      }
    }
    return isAuthenticated;
  }
}
In the code above, we created a class AuthService and defined a static method, authenticateUser. This method handles all the biometric authentication logic and returns a bool indicating whether the biometric authentication has been successful or not.
Now, in the LoginScreen, we need to call the authenticateUser method in the onPressed property of our TextButton widget, as shown in the code snippet below.
TextButton(
  onPressed: () async {
      bool isAuthenticated = await AuthService.authenticateUser();
      if (isAuthenticated) {
          Navigator.push(
            context,
            MaterialPageRoute(
              builder: (context) => const PrivateScreen()),
            );
      } else {
          ScaffoldMessenger.of(context).showSnackBar(
              const SnackBar(
                content: Text('Authentication failed.'),
                ),
          );
        }
  //...
  },
From the code snippet above — if the authentication is successful — we will navigate the user to the PrivateScreen; otherwise, we display a Snackbar with an error message.
To include the USE_FINGERPRINT permission, add the following line of code to your AndroidManifest.xml file, which is located in the directory android/app/src/main:
<uses-permission android:name="android.permission.USE_FINGERPRINT"/>
Then, update the MainActivity.kt file to use FlutterFragmentActivity instead of FlutterActivity:
import io.flutter.embedding.android.FlutterFragmentActivity
import io.flutter.embedding.engine.FlutterEngine
import io.flutter.plugins.GeneratedPluginRegistrant

class MainActivity: FlutterFragmentActivity() {
    override fun configureFlutterEngine(flutterEngine: FlutterEngine) {
        GeneratedPluginRegistrant.registerWith(flutterEngine)
    }
}
Alternatively, if you use Java instead of Kotlin, update your MainActivity.java file with the following code:
import android.os.Bundle;
import io.flutter.app.FlutterFragmentActivity;
import io.flutter.plugins.flutter_plugin_android_lifecycle.FlutterAndroidLifecyclePlugin;
import io.flutter.plugins.localauth.LocalAuthPlugin;

public class MainActivity extends FlutterFragmentActivity {
    @Override
    protected void onCreate(Bundle savedInstanceState) {
        super.onCreate(savedInstanceState);
        FlutterAndroidLifecyclePlugin.registerWith(
                registrarFor(
                        "io.flutter.plugins.flutter_plugin_android_lifecycle.FlutterAndroidLifecyclePlugin"));
        LocalAuthPlugin.registerWith(registrarFor("io.flutter.plugins.localauth.LocalAuthPlugin"));
    }
}
For FaceID to work on iOS, add the following line to the Info.plist file. This defines the message that tells the user why the app is seeking permission to authenticate with Face ID.
<key>NSFaceIDUsageDescription</key>
<string>Why is my app authenticating using face id?</string>

In this tutorial, we’ve learned what biometric authentication is and how we can implement biometric authentication in Flutter apps using the local_auth plugin.
The complete source code of this project is available on GitHub.
Install LogRocket via npm or script tag. LogRocket.init() must be called client-side, not
server-side
$ npm i --save logrocket

// Code:

import LogRocket from 'logrocket';
LogRocket.init('app/id');
// Add to your HTML:

<script src="https://cdn.lr-ingest.com/LogRocket.min.js"></script>
<script>window.LogRocket && window.LogRocket.init('app/id');</script>

Discover how React Fiber works under the hood. Learn how React builds the DOM, handles concurrent rendering, and works alongside React 19 features and the new React Compiler.

Learn how to use Skybridge, an open-source React framework, to build and deploy cross-platform AI apps and interactive UI widgets for ChatGPT, Claude, and MCP clients from a single codebase.

Learn how to set up Meilisearch, index documents, and build keyword, semantic, and hybrid search with AI-powered retrieval.

Compare pnpm and npm across security defaults, disk usage, dependency strictness, and workspace policy to decide which package manager fits your project.
Would you be interested in joining LogRocket's developer community?
Join LogRocket’s Content Advisory Board. You’ll help inform the type of content we create and get access to exclusive meetups, social accreditation, and swag.
Sign up now

