
An asset can be any resource in Unity; those resources can be images, audio, video, scripts, text, etc.

When building a Unity project to any platform, all the assets in your game will be “packaged” in a file (or more depending on your platform), and the resulting size of the build will depend on the size of the assets you decided to package within your game.
It’s not the same to create a game with multiple HD textures rather than using a Map Atlas, or using video on 240p rather than using 1080p. It’s expected that the greater the size of your assets, the greater the size of your final build.
In general, it’s a good practice to keep your build as lightweight as you can, so the player won’t be discouraged from downloading your game due to the size, and your scenes will run considerably faster.
There are multiple tips and tricks to achieve this, and in this article we will be talking about some of them, starting with streaming assets.
The Replay is a weekly newsletter for dev and engineering leaders.
Delivered once a week, it's your curated guide to the most important conversations around frontend dev, emerging AI tools, and the state of modern software.
Let’s say you have a nice scene in your game where all the action happens. The player is the enemy base, and in a specific room, you decide to put a video playing on a computer as an easter egg.
The video is really big, like more than 300MB, and the player might or might not enter that specific room to actually see it. Would it be ok to load it in your scene by default? That might cause unnecessary slowness in your great scene. So it could be great to just load it when we actually need it.
A streaming asset it just that: an asset placed in a specific folder that would be loaded by the Unity Player when needed. That asset will be placed in an easy to find address within the target platform.
Please note that any asset placed on a streaming asset folder (named StreamingAssets within Unity) will be copied into the target platform, and if a user searches within the project folder it will be able to see them.
This is how some of the mods of some games are made.
Changing the texture of a character? Go into the data folder and find the used texture, then modify it. Changing the voice lines of a tough boss? Just go to the data folder and find the audio track and replace it with another with the same name.
Streaming assets let the game run smoothly without loading all the assets from memory and serve the bigger ones in an easy to reach path.
We are going to show how streaming assets work with an easy example by showing a video in your game.
I downloaded a preview of a video from iStockPhoto for this example.
Make sure the video you want to use has one of the following extensions: .mov, .mpeg, .mp4, .avi, .asf.
For our initial example, we are going to create a new folder called Video and place our video inside that folder:
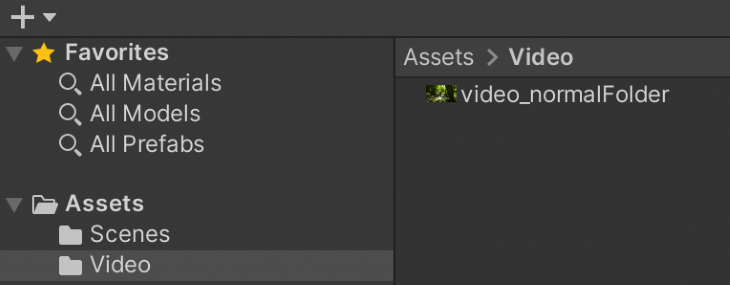
Then, on our Hierarchy panel, we are going to set up our video player.
Right-click on your Hierarchy and add an Empty Game Object. I called mine VideoObject.
Inside of it, I created a cube where we are going to play the video; it can be any shape you want, but I chose a cube for convenience. I call it Video_Canvas.
And at the same level of Video_Canvas, inside VideoObject, I added a new Video Player object by right-clicking VideoObject and selecting Video, then Video Player.
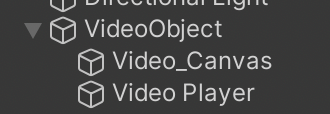
Here is how I set up our Video Player object:
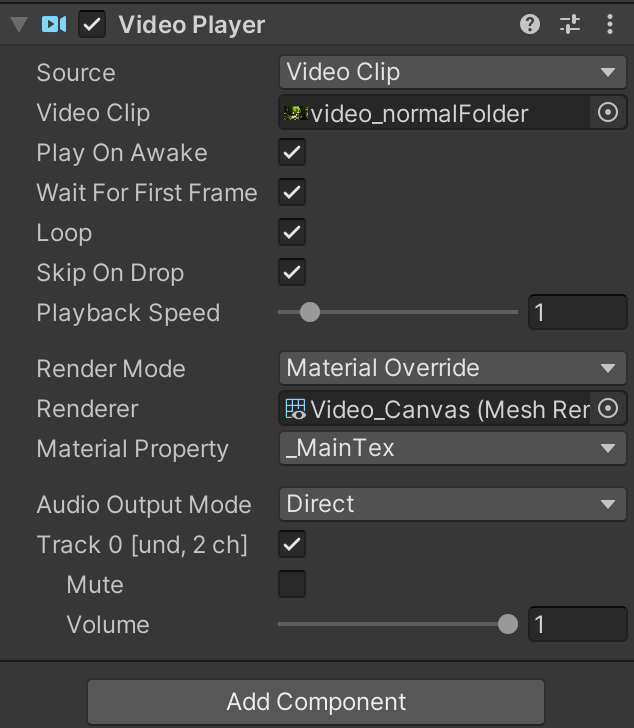
We set the Source as a Video Clip, and then we selected the video clip from our Video Folder that we created, then we selected Loop so the video would keep playing infinitely.
Then, select Render Mode as Material Override and drag and drop the Object you want to play the video on — in our case, the Video_Canvas cube. Let Material Property be _MainTex.
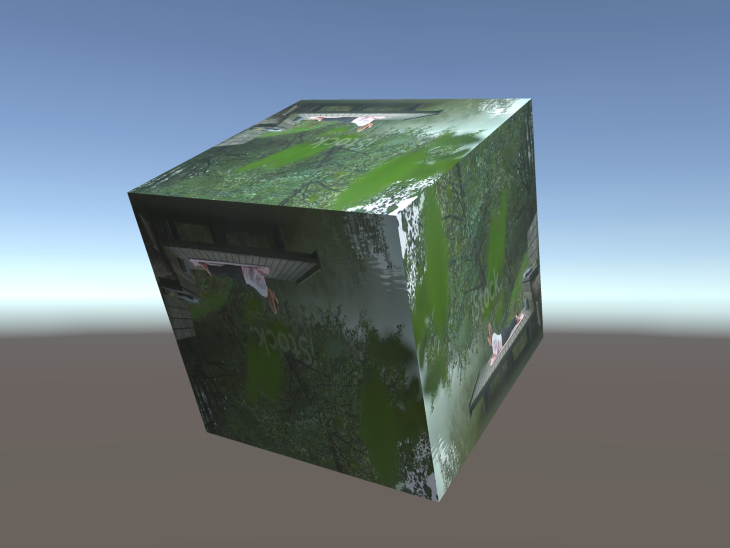
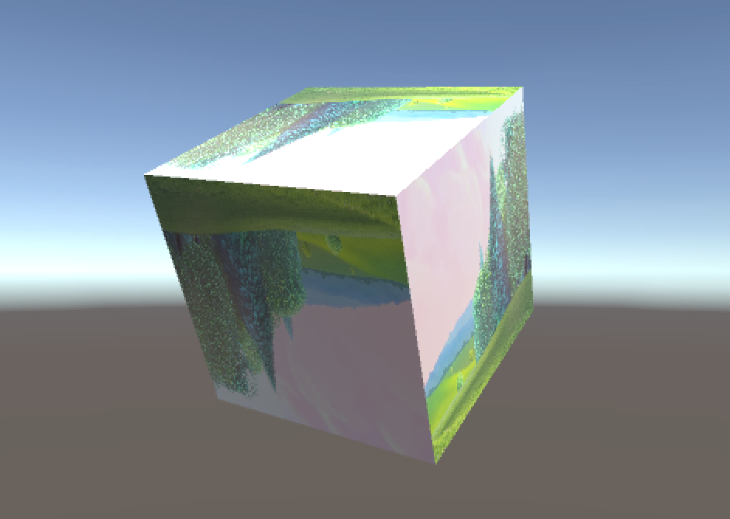
If you click on Play in the Unity Editor, you will see something like this: a video being played on each side of the cube.
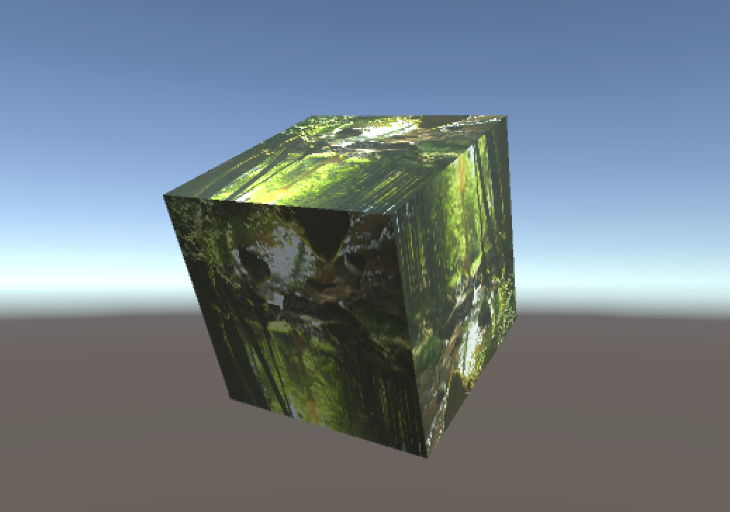
You could also create a plane or reduce the scale of the cube to the shape you want if you want a flatter surface, like a screen.
This demo video is 3.5MB.
If we build this project for a standalone platform (Windows, Linux, MacOs) we will see that a blank project with a video it’s 87.6MB.
![]()
Now, let’s see how it looks using the same video as a streaming asset.
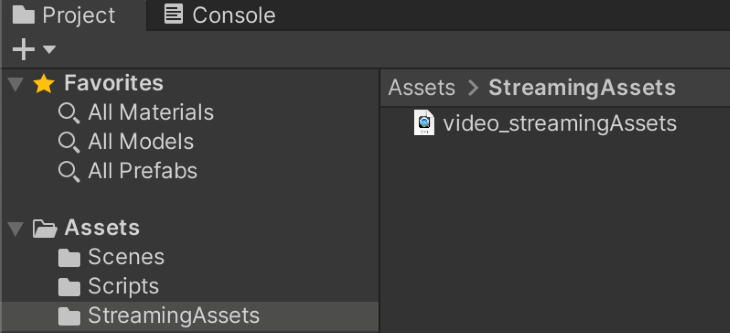
To do so, we are going to create a new folder called StreamingAssets in the Assets folder; this is a special named folder that will treat our video file video_streamingAssets as a regular file with no options in the properties window of the editor.
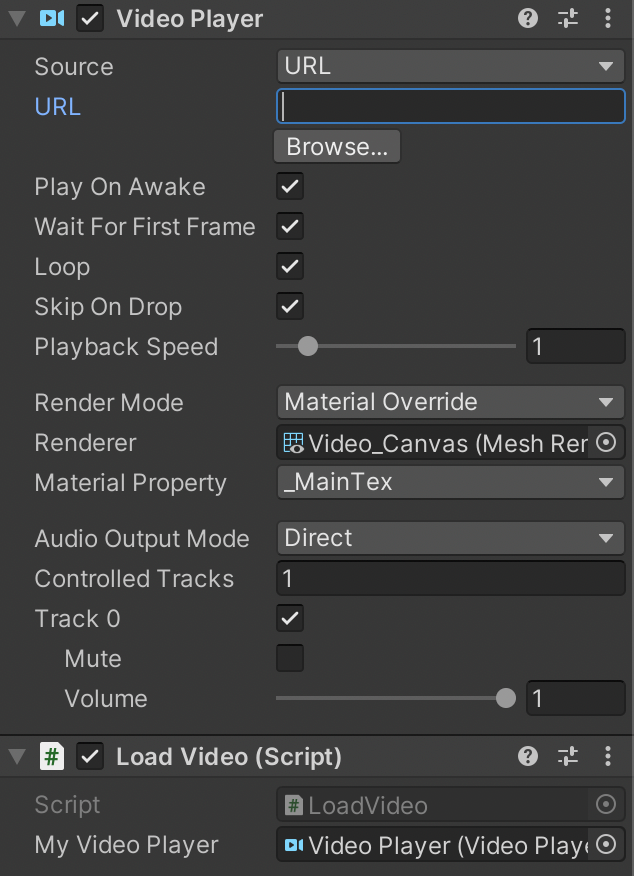
Then in our Video Player object, we could change the Source of the Video Player Game Component to URL and leave the actual URL alone. We will create a new Script called LoadVideo and attach it to our Video Player GameObject like in the image.
This script takes as a parameter a Video Player, so we will drag and drop our same Video Player that this script it’s attached to.
Here’s the script of LoadVideo:
using UnityEngine;
using UnityEngine.Video;

public class LoadVideo : MonoBehaviour
{
   public VideoPlayer myVideoPlayer;
   void Start()
   {
       string videoUrl= Application.streamingAssetsPath +"/"+ "video_streamingAssets" + ".mp4";
       myVideoPlayer.url = videoUrl;
   }
}
Basically, at the start of the application it will use Application.streamingAssetsPath to get the path of the StreamingAssets folder in any target platform that has been built into. And then it will reference the name of our video in that folder and its extension.
Then, it will take myVideoPlayer (that already has the reference of our scene video player) and it will write its url property with the path of our video.
This will result in the same cube with the playing video.

Now, if we build this project, we will see that it has the same size as our previous example, but with one major difference.

If we see the Package contents of this build, we can see that on Contents/Resources/Data there is our StreamingAssets folder with our video.
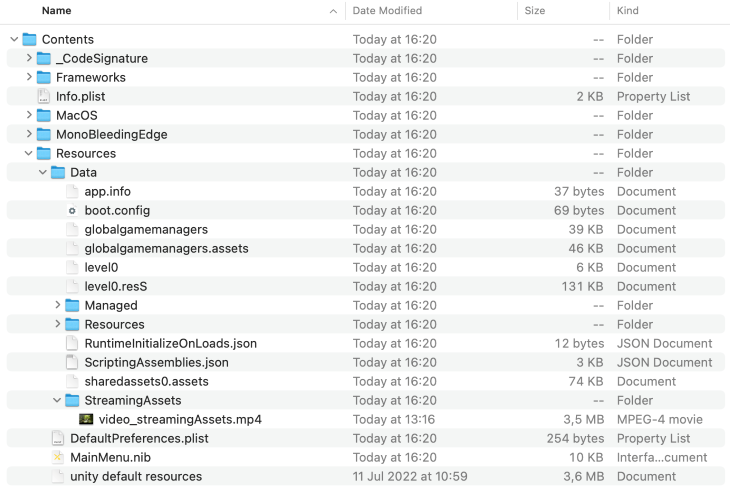
And if we replace the video in our StreamingAssets folder with another of the same name, we wouldn’t need to build our project again in order to see the changes reflected in our game.
Now that we know how we can detach our assets/content from our build. We could also call remote files from the URL on our Video Player. For doing so, we are going to use this video as example. It’s almost 10 minutes long and it’s about 151MB.
If we change our code to:
using UnityEngine;
using UnityEngine.Video;

public class LoadVideo : MonoBehaviour
{
   public VideoPlayer myVideoPlayer;
   void Start()
   {
       string videoUrl= "http://commondatastorage.googleapis.com/gtv-videos-bucket/sample/BigBuckBunny.mp4";
       myVideoPlayer.url = videoUrl;
   }
}
…and delete our original video of the StreamingAssets folder, we end up with something like this:
The same functionality, but now the video assets come from an external source.
Now if we build our project without the local video in our StreamingAssets folder, we would see a decrease in the size of our build.

Please keep in mind that this could also be done with an async call or a UnityWebRequest call and a coroutine, but for simplicity, we just add the exact URL of a video to demonstrate the power of streaming assets.
We can modify our LoadingScript like this in order to use a coroutine instead of passing the direct link to our video player:
using UnityEngine;
using UnityEngine.Video;
using UnityEngine.Networking;
using System.Collections;

public class LoadVideo : MonoBehaviour
{
   public VideoPlayer myVideoPlayer;
   void Start()
   {
       StartCoroutine(LoadExternalVideo("http://commondatastorage.googleapis.com/gtv-videos-bucket/sample/ElephantsDream.mp4"));
   }

     IEnumerator LoadExternalVideo(string url){
      using (UnityWebRequest request = UnityWebRequest.Get(url))
      {
          //Fetches a page and displays the number of characters of the response.
          yield return request.SendWebRequest();
          myVideoPlayer.url = request.url;
      }
  }
}
With this example, we could use a coroutine to consume an API endpoint and retrieve the URL of the video, but for simplicity, this is a simple example on how to do it with an external link.
The result will be very similar; we just need to make sure that our UnityWebRequest result is retrieved from the consumed endpoint and make sure that the URL of a video is present before setting it up to the URL property of the video player.
Streaming assets are just one of the different ways Unity handles assets for your game. It works great when you are trying to get your player base involved by allowing them to mod your game, or if you want to have a lightweight final build of your game, and then upon first launch, download the rest of the assets of your game before the the player takes notice.
There are many online games that do this approach: their games are very light, you can finish up a little tutorial of the first level, and then you will get a loading screen that downloads the rest of the assets.
You have to keep in mind the best approach for your game. You can’t have all your assets in a remote server, because what would it happen if the first time the player plays your game their device doesn’t have a good internet connection? What would your game look like without assets?
One of the best approaches is having a very light version of your assets as default (like materials, textures, images) as a placeholder, and when you are sure that your player will enjoy that content and the device is ready to download that info, do so as seamlessly as possible.
I hope you have liked this article and find it useful! Happy gamedev!
Install LogRocket via npm or script tag. LogRocket.init() must be called client-side, not
server-side
$ npm i --save logrocket

// Code:

import LogRocket from 'logrocket';
LogRocket.init('app/id');
// Add to your HTML:

<script src="https://cdn.lr-ingest.com/LogRocket.min.js"></script>
<script>window.LogRocket && window.LogRocket.init('app/id');</script>

@container scroll-state: Replace JS scroll listeners nowCSS @container scroll-state lets you build sticky headers, snapping carousels, and scroll indicators without JavaScript. Here’s how to replace scroll listeners with clean, declarative state queries.

Explore 10 Web APIs that replace common JavaScript libraries and reduce npm dependencies, bundle size, and performance overhead.

Russ Miles, a software development expert and educator, joins the show to unpack why “developer productivity” platforms so often disappoint.

Discover what’s new in The Replay, LogRocket’s newsletter for dev and engineering leaders, in the February 18th issue.
Would you be interested in joining LogRocket's developer community?
Join LogRocket’s Content Advisory Board. You’ll help inform the type of content we create and get access to exclusive meetups, social accreditation, and swag.
Sign up now