When mobile apps communicate with the server, they use SSL to protect the transmitted data against eavesdropping and tampering. If you navigate your browser to a protected website, you see a small lock on the top left corner that signifies that your connection is protected.

You can see that a protected site has a certificate that your browser recognizes as valid.
Connections are only made to websites that have a valid certificate, and your system can determine if a certificate is trusted by using the concept of a Chain of Trust.
A server certificate is trusted if it is signed by a trusted certificate, and that certificate is in turn signed by another trusted certificate. This process continues until it reaches the root certificate.
There, the root certificate is signed by a trusted certificate authority, and certificates of these trusted authorities are stored in your OS trust store. This chain of trusted certificates signing each other is referred to as the Chain of Trust. The Chain of Trust shows how an SSL certificate is linked back to a trusted certificate authority.
Now a hacker — the man-in-the-middle, who tries to eavesdrop on this traffic — does not have the private key for a certificate that is signed by a root trusted authority for the given domain. Therefore, he cannot sign data with that certificate. This means your system normally prevents connection to the attacker host.
However, there are two ways to bypass this:
SSL pinning is a way to narrow down the list of trusted certificates to prevent the attack scenario above. With SSL pinning, you store the certificate data of your trusted website on an immediate signing authority — you can store a certificate, a public key, or a hash for that certificate. Thus, we don’t just accept any certificate that is trusted by your trust store but rather only a single one or a limited subset of those certificates.
And the result of this is that SSL pinning provides an effective means to secure our mobile applications against the man-in-the-middle.
In this article, we will look at the ins and outs of how to implement SSL certificate pinning in React Native. But before we delve into that, below are the prerequisites that are required to get the most out of the article, and some reasons why SSL pinning might be right for your project.
If implemented correctly, SSL pinning adds the following advantages to a mobile application:
While SSL pinning adds extra security and advantages to a mobile application, its operational use is not optimal in some cases. Below are some disadvantages of SSL Pinning:
Once the above prerequisites are met, set up your React Native development environment by following the instructions given here and we will get started in the next section.
In this section, we will learn how to implement SSL pinning in a React Native application.
Make sure you have set up your React Native development environment. Now clone this starter app to get started by running:
git clone https://github.com/lawrenceagles/react-native-android-ssl-pinning-starter
Open your project in your favorite text editor and create a local.properties file in the Android directory. Add the following to this file:
sdk.dir = /home/<!-- your pc name here -->/Android/Sdk
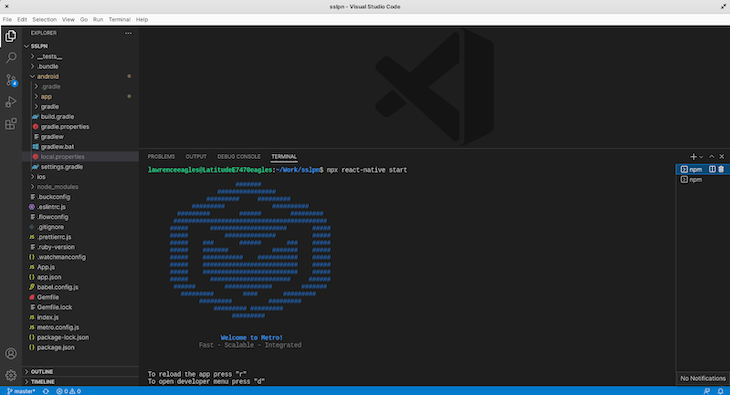
From here, you can start Metro by running npx react-native start and we get:
Next, open a new terminal and run npx react-native run-android to run your app. Make sure you have a device connected or an emulator running.
If everything works correctly, you should see your new app running in your Android emulator:
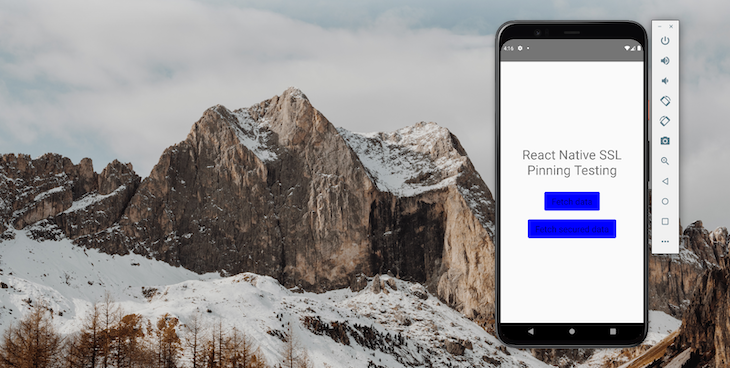
The starter app consists of a simple boilerplate with two buttons: fetch data and fetch secured data. Clicking on these buttons invokes two functions (as you might guess): fetchData and secureFetchData. Currently, these functions just log a text to the console, which you can see in your Metro terminal.
Now we will add SSL pinning to this app and test the functionality with these buttons.
There are many packages used to add SSL pinning in a React Native app. However, in this article we will work with the react-native-ssl-pinning package.
Let’s install and work with this package in the next section.
There are two ways of implementing SSL certificate pinning:
The react-native-ssl-pinning package we will work with in this article supports both certificate pinning and public key pinning. And to use public key pinning, we only need to set the pkPinning property to true. Let’s install and work with this package in the next section.
First, install the react-native-ssl-pinning package by running:
npm install react-native-ssl-pinning
To properly implement SSL pinning, we need a trusted certificate from a server we are communicating with. We can get a certificate from a server by using openssl.
We will be working with https://jsonplaceholder.typicode.com so to get a certificate, open your terminal and run the following code:
# Automatically extracts certifcate into a .pem file
openssl s_client -servername jsonplaceholder.typicode.com -connect jsonplaceholder.typicode.com:443 </dev/null | sed -n -e '/-.BEGIN/,/-.END/ p' > mycert.pem
The code above will output the certificate of jsonplaceholder and save it in a .pem file — mycer.pm. But we need the certificate in a .cer file so to convert it from .pem to .cer, so run the following code:
openssl x509 -in mycert.pem -outform der -out mycert.cer
And copy the mycert.cer file into your app’s /android/app/src/main/assets/ directory.
To get an invalid certificate, we will get an expired certificate from https://expired.badssl.com/.
In your terminal, run the following code:
openssl s_client -servername expired.badssl.com -connect expired.badssl.com:443 </dev/null | sed -n -e '/-.BEGIN/,/-.END/ p' > expcert.pem
Next convert the .pem file to .cer as mentioned above by running:
openssl x509 -in expcert.pem -outform der -out expcert.cer
After this, add the expcert.cer file to your /android/app/src/main/assets/ directory.
Now, we can refactor the fetchData and securedFetchData functions to use this certificate by using the react-native-ssl-pinning package.
Import this package into your App.js file with line of code:
import { fetch } from 'react-native-ssl-pinning';
Replace the fetchData function with this code:
const fetchData = () => {
    fetch("https://jsonplaceholder.typicode.com/posts/1", {
      method: "GET",
      timeoutInterval: 10000,
      sslPinning: {
        certs: ["expcert"]
      }
    })
      .then(response => {
        console.log(JSON.stringify(response.bodyString, null, "\t"))
      })
      .catch(err => {
        console.log(`error: ${err}`)
      });
  }
Also, replace the securedFetchData function with the following code:
const secureFetchData = () => {
    fetch("https://jsonplaceholder.typicode.com/posts/1", {
        method: "GET",
        timeoutInterval: 10000,
        sslPinning: {
            certs: ["mycert"]
        }
    })
        .then(response => {
            console.log(JSON.stringify(response.bodyString, null, "\t"))
        })
        .catch(err => {
            console.log(`error: ${err}`)
        })
}
In the code above, we updated the fetchData and securedFetchData functions to fetch data from jsonplaceholder.typicode.com using the fetch method from the react-native-ssl-pinning. This fetch method takes a sslPinning option, which is an object with a cert property. The cert property is an array of all our certificates.
In the fetchData we added the expcert certificate. So the connection should not be established. But in the securedFetchData function, we added the mycert certificate, which is a trusted certificate, so the connection should be established. And we should be able to fetch data from jsonplaceholder.typicode.com.
To test this, we need to rebuild our app by running:
npx react-native run-android
Now click on the Fetch secured data button and check the Metro terminal. We get:

We can see from the image that the data was fetched successfully.
Now click on the Fetch data button and check the log in the Metro terminal. We get this error:
LOG error: java.security.cert.CertPathValidatorException: Trust anchor for certification path not found.

This error arises because we use an expired certificate. SSL certificates expire over time, and this is for security reasons. In the next section, we will learn more about this.
SSL certificates are not valid forever. They have an expiration date, and this is important to the security guarantee of the SSL. When a certificate expires, it becomes invalid and needs to be renewed.
Unlike the web where users communicate with the server by using a browser, a mobile application needs to be installed on a user’s phone. And any feature upgrade, bug fix, or security patch would require the release of a new version.
Developers often use semantic versioning to handle all release versions of a mobile application.
A mobile application with an expired certificate will fail to connect to the server and this can lead to bad user experiences. To fix this, the certificate has to be renewed and a new version of the app would be released with this trusted certificate.
We can force users to upgrade their app to get the new version by using packages such as react-native-version-check.
This package provides APIs that enable us to check for the semantic version of an app and consequently determine if an update is needed or not.
Mobile security is invaluable when building a mobile application, and in this article, we have learned about SSL, a very important aspect of mobile security.
If you are interested in source code, you can get the full code of the app I built on GitHub.
Note, in React Native, there is no easy way to add SSL to an Expo application; it would require a complex workaround for it to be possible. The best way is what we have used in this article — react-native CLI.
And after going through this article, I do hope you are ready to implement SSL pinning in your React Native app.

LogRocket's Galileo AI watches sessions for you and and surfaces the technical and usability issues holding back your React Native apps.
LogRocket also helps you increase conversion rates and product usage by showing you exactly how users are interacting with your app. LogRocket's product analytics features surface the reasons why users don't complete a particular flow or don't adopt a new feature.
Start proactively monitoring your React Native apps — try LogRocket for free.
Hey there, want to help make our blog better?
Join LogRocket’s Content Advisory Board. You’ll help inform the type of content we create and get access to exclusive meetups, social accreditation, and swag.
Sign up now
A breakdown of the wrapper and container CSS classes, how they’re used in real-world code, and when it makes sense to use one over the other.

This guide walks you through creating a web UI for an AI agent that browses, clicks, and extracts info from websites powered by Stagehand and Gemini.

This guide explores how to use Anthropic’s Claude 4 models, including Opus 4 and Sonnet 4, to build AI-powered applications.

Which AI frontend dev tool reigns supreme in July 2025? Check out our power rankings and use our interactive comparison tool to find out.


One Reply to "How to implement SSL certificate pinning in React Native"
After following this article, is there any validation on server side also should be done? My confusion is a fetch with or without SSL certificate is still considered same on the server side …… isn’t it? OR, Am i missing something?