Editor’s note: This post was updated 2 March 2022 to include Vuefire as a method for configuring Vue 3 apps with Firebase, and improve the configuration of the sample Vue and Firebase deployment.

Frontend engineers today can easily build interfaces and implement their functionalities without the headache of developing a backend or application programming interface (API).
Vue.js is a lightweight framework for building interactive user interfaces and single-page applications. In this tutorial, we’ll demonstrate two ways to build a Vue.js application with create, read, update, delete (CRUD) functionalities and store data with Cloud Firestore. Here’s the full list of what we’ll cover:
If you wish, you can also deploy this application to Firebase.
Firebase is a backend-as-a-service (BaaS) offering from Google that features databases, an ML kit, cloud functions, authentication, hosting, cloud storage, and more. Firebase abstracts the complexity of building a robust and scalable backend system, enabling developers to focus on building the client side of applications.
For our CRUD application, we will focus on using Cloud Firestore for data storage. Cloud Firestore is a NoSQL database that stores data in the form of documents, which are arranged into collections and support client- or server-side integration. Cloud Firestore documents contain various fields that can hold any data type and support very fast read or write operations.
Vuefire is a lightweight wrapper that handles realtime binding between Vue/Vuex and Firebase databases, such as real-time databases or Cloud Firestore. It has some inbuilt logic that always keeps local data in sync with remote Firebase databases.
The Replay is a weekly newsletter for dev and engineering leaders.
Delivered once a week, it's your curated guide to the most important conversations around frontend dev, emerging AI tools, and the state of modern software.
To follow along with this tutorial, you’ll need:
npm install -g @vue/cli)
vue --versionnpm install -g firebase-tools)
firebase loginSetting up a Vue project will create the files and install the dependencies required to build a user interface. Execute the following command:
vue create crud-app
Configure your Vue project on the interactive screen that shows up. Simply select the default (Babel, ESLint) preset for the default configuration.
When done, you should see a new crud-app directory.
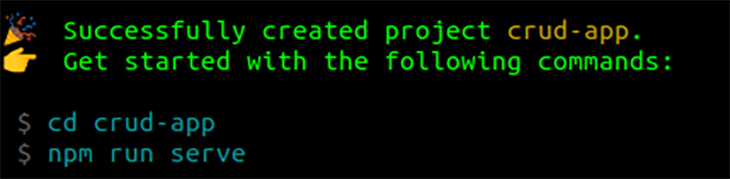
Change into the crud-app directory using cd crud-app or open the folder in your code editor.
To set up Element UI within the created Vue.js project, we’ll use its Vue.js plugin. Execute the following command to install Element UI in the crud-app directory.
vue add element
Configure the setup as follows:
Fully importNlocale, select en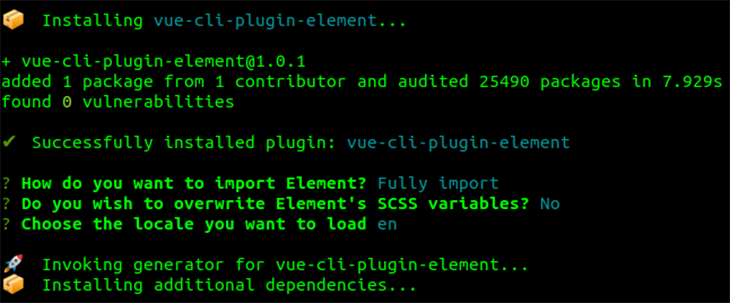
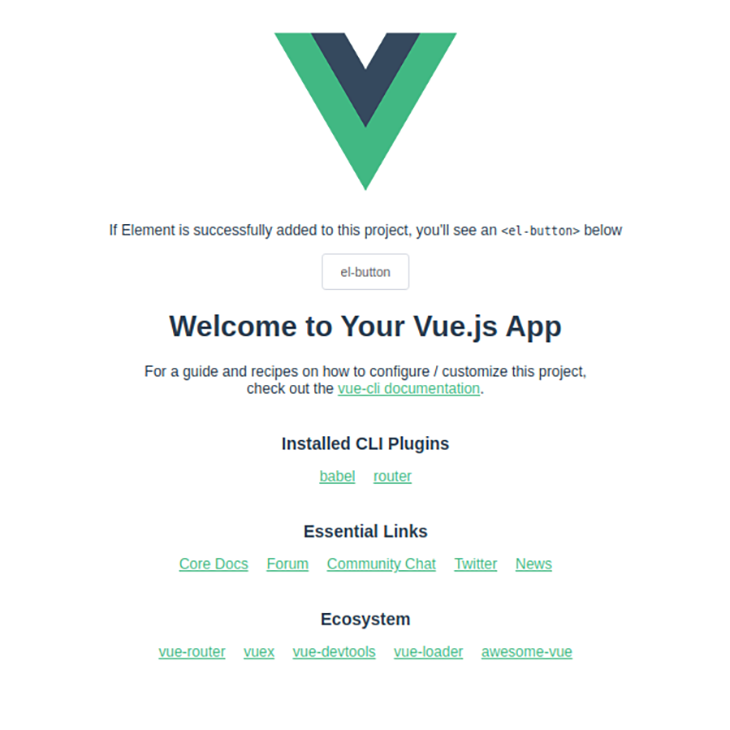
We’re now done setting up Vue.js and Element UI.
To start the development server, execute the following.
npm run serve
You should see an output similar to this on your browser:
Now let’s proceed to setting up and integrating the Firebase backend.
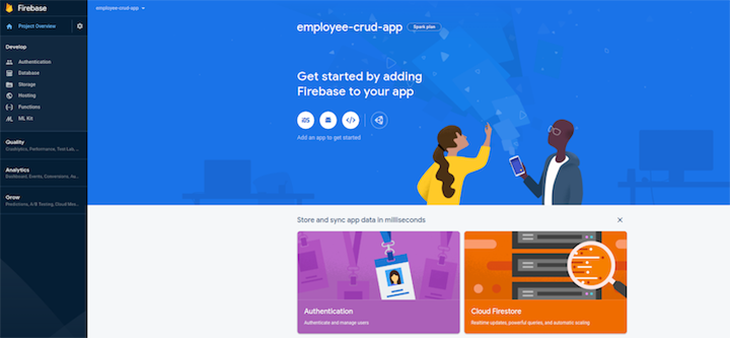
To get started with Firebase, create a Firebase project by following the steps below. (Note: Firebase projects are linked to a Google Cloud Platform project.)
scripts tag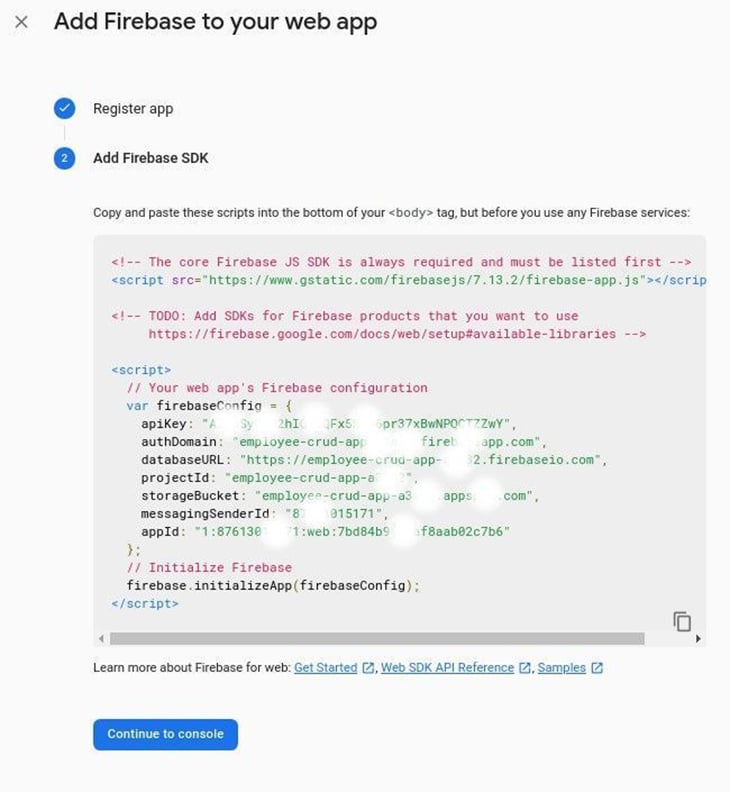
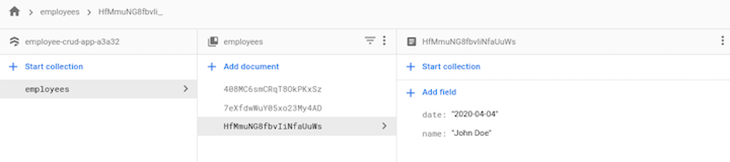
Create the Firestore database

Before you can use Cloud Firestore, you need to set up the Firebase client on the Vue project.
Install the Firebase JS client and update your dependencies within the crud-app directory.
npm install firebase --save
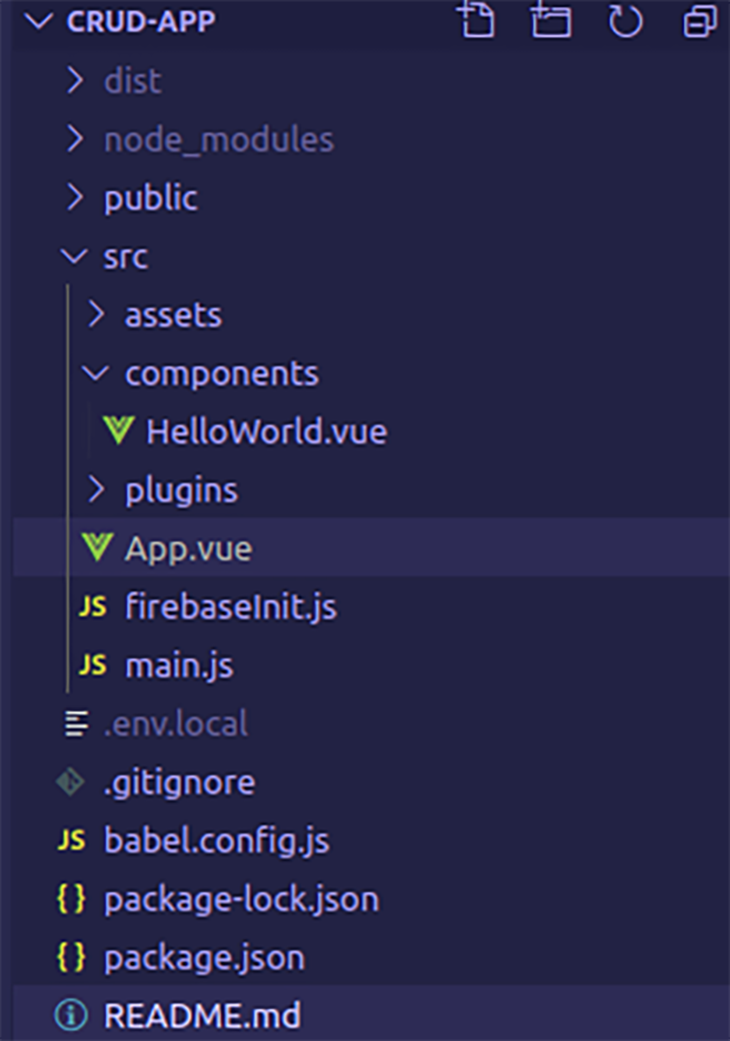
Create a new file with the name firebaseInit.js within the src directory with similar contents.
// src/firebaseInit.js
import firebase from "firebase";

// Your web app's Firebase configuration
var firebaseConfig = {
  apiKey: "AIzaSyC9J2hIQ1XQFZZZZZZZZZZZZZZZZZ",
  authDomain: "employee-crud-ZZZZZZZZZ.firebaseapp.com",
  databaseURL: "https://employee-crud-ZZZZZZ.firebaseio.com",
  projectId: "employee-crud-XXXXXXXX",
  storageBucket: "employee-crud-ZZZZZ.appspot.com",
  messagingSenderId: "8761301111111",
  appId: "1:87613015171:web:e60ee5139c5ZZZZZZZ"
};

// Initialize Firebase
export default firebase.initializeApp(firebaseConfig);
Replace the firebaseConfig object with what you copied earlier during the Firebase app setup.
Vue.js uses single-file components, which allow you to build an entire user interface — including the layout, functionalities, and styles — in one .vue file. For this tutorial, you’ll only need to modify the src/App.vue file. You can clear the contents of the App.vue file now, as this will be replaced shortly.
We will use a design library called Element UI, which provides a lot of reusable components that make building interfaces much faster. For our purposes, we’ll use a basic data table to list all the documents coming from the database.
A popover input is used to create and edit documents, while a button is used to trigger deletion.
<template>
  <!-- eslint-disable -->
  <div>
    <el-popover
      placement="bottom"
      title="New Employee"
      width="200"
      trigger="click"
    >
      <el-input
        placeholder="John Doe"
        v-model="name"
        @blur="createEmployee(name, date)"
      ></el-input>
      <el-button round slot="reference" type="success"
        >Add New Employee</el-button
      >
    </el-popover>
    <el-table
      :data="
        employeesData.filter(
          (data) =>
            !search || data.name.toLowerCase().includes(search.toLowerCase())
        )
      "
      style="width: 100%;"
    >
      <el-table-column label="Date" prop="date"> </el-table-column>
      <el-table-column label="Name" prop="name"> </el-table-column>
      <el-table-column align="right">
        <template slot="header" :slot-scope="scope">
          <el-input v-model="search" size="mini" placeholder="Type to search" />
        </template>
        <template slot-scope="scope">
          <el-popover
            placement="bottom"
            title="Edit Employee"
            width="200"
            trigger="click"
          >
            <el-input
              placeholder="John Doe"
              v-model="scope.row.name"
              @blur="updateEmployee(scope.row.id, scope.row.name, date)"
            ></el-input>
            <el-button size="mini" slot="reference">Edit</el-button>
          </el-popover>
          <el-button
            size="mini"
            type="danger"
            @click="deleteEmployee(scope.row.id)"
            >Delete</el-button
          >
        </template>
      </el-table-column>
    </el-table>
  </div>
</template>

<script>

export default {
  name: 'app',
  data(){
    return {
      name: '',
      employeesData: []
    }
  }
}
</script>
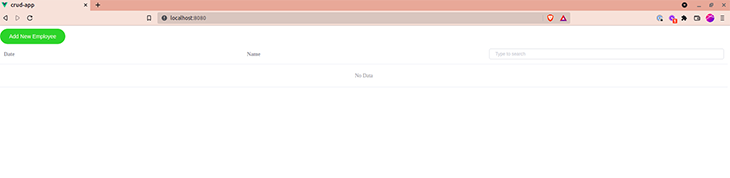
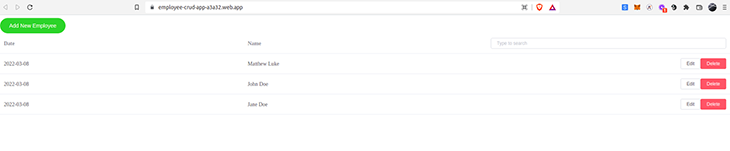
The interface should now look like the screenshot below.
In this section, we will integrate Cloud Firestore for CRUD operations in our Vue.js app. Below are some truncated snippets that explain how this method works.
You’ll need to import the initialized Firebase app and create an instance of Cloud Firestore in src/App.vue.
import firebase from "./firebaseInit";
const db = firebase.firestore();
create methodThe method below creates a new document on the Cloud Firestore collection.
    createEmployee(name, date) {
        db.collection("employees")
          .add({ date: date, name: name })
          .then(() => {
            console.log("Document successfully written!");
          })
          .catch((error) => {
            console.error("Error writing document: ", error);
          });
    }
The values of name and date are saved as a new document within the employees collection.
read methodThis method is used to fetch all documents from the Cloud Firestore collection.
    readEmployees() {
      let employeesData = [];
      db.collection("employees")
        .get()
        .then((querySnapshot) => {
          querySnapshot.forEach((doc) => {
           employeesData.push({
              id: doc.id,
              name: doc.data().name,
              date: doc.data().date,
            });
            console.log(doc.id, " => ", doc.data());
          });
          return employeesData
        })
        .catch((error) => {
          console.log("Error getting documents: ", error);
        });
    }
>
This loops through all documents in the Cloud Firestore collection and writes their data and id to the employeesData variable.
update methodThe update method is used to edit an existing document in the Cloud Firestore collection.
    updateEmployee(id, name, date) {
      db.collection("employees")
        .doc(id)
        .update({
          name: name,
          date: date,
        })
        .then(() => {
          console.log("Document successfully updated!");
        })
        .catch((error) => {
          console.error("Error updating document: ", error);
        });
    }
The document with the passed id will be updated on the Cloud Firestore collection with the new values for name and date that we passed during the method call.
delete methodThe delete method erases a document that exists in the Cloud Firestore collection.
    deleteEmployee(id) {
      db.collection("employees")
        .doc(id)
        .delete()
        .then(() => {
          console.log("Document successfully deleted!");
        })
        .catch((error) => {
          console.error("Error removing document: ", error);
        });
    }
The document with the passed ID will be deleted from the Cloud Firestore collection.
As explained earlier, our functions are all contained within the methods() section, and the variables in use are listed in the data() section. We then call the readEmployees() method inside the mounted() lifecycle Hook because we want to read all the documents once the application loads.
Now, you can update the <script> section of the src/App.vue file with the following snippet:
<!-- src/App.vue -->
<! ... >
<script>
import firebase from "./firebaseInit";
const db = firebase.firestore();
export default {
  data() {
    return {
      name: "",
      date: new Date().toISOString().slice(0, 10),
      employeesData: [],
      search: "",
    };
  },
  methods: {
    createEmployee(name, date) {
      if (name != "") {
        db.collection("employees")
          .add({ date: date, name: name })
          .then(() => {
            console.log("Document successfully written!");
            this.readEmployees();
          })
          .catch((error) => {
            console.error("Error writing document: ", error);
          });
        this.name = "";
      }
    },
    readEmployees() {
      this.employeesData = [];
      db.collection("employees")
        .get()
        .then((querySnapshot) => {
          querySnapshot.forEach((doc) => {
            this.employeesData.push({
              id: doc.id,
              name: doc.data().name,
              date: doc.data().date,
            });
            console.log(doc.id, " => ", doc.data());
          });
        })
        .catch((error) => {
          console.log("Error getting documents: ", error);
        });
    },
    updateEmployee(id, name, date) {
      db.collection("employees")
        .doc(id)
        .update({
          name: name,
          date: date,
        })
        .then(() => {
          console.log("Document successfully updated!");
          this.readEmployees();
        })
        .catch((error) => {
          // The document probably doesn't exist.
          console.error("Error updating document: ", error);
        });
    },
    deleteEmployee(id) {
      db.collection("employees")
        .doc(id)
        .delete()
        .then(() => {
          console.log("Document successfully deleted!");
          this.readEmployees();
        })
        .catch((error) => {
          console.error("Error removing document: ", error);
        });
    },
  },
  mounted() {
    this.readEmployees();
  },
};
</script>
And we’re done!
Vuefire provides an alternative way to bind to our Cloud Firestore database. With this method, you provide the key of the state to bind to, and Vuefire takes care of the rest!
Vuefire is able to query and modify data just like the custom CRUD methods we wrote in the previous section. Install the Vuefire npm package within the crud-app directory, like so:
npm install vuefire --save
To use the Firestore plugin provided by Vuefire, modify the src/main.js file and add the following, bolded lines of code to your file:
// src/main.js

import Vue from 'vue'
import App from './App.vue'
import './plugins/element.js'

import { firestorePlugin } from 'vuefire'
Vue.use(firestorePlugin);

Vue.config.productionTip = false
new Vue({
  render: h => h(App),
}).$mount('#app')
You also need to import the initialized Firebase app into src/App.vue:
import firebase from "./firebaseInit";
const db = firebase.firestore();
Let’s discuss the way Vuefire performs CRUD operations. To query data, we can use the firestore property to map our Firestore database so it can be accessed. We can use the following snippet to perform reads from the remote database:
// src/App.vue
// ...

<script>
import firebase from "./firebaseInit";
const db = firebase.firestore();
export default {
  name: 'app',
  data(){
    return {
      name: '',
      employeesData: []
    }
  },
  firestore: {
    employeesData: db.collection('employees')
  }
}
</script>
Vuefire also provides options to sort and filter data while reading from the remote database.
For modifying data, actions such as writing, updating, and deleting data from the database can be wrapped into methods that we can call using references. The following snippet performs data modification; the methods are formatted in bold characters:
// src/App.vue
// ...

<script>
import firebase from "./firebaseInit";
const db = firebase.firestore();
export default {
  name: "app",
  data() {
    return {
      name: "",
      employeesData: [],
    };
  },
  firestore: {
    employeesData: db.collection("employees"),
  },
  methods: {
    createEmployee(name) {
      this.$firestoreRefs.cities.add({
        name: name,
        date: new Date().toISOString().slice(0, 10),
      });
    },
    updateEmployee(employee) {
      const employee = { id: id, name: name, date: date };
      this.$firestoreRefs.employee.update({ name: employee.name }).then(() => {
        console.log("Employee updated!");
      });
    },
    deleteEmployee(id) {
      const employee = { id: id, name: name, date: date };
      this.$firestoreRefs.employee.doc(employee.id).delete();
    },
  },
};
</script>
To learn more about data modification with Vuefire, check out the official documentation here.
Firebase allows you to deploy static files — but first, you must build your assets. Within the crud-app directory, run the following command.
npm run build && cd dist
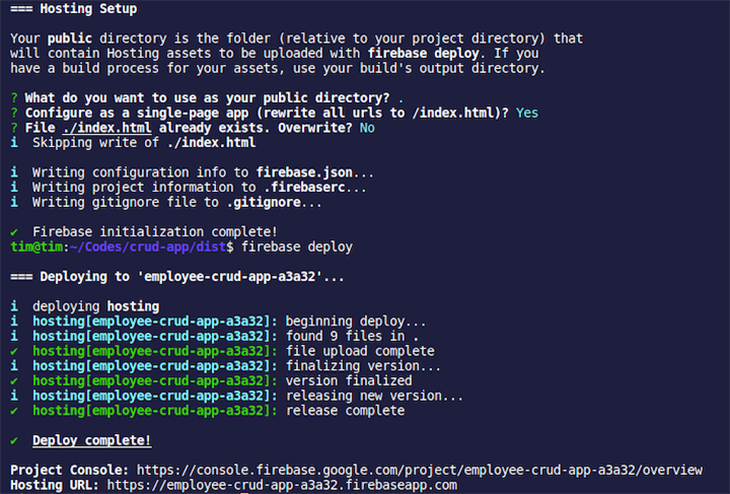
Next, initialize Firebase and complete the following steps.
firebase init
Use an existing project.Configure as a single-page app (rewrite all urls to /index.html), choose YesFile ./index.html already exists. Overwrite? select NoTo deploy, execute the following command.
firebase deploy
You can access the deployed app here.
You should now have the basic tools you need to build a simple application using Vue.js for the client side and Firebase for data storage and hosting. You can find the full source code on GitHub and also access a demo of the app.
To learn more, check out the following resources.
Debugging Vue.js applications can be difficult, especially when users experience issues that are difficult to reproduce. If you’re interested in monitoring and tracking Vue mutations and actions for all of your users in production, try LogRocket.

LogRocket lets you replay user sessions, eliminating guesswork by showing exactly what users experienced. It captures console logs, errors, network requests, and pixel-perfect DOM recordings — compatible with all frameworks.
With Galileo AI, you can instantly identify and explain user struggles with automated monitoring of your entire product experience.
Modernize how you debug your Vue apps — start monitoring for free.

Learn how to use Gemini CLI subagents to delegate frontend, backend, testing, and docs tasks to specialized agents with guardrails and clear ownership.

Learn how next-browser gives AI agents runtime context for debugging Next.js apps, including React props, hydration, PPR, forms, and performance.

Build dynamic LLM routing in Next.js with OpenRouter, TanStack AI, task classification, model fallbacks, and cost-aware routing.

TSRX adds first-class control flow, conditional hooks, and scoped styles to React via a TypeScript compiler extension — no new framework required.
Hey there, want to help make our blog better?
Join LogRocket’s Content Advisory Board. You’ll help inform the type of content we create and get access to exclusive meetups, social accreditation, and swag.
Sign up now

