Editor’s note: This post was updated on 23 September 2022.
I can’t imagine what life would be like without Google Maps. We use it for everything from finding directions to a destination, to searching for a nearby restaurant or gas station, to just zooming in and out of the map to see the street view of any location on the planet.
Adding Google Maps to your mobile app can open up a whole new world to your users — literally. In this tutorial, we’ll show you how to use the official plugin for integrating Google Maps in your Flutter app.
Here’s what we’ll cover:
GoogleMap widgetGoogleMap widgetThe Replay is a weekly newsletter for dev and engineering leaders.
Delivered once a week, it's your curated guide to the most important conversations around frontend dev, emerging AI tools, and the state of modern software.
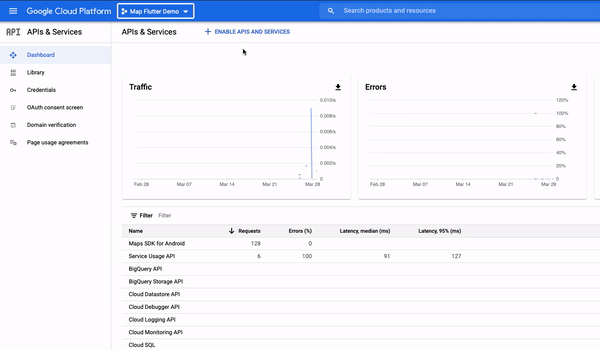
The very first step is to create a project at Google Developers Console. This is required because you’ll need APIs to integrate Google Maps in your app.
Head to the Google Developers Console and click the already-selected project.
Click NEW PROJECT and enter the details.
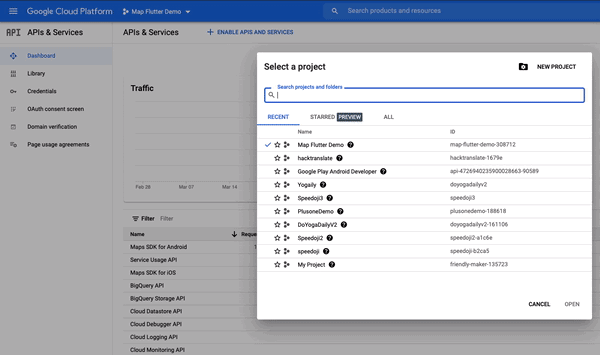
Click on the current project name again and you should see your new project created in the list.
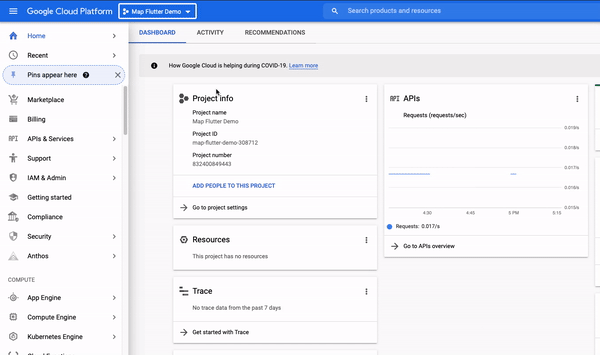
Once the project is created, you’ll have to enable the Maps API SDK for both Android and iOS.
It is important to note that the access to the Google Map APIs is not free. Therefore, you must create a set of API keys for it and restrict its permissions to reduce the chances of unauthorized usage. Here’s how you can generate the keys.
If you’re targeting both platforms, you should obtain two API keys so that you can track them better.
After creating the API keys, I would highly recommend implementing some restrictions. For example, if you’re willing to use the API keys just for a map, then you should allow it to be used by the Maps service only.
There are two types of restrictions:
To be able to use the Google Maps inside the app via the API key you created in the previous section, you’ll have to copy and paste as per the instructions below.
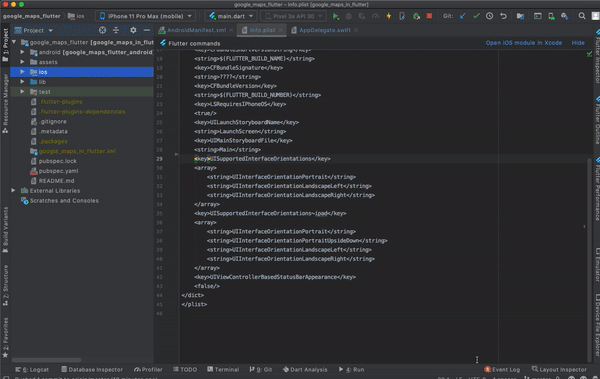
First, open your Flutter project and navigate to the file at this location: android/app/src/main/AndroidManifest.xml.
Next, paste in the code below:
<application ...
    <meta-data android:name="com.google.android.geo.API_KEY"
               android:value="YOUR KEY HERE"/>
Replace the value "YOUR KEY HERE" with an API key you created. Then, add the location permission.
Now the AndroidManifest.xml file should look like this:
<manifest xmlns:android="http://schemas.android.com/apk/res/android"
    package="com.pinkesh.google_maps_flutter">

    <uses-permission android:name="android.permission.ACCESS_FINE_LOCATION"/>
    <uses-permission android:name="android.permission.ACCESS_COARSE_LOCATION" />

    <application
        android:label="google_maps_flutter"
        android:icon="@mipmap/ic_launcher">

       <!-- TODO: Add your API key here -->
       <meta-data android:name="com.google.android.geo.API_KEY"
           android:value="YOUR KEY HERE"/>

        <activity>...</activity>
    </application>
</manifest>
The steps for running Google Maps in a Flutter app for iOS devices are similar to the procedure for Android.
First, specify your API key in the application delegate ios/Runner/AppDelegate.swift
Then, write the import GoogleMaps statement at the top to avoid iOS build issues.
The file should look like this:
import UIKit
import Flutter
import GoogleMaps
@UIApplicationMain
@objc class AppDelegate: FlutterAppDelegate {
override func application(
_ application: UIApplication,
didFinishLaunchingWithOptions launchOptions: [UIApplication.LaunchOptionsKey: Any]?
) -> Bool {
GeneratedPluginRegistrant.register(with: self)
GMSServices.provideAPIKey("YOUR-KEY")
return super.application(application, didFinishLaunchingWithOptions: launchOptions)
}
}
Next, open the Xcode and add the location permission in the info.plist file:
<key>NSLocationWhenInUseUsageDescription</key>
<string>The app needs location permission</string>
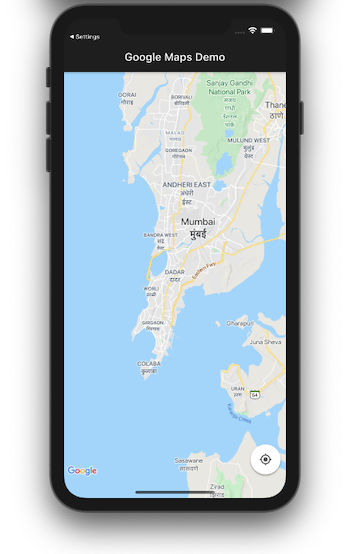
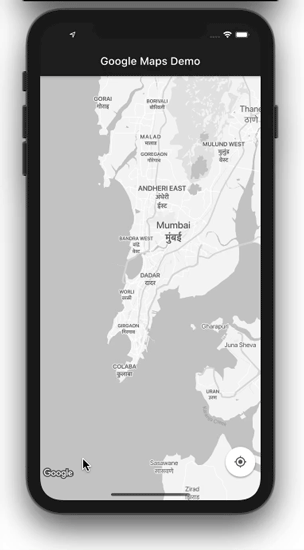
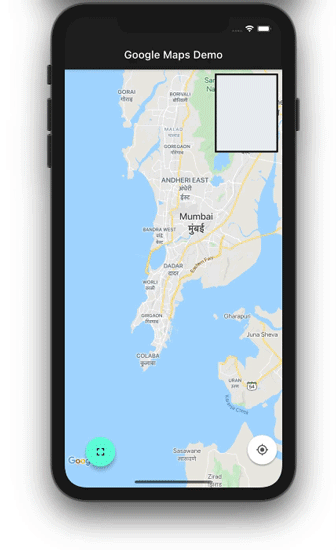
GoogleMap widgetAfter completing the steps outlined below, you’ll be able to see Google Maps on the screen in your Flutter app.
First, add the google_maps_flutter plugin to the pubspec.yaml file.
dependencies:
  flutter:
    sdk: flutter
  cupertino_icons: 1.0.0
  google_maps_flutter: ^2.0.1
Next, place the GoogleMap widget in your Dart file.
GoogleMap(
      initialCameraPosition: _kInitialPosition,
    ),
GoogleMap is given a _kInitialPosition, which holds the default location to show on the map when it’s loaded.
static final LatLng _kMapCenter =
    LatLng(19.018255973653343, 72.84793849278007);

static final CameraPosition _kInitialPosition =
    CameraPosition(target: _kMapCenter, zoom: 11.0, tilt: 0, bearing: 0);
Here is the bare minimum code to show the map:
import 'package:flutter/material.dart';
import 'package:google_maps_flutter/google_maps_flutter.dart';

class SimpleMap extends StatefulWidget {
  @override
  _SimpleMapState createState() => _SimpleMapState();
}

class _SimpleMapState extends State<SimpleMap> {
  static final LatLng _kMapCenter =
      LatLng(19.018255973653343, 72.84793849278007);

  static final CameraPosition _kInitialPosition =
      CameraPosition(target: _kMapCenter, zoom: 11.0, tilt: 0, bearing: 0);

  @override
  Widget build(BuildContext context) {
    return Scaffold(
      appBar: AppBar(
        title: Text('Google Maps Demo'),
      ),
      body: GoogleMap(
        initialCameraPosition: _kInitialPosition,
      ),
    );
  }
}
If you do not see the map correctly and/or receive an error that looks like: Cannot enable mylocation layer as location permissions are not granted, you can try doing one of the following:
<uses-permission android:name="android.permission.ACCESS_FINE_LOCATION"/>
<uses-permission android:name="android.permission.ACCESS_COARSE_LOCATION" />
If you’re working on a particularly stylish product and you want your map to reflect the look and feel of your branding, you can customize the map.
For this example, we’ll try to create a map style that is similar to that of Uber by following these steps:
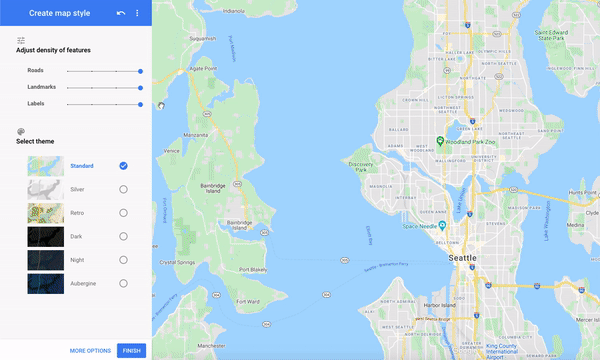
Now with the map style in hand, you’ll be able to put it inside the app and have the plugin consume it.
First, create an assets folder at the root of the app.
Next, create a map_style.json file inside it, and paste the code snippet you copied.
Add a reference in the pubspec.yaml file:
assets:
 - map_style.json
Load the new style in a map via GoogleMapController. The updated code should look like this:
import 'package:flutter/material.dart';
import 'package:google_maps_flutter/google_maps_flutter.dart';
class SimpleMap extends StatefulWidget {
@override
_SimpleMapState createState() => _SimpleMapState();
}
class _SimpleMapState extends State<SimpleMap> {
static final LatLng _kMapCenter =
LatLng(19.018255973653343, 72.84793849278007);
static final CameraPosition _kInitialPosition =
CameraPosition(target: _kMapCenter, zoom: 11.0, tilt: 0, bearing: 0);
GoogleMapController _controller;
Future<void> onMapCreated(GoogleMapController controller) async {
_controller = controller;
String value = await DefaultAssetBundle.of(context)
.loadString('assets/map_style.json');
_controller.setMapStyle(value);
}
@override
Widget build(BuildContext context) {
return Scaffold(
appBar: AppBar(
title: Text('Google Maps Demo'),
),
body: GoogleMap(
initialCameraPosition: _kInitialPosition,
onMapCreated: onMapCreated,
),
);
}
}
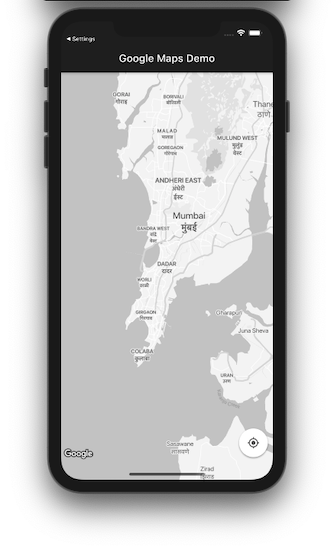
onMapCreated is a callback that’s called when the map is ready to use. It provides the GoogleMapController, which is really helpful for performing certain actions on the map. For this example, we used it to set the map style via the _controller.setMapStyle(value); method.
Here is the output:
GoogleMap widgetThe GoogleMap widget gives you a lot of flexibility to modify the map. Let’s explore some ways to do that.
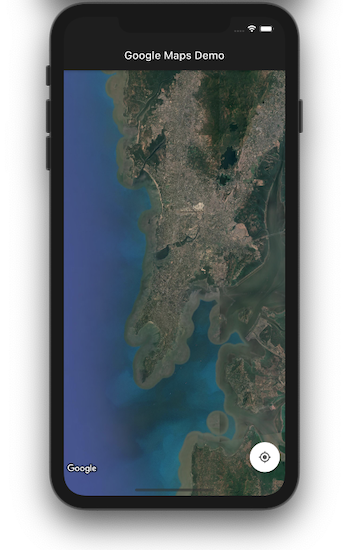
There are various types of maps available, including satellite, terrain, and hybrid. You can simply set the desired type to the mapType property of the widget:
GoogleMap(
  initialCameraPosition: _kInitialPosition,
  onMapCreated: onMapCreated,
  mapType: MapType.satellite,
);
By default, the map will show the location provided in the initialCameraPosition parameter of the widget (or any other location that you provide to the map programmatically). If the user wants to return to their location, setting myLocationEnabled to true will do the job.
A small blue dot will appear on the screen when the device is stationary and a chevron if the device is moving.
GoogleMap(
  initialCameraPosition: _kInitialPosition,
  onMapCreated: onMapCreated,
  myLocationEnabled: true,
);
People often wonder “How do I change my location on Google Maps in Flutter?” The answer to that question is that you can’t change your location on Google Maps in Flutter. Your location is determined by your geographical location on Earth via GPS calculations and it cannot be modified unless your device is moved to a new location.
In case you want to change the position of the “my location” button, you can create a FloatingActionButton (FAB) to replace the stock “my location” button and place it anywhere you want on the screen. You will only need to write the logic for centering the map’s camera on your location when the button is clicked. Here’s what the logic might look like:
void _currentLocation() async {

    // Create a map controller
    final GoogleMapController controller = await _controller.future;
    LocationData currentLocation;
    var location = new Location();
    try {
        // Find and store your location in a variable
        currentLocation = await location.getLocation();
    } on Exception {
        currentLocation = null;
    }

    // Move the map camera to the found location using the controller
    controller.animateCamera(CameraUpdate.newCameraPosition(
        CameraPosition(
            bearing: 0,
            target: LatLng(currentLocation.latitude, currentLocation.longitude),
            zoom: 17.0,
        ),
    ));
}
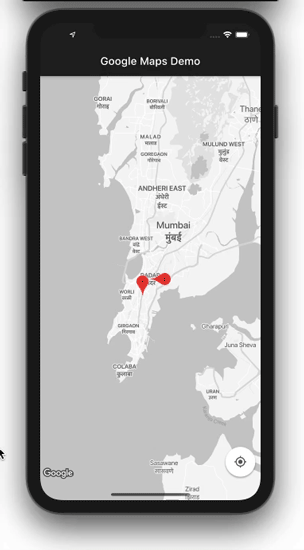
Markers are a great way to show a particular location.
To see how to create markers on your map, refer to the code below:
Set<Marker> _createMarker() {
  return {
    Marker(
        markerId: MarkerId("marker_1"),
        position: _kMapCenter,
        infoWindow: InfoWindow(title: 'Marker 1'),
        rotation: 90),
    Marker(
      markerId: MarkerId("marker_2"),
      position: LatLng(18.997962200185533, 72.8379758747611),
    ),
  };
}
Each marker in the set expects some parameters, which are useful to convey the information. The first marker is given the infowindow, which shows its ID (you can write anything here to describe the place) and a rotation of 90 degrees. The rotation param is very useful when you have multiple markers at the same place — for example, multiple cell antennae on a single tower.
GoogleMap(
  initialCameraPosition: _kInitialPosition,
  onMapCreated: onMapCreated,
  markers: _createMarker(),
);
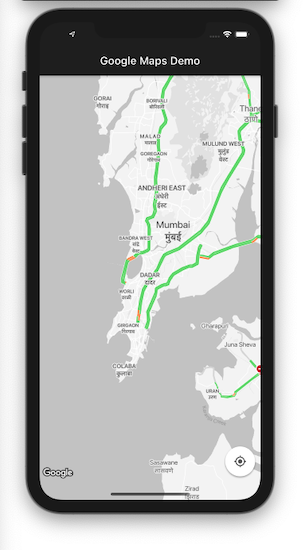
You can turn on traffic mode by simply setting the value of trafficEnabled to true.
GoogleMap(
  initialCameraPosition: _kInitialPosition,
  onMapCreated: onMapCreated,
  trafficEnabled: true,
);
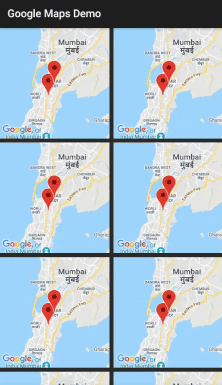
Let’s say you want to show a list of maps by displaying markers to help users locate satellite offices, other hospitals, etc.
First, create a GridView to show a list of Google Maps widgets. You can set the initialCameraPosition. Set liteModeEnabled to true. This creates the image of a map that you can’t interact with:
GridView.count(
  crossAxisCount: 2,
  crossAxisSpacing: 8,
  mainAxisSpacing: 8,
  // Generate 100 widgets that display their index in the List.
  children: List.generate(10, (index) {
    return Center(
      child: GoogleMap(
        initialCameraPosition: _kInitialPosition,
        markers: _createMarker(),
        liteModeEnabled: true,
      ),
    );
  }),
)
Create a set of markers and make sure you have a different position assigned to it.
Set<Marker> _createMarker() {
  return {
    Marker(
        markerId: MarkerId("marker_1"),
        position: _kMapCenter),
    Marker(
      markerId: MarkerId("marker_2"),
      position: LatLng(18.997962200185533, 72.8379758747611),
    ),
  };
}
At the time of writing, this feature is only available for Android.
The ability to take a snapshot of your location and quickly share your journey with others is a really cool feature.
First, create a button somewhere in your app. The _controller.takeSnapshot() method will do the rest of the magic for you with the click of a button.
FloatingActionButton(
  onPressed: () async {
    final imageBytes = await _controller.takeSnapshot();
    setState(() {
      _imageBytes = imageBytes;
    });
  },
  child: Icon(Icons.fullscreen),
)
Next, create a widget to show the snapshot:
Container(
  decoration: BoxDecoration(color: Colors.blueGrey[50]),
  height: 150,
  width: 120,
  child: _imageBytes != null ? Image.memory(_imageBytes) : null,
)
That’s it! The full code can be found on GitHub.
In this tutorial, we showed how to integrate Google Maps in your Flutter app and explored some ways to customize your map’s look and feel. We walked through how to enable the Maps API, generate and restrict API keys, and set up, style, and modify maps in a Flutter application.
Adding Google Maps capabilities to your app opens up a world of possibilities. With the basics under your belt, you’re ready to start building location-based features and interactive maps into your Flutter app.
Install LogRocket via npm or script tag. LogRocket.init() must be called client-side, not
server-side
$ npm i --save logrocket

// Code:

import LogRocket from 'logrocket';
LogRocket.init('app/id');
// Add to your HTML:

<script src="https://cdn.lr-ingest.com/LogRocket.min.js"></script>
<script>window.LogRocket && window.LogRocket.init('app/id');</script>

Learn what context rot is, why AI agent sessions degrade over time, and how to fix it with compaction, prompt anchoring, context files, plan files, and RAG.

Learn about TypeScript v6’s breaking changes, new ES2025 features, and deprecated options. A complete migration guide from v5 to prepare for v7.

Learn how Vite+ unifies Vite, Vitest, Oxlint, Oxfmt, Rolldown, and Node.js management in one CLI.

AI companies are buying developer tools as coding agents turn runtimes, package managers, and linters into strategic infrastructure.
Would you be interested in joining LogRocket's developer community?
Join LogRocket’s Content Advisory Board. You’ll help inform the type of content we create and get access to exclusive meetups, social accreditation, and swag.
Sign up now

