In this tutorial, we’ll learn about Mock Service Worker and how we can use it to mock network requests. We’ll build a chat application that will use the mock data provided by the Mock Service Worker API.

The Replay is a weekly newsletter for dev and engineering leaders.
Delivered once a week, it's your curated guide to the most important conversations around frontend dev, emerging AI tools, and the state of modern software.
According to its official website, Mock Service Worker is an API mocking library that uses the Service Worker API to intercept actual requests. Using Mock Server Worker, it becomes very easy to get a mock server up and running. It’s based on the idea of Service Workers in order to capture requests for caching.
It has the following features, among others:
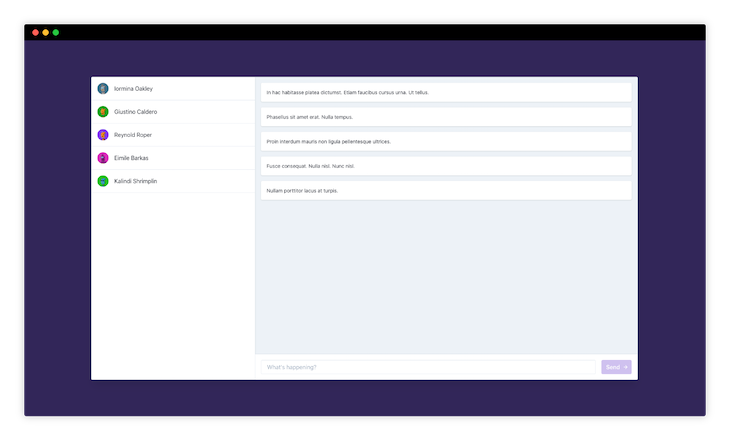
In this tutorial, we‘ll be building a chat application that will have a list of users and a list of messages. The mock data for this chat application will be supplied by the mocks defined by Mock Service Worker. At the end of this tutorial, our application should look like the following:
We’ll be using Next.js for building the application and Chakra UI for styling the application.
Next.js is a popular React framework that supports server-side rendering and a lot of other features out of the box. More details regarding Next.js can be obtained from its official documentation.
Chakra UI is a simple yet powerful component library for building React applications. More details regarding Chakra UI can be obtained from its official website.
We can create a Next.js application using the following command:
npx create-next-app
The above command will create a new Next.js application and set up everything for us. After the installation is complete, we can follow the instructions present on the screen to start the development server.
We can install the Chakra UI dependencies using the following command:
yarn add @chakra-ui/core @emotion/core @emotion/styled emotion-theming
Once the installation is complete, we need to update the pages/_app.js file with the following code:
// pages/_app.js

import { ThemeProvider, CSSReset, theme } from "@chakra-ui/core";

const App = ({ Component, pageProps }) => {
  return (
    <ThemeProvider theme={theme}>
      <CSSReset />
      <Component {...pageProps} />
    </ThemeProvider>
  );
};

export default App;
This will ensure that all the Chakra UI styles are now present in our application. We can now add any Chakra UI component to our application.
Note: Adding Chakra UI is optional. It’s only used here to design a good-looking interface. For the sake of keeping this tutorial short, we won’t dive deep into Chakra UI components.
Let’s add Mock Service Work to our application now. We can do so using the following command:
yarn add msw --dev
This will add Mock Service Work into our list of development dependencies. Since we don’t need any mocking of our data in production, it should be installed only in the development environment.
Using Mock Service Worker, we can mock both GraphQL and REST APIs. In this tutorial, we’ll be mocking REST APIs.
Let’s define the mocks for Mock Service Worker in a new file, mocks/handlers.js, with the following content:
// mocks/handlers.js

import { rest } from "msw";
import users from "data/users"; // contains mock data for users
import messages from "data/messages";// contains mock data for messages

export const handlers = [
  rest.get("https://backend.dev/users", (req, res, ctx) => {
    return res(ctx.json(users));
  }),

  rest.get("/users/:id/messages", (req, res, ctx) => {
    return res(ctx.json(messages));
  }),

  rest.post("/users/:id/messages", (req, res, ctx) => {
    const { message } = JSON.parse(req.body);
    return res(
      ctx.json({
        id: Math.random(),
        message,
      })
    );
  }),
];
From the above code, we can see that we’ve created three mock endpoints, the data from which will be fetched on the server side by Next.js:
GET backend.dev/users – this API endpoint is responsible for sending the initial data for showing our list of users.GET /users/:id/messages – this API endpoint will be responsible for sending the data for showing a list of messages.POST /users/:id/messages – this API endpoint will be responsible for sending the data when a new message is created.We’ll use all of these API endpoints in our Next.js application.
Now, let’s integrate these mock APIs with our application. To do so, we need to add a new file, mocks/browser.js, with the following content:
// mocks/browser.js

import { setupWorker } from "msw";
import { handlers } from "mocks/handlers";

export const worker = setupWorker(...handlers);
The above file will be responsible for sending mock data on the client side. We also need to create a new file for sending mock data on the server side:
// mocks/server.js

import { setupServer } from "msw/node";
import { handlers } from "mocks/handlers";

export const server = setupServer(...handlers);
The above two separate files are necessary because, according to MSW documentation, the same request handlers can be shared between browser and Node environments. Since Service Workers cannot run in Node, the integration process is different depending on the environment.
We’ll also need to create another file, mocks/index.js, which will be responsible for figuring out whether to send data from the server or client.
// mocks/index.js

if (typeof window === "undefined") {
  const { server } = require("mocks/server");
  server.listen();
} else {
  const { worker } = require("mocks/browser");
  worker.start();
}
The window object above is defined only on the client side. Leveraging this feature, we can easily figure our whether the data is being requested from the server side or client side.
Next, we need to add import the mocks/index.js file in our pages/_app.js file:
// pages/_app.js

require("mocks");

....

const App = ({ Component, pageProps }) => {

  ....

};

export default App;
For demo purposes, we’re loading the mock data from MSW. In a real application, the mocks should be present only for the development environment.
We can import MSW only on development by checking the NODE_ENV variable:
// pages/_app.js

if (process.env.NODE_ENV === "development") {
  require("mocks");
}

....

const App = ({ Component, pageProps }) => {

  ....

};

export default App;
Finally, we need to run MSW’s init command to place the Service Worker in the public directory of our application. In the case of Next.js, the public directory is ./public.
npx msw init ./public

We’ll be building the user interface for fetching the users first. We can use the Next.js getServerSideProps method to fetch the data on the server side and then render it on the browser. To do that, we need to create a new file, pages/index.js, with the following content:
// pages/index.js

import React from "react";

const Home = ({ users = [] }) => {
  const usersNode = () => {
    if (!users.length) {
      return <>No users found</>;
    }

    return (
      <>
        {users.map((user) => {
          return (
            <div key={user.id}>
              {user.first_name} {user.last_name}
            </div>
          );
        })}
      </>
    );
  };

  return usersNode();
};

export async function getServerSideProps() {
  const response = await fetch("https://backend.dev/users");
  const users = await response.json();

  return {
    props: {
      users,
    },
  };
}

export default Home;
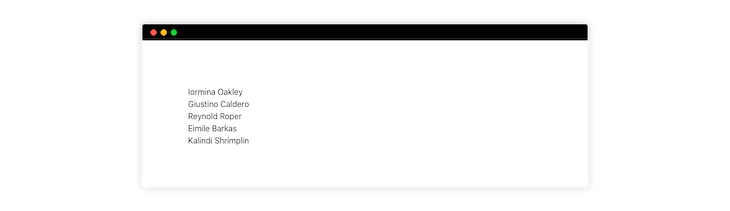
Here, we’re fetching the mock data from the https://backend.dev/users API endpoint on the server side and rendering on the user interface. The above code will render the following user interface:
Now, we’ll develop the user interface for fetching the list of messages. When a user is clicked, we fetch a list of messages from the /users/:id/messages API endpoint and render it on the interface. To do that, we need to update our pages/index.js file with the following content:
// pages/index.js

import React, { useState } from "react";

const Home = ({ users = [] }) => {
  const [messages, setMessages] = useState([]);

  const handleFetchMessages = async (userId) => {
    // 1. Set the fetching state to 'true' to show a spinner
    // 2. Fetch all the mock messages
    // 3. Store the messages in the state
    // 4. Set the fetching state to 'false' to remove the spinner
    const response = await fetch(`users/${userId}/messages`);
    const messages = await response.json();

    setMessages(messages);
  };

  const messagesNode = () => {
    if (!messages.length) {
      return <div>Please click on any items from the left sidebar</div>;
    }

    return (
      <div>
        {messages.map((message) => {
          return <div key={message.id}>{message.message}</div>;
        })}
      </div>
    );
  };

  ....

  return (
    <>
      {usersNode()}
      {messagesNode()}
    </>
  );
};

....

export default Home;
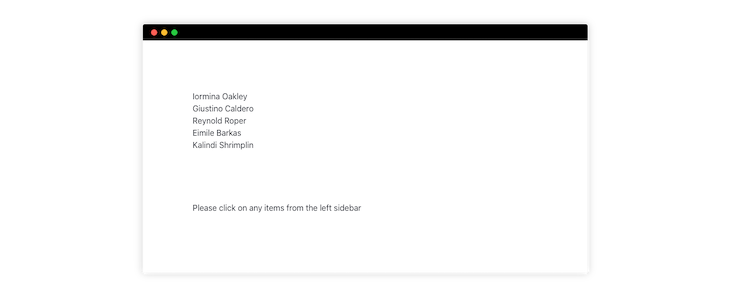
We fetch all the mock messages from the endpoint, then we store the data in the messages React state and render that array on the interface. Before the data is fetched, our user interface should look like the following:
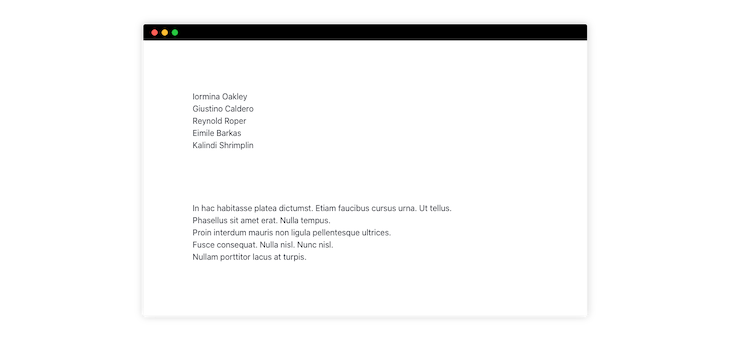
Once a user is clicked and the data is fetched from the API endpoint, our user interface should look like this:
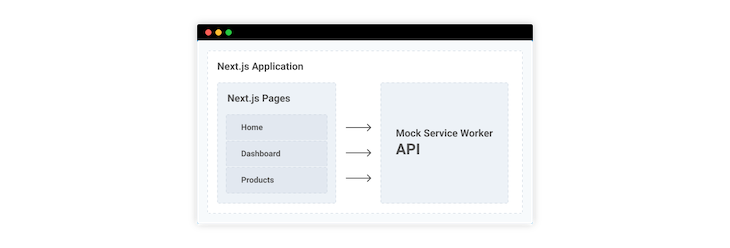
The different layers of our Next.js application are illustrated in the diagram below. All the Next.js pages can connect to the mock API of MSW and request for the data.
We’ll write a couple of integration tests using Cypress. Cypress is an end-to-end JavaScript testing framework. It has a lot of features and is very easy to integrate with any frontend application.
First, we need to install Cypress as a dependency:
yarn add -D cypress
The above command will add Cypress into our list of development dependencies. As with MSW, we don’t need any testing of our application in production, so it should be installed only in the development environment.
Next, we can add a script to our package.json file in order to run tests using Cypress:
// package.json

{

  ....

  "scripts": {

    ....

    "test": "cypress open"
  },

  ....

}
Now, we can run the following command to start Cypress from the root of our project:
yarn test
Please note that the development server of our application should be up and running since we need to run integration tests. It’s a good idea to run yarn dev in one terminal and yarn test in another.
The above command will launch the Cypress test runner.
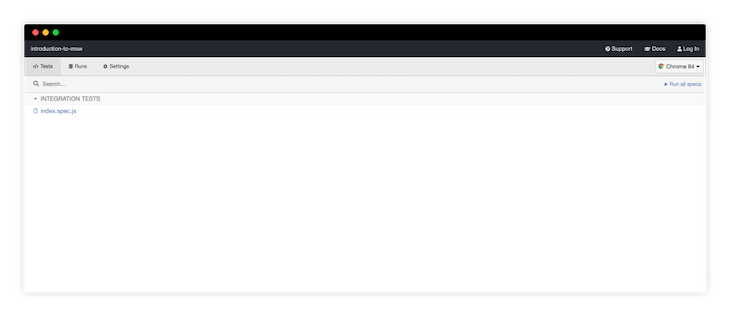
Next, we can start writing our integration tests using Cypress. We need to create a new file, cypress/integration/index.spec.js, with the following content:
// cypress/integration/index.spec.js

context("Cypress Tests", () => {
  beforeEach(() => {
    // This will ensure that Cypress always visits our development server
    // before running any tests
    cy.visit("http://localhost:3000/");
  });

  describe("User Interface Assertions", () => {
    it("should consist of 5 users", () => {
      cy.get("[data-test-id=user]").should("have.length", 5);
    });

    it("should consist of 5 messages when any user is selected", () => {
      cy.get("[data-test-id=user]").first().click();
      cy.get("[data-test-id=message]").should("have.length", 5);
    });
  });
});
In the above code, we’ve written two tests:
Both of these tests should pass per our mock data.
In this tutorial, we learned about how easy it is to start mocking and using mock data from Mock Service Worker. The source code for this application is available on GitHub, and a demo is hosted on Vercel.
Please note that the styles present in the demo application are due to the Chakra UI components. Also, a sample POST example is available in the demo application. All the mock data are present in this directory.
Debugging Next applications can be difficult, especially when users experience issues that are difficult to reproduce. If you’re interested in monitoring and tracking state, automatically surfacing JavaScript errors, and tracking slow network requests and component load time, try LogRocket.
LogRocket captures console logs, errors, network requests, and pixel-perfect DOM recordings from user sessions and lets you replay them as users saw it, eliminating guesswork around why bugs happen — compatible with all frameworks.
LogRocket's Galileo AI watches sessions for you, instantly identifying and explaining user struggles with automated monitoring of your entire product experience.
The LogRocket Redux middleware package adds an extra layer of visibility into your user sessions. LogRocket logs all actions and state from your Redux stores.


Modernize how you debug your Next.js apps — start monitoring for free.

Learn what context rot is, why AI agent sessions degrade over time, and how to fix it with compaction, prompt anchoring, context files, plan files, and RAG.

Learn about TypeScript v6’s breaking changes, new ES2025 features, and deprecated options. A complete migration guide from v5 to prepare for v7.

Learn how Vite+ unifies Vite, Vitest, Oxlint, Oxfmt, Rolldown, and Node.js management in one CLI.

AI companies are buying developer tools as coding agents turn runtimes, package managers, and linters into strategic infrastructure.
Hey there, want to help make our blog better?
Join LogRocket’s Content Advisory Board. You’ll help inform the type of content we create and get access to exclusive meetups, social accreditation, and swag.
Sign up now

