JavaScript, one of the core technologies that powers the web, has evolved over the years. Originally intended to be just a client-side scripting language, it has now grown to be a mature language and with its growth, we’ve seen the rise and fall of many libraries and frameworks over the years.

In this article, we will take a look at one of JavaScript’s oldest frontend frameworks, Ember.js. We will explore the core concepts and see how to get started using it.
Built by Yehuda Katz and Tom Dale in 2011, Ember.js is an opensource JavaScript framework, it is popularly known as the framework for building ambitious applications and commonly referred to as the “together framework” due to its close-knit community. It is a framework best suited to building large scale client-side applications.
Its official website describes Ember as :
A productive, battle-tested JavaScript framework for building modern web applications. It includes everything you need to build rich UIs that work on any device.
This tutorial assumes the reader has the following:
Install the ember-cli tool, this toolkit is for Ember.js that helps you bootstrap Ember projects on the fly.
Install the CLI tool with the following command:
npm install -g ember-cli
Installing the Ember CLI package globally gives us access to the ember command in our terminal, the ember new command helps us create a new application.
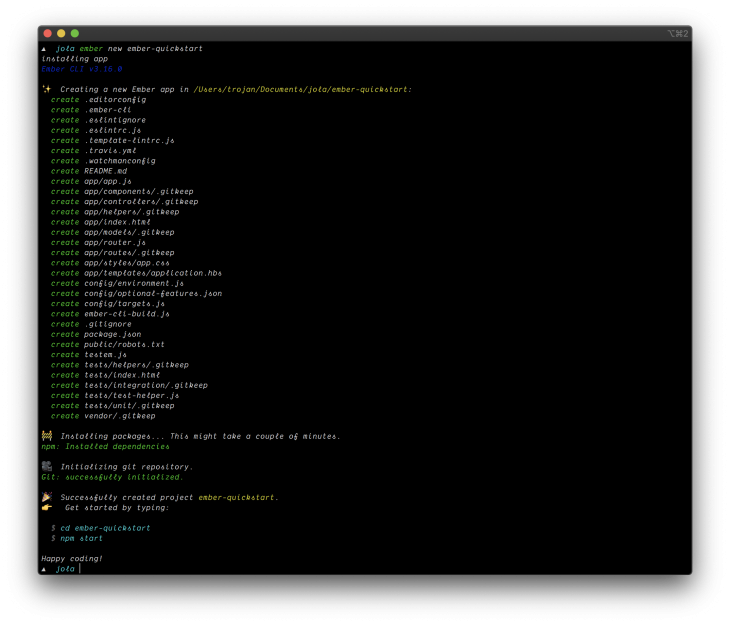
Next, create an ember project with the new command:
ember new ember-quickstart
This command will create a new directory called ember-quickstart and set up a new Ember application with all the necessary files and configurations for bootstrapping a project inside of it.

Change directory into the application directory:
cd ember-quickstart
start the development server:
ember serve
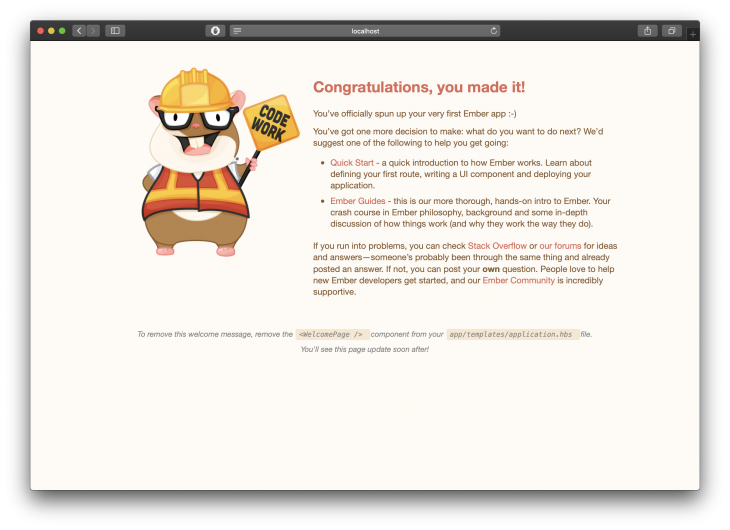
You should get something similar to this running on http://localhost:4200 after running the ember serve command.

The Ember.js is an MVC-based framework, it follows a uni-directional data flow pattern popularly know as Data Down Actions Up (DDAU) which was influenced by the Flux architectural pattern created by Facebook and uses Glimmer VM for rendering and updating the DOM, Glimmer is a virtual machine that compiles the handlebars templates code into bytecode herby delivering a faster experience., it parses the bytecode and renders the view to users.
Having an understanding of the following concepts in Ember is important.
Models are objects used to store and maintain data used in our application, The data can be retrieved with Ember Data a library for robustly managing data in applications. The Ember Data library is included by default in our Ember CLI scaffold.
Controllers are wrappers around the model, they act as the intermediary between the views and models. They are used to retrieve, update and modify data in the model. Data requests to the models are performed by the controller.
Templates represent the view layer in MVC, they are the interface used to render data to users. Templates are built with handlebars templating language.
Routing is managed by the Router file, it maps a route to a route handler stored in the /routes folder, The router is responsible for rendering contents created using a template to the user.
Components are reusable collections of UI elements that contain markup, logic, and styling. They are the building block for an application.
A new Ember project is structured similarly to this:
├── app
│   ├── app.js
│   ├── components
│   ├── controllers
│   ├── helpers
│   ├── index.html
│   ├── models
│   ├── router.js
│   ├── routes
│   ├── styles
│   │   └── app.css
│   └── templates
│       └── application.hbs
├── config
│   ├── environment.js
│   ├── optional-features.json
│   └── targets.js
├── ember-cli-build.js
├── package.json
├── package-lock.json
├── public
│   └── robots.txt
├── README.md
├── testem.js
├── tests
│   ├── helpers
│   ├── index.html
│   ├── integration
│   ├── test-helper.js
│   └── unit
└── vendor
Let’s take time to understand what the files and folder represent and how we can use them.
package.json — contains information about your project like which dependencies are installed in your project and scripts that can be run/app — this folder houses the core code of your application. It contains critical parts of your application such as components, templates, models, routes, and styles. You’d mostly be working with files in this directory
app.js — this is the main application file. It is the apps entry point/templates — this folder houses handlebars templates, these templates are compiled to /dist folder during build/controllers — this folder contains your controllers, a controller is where you define data binding to variables on your templates/helpers — this folder contains helper functions used in your handlebar templates. Helper functions are JavaScript functions that add additional functionalities to your templates beyond what is included out-of-the-box in Ember/index.html — the app/index.html file lays the foundation for the Ember application. This is where the basic DOM structure is laid out, the title attribute is set, and stylesheet/JavaScript includes are done/models — this directory is where your models are created, models are objects that represent the underlying data in your application. They are used to store and maintain data used in our application/router.js — this file houses the applications route configurations. The routes defined here correspond to routes in /routes folder/routes — this folder contains route handler files, which sets up what should happen when a route is loadedember-cli-build.js — this file describes how Ember CLI should build our apptestem.js — Ember CLI’s test runner Testem is configured in testem.js/public — this directory will be copied to the dist directory during build, use this for assets that don’t have a build step, such as images or fonts/vendor — this directory is where frontend dependencies (such as JavaScript or CSS) that are not managed by npm go/tests — The tests directory contains your automated tests, as well as various helpers to load and run the tests. QUnit is the default testing framework for Ember/config — The config directory contains your application’s configuration files, environment, and browser build settingsEmber.js gets lots of love from developers who make use of it for several reasons, some include:
In this article we’ve seen what Ember.js is, we’ve learned its core concepts and how to get started with using it.
The Ember.js framework has come a long way and has tons of guides and tutorials to help onboard new users of the framework, Check this tutorial made for people coming from other frameworks(it includes Vue and React) also the documentation is quite robust and explains concepts in-depth. The best part about Ember is the community – they have a discord group, their discussion forum is quite helpful, and the Dev.to feed is quite resourceful.
Except specifically needed for a job, I think it is quite unnecessary to learn it given its steep learning curve except obviously you’re doing so just for curiosity.
The low skill-demand rate also suggests that one might be better off using the newer and shiny libraries/framework such as React, Vue, or Svelte.
There’s no doubt that frontends are getting more complex. As you add new JavaScript libraries and other dependencies to your app, you’ll need more visibility to ensure your users don’t run into unknown issues.
LogRocket is a frontend application monitoring solution that lets you replay JavaScript errors as if they happened in your own browser so you can react to bugs more effectively.

LogRocket works perfectly with any app, regardless of framework, and has plugins to log additional context from Redux, Vuex, and @ngrx/store. Instead of guessing why problems happen, you can aggregate and report on what state your application was in when an issue occurred. LogRocket also monitors your app’s performance, reporting metrics like client CPU load, client memory usage, and more.
Build confidently — start monitoring for free.
Would you be interested in joining LogRocket's developer community?
Join LogRocket’s Content Advisory Board. You’ll help inform the type of content we create and get access to exclusive meetups, social accreditation, and swag.
Sign up now
Not sure if low-code is right for your next project? This guide breaks down when to use it, when to avoid it, and how to make the right call.

Compare Firebase Studio, Lovable, and Replit for AI-powered app building. Find the best tool for your project needs.

Discover how to use Gemini CLI, Google’s new open-source AI agent that brings Gemini directly to your terminal.

This article explores several proven patterns for writing safer, cleaner, and more readable code in React and TypeScript.