As your frontend applications receive increasing demand, they require fast and responsive backends to deliver the optimal user experiences. You’ll need a framework that plays nicely with the frontend tooling and frameworks you’re building with.

There are many backend frameworks to choose from across the various server-side languages. If you’re looking to use JavaScript, especially on your app’s frontend, you can consider using Fastify.
In this adoption guide, we’ll discuss some of the reasons you should (or shouldn’t) choose Fastify, key features you should know, and more. We’ll also compare Fastify to some popular alternatives to equip you to make an informed decision for your project.
Fastify is a performant, open source Node.js framework for building efficient and fast web applications. Its modular architecture is based on a rich, easy-to-integrate plugin system:

Fastify also plays nicely with popular modern frontend frameworks and libraries like React, Vue, and Angular. It provides great DX via schema-based validation, detailed documentation, and full TypeScript support, making it a popular choice for developers in the JavaScript ecosystem who need to spin up fast, reliable backend services.
The project contributors built Fastify to create a framework with high throughput and low latency that was secure with a minimal footprint. Since its inception, Fastify has undergone several iterations that added new features and improved its performance to stay updated with the trend in server-side app development.
Fastify leverages plugins to extend its core functionality. You build your application by registering plugins that provide specific functionalities. These plugins can define routes, handle server decorations, or add custom logic.
As usual, there are multiple factors you should consider when choosing a server-side framework for your application. Here’s an overview of the factors that make Fastify a great tool to use:
Of course, Fastify isn’t perfect. Depending on your use case, you may find other frameworks better suited for your project. Check out the comparison table between Fastify and other popular frameworks below to learn more.
Here’s a quickstart guide to get you started with Fastify, including installing, building a route, and creating a server.
First, ensure you have Node.js installed. You can install Fastify using npm or Yarn:
# NPM
npm init -y
npm install fastify

# YARN
yarn init -y
yarn add fastify
To create a server with Fastify, create a new file named server.js and add this import for the Fastify library:
// Import the Fastify library
const fastify = require('fastify')({ logger: true });
Next, define a simple route at the root directory to which you can send requests:
fastify.get('/', async (request, reply) => {
  return { hello: 'world' };
});
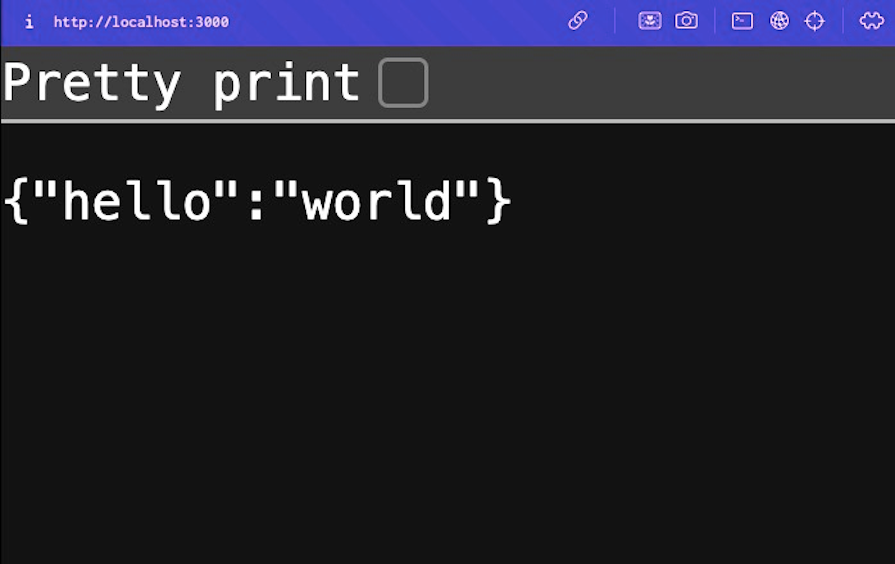
The route returns a JSON with {"hello":"world"} when you visit the root URL with the server running locally on port 3000.
Here’s a function definition that starts the server on port 3000 with error handling to catch any errors while running the server:
// Run the server
const start = async () => {
  try {
    await fastify.listen(3000);
    fastify.log.info(`Server listening on ${fastify.server.address().port}`);
  } catch (err) {
    fastify.log.error(err);
    process.exit(1);
  }
};
Finally, call the start function at the bottom of the file:
start();
If you’re using Node like me, you can run the server with this command:
node server.js
Request the server or open the endpoint on your browser. Here’s the output you should see:

You can add more routes by defining additional handlers. Here’s an example POST route:
// Define a POST route
fastify.post('/data', async (request, reply) => {
  const { name } = request.body;
  return { hello: name };
});
For the POST route, you’re using the post function. The POST route returns the body of the request with request.body function.
Fastify is a supercharged backend framework that can probably take whatever you throw at it. Let’s go over some important operations you’d explore with Fastify if you adopt it as your app’s backend framework.
Plugins are how you get to extend Fastify’s functionality. There are many plugins out there that you can try out for what you’re building. Explore the Ecosystem page and check out the 296+ plugins available to use. If you can’t find a plugin, writing one for your use case is very easy.
Here’s how easy and intuitive it is to use Fastify plugins:
const fastify = require('fastify')();
const cors_plugin = require('@fastify/cors')

// Example: Registering a CORS plugin

fastify.register(cors_plugin, {
    origin: '*'
});
The @fastify/cors plugin helps you use CORS easily in your Fastify app. You’ll have to register plugins with fastify.register to use them.
You can achieve various forms of authentication and authorization with Fastify. Here’s an example use of a JWT plugin for authentication with Fastify:
const fastify = require('fastify')();
fastify.register(require('@fastify/jwt'), {
    secret: 'supersecret'
});

// JWT authentication hook
fastify.addHook('onRequest', async (request, reply) => {
    try {
        await request.jwtVerify();
    } catch (err) {
        reply.send(err);
    }
});

fastify.post('/login', async (request, reply) => {
    const token = fastify.jwt.sign({ user: 'example' });
    return { token };
});

fastify.listen({ port: 3000, host: '0.0.0.0' });
After registering the plugin, the program adds a JWT authentication hook to verify JWTs. On visiting the /login route, the endpoint should be authenticated.
You can validate incoming data from requests with a schema where you’d specify required values. Here’s how:
const fastify = require('fastify')();

fastify.post('/data', {
    schema: {
        body: {
            type: 'object',
            properties: {
                name: { type: 'string' },
                age: { type: 'integer' }
            },
            required: ['name', 'age']
        }
    }
}, async (request, reply) => {
    return { status: 'Data is valid' };
});

fastify.listen({ port: 3000, host: '0.0.0.0' });
The program ensures that POST requests to /data have a JSON object with two properties: a name of type string and an age of type integer. On receiving valid data, the server responds with a success message.
Serialization is an operation you’d be doing a lot if you’re using Fastify to build APIs. Here’s how you can serialize data with Fastify:
const fastify = require('fastify')();

fastify.get('/user', {
    schema: {
        response: {
            200: {
                type: 'object',
                properties: {
                    id: { type: 'integer' },
                    name: { type: 'string' }
                }
            }
        }
    }
}, async (request, reply) => {
    return { id: 1, name: 'John Doe' };
});

fastify.listen({ port: 3000, host: '0.0.0.0' });}
The program defines a route that responds to GET requests on the /user endpoint. When clients make GET requests to the endpoint, the server validates the response and ensures the response has the expected structure with the id (integer) and name (string) properties.
Fastify also has built in functions for logging in different levels:
const fastify = require('fastify')({ logger: true });

fastify.get('/', async (request, reply) => {
    request.log.info('Hello world route called');
    return { hello: 'world' };
});

fastify.listen({ port: 3000, host: '0.0.0.0' });
The program defines a simple web server that responds to GET requests on the root path with the message hello world after logging the message Hello world route called to the specified output.
Adapters make it easy to use Fastify to work with different server environments:
const fastify = require('fastify')();
const awsLambdaFastify = require('aws-lambda-fastify');

fastify.get('/', async (request, reply) => {
    return { hello: 'world' };
});

const proxy = awsLambdaFastify(fastify);
exports.handler = proxy;
The example program above acts as an adapter for a Fastify app that runs within AWS Lambda. The aws-lambda-fastify bridges wrap the Fastify app to make it compatible with the Lambda execution model.
You can handle request-related errors with Fastify and error handlers. Here’s how:
const fastify = require('fastify')();

fastify.setErrorHandler((error, request, reply) => {
    reply.status(500).send({ error: 'Something went wrong!' });
});

fastify.get('/', async (request, reply) => {
    throw new Error('Oops!');
});

fastify.listen({ port: 3000, host: '0.0.0.0' });
Here, we’re created custom error handlers for the Fastify app. All uncaught errors, like the ones from the GET requests to the root path, trigger the handler.
The handler sends a generic error message with a 500 status code to the client, but in a real application, you’d likely provide more specific error responses.
You can use Fastify for most of the use cases you would use a backend framework for, from building web backends to APIs and real-time apps. Let’s dive into some of Fastify’s popular use cases for you to gain insights into what you can use Fastify for:
You can check out the Fastify website and forums to learn how the community is using Fastify to power various use cases. There are also multiple popular organizations already using Fastify across multiple projects for different use cases. You can check out this page for a comprehensive overview of organizations using Fastify.
Using various methods, you can deploy your Fastify projects locally or to cloud providers. Deployment options for your Fastify project include:
There are also some best practices you should follow for deploying your Fastify project, such as:
Following these practices while using these deployment options sets your project up for success.
Fastify isn’t the only popular backend framework in the JS/TS ecosystem. There are more, like Express, Hapi, and Koa. Here’s a comparison table that overviews how Fastify compares to these other frameworks:
| Aspect | Fastify | Express.js | Koa | Hapi |
|---|---|---|---|---|
| Features | Built-in plugins, schema validation, automatic JSON parsing, HTTP/2 support, TypeScript support | Middleware system (large ecosystem), routing, templating | Lighter, more modular middleware system | Extensive built-in features (routing, validation, auth), plugins |
| Performance | Fastest (fewer callbacks, less boilerplate) | Good (may require optimization, callback-heavy) | Competitive (requires optimization) | Good (mature framework, optimized code) |
| Community | Growing, active development | Large, established | Moderate, growing | Established, active |
| Resource/Docs | Excellent documentation, active GitHub, tutorials | Extensive documentation, community support, tutorials | Good documentation, active community | Comprehensive documentation: plugins often have separate docs |
| Philosophy | Performant, modern, built-in features | Flexible, large ecosystem | Lightweight, modular, control over requests | Enterprise-grade, extensive features, plugins |
It’s safe to conclude that Fastify is ideal for high-performance APIs, whereas Express.js has a greater community with more middleware, and Koa is an alternative to Express for small projects that need a custom setup, and Hapi is great for enterprise-grade applications.
Now, you can make a choice for your project based on this table and bring your project to life.
In this guide, you’ve learned about Fastify, and hopefully, you’ve had your doubts cleared or have reasons to adopt Fastify for your projects.
You always have the Fastify community of developers if you get stuck. Also, there are many Fastify resources on the LogRocket blog that you can use to build your projects. Explore and enjoy!
Install LogRocket via npm or script tag. LogRocket.init() must be called client-side, not
server-side
$ npm i --save logrocket

// Code:

import LogRocket from 'logrocket';
LogRocket.init('app/id');
// Add to your HTML:

<script src="https://cdn.lr-ingest.com/LogRocket.min.js"></script>
<script>window.LogRocket && window.LogRocket.init('app/id');</script>
Would you be interested in joining LogRocket's developer community?
Join LogRocket’s Content Advisory Board. You’ll help inform the type of content we create and get access to exclusive meetups, social accreditation, and swag.
Sign up now
Not sure if low-code is right for your next project? This guide breaks down when to use it, when to avoid it, and how to make the right call.

Compare Firebase Studio, Lovable, and Replit for AI-powered app building. Find the best tool for your project needs.

Discover how to use Gemini CLI, Google’s new open-source AI agent that brings Gemini directly to your terminal.

This article explores several proven patterns for writing safer, cleaner, and more readable code in React and TypeScript.