As developers, we often find ourselves jumping between the code editor and external resources like documentation, forums, and tutorials. This constant context switching, though sometimes necessary, can seriously drain productivity and focus. But what if there were a better way, one where your development environment could proactively fetch the information you need, right when you need it? That’s the promise of the Model Context Protocol (MCP).

In this article, we’ll explore the Chakra UI MCP server as a case study, setting up a simple dashboard and using it to illustrate the benefits and challenges MCP servers bring to modern web development.
The Replay is a weekly newsletter for dev and engineering leaders.
Delivered once a week, it's your curated guide to the most important conversations around frontend dev, emerging AI tools, and the state of modern software.
Before diving into the Chakra UI MCP server, let’s first understand what the Model Context Protocol (MCP) is: The Model Context Protocol, or MCP for short, acts as a communication layer between a Large Language Model (LLM) and external tools. Think of it as an API that allows an LLM to query external systems and receive real-time data in return.
This concept is revolutionary in AI because most models are limited to the knowledge they were trained on. MCP servers change that, allowing AI systems to access live, external information beyond their static training data.
To follow along, you’ll need:
In this article, we will use React to demonstrate the Chakra UI MCP server. Specifically, we will be setting up React using Vite.
To set up React with Vite, run the following command:
npm create vite@latest
And follow the prompt. We will be using TypeScript.
Next, install Chakra UI with:
npm i @chakra-ui/react @emotion/react
Next, we will get into connecting the Chakra UI MCP server to your code editor.
Before you can start using Chakra’s MCP server, you’ll need to configure it in your code editor.
In this guide, we’ll walk through how to set up Chakra’s MCP server in the following editors:
In Cursor and VS Code, you will need the JSON text below to complete the setup:
{
  "mcpServers": {
    "chakra-ui": {
      "command": "npx",
      "args": ["-y", "@chakra-ui/react-mcp"]
    }
  }
}
If you’re using Cursor, create a .cursor folder in the root of your project. Inside that folder, create a new file named mcp.json.
Once the file is created, add the JSON configuration text shown above to it and save the file.
After installing GitHub Copilot and Copilot Chat, create a .vscode folder in the root of your project. Inside that folder, add a new file named mcp.json, and paste in the JSON configuration provided above.
When you are done setting up Claude code, run the following command to set up the Chakra UI MCP server:
claude mcp add chakra-ui -- npx -y @chakra-ui/react-mcp
I will be using Cursor to explore the MCP server.
You can also explore our overview of the top MCP servers for AI projects to see how other frameworks are embracing this approach.

Note (troubleshooting):
If the Chakra UI MCP server isn’t working after creating mcp.json, open your editor settings, go to MCP Integrations, toggle Chakra UI off, then toggle it on again.
Chakra UI MCP server endpoints:
get_theme
v2_to_v3_code_review
installation
get_component_props
list_components
get_component_example
customize_theme
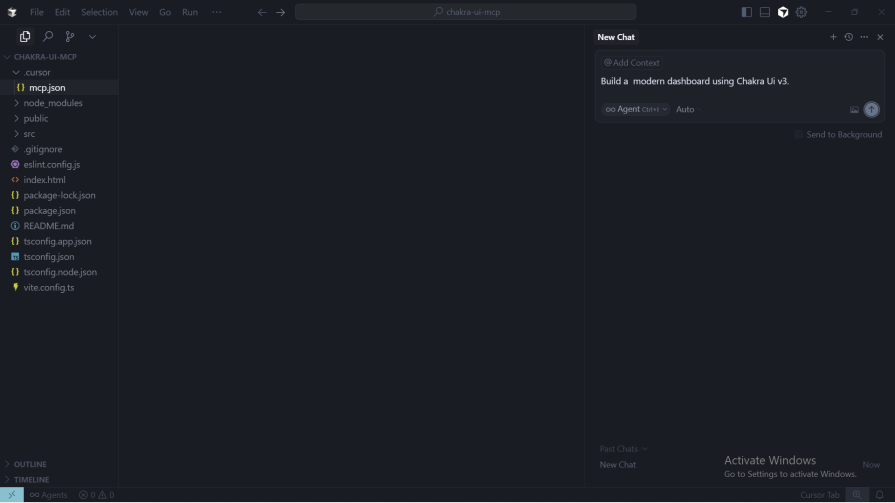
I’ve created the React project and configured Cursor to use the Chakra UI MCP server. Let’s have it scaffold a dashboard.
Use this prompt: Build a modern dashboard using Chakra UI v3:
The MCP server is working!
Let’s see what the Chakra UI MCP server can do.
First, it queried the installation endpoint, which looks up the install steps that match the current codebase (framework, package manager, and Chakra UI version). This ensures the setup instructions it returns are correct for your project before generating any code:
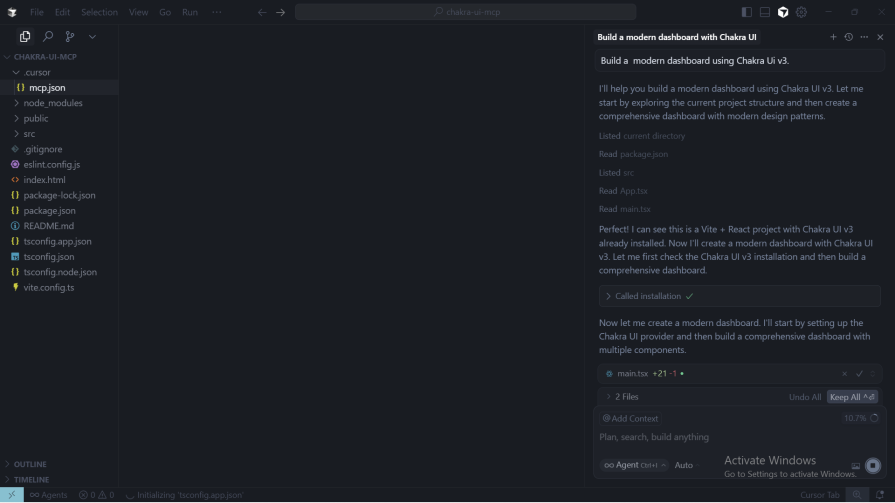
Good thing I had already completed the installation manually, so the MCP server moved on to the next step.
It then called the list_components endpoint to check whether Chakra UI v3 includes chart components, and it did:
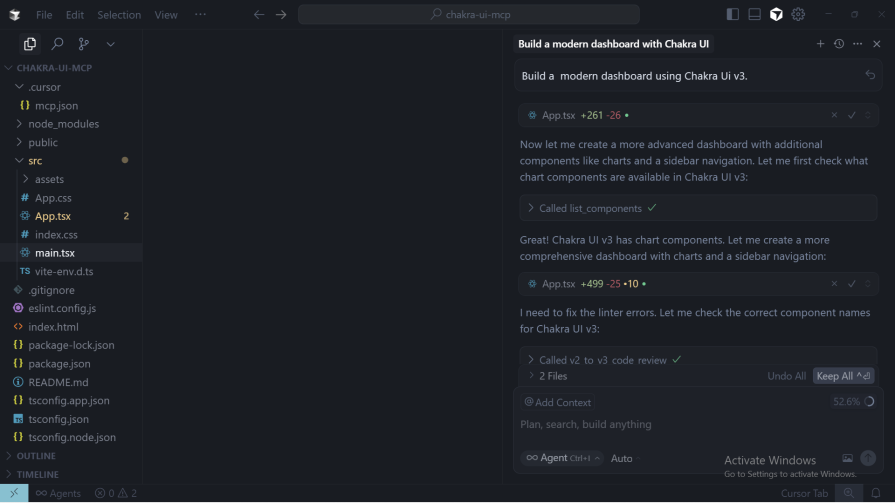
It even verified the correct component names by calling the get_component_props endpoint. I didn’t have to go back and forth through the docs, the MCP server handled that for me:
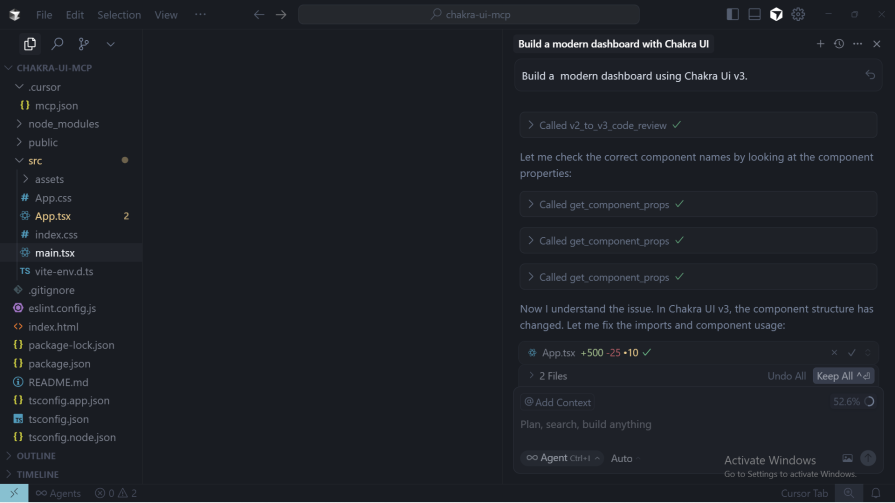
When it encountered an issue in the codebase, the MCP server called the get_component_example endpoint to verify its approach, just like a developer would do when double-checking the documentation:
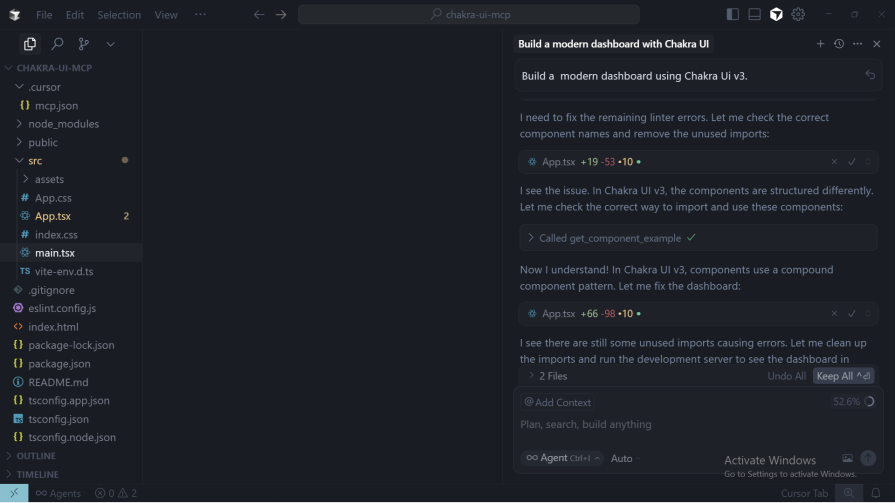
It ran into some API changes in the Chakra UI v3 setup I requested, so it called the get_component_props endpoint again to fetch the updated component properties and apply the correct usage:
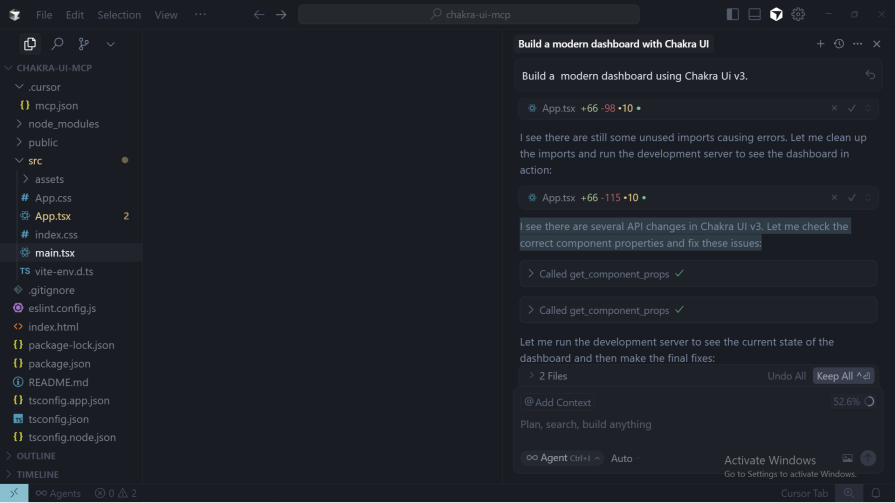
The app did not run at the first iteration, so I just copied the error code and gave it:
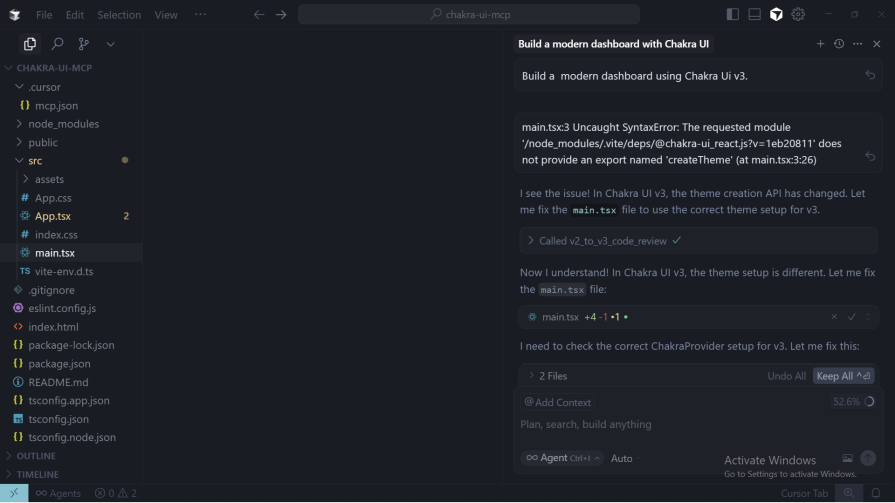
It then called the v2_to_v3_code_review endpoint to fix the theme setup error.
As you may have noticed, all of this happened directly inside the codebase, no switching between tabs or docs required.
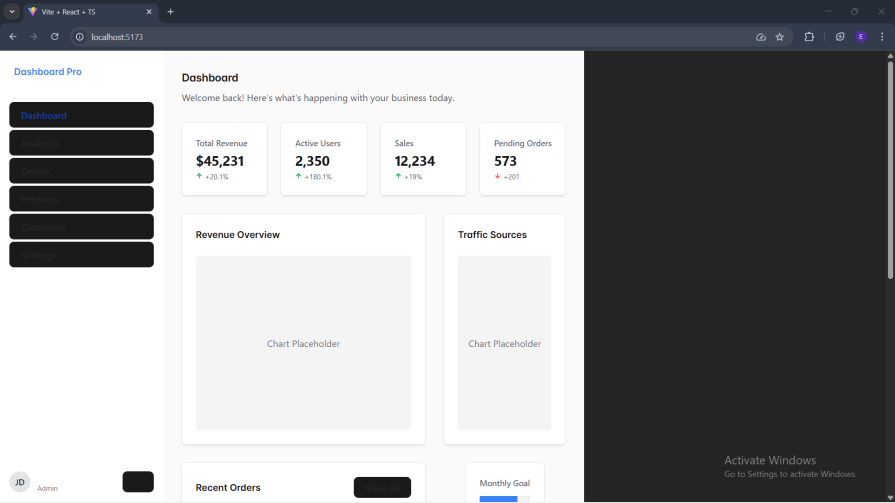
Now, let’s take a look at what it produced:
For curiosity’s sake, I asked the AI to explain how it used the Chakra UI MCP server.
Use this prompt: Walk me through how you used the Chakra UI MCP server to implement this dashboard:
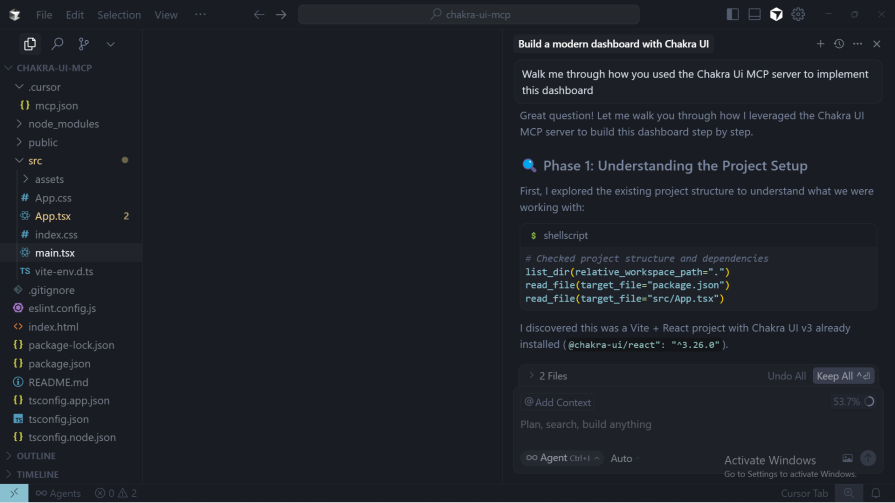
The AI explained that it began by setting up the project and using the Chakra UI MCP server to fetch installation guidance. During this process, it discovered that Chakra UI v3 introduces a new provider pattern, replacing the older ChakraProvider approach.
It recommended switching to the new provider component with a default provider value.
Next, it leveraged the MCP server to explore available components, understand the v3 API, and review migration patterns from v2 to v3. Finally, it pulled practical examples from the MCP server to demonstrate these changes in action.
Based on those insights, it implemented the dashboard using the updated v3 patterns while comparing them to the older v2 syntax:
// v2 style (old)
<Card>
  <CardBody>
    <Stat>
      <StatNumber>Value</StatNumber>
    </Stat>
  </CardBody>
</Card>

// v3 style (new)
<Card.Root>
  <Card.Body>
    <Stat.Root>
      <StatValueText>Value</StatValueText>
    </Stat.Root>
  </Card.Body>
</Card.Root>
In the end and with the aid of the MCP server, it structured the dashboard with:
Stat.Root components with indicatorsTable.Root with TableScrollArea for responsivenessProgress.Root with custom styling that it createdLet’s take a brief look at what tools like Chakra UI MCP server hold for developers in the course of doing their job.
When using such tools, a developer experiences the following things:
In the future, AI assistants will not only suggest code but will be like a pair programmer with the full knowledge of your project’s component library, design system, and theme. This could lead to:
v2_to_v3_code_review endpoint, migrating from an old version of a framework to a new version may just be a matter of setting up the MCP client on your codebase to interact with the new documentation, and voila, migration is completed and with minimal manual interventionAs MCP adoption continues to grow, we’re moving toward a future where the line between writing code and learning a framework becomes almost invisible. Documentation will no longer live in a separate tab, it will exist as an interactive, integrated part of the development environment, creating a far more efficient workflow for developers.
Adoption of MCP servers by frontend tools, though a good thing, still poses some danger to the frontend field in particular and web development in general.
The challenges and risks this may bring seem to be the same risks that AI has brought to the field, but let us take a look at the most important challenges and risks this may bring:
As developers, the constant back-and-forth between our codebase and external documentation has always been a pain point in our workflow. It’s exciting to see libraries and frameworks beginning to address this challenge through the adoption of MCP servers.
In this article, we explored the Chakra UI MCP server as a prime example of how this technology can enhance the development process. By bringing documentation, component details, and even code reviews directly into the editor, MCP servers minimize context switching, improve accuracy, and accelerate development.
As more tools adopt MCP, we’re moving closer to a future where you can simply chat with your codebase and build features effortlessly.
Build a CRUD REST API with Node.js, Express, and PostgreSQL, then modernize it with ES modules, async/await, built-in Express middleware, and safer config handling.
Discover what’s new in The Replay, LogRocket’s newsletter for dev and engineering leaders, in the March 25th issue.

Discover a practical framework for redesigning your senior developer hiring process to screen for real diagnostic skill.
I tested the Speculation Rules API in a real project to see if it actually improves navigation speed. Here’s what worked, what didn’t, and where it’s worth using.
Would you be interested in joining LogRocket's developer community?
Join LogRocket’s Content Advisory Board. You’ll help inform the type of content we create and get access to exclusive meetups, social accreditation, and swag.
Sign up now

