Picture the following scenario: you’ve finished developing a brand new API, and now have to write documentation to guide you when building client-side applications that consume the API. You start thinking of various ways to achieve this, and you lay out multiple alternatives like Swagger, Docusaurus, Postman and many more.

You remember the stress involved in the API documentation phase and wonder if there are shortcuts to speed things up – you can’t skip this phase, because what good is software if nobody can use it?
My favorite tool for creating API documentation is Swagger because of its ease of creating, maintaining, and publishing API documentation. Swagger is a professional, open source toolset that helps users, teams, and enterprises easily create and document APIs at scale. Here’s a demo to get a feel of how Swagger works.
Benefits of using Swagger in your next project include:
This tutorial will teach you how to seamlessly create Swagger documentation for Go web APIs directly from the source code using annotations and Swag. In this article, we will build a demo web API with Go and Gin, then create documentation for it using Swag.
The Replay is a weekly newsletter for dev and engineering leaders.
Delivered once a week, it's your curated guide to the most important conversations around frontend dev, emerging AI tools, and the state of modern software.
To follow and understand this tutorial, you will need the following:
Gin is the fastest full-featured web framework for Go, featuring a Martini-like API emphasizing performance and productivity. Gin is fast, crash-free, extensible with built-in rendering, and features support for middleware, routes grouping, and convenient error management.
Now let’s build the web API for a basic “to do” application.
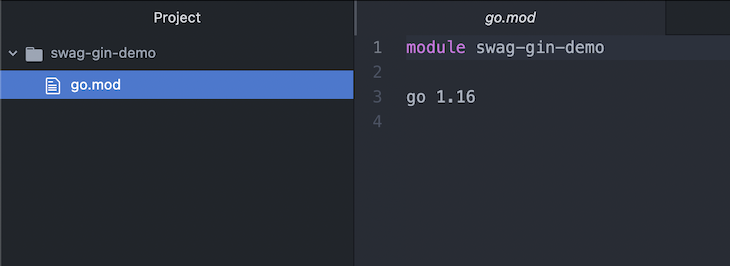
Create a new Go project in your text editor or IDE and initialize your go.mod file. You are free to use any name for your package:
go mod init swag-gin-demo
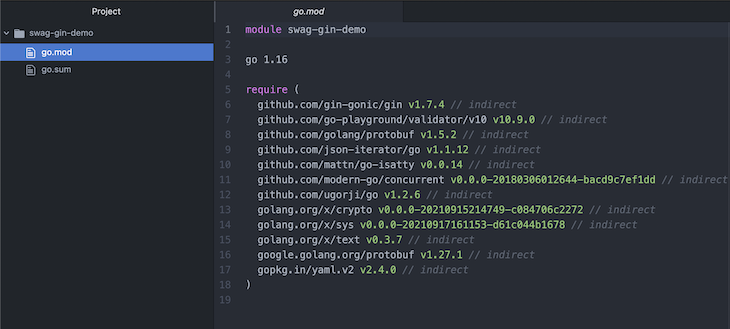
Install the Gin web framework in your project. In the terminal, type the following:
go get -u github.com/gin-gonic/gin
Create a file named main.go and save the following code in it:
package main

import (
        "github.com/gin-gonic/gin"
        "net/http"
)

func main() {
        // configure the Gin server
        router := gin.Default()

        // run the Gin server
        router.Run()
}
getAllTodos routeLet’s create a todo type and seed the list with some data. Add the following code to the main.go file:
// todo represents data about a task in the todo list
type todo struct {
        ID   string `json:"id"`
        Task string `json:"task"`
}

// message represents request response with a message
type message struct {
        Message string `json:"message"`
}

// todo slice to seed todo list data
var todoList = []todo{
        {"1", "Learn Go"},
        {"2", "Build an API with Go"},
        {"3", "Document the API with swag"},
}
Create a route handler that will accept a GET request from the client then return all the items in the to do list.
Add the following code to the main.go file:
func getAllTodos(c *gin.Context) {
        c.JSON(http.StatusOK, todoList)
}
Register the getAllTodos handler to the Gin router. Update the main function in main.go with the following code:
func main() {
        // configure the Gin server
        router := gin.Default()
        router.GET("/todo", getAllTodos)

        // run the Gin server
        router.Run()
}
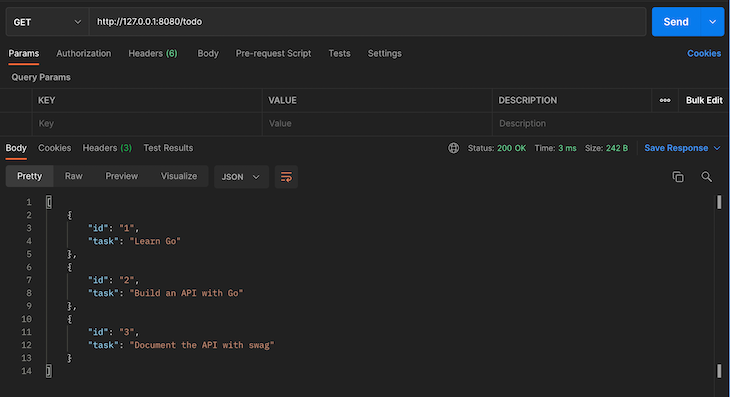
Test the getAllTodos route by running the Gin server and making a request via Postman like so:
go run main.go
getTodoByID routeCreate a route handler that will accept a GET request from the client and a todo ID, then return the details of the associated item from the todo list.
Add the following code to the main.go file:
func getTodoByID(c *gin.Context) {
        ID := c.Param("id")

        // loop through todoList and return item with matching ID
        for _, todo := range todoList {
                if todo.ID == ID {
                        c.JSON(http.StatusOK, todo)
                        return
                }
        }

        // return error message if todo is not found
        r := message{"todo not found"}
        c.JSON(http.StatusNotFound, r)
}
Register the getTodoById handler to the Gin router. Add the following code to the router configuration in main.go:
router.GET("/todo/:id", getTodoByID)
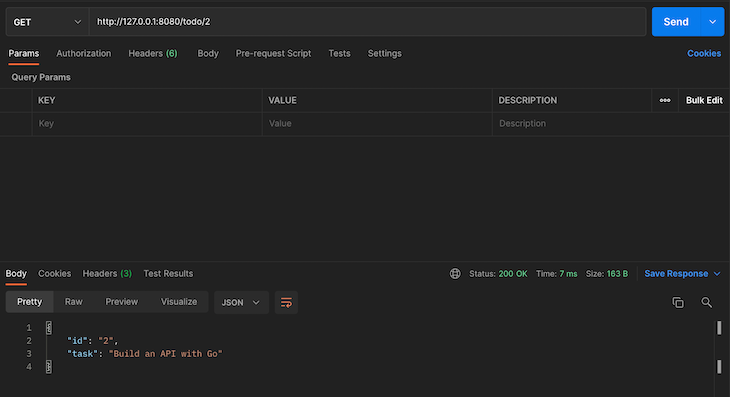
Test the getTodoById route by making a request via Postman like so:
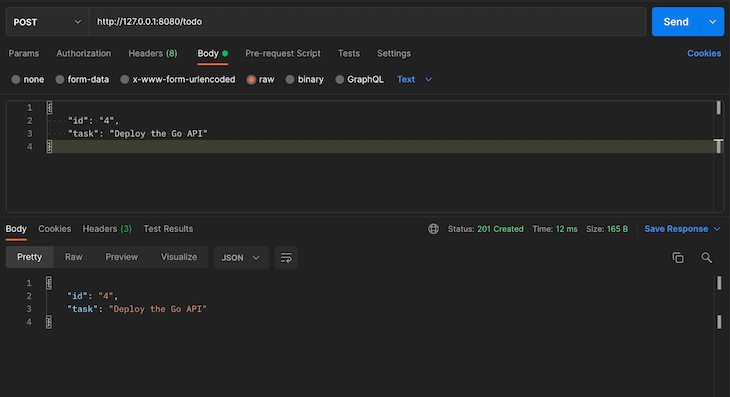
createTodo routeCreate a route handler that will accept a POST request from the client with a todo ID and task, then add a new item to the todo list.
Add the following code to the main.go file:
func createTodo(c *gin.Context) {
        var newTodo todo

        // bind the received JSON data to newTodo
        if err := c.BindJSON(&newTodo); err != nil {
                r := message{"an error occurred while creating todo"}
                c.JSON(http.StatusBadRequest, r)
                return
        }

        // add the new todo item to todoList
        todoList = append(todoList, newTodo)
        c.JSON(http.StatusCreated, newTodo)
}
Register the createTodo handler to the Gin router. Add the following code to the router configuration in main.go:
router.POST("/todo", createTodo)
Test the createTodo route by making a request via Postman like so:
deleteTodo routeCreate a route handler that will accept a DELETE request from the client along with a todo ID, then remove the associated item from the todo list. Add the following code to the main.go file:
func deleteTodo(c *gin.Context) {
        ID := c.Param("id")

        // loop through todoList and delete item with matching ID
        for index, todo := range todoList {
                if todo.ID == ID {
                        todoList = append(todoList[:index], todoList[index+1:]...)
                        r := message{"successfully deleted todo"}
                        c.JSON(http.StatusOK, r)
                        return
                }
        }

        // return error message if todo is not found
        r := message{"todo not found"}
        c.JSON(http.StatusNotFound, r)
}
Register the deleteTodo handler to the Gin router. Add the following code to the router configuration in main.go:
router.POST("/todo", deleteTodo)
Test the deleteTodo route by making a request via Postman like so:

Swag is middleware that helps to automatically generate RESTful API documentation with Swagger 2.0 for Go directly from source code using annotations. It requires you to specify how your routes work and automates the entire Swagger documentation creation process.
Swag is compatible with many Go web frameworks and has various integrations for them. This tutorial will use the Gin integration.
Install the Swag package in your project. In the terminal, type:
go get -u github.com/swaggo/swag/cmd/swag
go get -u github.com/swaggo/gin-swagger
go get -u github.com/swaggo/files
Initialize Swag in your project. In the terminal, type:
swag init
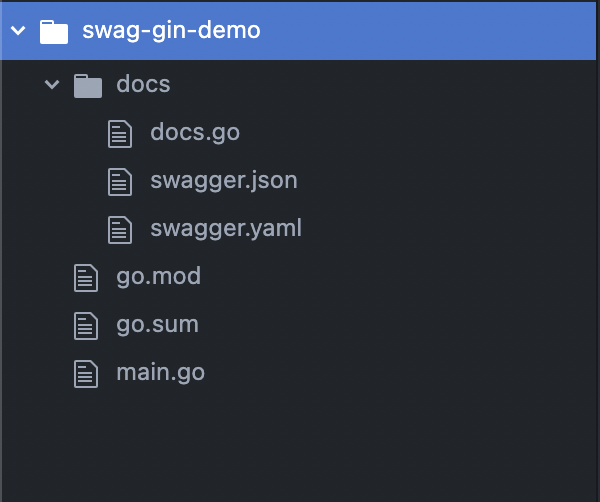
This will make Swag parse your annotations and generate the Swagger documentation for your code into the newly created docs folder.
If your terminal does not recognize swag init when executed, you need to add the Go bin folder to PATH.
Update the imports in the main.go file with the code below:
import (
        "github.com/gin-gonic/gin"
        swaggerFiles "github.com/swaggo/files"
        ginSwagger "github.com/swaggo/gin-swagger"
        "net/http"
        _ "swag-gin-demo/docs"
)
If you noticed, we imported swag/files, swaggo/gin-swagger, and the docs package (for effects) into the server code.
The General API annotations contain basic information about the API documentation (title, description, version, contact info, host, and license).
Add the following set of annotations to the main.go file (preferably before the main function):
// @title Go + Gin Todo API
// @version 1.0
// @description This is a sample server todo server. You can visit the GitHub repository at https://github.com/LordGhostX/swag-gin-demo

// @contact.name API Support
// @contact.url http://www.swagger.io/support
// @contact.email [email protected]

// @license.name MIT
// @license.url https://opensource.org/licenses/MIT

// @host localhost:8080
// @BasePath /
// @query.collection.format multi
Swag also lets you define your General API annotations in another file. You can learn how to do that here.
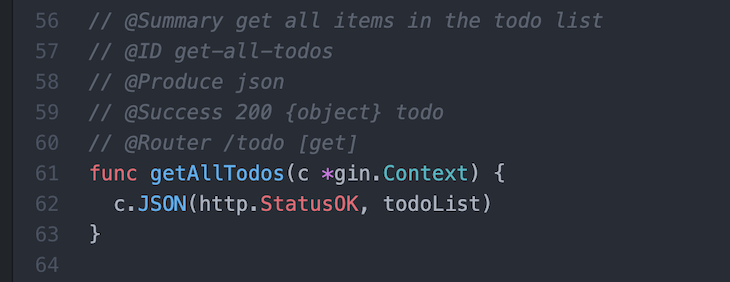
controller codeAPI operation annotations contain how the controller works (description, router, request type, parameters, and response codes). Let’s see how to add annotations for the getAllTodos route.
Add the following annotations right before the getAllTodos function in the main.go file:
// @Summary get all items in the todo list
// @ID get-all-todos
// @Produce json
// @Success 200 {object} todo
// @Router /todo [get]
In the code above, we defined the following:
@Summary, the summary of what the route does@ID, a unique identifier for the route (mandatory for every route)@Produce, the route response data type@Success 200, the response model for expected status codes@Router /todo [get], the route URI and accepted request methodWe will add annotations for the getTodoByID route. Add the following code right before the getTodoByID function in the main.go file:
// @Summary get a todo item by ID
// @ID get-todo-by-id
// @Produce json
// @Param id path string true "todo ID"
// @Success 200 {object} todo
// @Failure 404 {object} message
// @Router /todo/{id} [get]
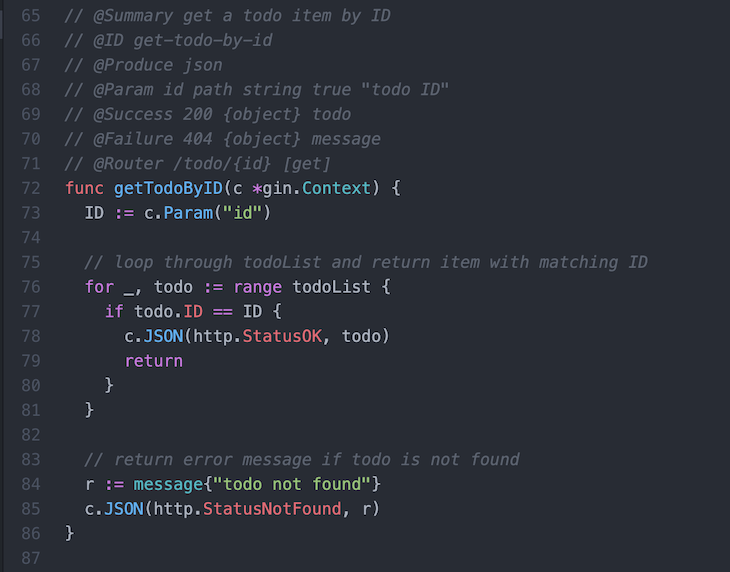
Here, we specified to Swag that the route accepts a mandatory string parameter called id attached to the request path. It has the name todo ID with @Param id path string true "todo ID".
Next, we will add annotations for the createTodo route. Add the following code right before the createTodo function in the main.go file:
// @Summary add a new item to the todo list
// @ID create-todo
// @Produce json
// @Param data body todo true "todo data"
// @Success 200 {object} todo
// @Failure 400 {object} message
// @Router /todo [post]
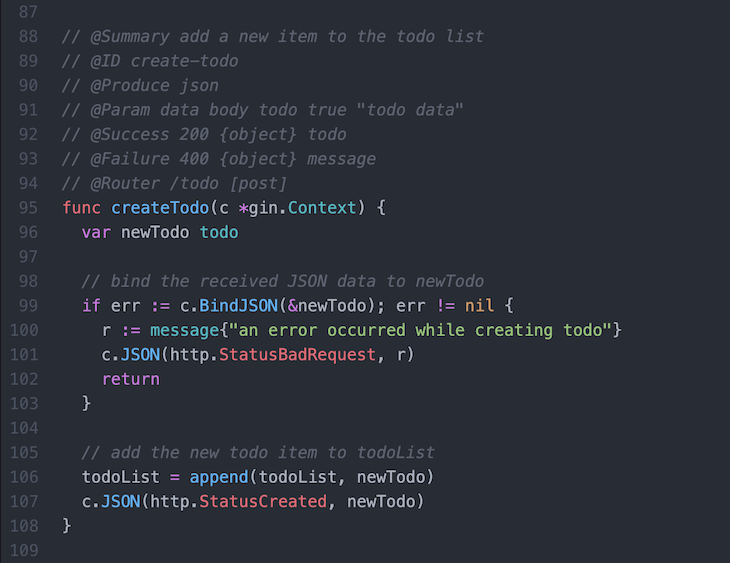
Here, we specified to Swag that the route accepts a mandatory todo parameter called data attached to the request body. It has the name todo data with @Param data body todo true "todo data".
We will add annotations for the deleteTodo route. Add the following code right before the deleteTodo function in the main.go file:
// @Summary delete a todo item by ID
// @ID delete-todo-by-id
// @Produce json
// @Param id path string true "todo ID"
// @Success 200 {object} todo
// @Failure 404 {object} message
// @Router /todo/{id} [delete]

Now you have defined all the annotations for the server and routes, let’s view and test the documentation.
To generate the documentation from your code, run swag init again in the terminal like so:
swag init
We have to run swag init each time we update the annotations in the code, so the documentation is regenerated and updated accordingly.
We also have to register a route handler to the Gin router responsible for rendering the Swagger documentation created by Swag. Add the following code to the router configuration in main.go:
// docs route
router.GET("/docs/*any", ginSwagger.WrapHandler(swaggerFiles.Handler))
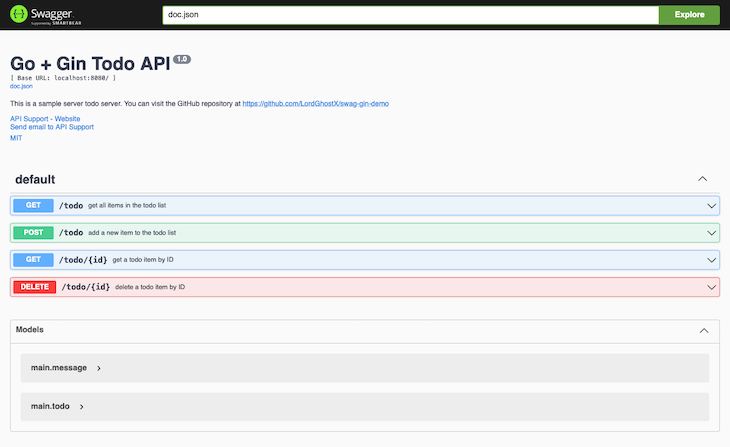
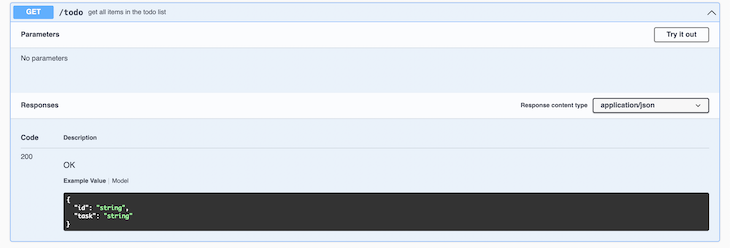
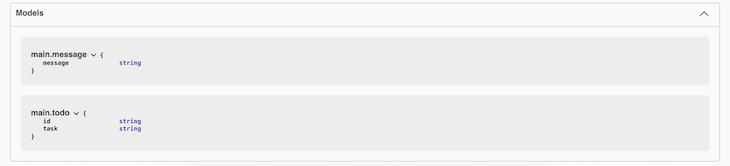
Now that we have configured the docs route, run the server and navigate to the /docs/index.html URI in your browser and you’ll see the generated Swagger documentation:
go run main.go
This article showed you how to seamlessly generate Swagger documentation for web APIs built with Go using Swag. You can learn more about Swag from its official documentation.
We chose to use Swagger because of the numerous features and functionalities that make it easy to create and maintain documentation for web APIs.
The source code of the web API built and documented in this tutorial is available on GitHub for you to explore.
Install LogRocket via npm or script tag. LogRocket.init() must be called client-side, not
server-side
$ npm i --save logrocket

// Code:

import LogRocket from 'logrocket';
LogRocket.init('app/id');
// Add to your HTML:

<script src="https://cdn.lr-ingest.com/LogRocket.min.js"></script>
<script>window.LogRocket && window.LogRocket.init('app/id');</script>

Learn about TypeScript v6’s breaking changes, new ES2025 features, and deprecated options. A complete migration guide from v5 to prepare for v7.

Learn how Vite+ unifies Vite, Vitest, Oxlint, Oxfmt, Rolldown, and Node.js management in one CLI.

AI companies are buying developer tools as coding agents turn runtimes, package managers, and linters into strategic infrastructure.

Learn how AI-assisted development governance uses rules, agents, hooks, and protocols to help AI coding tools produce safer, more consistent code.
Hey there, want to help make our blog better?
Join LogRocket’s Content Advisory Board. You’ll help inform the type of content we create and get access to exclusive meetups, social accreditation, and swag.
Sign up now

