For some years now, developers have faced many performance challenges while using traditional JavaScript runtimes like Node.js and Deno. Even though these frameworks are used by giant tech companies like Google, Amazon, and Facebook, they still have some drawbacks. Bun was developed to address these challenges.

In this tutorial, you’ll learn how to develop cross-platform apps with Bun v1.1. To follow along with this tutorial, ensure you have Node and npm installed on your computer.
If you’re not familiar with Bun, here’s a quick recap. Bun is a relatively new JavaScript runtime that uses the JavaScriptCore engine for running, building, testing, and debugging JavaScript and TypeScript code.
While Node.js and Deno run on the JavaScript V8 engine, Bun runs directly on the JavaScriptCore engine. This solves the performance issues seen in Node.js and makes setting up, building, and bundling JavaScript code faster.
It also makes Bun compatible with all npm packages, and even makes installation two times faster than with the npm i command. Bun’s startup is up to four times faster than Node, which can boost your development experience.
Bun v1.1 was released with a lot of new features that complement the previous releases. First, it made Bun’s installation much simpler, as well as more similar to the way you’d do it in a Node.js project. Let’s discuss other attributes that were brought with this version 1.1 release in detail.
Bun was only running on Unix-based operating systems before now, but the Bun v1.1 release adds support for Windows 10. It’s been tested in Windows and passed 98 percent of the tests that were also done for MacOS and Linux, showing that the Bun’s runtime, test runner, package manager, and bundler can run on Windows machines.
To run Bun on your Windows computer, open PowerShell and run this command:
powershell -c irm bun.sh/install.ps1 | iex
Bun was built with high speed in mind, and it’s relatively faster than other JavaScript runtimes like Node.js. This makes it all the more impressive that the v1.1 release has doubled the speed by integrating JavaScript, TypeScript, and JSX into Bun’s custom-built transpiler.
Also, the file caching mechanism allowed Bun to cache files that exceeded 50KB (which was introduced earlier in v1.0), contributing to the improved performance of Bun v1.1 and its command-line utilities like tsc.
The Bun shell has been upgraded to work as a multi-platform shell, working on both Unix-base operating systems and Windows operation systems. This upgrade implied the process of writing Javascript code by removing all the unnecessary ambiguous complexities associated with it.
To maintain the speed of Bun and its ability to work well across platforms, the team introduced a .Bunx file format in the v1.1 release. The .Bunx file serves as a cross-platform symlink that runs scripts with either Bun or Node.js, depending on the file system.
This new feature solves several problems, such as:
terminate batch job? (Y/n), which can halt the development processLet’s get some hands-on experience with cross-platform development in Bun by building a to-do application. This tutorial should help you better understand Bun’s strengths and how to use it in your projects. We’ll create a Bun server and cover how to integrate Bun with React-Native to build a cross-platform application.
Before we start building an application using Bun v1.1, you need to install it on Mac, Linux, and Windows operating systems. Run the command below to install Bun globally on your computer:
npm install -g bun
Note that, for Windows users, Bun works only on Windows 10 v1809 as of the time of creating this tutorial.
The above command will install the latest version (v1.1.x) of Bun on your computer. Verify the installation with the command below:
bun --version
You should see the installed version appear on a new line in your terminal:

With Bun installed on your macOS, Linux, or Windows computer, create a directory for your project and change the directory into the folder:
mkdir bunapp
cd bunapp
Then, create a new project with this command:
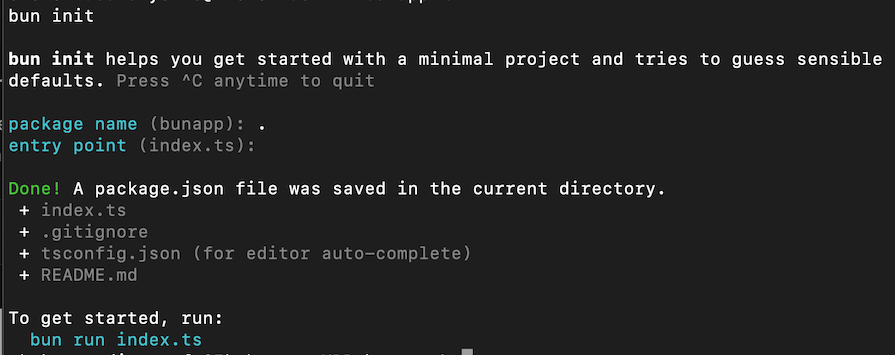
bun init
This will create a new project.json file with with an entry index.ts file in your project directory. Once the init command is completed, install the dependencies by running npm install:

Update the code in the index.ts file to create a web server using Bun’s built-in HTTP module:
const server = Bun.serve({
    port: 3000,
    fetch() {
      return new Response("Bun!");
    },
  });

  console.log(`Listening on http://localhost:${server.port}`);
Now start the server with this command:
bun run index.ts
You will see Listening on http://localhost:3000 on your terminal.
Currently, Bun runs server-side JavaScript and TypeScript projects. However, you could also use Bun in your React Native projects to run Node.js dependencies and scripts. To integrate Bun into your React Native project, first create the project with Bun:
bun create expo my-bun-app
Then, update your package.json file to replace the npm or Yarn scripts with Bun commands:
"scripts": {
    "start": "bun expo start",
    "android": "bun expo run:android",
    "ios": "bun expo run:ios",
    "web": "bun expo run:web"
  },
Now, update your App.js file to build a to-do application with the code snippets below:
import React, { useState } from 'react';
import { Text, View, TextInput, Button, FlatList, TouchableOpacity } from 'react-native';
export default function App() {
  return (
    <View style={styles.container}>
      <Text style={styles.title}>To-Do App</Text>
      <TextInput
        style={styles.input}
        placeholder="Enter a task"
        value={task}
        onChangeText={setTask}
      />
      <Button title="Add Task" onPress={addTask} />
      <FlatList
        data={tasks}
        renderItem={({ item }) => (
          <TouchableOpacity onPress={() => removeTask(item.key)}>
            <Text style={styles.task}>{item.text}</Text>
          </TouchableOpacity>
        )}
      />
    </View>
  );
}
The above code creates a to-do app that will allow users to create a list of tasks. The users can add, remove, and view the list of tasks added. We’ve added event listeners and attached the functions required for the app to function to the component.
Now add the addTask and removeTask functions above the return keyword:
const [task, setTask] = useState('');
const [tasks, setTasks] = useState([]);
const addTask = () => {
  if (task.length > 0) {
    setTasks([...tasks, { key: Date.now().toString(), text: task }]);
    setTask('');
  }
};
const removeTask = (key) => {
  setTasks(tasks.filter(task => task.key !== key));
};
In this code, we created a tasks state to store the list of to-dos, along with a task to manage the current input value for a new task, hold the value entered from the keyboard, and use setTask to update it.
Then we created the addTask function to add a new task to the list of tasks and the removeTask to remove a to-do by its ID. The removeTask will filter through the arrays of tasks to remove the one that matches the selected task’s ID.
Lastly, add the code snippet below to style the application:
const styles = StyleSheet.create({
  container: {
    flex: 1,
    backgroundColor: '#fff',
    alignItems: 'center',
    justifyContent: 'center',
    padding: 20
  },
  title: {
    fontSize: 24,
    marginBottom: 20
  },
  input: {
    height: 40,
    borderColor: 'gray',
    borderWidth: 1,
    marginBottom: 10,
    paddingHorizontal: 10,
    width: '100%'
  },
  task: {
    padding: 10,
    fontSize: 18,
    backgroundColor: '#f9c2ff',
    marginBottom: 5,
    textAlign: 'center'
  }
});
Now start the application by running the command below:
npm run start
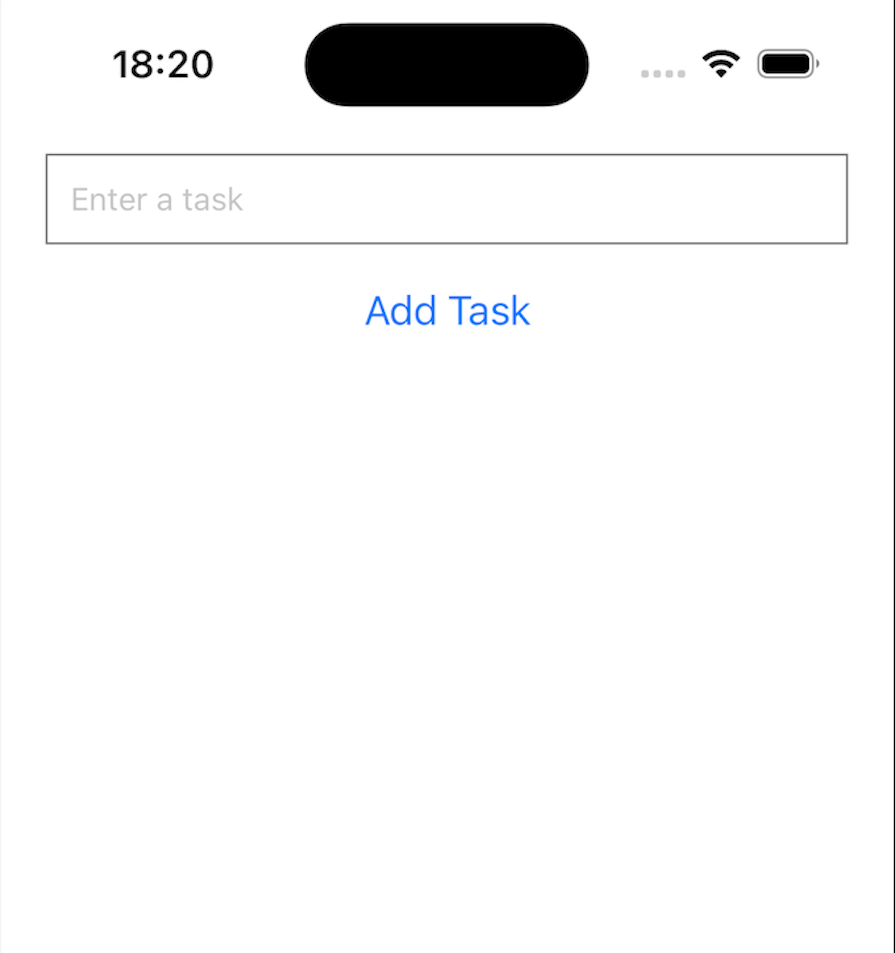
Then select the device you wish to run the application on. The app will look like the screenshot below on iPhone:

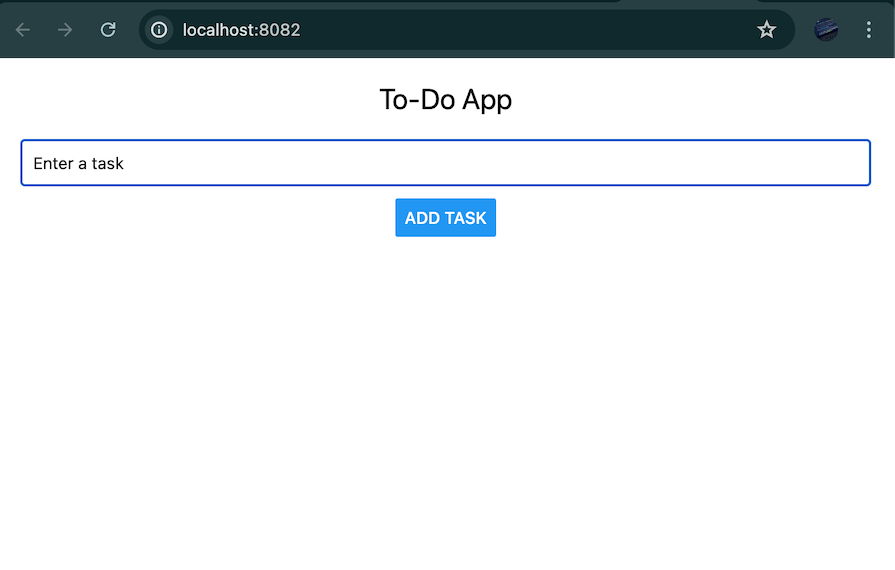
On a web browser, it will look like the screenshot below:

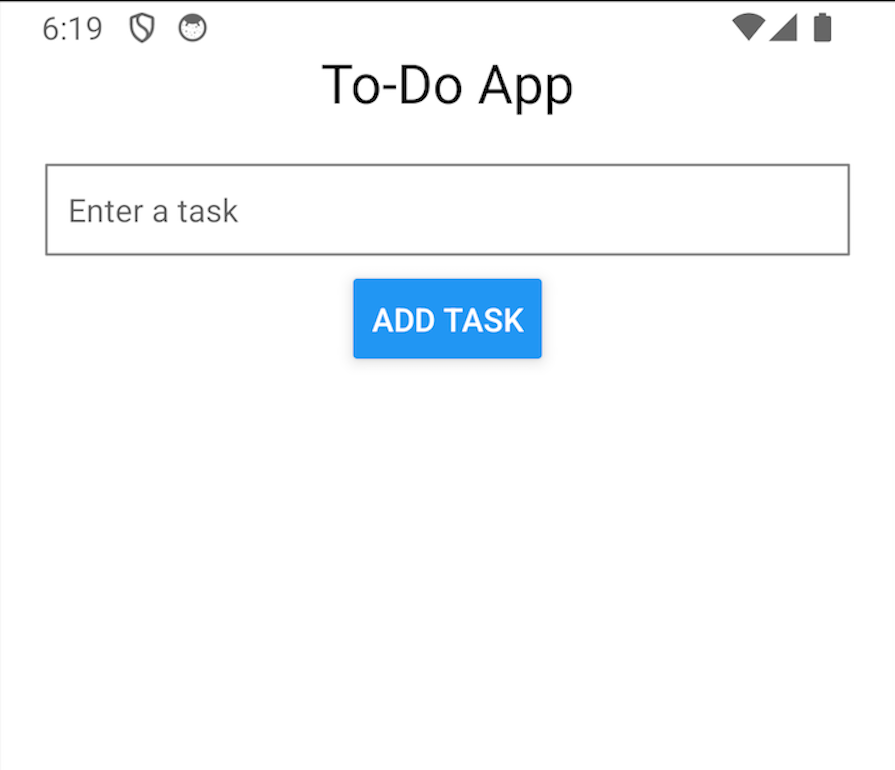
It will look the screenshot below on Android devices:

You can see that all of our components are present and functional, although they render slightly differently on each device type. Our cross-platform app works correctly!
If you want more consistent styling across devices, you may need to do some extra work at this stage, but now you know you can build an app with Bun that works on different platforms.
Node.js, Bun, and Deno are all well-known JavaScript runtimes that were developed for building scalable and performant applications.
Some years after Ryan Dahl developed Node.js, he co-created Deno to fix some of the challenges he identified in Node. As technology evolved over the years, developers discovered other challenges that neither Node nor Deno solved, such as performance, simplified JavaScript, and TypeScript development.
While Deno and Bun offer better alternatives to Node.js, they haven’t been able to beat Node‘s massive adoption by big tech companies and the community of developers it has. Let’s compare these three frameworks across various aspects.
Node relies on the V8 engine and is the most mature and popular JavaScript runtime. Deno runs on the V8 JavaScript engine — exactly like Node, but with additional sandboxing security.
Bun is another runtime that is available for Deno or Node — not as a runtime itself, but as an integration, depending on the project’s requirements.
Deno supports TypeScript by default, which eliminates the need to add a separate transpiling tool. Node.js requires a separate transpiling tool such as Babel to transpile TypeScript or new JavaScript features.
Similar to Deno, Bun has a default support for transpiling.
Deno supports ECMAScript modules and also uses CommonJS modules. Node.js was first developed for npm with the CommonJS build targets, but it now supports ESM as well.
Bun also supports ESM and is compatible with CommonJS modules.
The Deno runtime contains a standard library with inbuilt APIs for HTTP, file systems, and networking. Node.js has a larger ecosystem of third-party libraries and modules used for implementing different kinds of functionalities.
Bun depends on the Deno or Node.js runtimes for web API support.
Deno is developed to support hot reloading by default. To enable hot reloading in Node, you’d have to install a third-party package like Nodemon.
Bun works with hot reload capabilities from either Deno or Node.js.
Below is a table summarizing the aspects we discussed for Node.js, Bun, and Deno:
| Features | Node.js | Bun | Deno |
|---|---|---|---|
| JavaScript runtime | V8 engine; most mature and popular | Integration with Deno or Node.js | V8 engine with additional sandboxing security |
| Transpiler capabilities | Requires separate tools like Babel | Default support for transpiling | Default support for TypeScript |
| ESM and CommonJS compatibility | Supports both (initially CommonJS) | Supports both | Supports both |
| Web API support | Large ecosystem of third-party libraries | Depends on Deno or Node.js | Standard library with inbuilt APIs |
| Hot reloading functionality | Requires third-party packages like Nodemon | Works with capabilities from Deno or Node.js | Supported by default |
| Cross-platform functionality | Supported by default | Supported as of v1.1, although additional styling may be needed | Supported by default |
Throughout this tutorial, we’ve learned how to build a cross-platform application with Bun v1.1.
We started by reviewing what Bun is and exploring the new features released in Bun v1.1. Then, we saw how to build a cross-platform to-do app using the Bun runtime, as well as how to integrate Bun with React Native. Lastly, we compared Bun with other JavaScript runtimes like Node.js and Deno.
I hope you find this guide helpful. If you have any further questions or run into any issues, feel free to comment below.
 Monitor failed and slow network requests in production
Deploying a Node-based web app or website is the easy part. Making sure your Node instance continues to serve resources to your app is where things get tougher. If you’re interested in ensuring requests to the backend or third-party services are successful, try LogRocket.

LogRocket lets you replay user sessions, eliminating guesswork around why bugs happen by showing exactly what users experienced. It captures console logs, errors, network requests, and pixel-perfect DOM recordings — compatible with all frameworks.
LogRocket's Galileo AI watches sessions for you, instantly identifying and explaining user struggles with automated monitoring of your entire product experience.
LogRocket instruments your app to record baseline performance timings such as page load time, time to first byte, slow network requests, and also logs Redux, NgRx, and Vuex actions/state. Start monitoring for free.
Would you be interested in joining LogRocket's developer community?
Join LogRocket’s Content Advisory Board. You’ll help inform the type of content we create and get access to exclusive meetups, social accreditation, and swag.
Sign up now
Discover how to use Gemini CLI, Google’s new open-source AI agent that brings Gemini directly to your terminal.

This article explores several proven patterns for writing safer, cleaner, and more readable code in React and TypeScript.

A breakdown of the wrapper and container CSS classes, how they’re used in real-world code, and when it makes sense to use one over the other.

This guide walks you through creating a web UI for an AI agent that browses, clicks, and extracts info from websites powered by Stagehand and Gemini.