Separating the backend and frontend has become the norm in developing full-stack applications. But there aren’t many options out there to host a full-stack app on a single provider.
In this post, we will see step by step how to deploy a full-stack JavaScript application using Node.js and React on Begin with Begin Data. Let’s get the ball rolling!
A true full-stack application would not only cover the backend and the frontend, but also incorporate the data storage layer. There aren’t many options that provide a managed solution for all three pieces.
There’s just a handful of options if you want to quickly try out your idea without paying a dime. Vercel and Qovery are two that come to mind for handling both the backend and frontend.
If you identify yourself as a frontend developer who mainly knows one language — JavaScript — setting up a database and understanding all the backend and data layer aspects might become overwhelming pretty fast. This is the area where Begin.com shines. Let’s see why.
As a frontend developer, you want to write the frontend parts, but if need be, you could probably dabble a bit in the backend if you feel it is familiar territory.
Begin provides unparalleled, ultra-usable abstractions on top of popular AWS services many of us are scared to configure and glue together, including AWS Lambda and DynamoDB. You can get from code to a working URL in 30 seconds — for free, at that.
All this makes Begin very frontend-friendly. As they say on their homepage, “Begin makes serverless absurdly easy.” They also add, “No servers. No config. No sweat.” Let’s test out these claims.
Begin may provide us with highly usable abstractions on top of AWS Lambda, but it comes with its own opinions on how to use it.
Begin is like a SaaS version of Architect. It is a serverless framework that helps you build massively scalable serverless applications. It is open source, and its features include the ability to work locally.
Architect has a defined project layout and prescriptions on how to share code between Lambda functions. With these opinions, Architect does make deploying, logging, and monitoring a breeze.
In the next step, we will see how to build a simple news app that fetches the latest US news from sources like CNN, ABC News, and The Guardian.
Before we dive into the code, below are some things you should know:
Next, we will look at how to build the news app.
By now, you know that our goal is to build a small news application that will show the latest US news from a number of sources. It will look like the example below:

This example app will have two main parts: the backend written in Node.js and the frontend in React. The data for this news app will be stored in Begin Data, which is a very useful abstraction on top of DynamoDB. Time to get our hands dirty with some code now.
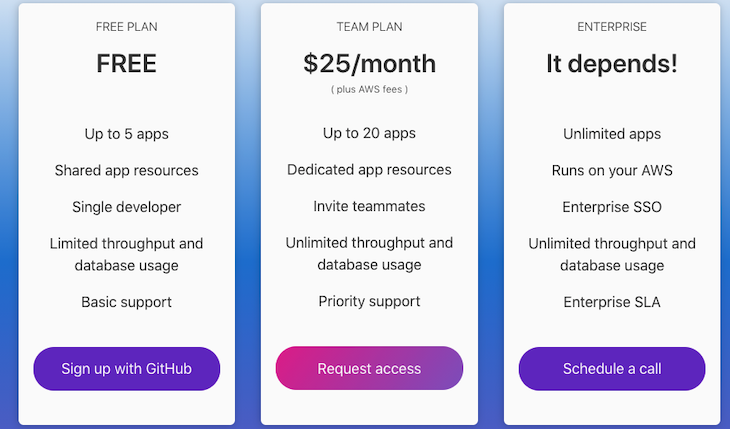
To start using Begin, please go to the homepage, click the Sign up with GitHub button, and authorize with your GitHub account. Begin has a generous free plan that accommodates five free apps, so please do sign up with them.
We will use a Begin example of Node.js and React to start with. We will later modify it to become our US news app.
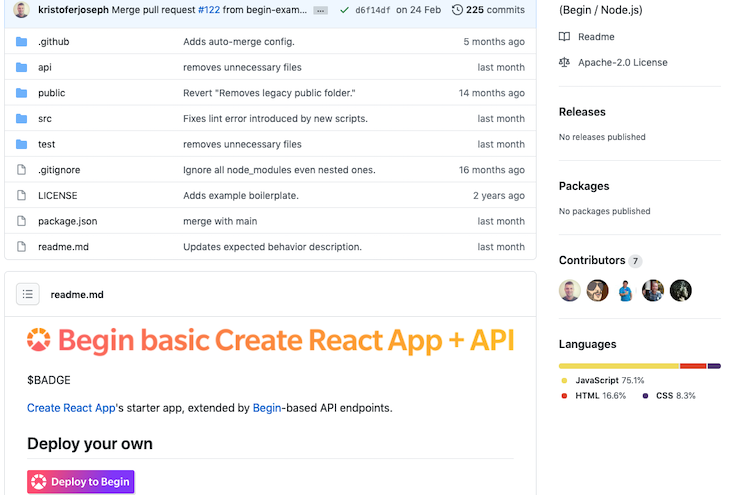
Head over to the Begin Node + React example app and click the Deploy to Begin button, as seen below:
Since we are already logged in, it will take us to the following screen:
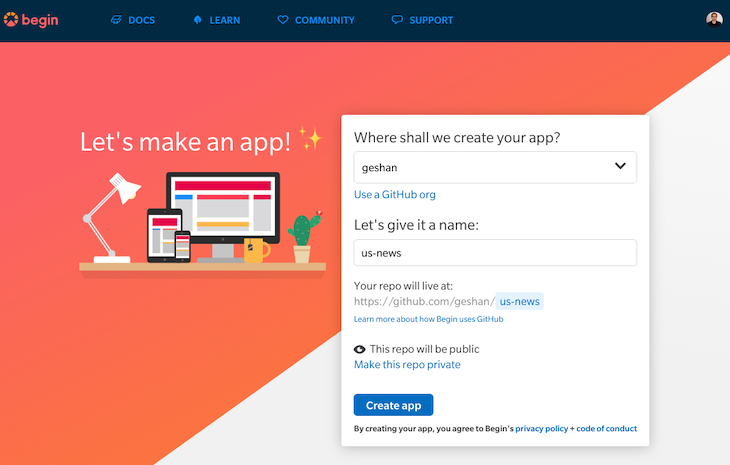
You will need to allow Begin to access your GitHub. When you click the Create app button, it will create the Begin app as a new repository on your GitHub account. In my case, it created this open source GitHub repo on my account.
It will start the CI/CD process and deploy the app on a unique Begin URL, as seen below:
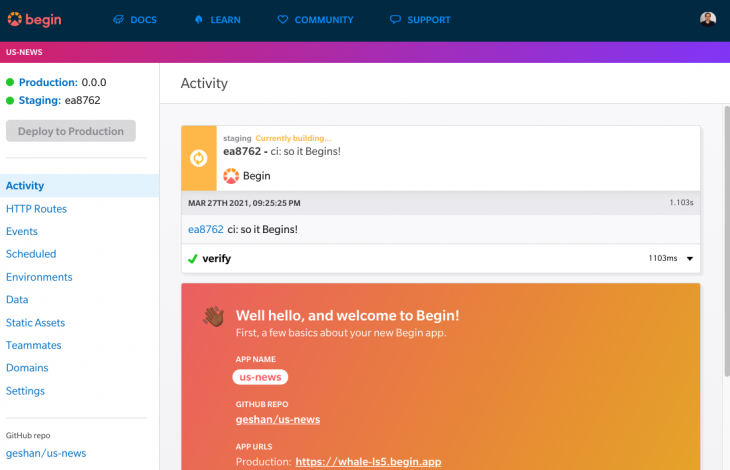
You will need to wait 2–3 minutes for the build and deployment process to complete, then you can visit the staging environment of your new Begin app. It has a very simple API, which React calls to show its content.
After some time, the build and deploy processes are done:

If we hit our staging URL, which, in my case, was https://whale-ls5-staging.begin.app/, we will see a basic React app:
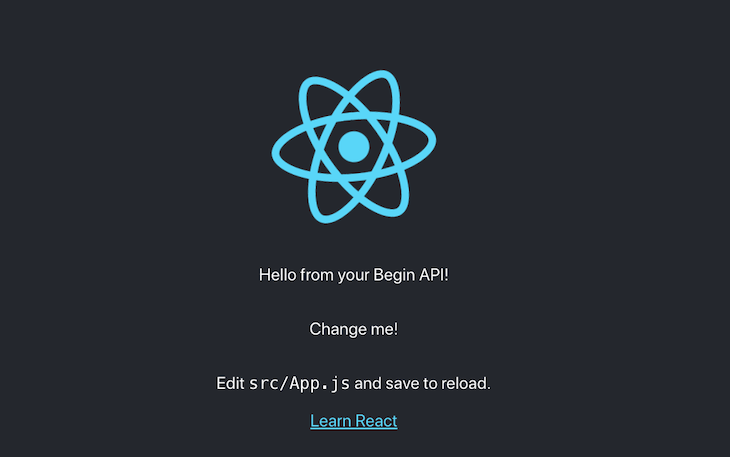
Hooray! Our basic React app with a super-simple Node.js backend is up and running on Begin.com.
It will only deploy to production when we push a new tag on GitHub. Begin asks us to use SemVer for releases with Git tags.
Now we will move on to actually building our news API that will be consumed by React.
We currently have a dummy API for our example application available at /api. It simply responds with a message Hello from your Begin API!. We will delete this API and add two new GET APIs.
The first will be accessible at /api/news to get the latest news saved in Begin Data. The second can be reached at /api/fetch-news to fetch the news from sources’ RSS feeds and save it in the Begin data table. Let’s take a look at the code to do all this.
First, clone the repository somewhere on your machine so you can edit it, then run npm install to get all the dependencies. To build these two new APIs, we will first remove the http section from the package.json file’s arc section and make it look like the below:
"arc": {
    "app": "react-hello",
    "static": {
      "folder": "build",
      "spa": true
    }
},
As the next step, we will delete the api folder present on the root:
rm -rf api
If you want to delete it with a GUI, I leave that decision up to you.
app.arc fileSubsequently, we will add an app.arc file that defines the routes and Begin data table we will use to store news. The app.arc file looks like this:
@app
react-hello

@static
folder build

# json api
@http
get /api/news
get /api/fetch-news

@tables
data
  scopeID *String
  dataID **String
  ttl TTL
A couple of important things to note here are:
GET API endpoints, /api/news and /api/fetch-news, which will show the news and fetch the news from our defined sources and save it on Begin Data@tables that tells Begin we want to add a table called news with a time to live (TTL) field. We will find out the use of the TTL field later on.For the API routes to function properly, we’ll need the rss-parser module because we’re fetching the news from the sources’ RSS feeds. Install it with:
npm i --save rss-parser
Then we will add the two files to serve the two API endpoints in the http folder, as below:
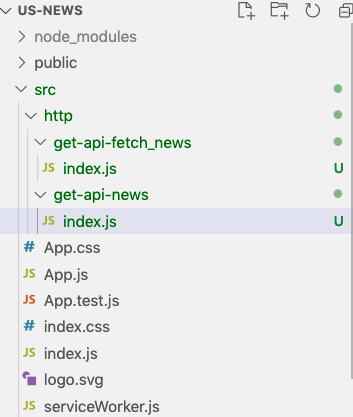
The first file is index.js in the get-api-fetch_news folder. This is where most of the interesting things happen:
const data = require('@begin/data');
const Parser = require('rss-parser');
const parser = new Parser();
const table = 'news';

function formatFeedStories(stories, source) {
  const MAX_STORIES = 10;
  let formattedStories = [];
  let count = 0;
  for (story of stories) {
    formattedStories.push({
      headline: story.title.trim(),
      url: story.link,
      published_date: story.pubDate,
      source });
    if (count === MAX_STORIES - 1) {
      break;
    }
    count++;
  }

  console.log(`Formatted ${formattedStories.length} storied from ${source}`, formattedStories);
  return formattedStories;
}

async function getStories(feedUrl, source) {
  try {
    const feed = await parser.parseURL(feedUrl);
    return formatFeedStories(feed.items, source);
  } catch (err) {
    const errMessage = `Error while parsing feed from news stories for ${source}`;
    console.log(errMessage, err);

    return [];
  }
}

async function saveNewsFromSources() {
  const newsSources = [
    {
      feedUrl: 'http://rss.cnn.com/rss/edition.rss',
      source: 'CNN'
    },
    {
      feedUrl: 'https://abcnews.go.com/abcnews/topstories',
      source: 'ABC News'
    },
    {
      feedUrl: 'https://www.theguardian.com/us-news/rss',
      source: 'The Guardian'
    }
  ]
  let totalStoriesSaved = 0;

  for (newsSource of newsSources) {
    const stories = await getStories(newsSource.feedUrl, newsSource.source);
    const savedCount = await saveNews(stories);
    console.log(`Saved ${savedCount} stories from ${newsSource.source}`);
    totalStoriesSaved += savedCount;
  }

  return totalStoriesSaved;
}

async function saveNews(stories) {
  const storiesToInsert = [];
  const ttl = (Date.now() / 1000) + (60 * 60 * 6); // 6 hours from now in seconds

  for(story of stories) {
    const key = story.url.slice(-50);
    const newsExists = await data.get({table, key});
    if (!newsExists) {
      storiesToInsert.push({table, key, ttl, ...story});
    }
  }

  if (storiesToInsert.length) {
    await data.set(storiesToInsert);
  }

  return storiesToInsert.length;
}

exports.handler = async function http(req) {
  try {
    const noOfStoriesSaved = await saveNewsFromSources();
    return {
      statusCode: 200,
      headers: {
        'content-type': 'application/json; charset=utf8'
      },
      body: JSON.stringify({message: `${noOfStoriesSaved} News stories fetched and saved!`})
    }
  } catch(e) {
    console.log(`e: ${e.message}`, e);
    return {
      statusCode: 500,
      headers: {
        'content-type': 'application/json; charset=utf8',
      },
      body: JSON.stringify({'message': `some error occured while fetching news, ${e.message}`})
    }
  }
}
The main heavy lifting of the application is in this 100-line file. Let’s run through the main points.
The news sources’ RSS feed URLs are defined in saveNewsFromSources. In our case, we’re pulling from CNN, ABC News, and The Guardian. For each of these news sources, it gets the 10 latest stories in the getStories function.
After that, it saves the stories in the saveNews function. This saves the stories in the news table with a time to live (TTL) of 6h only if it doesn’t already exist. So the stories stay in the database for a maximum of 6h, and they are auto-deleted after their TTL expires.
Another point to notice here is that we generate a unique key from the last 50 characters from the URL (N.B., keys in Begin Data need to be a maximum of 50 characters). We use this same key to check whether the news already exists; if it exists, we don’t save it again.
We log things like the stories and the number of news stories saved for our own reference. We also log errors should any occur.
Consequently, we will add the other index.js file in http/get-news-api folder to fetch the news from the data store and serve it up as JSON.
const data = require('@begin/data');

function pick(obj, attributes = []) {
  return Object.entries(obj)
    .filter(([key]) => attributes.includes(key))
    .reduce((obj, [key, val]) => Object.assign(obj, { [key]: val }), {});
}

exports.handler = async function http (req) {
  const newsStories = await data.get({table:'news', limit: 20});
  let storiesToShow = [];

  for (newsStory of newsStories) {
    const pickedStory = pick(newsStory, ['headline', 'url', 'published_date', 'source']);
    if (pickedStory.headline) {
      storiesToShow.push(pickedStory);
    }
  }

  const sortedStories = storiesToShow.sort((a, b) => new Date(b.published_date) - new Date(a.published_date));
  return {
    headers: {
      'content-type': 'application/json; charset=utf8',
      'cache-control': 'no-cache, no-store, must-revalidate, max-age=0, s-maxage=0'
    },
    statusCode: 200,
    body: JSON.stringify(sortedStories)
  }
}
This small 30-line file is pretty straightforward. It queries Begin Data to get 20 news stories. It only picks up the four fields from the response headline, url, published_date, and source. It does a quick sort based on the date to put the latest news first, then the sorted stores are sent out as JSON. Pretty easy!
In the next section, we will see how the React code and CSS are changed to show the latest 20 news stories we pull from the Begin data table.
The example application already calls the /api endpoint to render the dummy text, but we deleted the old API and added the new news APIs. As such, we need to change the code to call our APIs and show the latest news on the React app. We will change the App.js in src as follows:
import React, { useState, useEffect } from 'react';
import logo from './logo.svg';
import './App.css';

const App = () => {
  const [stories, setStories] = useState([]);
  const [message, setMessage] = useState('loading...');
  useEffect(() => {
    async function fetchNewsStories () {
      try {
        await (await fetch('/api/fetch-news')).json();
        const data = await (await fetch('/api/news')).json();
        setStories(data)
        const message = data.length ? '' : 'No stories found';
        setMessage(message);
      } catch (err) {
        console.log(`err: ${err.message}`, err);
        setMessage('could not fetch stories');
      }
    }
    fetchNewsStories()
  }, []);

  return (
    <div className="App">
      <header className="App-header">
        <img src={logo} className="App-logo" alt="logo" />
        <h2>Latest News</h2>
        {message}
        <div className="stories">
          {Array.isArray(stories) && stories.map(story => <h3><a href={story.url} target="_blank" rel="noreferrer">{story.headline}</a> - {story.source}</h3>)}
        </div>
      </header>
    </div>
  );
}

export default App;
Let’s do a quick rundown of what the React app is doing. We’re doing two things in the fetchNewsStories function inside the useEffect. The first is to call the API to fetch the news and write it to the datastore.
Next, we call the get news API and set it as stories. The fetch news call is idempotent as it will add news that is not in the database with the unique key.
The stories array variable is later looped with a Map and we show the headline and source as H3 with a link to the news story. We show a loading message while the stories are loading, and if there’s an error, we show a could not fetch stories message to the users.
In addition, we will also remove background-color: #282c34; on line 12 and color: white on line 18 of App.css to make the news more readable.
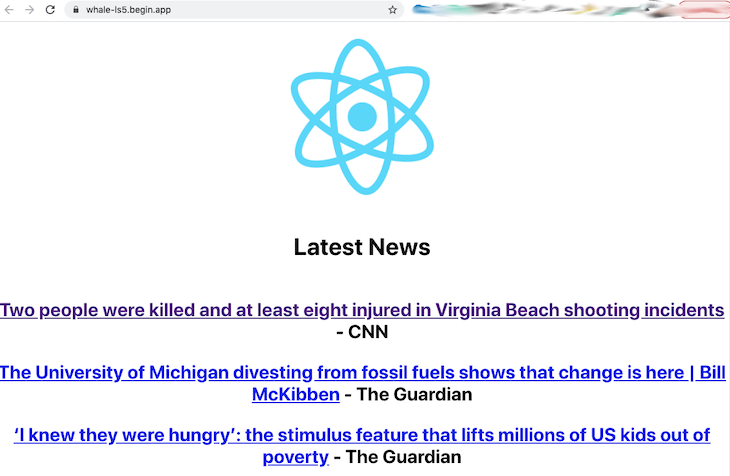
We can quickly test our app locally with npm start to see something like the below:
Congratulations! Your latest news app is working. If you want to try out what the API looks like in your local, you can hit http://localhost:3333/api/news to see the get news API’s JSON response. If it’s empty, first hit the fetch news API at http://localhost:3333/api/fetch-news to get the latest news from all three sources.
We’ll need to fix the tests written with tape so that the test step in the deployment passes. To do so, in the /test folder, we’ll change lines 17–26 of the api-test.js file to look like this:
test('get /api/news', async t => {
  t.plan(1)
  try {
    let result = await tiny.get({url: `${base}/api/news`})
    t.ok(result, 'Got API response', result.body);
  } catch (err) {
    t.fail(err)
  }

})
We changed the API path in the test and simply assert that we get a response back from the API. It’s not a great test, but it lets us reach our goal of deploying the API.
Now we will deploy it to Begin. To deploy the changes, we will commit and push them to GitHub. Main code changes are available as a pull request for your reference; test code changes are in a different pull request.
We will open a pull request for the news app. After the pull request is merged, it will auto-deploy these changes on the staging environment as seen below:
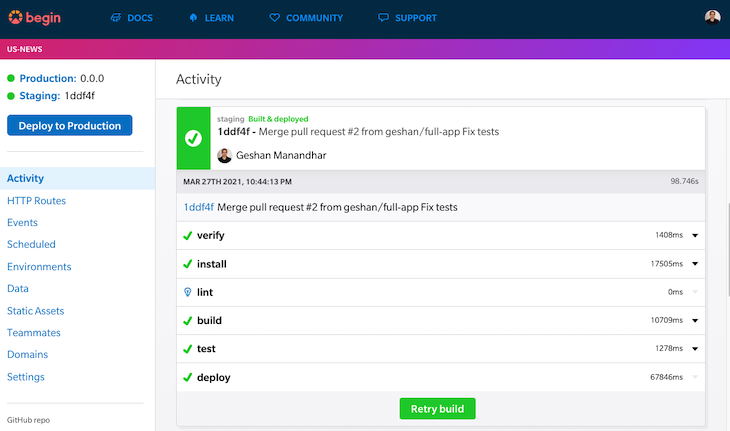
After that, if we check the staging URL, we can see the app working similar to our local. We can visit staging by clicking the Staging link in the top left of the above page.
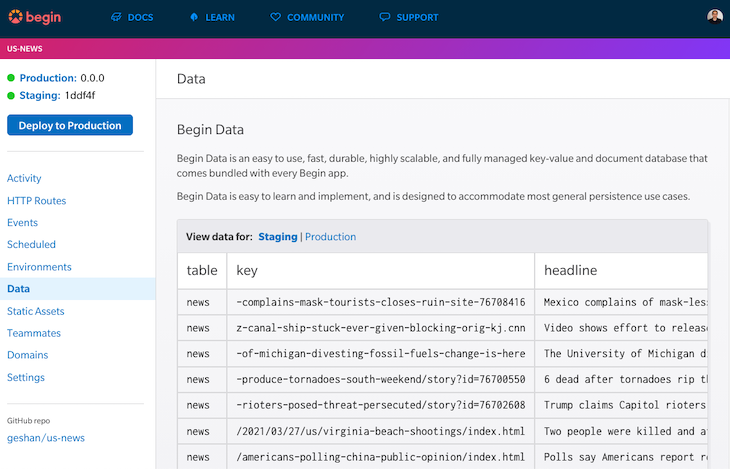
If we check the Data page, we can see that our news stories data is written on Begin Data as well:
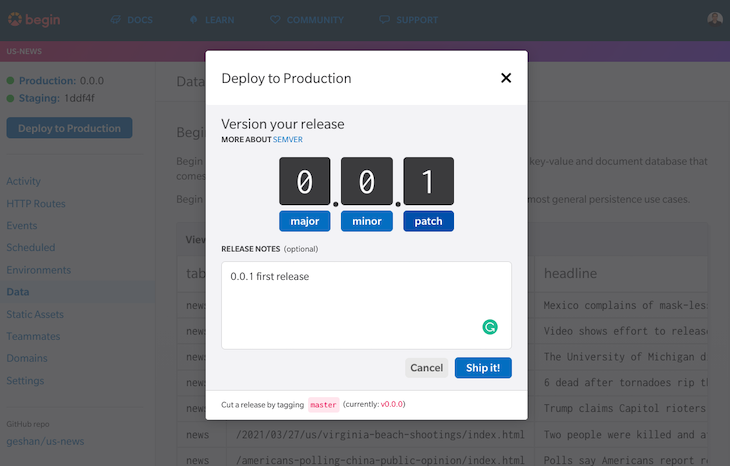
Finally, we will deploy a production release. Click the Deploy to Production button and select a version — I will go with 0.0.1, with a release note of 0.0.1 first release — and click the Ship It! button:
Similar to staging, it will take its time to build, and it deploys by provisioning the resources for us:
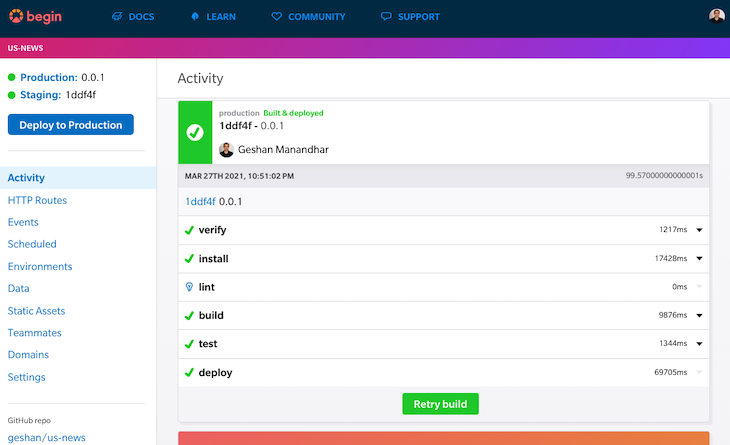
All of these updates are available via the Activity link. After that, we can check how the app looks in production:
You can check my app’s production version to see how it works.
Begin provides other features, too, like scheduled functions. We could have used a scheduled function in place of the fetch news API that runs every 6h and fills up our news table. That is one of the reasons I used a TTL of 6h.
You can also check out event functions, which can replace a queue for any functionality that needs one. The example depicts an account verification email, which is a great candidate to use a queue, but it is solved very well by an event-based kind of approach.
You might also want to explore more of Begin — for instance, mapping custom domains is another great feature. All in all, Begin provides solid abstractions on top of AWS services without locking you in.
We saw how we can deploy a full-stack JavaScript app on Begin.com using Begin Data to store our data, too. Rather than using two or three services for data, backend, and frontend, we can utilize Begin to host a full application and its data on the same service. I hope you explore more Begin features like scheduled function and customs domains to easily deploy your idea and have it working with less effort.
Install LogRocket via npm or script tag. LogRocket.init() must be called client-side, not
server-side
$ npm i --save logrocket

// Code:

import LogRocket from 'logrocket';
LogRocket.init('app/id');
// Add to your HTML:

<script src="https://cdn.lr-ingest.com/LogRocket.min.js"></script>
<script>window.LogRocket && window.LogRocket.init('app/id');</script>
Would you be interested in joining LogRocket's developer community?
Join LogRocket’s Content Advisory Board. You’ll help inform the type of content we create and get access to exclusive meetups, social accreditation, and swag.
Sign up now
Discover how to use Gemini CLI, Google’s new open-source AI agent that brings Gemini directly to your terminal.

This article explores several proven patterns for writing safer, cleaner, and more readable code in React and TypeScript.

A breakdown of the wrapper and container CSS classes, how they’re used in real-world code, and when it makes sense to use one over the other.

This guide walks you through creating a web UI for an AI agent that browses, clicks, and extracts info from websites powered by Stagehand and Gemini.


2 Replies to "Deploying a full-stack Node.js + React app for free with Begin"
Hi Geshan Manandhar,
I followed steps mention in this guide, but test are failing. Can you help me resolving this issue. Test are passing on local machine but failing on begin site.
> [email protected] test /tmp/cf9dd36c4da4-4fb2-b199-0f30d828c05f
> cross-env NODE_ENV=testing PORT=6666 tape test/**/*-test.js test/*-test.js | tap-spec
Set up env
✔ sandbox loaded
Start the Sandbox
App ⌁ react-hello
Region ⌁ us-west-2
Profile ⌁ @aws profile / AWS_PROFILE not configured
Version ⌁ –
cwd ⌁ /tmp/cf9dd36c4da4-4fb2-b199-0f30d828c05f
✓ Sandbox Found Architect project manifest: package.json
✓ Sandbox No testing environment variables found
✓ Sandbox Project files hydrated into functions
✓ Sandbox Started service discovery emulator
✓ Sandbox Loaded routes (HTTP API mode / Lambda proxy v2.0 format)
get /api ………………………… api
http://localhost:6666
✓ Sandbox Started in 26ms
❤︎ Local environment ready!
✔ should be strictly equal
get /api
events.js:291
throw er; // Unhandled ‘error’ event
^
Error: spawn ps ENOENT
at Process.ChildProcess._handle.onexit (internal/child_process.js:268:19)
at onErrorNT (internal/child_process.js:470:16)
at processTicksAndRejections (internal/process/task_queues.js:84:21)
Emitted ‘error’ event on ChildProcess instance at:
at Process.ChildProcess._handle.onexit (internal/child_process.js:274:12)
at onErrorNT (internal/child_process.js:470:16)
at processTicksAndRejections (internal/process/task_queues.js:84:21) {
errno: ‘ENOENT’,
code: ‘ENOENT’,
syscall: ‘spawn ps’,
path: ‘ps’,
spawnargs: [ ‘-o’, ‘pid’, ‘–no-headers’, ‘–ppid’, 153 ]
}
npm ERR! Test failed. See above for more details.
Hello @prasad, the easiest way out might be to comment the test out or delete that test, thanks!