
The Replay is a weekly newsletter for dev and engineering leaders.
Delivered once a week, it's your curated guide to the most important conversations around frontend dev, emerging AI tools, and the state of modern software.
Deploying applications to a web or cloud hosting platform is usually the last step in the development cycle, allowing users to access our apps at last. While there are many tools to make this happen, in this article, we will be learning how to deploy FastAPI applications to Vercel.

FastAPI is a modern and fast Python web framework for building backend API applications. FastAPI comes with support for API documentation powered by Swagger, security modules, and type checking to ensure correctness in code.
To demonstrate how FastAPI applications are deployed to Vercel, we will be building a simple notes app.
From this point, I’ll assume you have Python and Virtualenv installed. Check by running the commands below:
$ python3 --version
Then run:
$ virtualenv --version
Before we dive too deep, let’s map out the project structure and the installation of the dependencies needed for your application. Start by creating the project folder:
$ mkdir fastapi-notes-app && cd fastapi-notes-app
$ mkdir server
$ touch {main,server/api,server/routes,server/__init__}.py
Next, create a virtual environment in the base directory and install the dependencies needed:
$ virtualenv -p python3.8 venv
Next, we’ll activate the virtual environment, an isolated part of our application where we will install the dependencies for our app. To do so, run the command below:
$ source venv/bin/activate
With the virtual environment in place, install FastAPI and Uvicorn:
(venv)$ pip3 install fastapi uvicorn
Uvicorn is an ASGI (Asynchronous Server Gateway Interface) server that enables us to run our application.
Now, let’s create a base route to verify that the installation of FastAPI and Uvicorn was successful.
server/api.py
Start out by importing FastAPI and initializing the class method into a variable, app:
from fastapi import FastAPI

app = FastAPI()
Next, define the route:
@app.get("/", tags=["Root"])
async def read_root():
  return {
    "message": "Welcome to my notes application, use the /docs route to proceed"
   }
To run the application, you have to define an entry point in the main.py file. In the entry point, we’ll be using Uvicorn to run the server, as indicated earlier:
//main.py
import uvicorn

if __name__ == "__main__":
  uvicorn.run("server.api:app", host="0.0.0.0", port=8000, reload=True)
In the main block, we invoke the run method from Uvicorn and take in the following parameters:
Run the main.py file:
(venv)$ python3 main.py
The above command should return an output like the one below in our command line:
INFO:     Uvicorn running on http://0.0.0.0:8000 (Press CTRL+C to quit)
INFO:     Started reloader process [20586] using statreload
INFO:     Started server process [20588]
INFO:     Waiting for application startup.
INFO:     Application startup complete.
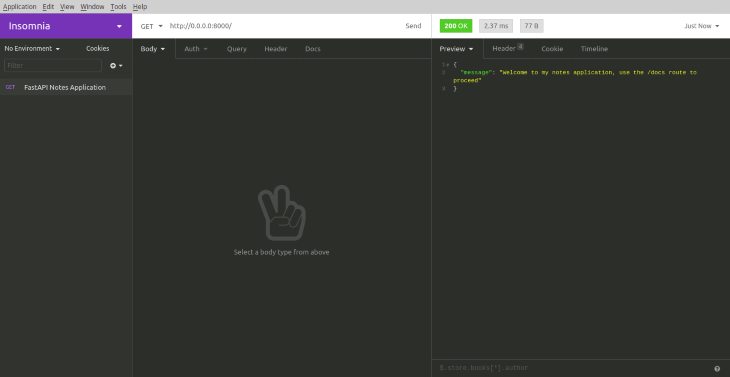
The application can be viewed on the browser on http://0.0.0.0:8000. We will be using Postman/Insomnia to test our application endpoints.
Feel free to swap any of these out for FastAPI’s interactive docs on
http://0.0.0.0:8000/docs.
Next, send a GET request to http://0.0.0.0:8000 on Postman (or Insomnia):
Let’s define the model schema for our application. This will represent how data is stored in our application. In the app folder, create a new file, model.py:
from typing import Optional
from pydantic import BaseModel

class NoteSchema(BaseModel):
  title: Optional[str]
  content: Optional[str]

  class Config:
    schema_extra = {
        "example": {
            "title": "LogRocket.",
            "content": "Logrocket is the most flexible publishing company for technical authors. From editors to payment, the process is too flexible and that's what makes it great."
        }
    }
In the code block above, we defined a Pydantic schema called NoteSchema, which represents how the notes data will be stored in our application’s temporary database. The subclass config holds an example request body, which will guide users when trying to send requests from the interactive docs.
Let’s define the routes for the CRUD operations in the routes.py file in the next section.
With the schema in place, let’s create an in-app database to store and retrieve our notes and import the notes schema.
routes.pyStart by importing FastAPI’s APIRouter class and NoteSchema:
from fastapi import APIRouter, Body
from fastapi.encoders import jsonable_encoder
from server.model import NoteSchema

router = APIRouter()
Just below the router variable, create a temporary database, notes:
notes = {
    "1": {
        "title": "My first note",
        "content": "This is the first note in my notes application"
    },
    "2": {
        "title": "Uniform circular motion.",
        "content": "Consider a body moving round a circle of radius r, wit uniform speed v as shown below. The speed everywhere is the same as v but direction changes as it moves round the circle."
    }
}
Next, define the routes for GET requests:
@router.get("/")
async def get_notes() -> dict:
    return {
        "data": notes
    }

@router.get("/{id}")
async def get_note(id: str) -> dict:
    if int(id) > len(notes):
        return {
            "error": "Invalid note ID"
        }

    for note in notes.keys():
        if note == id:
            return {
                "data": notes[note]
            }
In the code block above, we defined two routes:
/note to return all the available notes/note/{id} to return a note with an ID matching the one passedBefore proceeding to test the routes, include the notes router in the global route handler in api.py, like this:
from server.routes import router as NoteRouter

...

app.include_router(NoteRouter, prefix="/note")
The FastAPI().include_router() method is used to include routes declared in other files in the global route handler. This method comes in handy in applications where you split routes into separate files and directories.
With the notes route in place, let’s test the routes:
/note: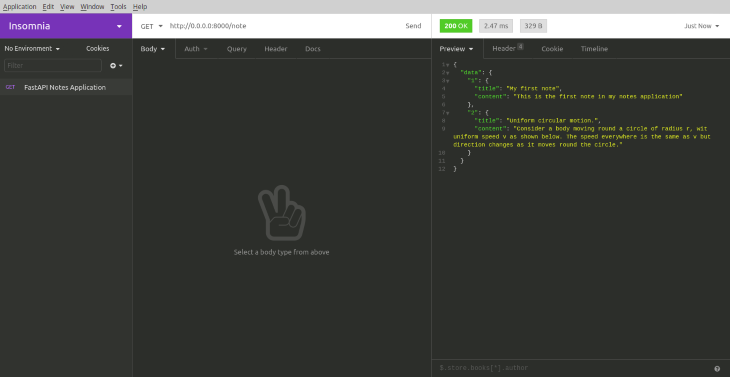
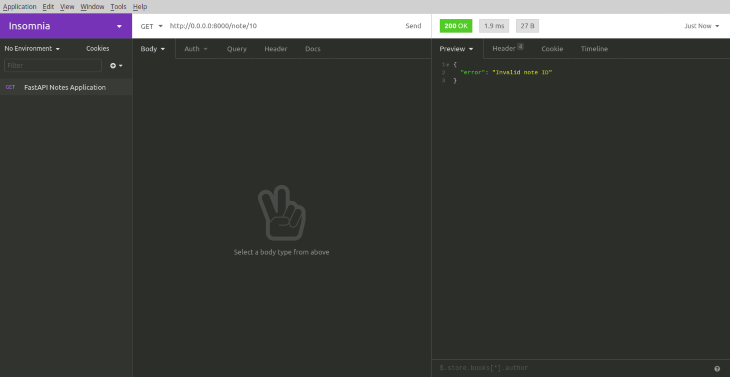
/note/{id}: In our temporary database, we added two notes with IDs 1 and 2. Passing an ID that isn’t in the notes database will return an error response. We’ll try both valid and invalid IDs, in that order: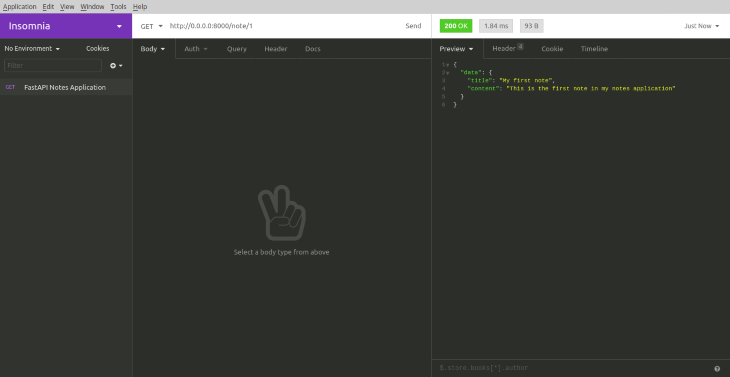
Now for an ID that’s not in the database:
Next, define the POST route to add a new note:
@router.post("/note")
async def add_note(note: NoteSchema = Body(...)) -> dict:
    note.id = str(len(notes) + 1)
    notes[note.id] = note.dict()

    return {
        "message": "Note added successfully"
    }
In the add_note function, we set the note to be of type NoteSchema, our model, and made it a required argument using Body(…). The ellipsis in the Body() statement indicates that this request body must be filled according to the schema specification.
To test the POST route, you need to change the request type from GET to POST in Postman/Insomnia and the URL address to http://0.0.0.0:8000/note. Next, set the request body to JSON and pass in the JSON code below:
{
    "title": "Deploying FastAPI applications to Vercel",
    "content": "In this article, you will be learning how to build and in turn deploy a FastAPI application to Vercel."
}
Now, send the request:
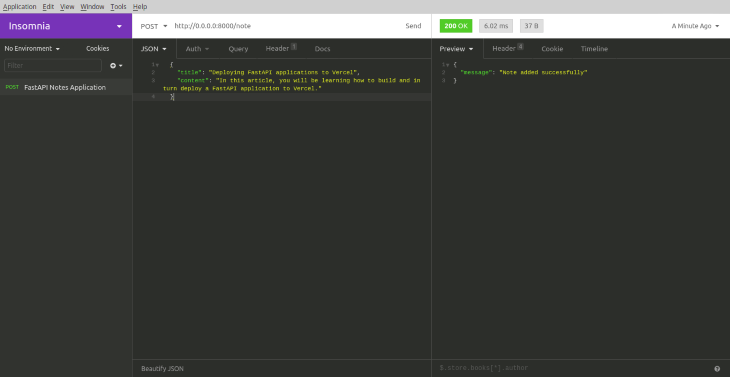
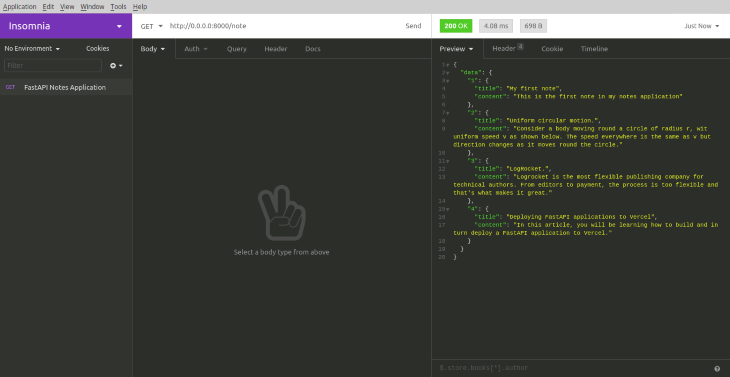
The note has been added successfully. Run a GET request on the /note endpoint to verify the addition:
Next, define the update and delete routes:
@router.put("/{id}")
def update_note(id: str, note: NoteSchema):
    stored_note = notes[id]
    if stored_note:
        stored_note_model = NoteSchema(**stored_note)
        update_data = note.dict(exclude_unset=True)
        updated_note = stored_note_model.copy(update=update_data)
        notes[id] = jsonable_encoder(updated_note)
        return {
            "message": "Note updated successfully"
        }
    return {
        "error": "No such with ID passed exists."
    }


@router.delete("/{id}")
def delete_note(id: str) -> dict:
    if int(id) > len(notes):
        return {
            "error": "Invalid note ID"
        }

    for note in notes.keys():
        if note == id:
            del notes[note]
            return {
                "message": "Note deleted"
            }

    return {
        "error": "Note with {} doesn't exist".format(id)
    }
In the update route, we are performing a partial update. We only update a note if the note exists; otherwise, we return an error message. We also apply the same logic to the delete route. We first check whether the note exists before deleting; otherwise, we return an error message. Let’s go on to test the routes.
Here’s the update route:
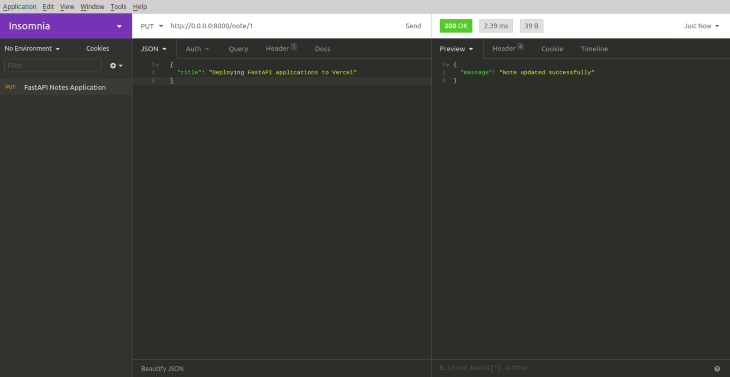
Now let’s delete the second note to test the delete route:
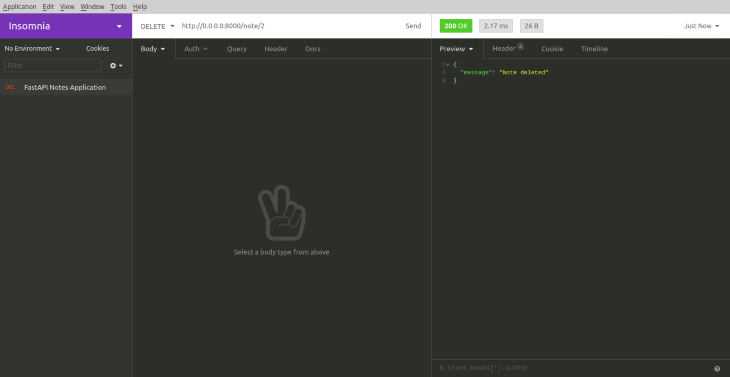
With the routes in place and tested, we can proceed with deploying to Vercel.
In this section, we’ll be deploying to Vercel. If you don’t have the Vercel command line tool installed, you can get it by running the following command:
yarn global add vercel
Next, log on:
vercel login
To deploy to Vercel, a vercel.json configuration file is needed. Create a vercel.json file in the parent directory and add the following JSON code:
{
  "builds": [
    {"src": "/server/api.py", "use": "@now/python"}
  ],
  "routes": [
    {"src": "/(.*)", "dest": "server/api.py"}
  ]
}
In the code block above, the builds key holds an array containing another object. In this object, we indicated the path to the application’s entry point. We also stated the package to be used when building our app in the routes object. We direct all routing to the server/api.py file.
Before we proceed to deployment, let’s create a requirements.txt file containing our application dependencies:
//requirements.txt
fastapi
uvicorn
With the configuration and requirements file in place, let’s initialize Vercel. Run this command in the parent directory:
vercel .
Follow the prompt in the console, and we should see a similar screen:

We have successfully deployed our application to Vercel in just four simple steps. We can preview the deployed application by clicking the links in the console or from our Vercel dashboard:
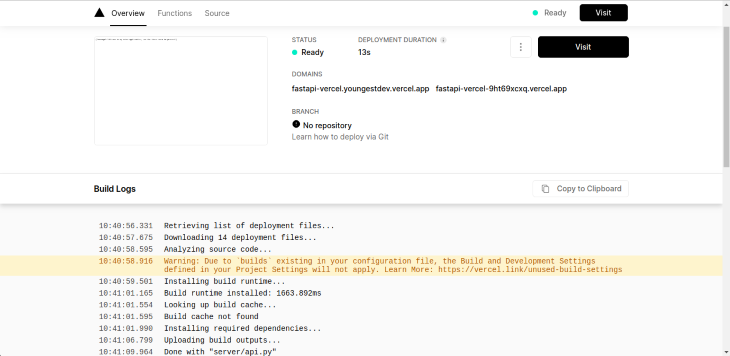
The application deployed in this article can be viewed here.
In this article, we have learned how to build and deploy a FastAPI application. You can read more on FastAPI from the official docs and you can find the code used in this article on GitHub.
Install LogRocket via npm or script tag. LogRocket.init() must be called client-side, not
server-side
$ npm i --save logrocket

// Code:

import LogRocket from 'logrocket';
LogRocket.init('app/id');
// Add to your HTML:

<script src="https://cdn.lr-ingest.com/LogRocket.min.js"></script>
<script>window.LogRocket && window.LogRocket.init('app/id');</script>

React Server Components and the Next.js App Router enable streaming and smaller client bundles, but only when used correctly. This article explores six common mistakes that block streaming, bloat hydration, and create stale UI in production.

Gil Fink (SparXis CEO) joins PodRocket to break down today’s most common web rendering patterns: SSR, CSR, static rednering, and islands/resumability.

@container scroll-state: Replace JS scroll listeners nowCSS @container scroll-state lets you build sticky headers, snapping carousels, and scroll indicators without JavaScript. Here’s how to replace scroll listeners with clean, declarative state queries.

Explore 10 Web APIs that replace common JavaScript libraries and reduce npm dependencies, bundle size, and performance overhead.
Would you be interested in joining LogRocket's developer community?
Join LogRocket’s Content Advisory Board. You’ll help inform the type of content we create and get access to exclusive meetups, social accreditation, and swag.
Sign up now
One Reply to "Deploying FastAPI applications to Vercel"
great article
Any idea on how to deploy fastapi on shared hosting server (cpanel)