
In this article, we’ll be creating a clone of Google Keep using React, React Hooks, Styled components, and Firebase. Google Keep is a note-taking app, and some of the features we’ll be replicating include creating notes and storing them in Firebase.

This is what we’ll be achieving: keep-react-clone.netlify.app.
The Replay is a weekly newsletter for dev and engineering leaders.
Delivered once a week, it's your curated guide to the most important conversations around frontend dev, emerging AI tools, and the state of modern software.
You’ll need basic knowledge of React (functional components), React Hooks, and JavaScript.
Also, make sure you have Node >= 8.10 and npm >= 5.6 installed on your machine. You can install Node.js here.
First let’s create a React app:
npx create-react-app google-keep-clone
cd google-keep-clone
Now we’ll install Firebase:
npm install --save firebase
Also install Styled components:
npm install --save styled-components
To create a Firebase project open the firebase console, sign in and create a project by clicking on “add project.”
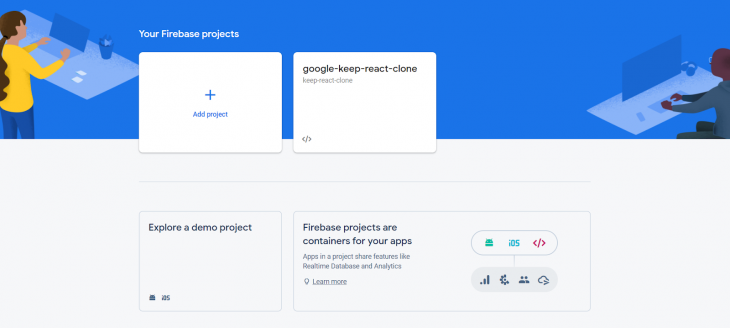
Then fill in your project name:
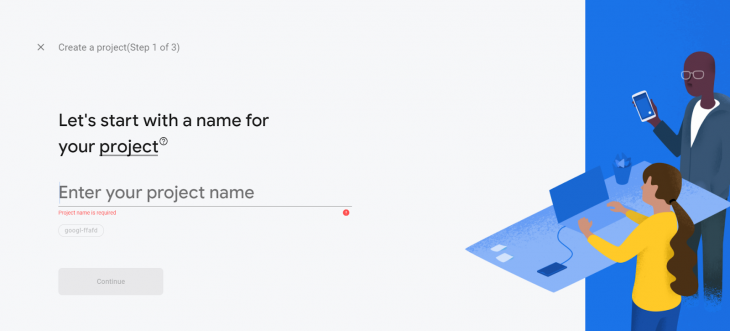
On the next page, you can decide to enable Google Analytics:

Finally, create the project.
Once that is done, it would take you to your Firebase console:

On the Firebase console, click on the settings icon next to Project Overview and navigate to Project Settings.
Scroll down to Your Apps and click the button for web app:
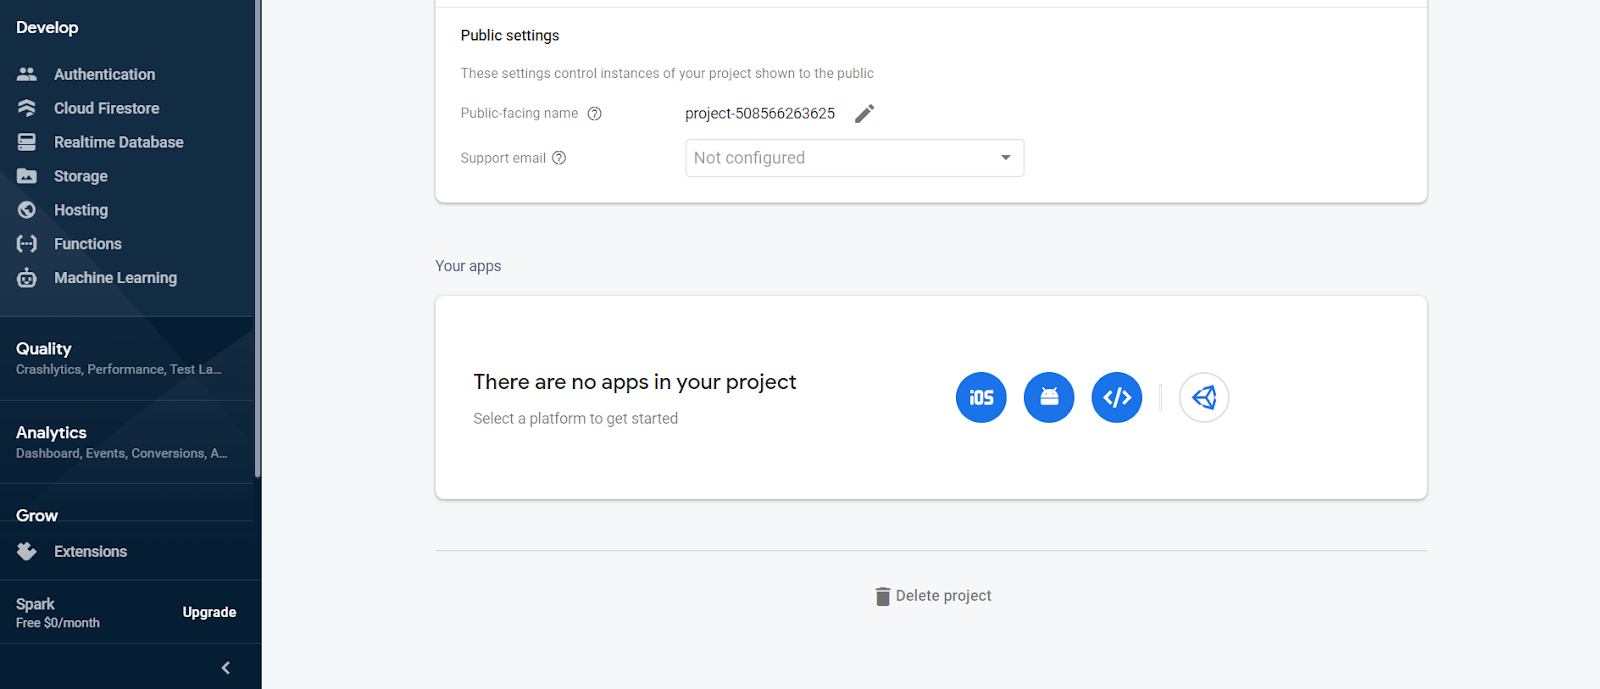
You should have an interface to register your web app open now. Fill the nickname and click the button:
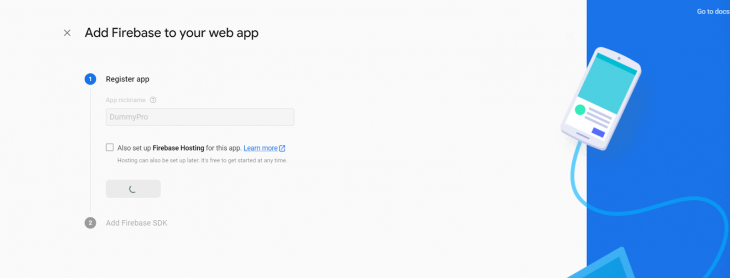
It should show your Firebase config details now, copy everything you have inside the script tag.
Going back to our code, create a Firebase.js file in your src folder, import the Firebase we installed, and paste everything you got from the config details in the script tag.
Don’t forget to export Firebase, as this is the file you’ll be importing to your React components.
You should have something like this:
import firebase from 'firebase';
  const firebaseConfig = {
    apiKey: "xxxxxxxxxx",
    authDomain: "keep-react-clone.firebaseapp.com",
    databaseURL: "https://keep-react-clone.firebaseio.com",
    projectId: "keep-react-clone",
    storageBucket: "keep-react-clone.appspot.com",
    messagingSenderId: "xxxxxxxx",
    appId: "xxxxxxxxxx",
    measurementId: "xxxxxxx"
  };

  firebase.initializeApp(firebaseConfig);
  firebase.analytics();
  export default firebase
Note: “xxxxxxxx” is just a placeholder — yours would be actual characters.
Clear the defaults in our App.js so you’re just left with your React and CSS imports, and the App component.
Now import the Firebase file into it:
import firebase from ./firebase
Let’s create our header.
This is what we want to achieve. It shouldn’t be too hard:
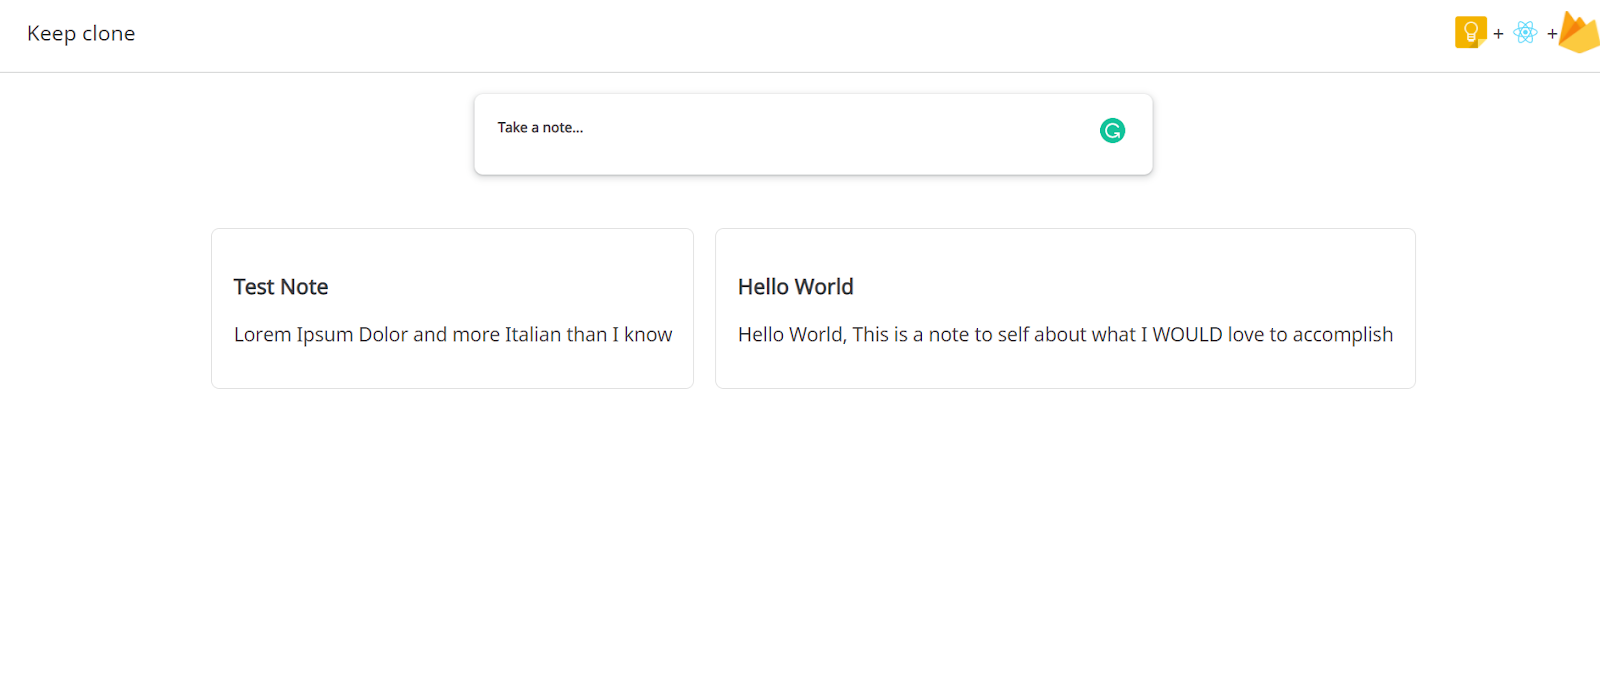
Let’s create a Header.js file inside our components folder (create the components folder in your src folder if you don’t see it there by default).
We’ll import React and Styled components:
import React from "react";
import styled from "styled-components";
Also, import your images for the logos:
import keepLogo from '../assets/keep-logo.png'
import reactLogo from '../logo.svg'
import firebaseLogo from '../assets/firebase-logo.png'
After this, we create our functional component and export it:
const Header = () => {
   return ();
  };

 export default Header;
Styled components help you write CSS in your JavaScript. This way you can create reusable elements with predefined styles.
To create a nav, with some styles which will be the wrapper for our header, we simply create a variable. Then, we call its value in our CSS styles in a backtick: preceded by styled.(name of element).
It’ll look like this:
const Nav = styled.nav`
  display: flex;
  justify-content: space-between;
  align-items:center;
  padding: 4px 25px;
  border-bottom: 1px solid rgba(60, 64, 67, 0.2);
  `;
Doing the same for our logos wrapper at the right end:
const ImgWrap = styled.div`
display: flex;
align-items:center;
`;
And our image element:
const Img = styled.img`
width:40px;
height:40px;
`;
With all these, we can update our Header function to look like this:
const Header = () => {
    return (
      <Nav>
        <p>Keep clone</p>
        <ImgWrap>
          <Img src={keepLogo} alt="Google keep logo" />
          <p>+</p>
          <Img src={reactLogo} alt="React logo"/>
          <p>+</p>
          <Img src={firebaseLogo} alt="firebase logo"/>
        </ImgWrap>
      </Nav>
    );
  };
Moving to the body of the app, let’s create a Main.js file and import React and styled components like we did above.
Then, we create a functional component called main where we return the main HTML element.
const Main = () =>{
   return(
      <main>
      </main>
    )
  }
  export default Main
Next, we create a form that will house the input for the title of our note and textarea for the note body. With our styled components, we’ll name it NoteInput.
const NoteInput = styled.form`
  box-shadow: 0 1px 2px 0 rgba(60,64,67,.3),
    0 2px 6px 2px rgba(60,64,67,.15);
  width:600px;
  border-radius:8px;
  margin:20px auto;
  padding:20px;
  `
Then the styling for our Title and TextArea.
const Title = styled.input`
    border:none;
    color:#000;
    display:block;
    width:100%;
    font-size:18px;
    margin:10px 0;
    outline:none;
    &::placeholder{
      color:#3c4043;
      opacity:1;
    }
  `
const TextArea = styled.textarea`
      border:none;
      color:#000;
      display:block;
      width:100%;
      font-family: 'Noto Sans', sans-serif;
      font-size:13px;
      font-weight:bold;
      outline:none;
      resize: none;
      overflow: hidden;
      min-height: 10px;
      &::placeholder{
        color:#3c4043;
        opacity:1;
      }
  `
Note: I’m not elaborating on the CSS styling because they are just basic styling and this article doesn’t aim to teach CSS.
Let’s add our NoteInput, Title, and TextArea to our component:
const Main = () =>{
   return(
      <main>
       <NoteInput action="">
         <Title type="text" placeholder="Title"/>
         <TextArea name="" id="" cols="30" rows="1" placeholder="Take a note..."/>
        </NoteInput>
      </main>
    )
  }
  export default Main
In our App.js file, we have to import both the Header and Main components to see what we have done so far. We’ll also import useState and UseEffect, we’ll come to them later:
import React, { useState, useEffect } from "react";
import Header from "./components/Header";
import Main from "./components/Main";
You should have this in your browser:

But looking at the Google Keep app, the title doesn’t show until you click on the TextArea. To achieve this, we’ll create a state for showInput and toggle it’s value between true and false depending on if the textarea is clicked or not.
const [showInput, setShowInput] = useState(false);
Let’s also create states for our title input and textarea:
const [textValue, setTextValue] = useState('');
const [titleValue, setTitleValue] = useState('');
We’ll then pass showInput, textValue, titleValue and their state handlers to the Main component.
<Main
textValue = {textValue}
titleValue = {titleValue}
showInput={showInput}
onShowInput = {(state)=>setShowInput(state)}
onTextChange = {(state)=>setTextValue(state)}
onTitleChange = {state=>setTitleValue(state)}
/>
In our Main.js, we can pass the props into our functional component and dynamically display the title input:
{props.showInput ? <Title type="text" name="" id=""
 placeholder="Title"
 value={props.titleValue}
 onFocus={()=>props.onTitleFocus(true)}
 onBlur={()=>props.onTitleFocus(false)}
 onChange={(e)=>props.onTitleChange(e.target.value)}
 /> : ''
 }
We’ll also add value and onChange event for the textarea, and set showInput to true onFocus.
<TextArea name="" id="" cols="30" rows="1"
            placeholder="Take a note..."
            value={props.textValue}
            onFocus={()=> {
              props.onShowInput(true);
            }}
            onChange={(e)=>props.onTextChange(e.target.value)}
          />
TextArea’s don’t grow automatically with text, so to ensure this, we create an autoGrow function
const autoGrow = (elem) =>{
      elem.current.style.height = "5px";
      elem.current.style.height = (10 +
      elem.current.scrollHeight)+"px";
    }
We’ll use the useRef Hook to pass the element we want into the autoGrow function.
To use useRef, we’ll have to import it so update your import to this:
import React, { useRef} from 'react'
And then we can use useRef Hook:
const textAreaRef = useRef(null);
We’ll add the ref value of the textarea to be textAreaRef:
ref={textAreaRef}
Also make sure with onFocus, our ref is being focused, and with onInput, we call the autoGrow function.
This is our updated TextArea now:
<TextArea name="" id="" cols="30" rows="1"
        placeholder="Take a note..."
        value={props.textValue} onFocus={()=> {
         props.onShowInput(true);
         textAreaRef.current.focus();
        }} onInput={()=>autoGrow(textAreaRef)} ref={textAreaRef}
        onChange={(e)=>props.onTextChange(e.target.value)}
/>
The way Google Keep works, when you click outside the textbox, that note is then added to the list. To achieve this, we have to be checking if the textarea and title inputs are focused on or not.
So let’s go back to our App.js file and create two new states: textFocused and titleFocused.
const [textFocused, setTextFocused] = useState(false);
const [titleFocused, setTitleFocused] = useState(false);
Pass it into your Main component like this:
onTextFocus={(state) => setTextFocused(state)}
onTitleFocus={(state)=>setTitleFocused(state)}
Going back to our Main.js to create the Title. Its onFocus event will set textFocused to true and onBlur will set textFocused to false.
onFocus={()=>props.onTitleFocus(true)}
onBlur={()=>props.onTitleFocus(false)}
Same applies for TextArea:
onFocus={()=>props.onTitleFocus(true)}
onBlur={()=>props.onTextFocus(false)}
We’ll then create a function that will be called when the App is clicked. This function checks if both textFocused and titleFocused are false and if either textValue or titleValue isn’t empty before adding a new note.
const blurOut = () => {
    if (!textFocused && !titleFocused) {
      if(textValue !== '' || titleValue !== ''){
        setShowInput(false)
        let noteObj = {
          title:titleValue,
          text:textValue
        }
        setTextValue('');
        setTitleValue('')
      }
    }
  };
You’ll notice we’ve only created a note object. Let’s create a state for our notes:
const [notes, setNotes] = useState([]);
We can add this after setTitleValue(‘ ‘)) in our blurOut function.
setNotes([...notes, noteObj])
In case you’re wondering why we use the spread operator, this basically adds noteObj to the preexisting notes that were there. You can read more on the spread operator.
To display our notes, let’s create a Note.js file for our note component.
There’s nothing much here apart from basic styling, so you can copy this:
import React from 'react'
  import styled from "styled-components";

  const NoteDiv = styled.div`
  padding:20px;
  border:1px solid #e0e0e0;
  border-radius:8px;
  text-align:left;
  font-size:18px;
  margin:10px;
  min-width:300px;
  `
  const H = styled.h3`
  font-size:20px;
  font-weight:bold;`
  const Note = (props) =>{
    return(
      <NoteDiv>
        <H>{props.note.title}</H>
        <p>{props.note.text}</p>
      </NoteDiv>
    )
  }
  export default Note;
Now, import Note.js into your Main.js component. We’ll first create a wrapper for the notes called NoteCon:
const NoteCon = styled.div`
padding:20px;
display:flex;
flex-wrap:wrap;
justify-content:center;
`
We’ll add the wrapper after NoteInput and map the notes we’ll be getting from App.js to the Note component. In case you don’t know about list rendering in React, look at this.
<NoteCon>
 {props.notes.map((note,index)=><Note note={note}
 key={index} />)}
</NoteCon>
Go back to App.js and pass notes as a prop to the Main component.
notes={notes}
We’ll also call the blurOut function onClick of the App component.
What we’ve done so far doesn’t persist. Once you refresh, it clears up. We need to store our notes information to Firebase and get it from there everytime we refresh.
Since we’ve already imported Firebase, we can call a reference to our data in the Firebase database and use Firebase inbuilt methods to store data.
const db = firebase.database().ref('data');
db.push().set(noteObj)
Our updated blurOut function should look like this ( I used try...catch for error handling):
const blurOut = () => {
    if (!textFocused && !titleFocused) {
      if(textValue !== '' || titleValue !== ''){
        setShowInput(false)
        let noteObj = {
          title:titleValue,
          text:textValue
        }
        setTextValue('');
        setTitleValue('')
        try{
          setNotes([...notes, noteObj])
            const db = firebase.database().ref('data');
            db.push().set(noteObj)
        }
        catch(error){
          console.log(error);
        }
      }
    }
  };
To fetch data, let’s create a function getData:
const getData = ()=>{}
Then we create an empty array for the notes, loop through each value in the database, and push to our array. We finally check to make sure the array isn’t empty before updating our state:
const getData = ()=>{
    let notesArr = [];
    try{
      const db = firebase.database().ref('data');
      db.orderByValue().once("value", snapshot =>{
        snapshot.forEach((note)=>{
          // console.log(notes)
          // setNotes([...notes, note.val()])
          notesArr.push(note.val());
        })

        if(notesArr.length !== 0){
         setNotes(notesArr)
        }
      })
     }
    catch(error){
       console.log(error)
    }
  };
Remember we imported the useEffect Hook. We’ll call our getData function inside the useEffect.
This React Hook makes sure that its function gets called immediately after the page renders.
useEffect(()=>{
 getData();
}, [])
The empty array at the end means this useEffect should only run once, at the initial time the component is mounted, which is what we want.
For reference, you can view this repo to see what I did practically.
With this, we’ve created a simple clone of Google Keep. However, some functionalities are still missing, such as editing a note, deleting, splitting into different categories, and even creating different database accounts for each user.
You can try adding these features and more on your own and I’ll be happy to see what you’ve done. You can reach me on Twitter.
Install LogRocket via npm or script tag. LogRocket.init() must be called client-side, not
server-side
$ npm i --save logrocket

// Code:

import LogRocket from 'logrocket';
LogRocket.init('app/id');
// Add to your HTML:

<script src="https://cdn.lr-ingest.com/LogRocket.min.js"></script>
<script>window.LogRocket && window.LogRocket.init('app/id');</script>

React Server Components and the Next.js App Router enable streaming and smaller client bundles, but only when used correctly. This article explores six common mistakes that block streaming, bloat hydration, and create stale UI in production.

Gil Fink (SparXis CEO) joins PodRocket to break down today’s most common web rendering patterns: SSR, CSR, static rednering, and islands/resumability.

@container scroll-state: Replace JS scroll listeners nowCSS @container scroll-state lets you build sticky headers, snapping carousels, and scroll indicators without JavaScript. Here’s how to replace scroll listeners with clean, declarative state queries.

Explore 10 Web APIs that replace common JavaScript libraries and reduce npm dependencies, bundle size, and performance overhead.
Hey there, want to help make our blog better?
Join LogRocket’s Content Advisory Board. You’ll help inform the type of content we create and get access to exclusive meetups, social accreditation, and swag.
Sign up now
2 Replies to "Creating a Google Keep clone with React and Firebase"
This tutorial is neat, but as it seems to be outdated and doesn’t work in its current version. Notes don’t post when focus is changed. Would you be willing to update it, and maybe add some more clear instructions in some areas? It was not always clear where something should go.
Also – I had to include the line props.onShowInput(true); to the onFocus as the title wouldn’t show otherwise.
Thanks for the helpful feedback. We’ll review this post and put it under consideration for an update.