In this step-by-step tutorial, we’ll create a news feed application with minimal code using React Native for iOS and Android. Our application will consist of two screens, the first is the Home screen or the Feed screen. The second Detail screen will handle loading a single article, loading news for a selected category, or searching for news with a specific keyword.

You can find the complete source code for this article in this repository. Let’s get started!
To populate our application with news articles, we’ll use the News API as our backend. The News API provides us with a REST API that we can use to get the latest, breaking news headlines from all around the world.
Before you can begin using the News API, you need to get an API token from the website. Go to the Get started page and click on Get API Key. Once you click the button, you’ll be redirected to the registration page. After filling in your details on the page and registering successfully, you can get your API token. Now, let’s take the API for a spin and test everything it has to offer.
To test the API, we’ll use Postman, but you can use the API platform of your choice. Alternately, you can simply use curl in your terminal. You can either use the standalone Postman application on your OS, or simply use the web app, which is what I prefer.
For Feed, we’ll use the top headlines endpoint, so let’s test it first:
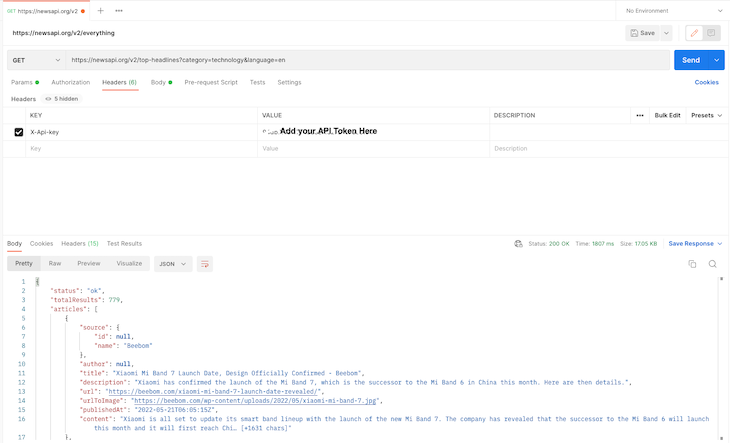
We’re using the following URL:
https://newsapi.org/v2/top-headlines?category=technology&language=en
We are passing two query parameters to the URL:
category=technology: Gets all the top headlines in the technology categorylanguage=en: Ensures we only get news articles written in EnglishEach call to a News API URL must contain an apiKey, which is used to authenticate the user who is sending the request and for analytics purposes.
We can add our API key in an API call in one of two ways. For one, you can directly send it as a query param in the URL itself:
https://newsapi.org/v2/top-headlines?category=technology&language=en&apiKey=<YOUR_API_KEY>
However, this method is not secure, and therefore is not recommended. But, you can use it for testing. Alternately, we can try sending API_KEY inside the request header using the X-Api-key. If you’re using curl, you could add a request header like the one below:
 curl https://newsapi.org/v2/top-headlines?category=technology&language=en
   -H "X-Api-key: <YOUR_API_KEY>"
If you’re using Postman, then simply go to the Headers tab of request and add a key and value, like in the screenshot above.
Now that we have a response object from our API, let’s analyze it and see what it provides for us. The response has an articles key, which is an array of objects where each object is a news article.
A sample of a news object is given below:
{
    "source": {
        "id": null,
        "name": "digitalspy.com"
    },
    "author": "Joe Anderton",
    "title": "Walking Dead's Norman Reedus reveals Death Stranding 2 existence - Digital Spy",
    "description": "The Walking Dead star Norman Reedus reveals Death Stranding 2 existence.",
    "url": "https://www.digitalspy.com/tech/a40064850/walking-dead-norman-reedus-death-stranding-2/",
    "urlToImage": "https://hips.hearstapps.com/digitalspyuk.cdnds.net/16/28/1468254183-screen-shot-2016-07-11-at-171152.jpg?crop=1xw:0.8929577464788733xh;center,top&resize=1200:*",
    "publishedAt": "2022-05-21T10:12:41Z",
    "content": "The Walking Dead star Norman Reedus has seemingly revealed the existence of Death Stranding 2.\r\nThe actor played leading character Sam Porter Bridges in the PlayStation and PC game from Metal Gear So… [+2088 chars]"
}
As you can see, we get a lot of data for a single news article, but we’ll use title, url, urlToImage, publishedAt, and content. Now that our backend is all set up, let’s start working on the mobile app.
Before we actually write the code for our app, let’s discuss the features we want to build. First, we’ll need a home screen or feed where we’ll show all the latest news articles. At the top of the list, there will be a horizontal list of news category tags, which, when selected, will load news for that specific category.
We’ll need a search bar at the top of the screen that the user can use to search news using a specific keyword. We’ll also implement shared transition navigation. When the user clicks on any news articles, the NewsDetail screen will appear.
We’ll use Redux to manage state in our application. We want to persist the data between application lifecycles, so we’ll use Redux Persist.
The app UI will support both dark and light mode. The final UI we are building will look like the following images:
Let’s start by creating a new React Native project as follows:
npx react-native init <App-Name-Here> --template react-native-template-typescript
I’ll use TypeScript, but feel free to use JavaScript. If you are facing any issues creating a TypeScript template project, you can refer to the docs.
With our project set up, let’s start writing our code. First, remove all the boilerplate code in App.tsx and add the code below:
import React from 'react';
import {Text} from 'react-native';

const App: React.FC = () => {
  return <Text>This is Feed Screen</Text>;
};

export default App;
Let’s start by adding state-management to our app. We need to install some libraries to incorporate Redux into our project:
yarn add @reduxjs/toolkit react-redux redux
Or, if you prefer npm, use the following command:
npm i @reduxjs/toolkit react-redux redux
In the step above, we are installing @reduxjs/toolkit, react-redux, and redux. In Redux v6, the createStore method is deprecated, and we need to use Redux Toolkit’s configureStore method instead.
Now, let’s create a Redux store and hook up some actions and reducers to it. Create a new folder in the root of the project directory and name it src. We’ll keep all our application code here. Add the redux folder inside it, then create three files inside it, actions.ts, reducers.ts, and store.ts.
The directory structure should now look like the following:

We’ll create an action function to get news articles from the API and store them in our store. For now, let’s just return an empty array:
export const GET_NEWS_FEED = 'GET_NEWS_FEED';

export const getNewsFeed =
() => (dispatch) => {
      dispatch({
        type: GET_NEWS_FEED,
        payload: [],
      });
};
Let’s create feedReducer for our newsFeed:
import {GET_NEWS_FEED} from './actions';

const initialState = {
  newsFeed: [],
};

const feedReducer = (
  state = initialState,
  action: {type: String; payload: any},
) => {
  switch (action.type) {
    case GET_NEWS_FEED:
      return {...state, newsFeed: action.payload};
    default:
      return state;
  }
};
export default feedReducer;
In the reducer, we have the state variable newsFeed, which initially is an empty array. When we receive the GET_NEWS_FEED action, we set its value to the payload passed in action.
Now that we have actions and reducers for our state, let’s create a Redux store and initialize it with the following values.
Create store.ts file and add the following code:
import {configureStore} from '@reduxjs/toolkit';
import {combineReducers} from 'redux';
import feedReducer from './reducers';

const rootReducer = combineReducers({
  feedReducer: feedReducer,
});

export const store = configureStore({
  reducer: rootReducer,
});
We’ve successfully set up the redux store, now, we just need to pass it into our application. Add the following code to your App.tsx file:
import React from 'react';
import {Text} from 'react-native';
import {Provider} from 'react-redux';
import {store} from './src/redux/store';

const App: React.FC = () => {
  return (
    <Provider store={store}>
      <Text>This is feed screen</Text>
    </Provider>
  );
};

export default App;
So far, we have a working Redux store. Let’s populate it with news articles. To implement network calls, we’ll use Axios, so let’s add it to the project:
yarn add axios
We need to create an axios instance so we don’t need to handle request headers every time we make an API call. Create a new folder named api in src and add a file named index.ts inside it:
We’ll create an axios instance inside the index.ts file and export it as an apiClient variable:
import axios from 'axios';
const BASE_URL = 'https://newsapi.org/v2/';

export const apiClient = axios.create({
  baseURL: BASE_URL,
  timeout: 10000,
  headers: {
    'X-Api-key': '<Add-your-api-token-here>',
  },
});
Now, let’s utilize this apiClient in our getNewsFeed action. Make the following changes in your actions.ts file:
export const getNewsFeed = () => async (dispatch: Function) => {
  try {
    const res = await apiClient.get(
      'top-headlines?language=en&category=business',
    );
    if (res.status === 200) {
      dispatch({
        type: GET_NEWS_FEED,
        payload: res?.data?.articles,
      });
    } else {
      console.warn('Something went wrong');
    }
  } catch (error) {
    console.error(error);
  }
};
In the code above, we make an API call to get the top headlines in the business category. If we receive a successful response from the API, then we update the newsFeed state with the new articles received.
We need to call this action when our App is rendered the first time. We’ll also display a list of article titles. Before we populate our newsFeed, let’s create files for different screens in our application.
Create a screens folder inside src and create a new folder named Feed inside it. Then, add two files inside the Feed folder named index.tsx and styles.ts:
To handle notches on an iPhone, we’ll use a helper library called react-native-iphone-x-helper. Install it using the command below:
yarn add react-native-iphone-x-helper
Let’s add some styles for our screen. Make the following changes in your feed/styles.ts:
import {StyleSheet} from 'react-native';
import {getStatusBarHeight, isIphoneX} from 'react-native-iphone-x-helper';

export default StyleSheet.create({
  container: {
    flex: 1,
    flexGrow: 1,
    paddingTop: isIphoneX() ? getStatusBarHeight() + 20 : 20,
  },
  list: {
    flex: 1,
    flexGrow: 1,
    paddingVertical: 8,
  },
});
Then, add the code below in your feed/index.tsx file:
import React, {useEffect} from 'react';
import {Text, useColorScheme, View} from 'react-native';
import {useDispatch, useSelector} from 'react-redux';
import {getNewsFeed} from '../../redux/actions';
import styles from './styles';

export const Feed: React.FC = () => {
  const {newsFeed} = useSelector((state: any) => state.feedReducer);
  const dispatch: Function = useDispatch();

  useEffect(() => {
    dispatch(getNewsFeed());
  }, [dispatch]);
  const backgroundColor = useColorScheme() === 'dark' ? '#000' : '#fff';
  return (
    <View style={[styles.container, {backgroundColor}]}>
      {newsFeed?.map((item: any) => (
        <Text>{item.title}</Text>
      ))}
    </View>
  );
};
Now, we need to render the feed component in our App component. Make the changes below in your App.tsx file:
import React from 'react';
import {Provider} from 'react-redux';
import {store} from './src/redux/store';
import {Feed} from './src/screens/feed';

const App: React.FC = () => {
  return (
    <Provider store={store}>
      <Feed />
    </Provider>
  );
};
export default App;
Now, your UI should look like the following image:
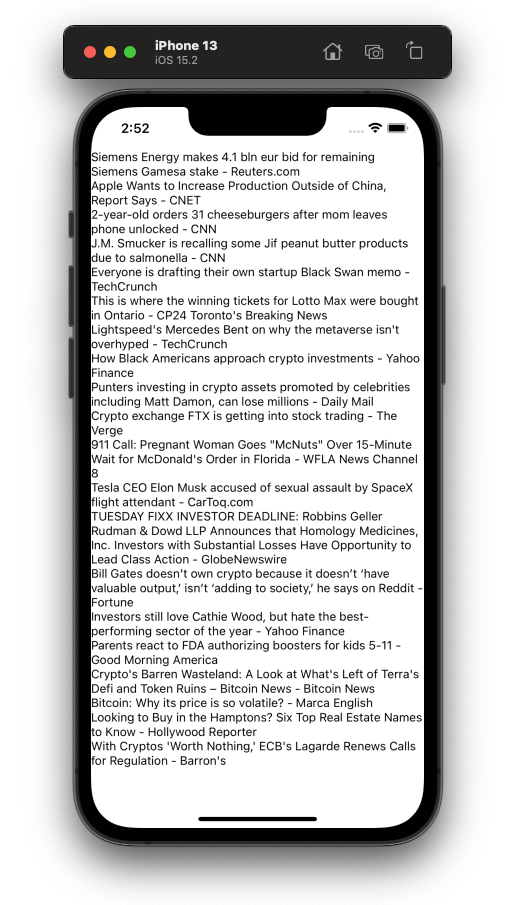
We are now able to fetch a list of the latest news from around the world and display it on the screen. Next, we’ll add some UI design.
Currently, we are showing the title of the news on the screen. We need to update it to show an image of the article. Above it, we’ll display the title of the article. At the bottom, we’ll show the timestamp of the particular news/article.
Let’s replace our map function in feed/index.tsx with a Flatlist. Before you jump into implementing the UI, you first need to add some libraries that we’ll use to design our UI:
yarn add react-native-uuid react-native-linear-gradient moment
We‘ll use react-native-uuid to generate a unique key for every news article component and react-native-linear-gradient to create a semi-transparent to transparent overlay over the image on which we’ll display the title of the article.
Finally, we use moment to convert the timestamp received from API to a human-readable format. Make the following changes to feed/index.tsx:
import uuid from 'react-native-uuid';
....
return (
  <View style={[styles.container, {backgroundColor}]}>
    <FlatList
      keyExtractor={() => uuid.v4()}
      showsVerticalScrollIndicator={false}
      data={newsFeed}
      renderItem={({item, index}: any) => (
        <NewsArticle post={item} />
      )}
      style={styles.list}
    />
  </View>
);
In the code above, you can notice we are assigning a unique key to each item rendered by the Flatlist component. Therefore, React treats each article differently, and there should be no overlap in the UI. If this doesn’t make sense now, it will later when our UI logic gets a little more complicated.
The code above will also throw an error saying “NewsArticle is not defined”. Let’s fix that by creating a new component for our news article.
In the src directory of your project, create a new folder named components, which will contain all the UI components we’ll use throughout the application. Now, create a new folder called NewsArticle and add two files inside it called index.tsx and styles.ts:
Add the following code to styles.ts:
import {Platform, StyleSheet} from 'react-native';

const boxShadow: any = Platform.select({
  ios: {
    shadowColor: '#000',
    shadowOffset: {
      width: 0,
      height: 0,
    },
    shadowOpacity: 0.4,
    shadowRadius: 4,
  },
  android: {elevation: 6},
});

export default StyleSheet.create({
  container: {
    height: 240,
    marginBottom: 18,
    backgroundColor: '#eee',
    borderRadius: 24,
    marginHorizontal: 16,
    ...boxShadow,
  },
  imageContainer: {flex: 1},
  image: {
    flex: 1,
    borderRadius: 24,
    height: 300,
  },
  titleContainer: {
    position: 'absolute',
    bottom: 0,
    width: '100%',
    borderBottomLeftRadius: 24,
    borderBottomRightRadius: 24,
    height: 160,
    paddingLeft: 16,
    paddingRight: 10,
    justifyContent: 'flex-end',
    alignItems: 'flex-start',
  },
  text: {
    fontSize: 18,
    fontWeight: '600',
    lineHeight: 24,
    color: '#fff',
    paddingBottom: 24,
  },
  timestamp: {
    position: 'absolute',
    color: '#eee',
    fontSize: 12,
    fontWeight: '300',
    right: 16,
    bottom: 8,
  },
});
These are just some basic styles that we’ll use to design our NewsArticle component. Add the following code to your index.tsx file:
import moment from 'moment';
import React from 'react';
import {Image, Text, TouchableOpacity} from 'react-native';
import LinearGradient from 'react-native-linear-gradient';
import styles from './styles';

type Post = {
  title: string;
  urlToImage: string;
  publishedAt: string;
  url: string;
  author: string;
};

export const NewsArticle: React.FC<{
  post: Post;
}> = ({post}) => {
  return (
    <TouchableOpacity activeOpacity={1} style={styles.container}>
      <Image
        source={{
          uri: post?.urlToImage ?? 'https://picsum.photos/800',
          cache: 'force-cache',
        }}
        resizeMode={'cover'}
        style={styles.image}
      />
      <LinearGradient
        colors={['#0000', '#000A', '#000']}
        style={styles.titleContainer}>
        <Text style={styles.text}>{post?.title}</Text>
        <Text style={styles.timestamp}>
          {moment(post?.publishedAt).format('HH:MM DD, MMMM')}
        </Text>
      </LinearGradient>
    </TouchableOpacity>
  );
};
In the code above, we’ve declared the NewsArticle component, which receives a post prop, which is of type Post. The definition of Post is given above the component.
For the UI, we wrapped the whole component inside TouchableOpacity, which we’ll use later in the tutorial to navigate the user to the NewsDetail screen. Then, an Image is displayed over the whole view. If we don’t get any urlToImage from API, then we show a random placeholder image.
For the text, we have the Text components inside a LinearGradient component, which is positioned absolute over the Image, making the text readable to the user and maintaining the contrast ratio in the text UI. We also use moment to format the publishedAt property of the article and finally display the formatted value.
After implementing the changes above in your code, your application UI should look like the following:

We now have a working, readable news feed. Let’s add functionality to refresh the page when the user pulls up on the screen. Thankfully, this has a pretty straightforward implementation. We just need to use the RefreshControl prop of the Flatlist component.
Make the following changes in your feed/index.tsx:
import React, {useCallback, useEffect, useState} from 'react';
import {FlatList, RefreshControl, useColorScheme, View} from 'react-native';
import {useDispatch, useSelector} from 'react-redux';
import {NewsArticle} from '../../components';
import {getNewsFeed} from '../../redux/actions';
import styles from './styles';
import uuid from 'react-native-uuid';

export const Feed: React.FC = () => {
  const {newsFeed} = useSelector((state: any) => state.feedReducer);
  const dispatch: Function = useDispatch();
  const [isLoading, setIsLoading] = useState(false);

  useEffect(() => {
    dispatch(getNewsFeed(setIsLoading));
  }, [dispatch]);

  const handleRefresh = useCallback(() => {
    dispatch(getNewsFeed(setIsLoading));
  }, [dispatch]);
  const backgroundColor = useColorScheme() === 'dark' ? '#000' : '#fff';
  return (
    <View style={[styles.container, {backgroundColor}]}>
      <FlatList
        keyExtractor={() => uuid.v4()?.toString()}
        showsVerticalScrollIndicator={false}
        data={newsFeed}
        renderItem={({item}: any) => <NewsArticle post={item} />}
        refreshControl={
          <RefreshControl refreshing={isLoading} onRefresh={handleRefresh} />
        }
        style={styles.list}
      />
    </View>
  );
};
In the code above, we’ve added a state isLoading, which is true when news is being fetched through the getNewsFeed method. Then, we added the RefreshControl component in Flatlist, which will be shown when isLoading is true and also when the user pulls the list up to refresh data. Then, the handleRefresh method will be triggered.
Notice that we’ve added a setIsLoading parameter inside the getNewsFeed method. But, we haven’t changed the method definition yet. Let’s do that next; add the following code in your actions.ts file:
export const getNewsFeed =
  (setIsLoading: Function) => async (dispatch: Function) => {
    try {
      setIsLoading(true);
      const res = await apiClient.get(
        'top-headlines?language=en&category=business',
      );
      setIsLoading(false);
      if (res.status === 200) {
        dispatch({
          type: GET_NEWS_FEED,
          payload: res?.data?.articles,
        });
      } else {
        console.warn('Something went wrong');
      }
    } catch (error) {
      console.error(error);
    }
};
The output will be something like the images below:

We now have a working news feed, but there is a minor problem. You might notice that when the app is first loaded, the screen is blank for some time. To solve this problem, we’ll use Redux Persist, which is a kind of a middleware for the Redux store that persists store data, rehydrating and populating it.
After implementing Redux Persist, when the user closes and opens the app, they’ll see the previous feed instead of a blank screen. If any new feed is available, then that will be loaded.
First, add the dependencies to your project. To do so, execute the command below:
yarn add @react-native-community/async-storage redux-persist
We need to add Async Storage because all of our store data will be stored in it. When the app opens again, the store will be rehydrated using the data inside it. Basically, Redux Persist uses AsyncStorage for storage in React Native.
Once the dependencies are added, we need to make some changes in our store.ts file:
import AsyncStorage from '@react-native-community/async-storage';
import {configureStore} from '@reduxjs/toolkit';
import {combineReducers} from 'redux';
import feedReducer from './reducers';
import {persistReducer, persistStore} from 'redux-persist';

const persistConfig = {
  key: 'root',
  storage: AsyncStorage,
  whitelist: ['newsFeed'],
};

const rootReducer = combineReducers({
  feedReducer: persistReducer(persistConfig, feedReducer),
});

export const store = configureStore({
  reducer: rootReducer,
  middleware: getDefaultMiddleware =>
    getDefaultMiddleware({
      serializableCheck: false,
    }),
});

export const persistor = persistStore(store);
In the code above, we created a persistConfig object, which is responsible for the configuration of Redux Persist. Inside the object, there are two main key objects, storage and whitelist.
We’ll use storage as storage for our Redux store data, and whitelist is an array of strings. These are the names of the reducers that we want to persist. If we pass an empty array to whitelist, then all our reducers will be persisted.
Next, we create a persisted reducer using the persistReducer method from Redux Persist and pass the persistConfig as the first argument. We then pass the actual reducer we want to persist.
We are passing serializableCheck: false in the middleware key of configureStore to suppress a warning that is thrown when we use Redux Persist with Redux v6.
At last, we create a persisted copy of our store using the persistStore method and export it as persistor. We’ll use this in our next step.
Finally, to provide the persisted data to our application, we need to pass it in our App.tsx file just after the Redux store Provider component.
Add the following code inside the App.tsx file:
import React from 'react';
import {ActivityIndicator} from 'react-native';
import {Provider} from 'react-redux';
import {PersistGate} from 'redux-persist/integration/react';
import {persistor, store} from './src/redux/store';
import {Feed} from './src/screens/feed';

const App: React.FC = () => {
  return (
    <Provider store={store}>
      <PersistGate
        loading={<ActivityIndicator size={'large'} color={'#000'} />}
        persistor={persistor}>
        <Feed />
      </PersistGate>
    </Provider>
  );
};
export default App;
We are passing persisted store data through the PersistGate component, and the persisted store is coming from the persistor. There is a loading prop in the PersistGate component that takes any JSX component as an argument, and that JSX component is shown until the store is rehydrated.
With that, we’ve persisted our store data. Now, if you close the app and open it again, you won’t see the blank screen.
Next, we’ll implement category tags. Our app will have a horizontal list of predefined categories of news that users can view. When the user taps any category tag, then the news feed should update and show news related to that specific category only.
Let’s start by creating a data source for categories. Create a file named constants.ts in the src folder of your project, then add the following code to it:
interface NewsCategoryTypes {
  [key: string]: string;
}

export const NewsCategory: NewsCategoryTypes = {
  business: 'business',
  entertainment: 'entertainment',
  general: 'general',
  health: 'health',
  science: 'science',
  sports: 'sports',
  technology: 'technology',
};
Now, let’s display a list of categories on the Feed screen above the articles list. Add the code below in the feed/index.tsx file:
import {NewsArticle, NewsTags} from '../../components';
import {NewsCategory} from '../../constants';
....
export const Feed: React.FC = () => {
  const [isLoading, setIsLoading] = useState(false);
  const [selectedCategory, setSelectedCategory] = useState(
    NewsCategory.business,
  );
  ....
  useEffect(() => {
    dispatch(getNewsFeed(setIsLoading, selectedCategory));
  }, [dispatch, selectedCategory]);

  const handleRefresh = useCallback(() => {
    dispatch(getNewsFeed(setIsLoading, selectedCategory));
  }, [dispatch, selectedCategory]);

  return (
    <View style={[styles.container, {backgroundColor}]}>
      <NewsTags
          selectedCategory={selectedCategory}
          setSelectedCategory={setSelectedCategory}
      />
      ....
    </View>
  );
};
In the code above, we introduced a new state called selectedCategory and gave it an initial value of NewsCategory.business. We also are now passing selectedCategory in our getNewsFeed action, and finally, we are rendering the NewsTags component, which we haven’t created yet.
Let’s do that now. Create a new folder called NewsTags and add two files inside it, styles.ts and index.tsx:
Add the code below to the styles.ts file:
import {StyleSheet} from 'react-native';
export default StyleSheet.create({
  list: {
    maxHeight: 40,
  },
  contentContainer: {
    paddingHorizontal: 24,
    alignItems: 'center',
    justifyContent: 'center',
  },
});
To display a horizontal list of categories, add the following code in the NewsTags/index.tsx file:
import React from 'react';
import {FlatList} from 'react-native';
import {NewsCategory} from '../../constants';
import {Tag} from '../Tag';
import styles from './styles';

export const NewsTags: React.FC<{
  selectedCategory: String;
  setSelectedCategory: Function;
}> = ({selectedCategory, setSelectedCategory}) => {
  return (
    <FlatList
      horizontal
      showsHorizontalScrollIndicator={false}
      data={Object.keys(NewsCategory)}
      keyExtractor={(item: string) => item}
      renderItem={({item}: any) => (
        <Tag
          category={item}
          selectedCategory={selectedCategory}
          setSelectedCategory={setSelectedCategory}
        />
      )}
      style={styles.list}
      contentContainerStyle={styles.contentContainer}
    />
  );
};
In the code above, we render over all the keys in our NewsCategory object. Inside renderItem, we have passed the Tag component, which we haven’t created yet. Let’s create it now. Add a folder called Tag in components and create two files as seen in the below image:
Paste the code below inside the styles.ts file:
import {StyleSheet} from 'react-native';
export default StyleSheet.create({
  container: {
    borderWidth: 1,
    borderColor: '#FFA500',
    borderRadius: 12,
    height: 28,
    paddingHorizontal: 14,
    justifyContent: 'center',
    alignItems: 'center',
    marginRight: 24,
    backgroundColor: '#FFA50066',
  },
  text: {
    fontSize: 14,
    fontWeight: '500',
  },
  selected: {
    backgroundColor: '#FF8800',
    borderColor: '#FF6600',
  },
});
To actually render a Tag component, add the following code to the index.tsx file:
import React, {useCallback} from 'react';
import {Text, TouchableOpacity, useColorScheme} from 'react-native';
import styles from './styles';

export const Tag: React.FC<{
  category: String;
  selectedCategory: String;
  setSelectedCategory: Function;
}> = ({category, selectedCategory, setSelectedCategory}) => {
  const textColor = useColorScheme() === 'dark' ? '#fff' : '#000';
  const handlePress = useCallback(() => {
    setSelectedCategory(category);
  }, [category, setSelectedCategory]);
  return (
    <TouchableOpacity
      style={[
        styles.container,
        selectedCategory === category && styles.selected,
      ]}
      onPress={handlePress}>
      <Text style={[styles.text, {color: textColor}]}>{`${
        category.charAt(0).toUpperCase() + category.slice(1)
      }`}</Text>
    </TouchableOpacity>
  );
};
The code above is a simple view that renders a category name text. When pressed, it sets the selectedCategory to that category.
Finally, we’ll modify the getNewsFeed action method so that it returns a news feed for a selected news category. Modify the getNewsFeed method in actions.ts like below:
export const getNewsFeed =
  (setIsLoading: Function, category: String = NewsCategory.business) =>
  async (dispatch: Function) => {
    try {
      setIsLoading(true);
      const res = await apiClient.get(
        `top-headlines?language=en&category=${category}`,
      );
      setIsLoading(false);
      if (res.status === 200) {
        dispatch({
          type: GET_NEWS_FEED,
          payload: res?.data?.articles,
        });
      } else {
        console.warn('Something went wrong');
      }
    } catch (error) {
      console.error(error);
    }
};
Now, we can select a specific news category for which we want to see the news. The output will be like the image below:
The last feature we’ll implement in our application is searching for a piece of particular news using a string search query. The logic is very simple. We’ll have a TextInput at the top of the screen. When the user types something into the TextInput, we’ll query the NewsAPI search endpoint to get the search result, then show it on the feed.
First, let’s add the required redux actions . Add the following code to your actions.ts:
export const searchNews =
  (searchTerm: string = '', setIsLoading: Function = () => {}) =>
  async (dispatch: Function) => {
    try {
      setIsLoading(true);
      const res = await apiClient.get(`everything?q=${searchTerm}`);
      setIsLoading(false);
      if (res.status === 200) {
        dispatch({
          type: SEARCH_NEWS,
          payload: res?.data?.articles,
        });
      } else {
        console.warn('Something went wrong');
      }
    } catch (error) {
      console.error(error);
    }
};

export const resetSearchResults = () => (dispatch: Function) => {
  dispatch({
    type: RESET_SEARCH_RESULTS,
  });
};
We also need to add some extra states to our reducers. Add the following code to your reducers.ts:
import {GET_NEWS_FEED, RESET_SEARCH_RESULTS, SEARCH_NEWS} from './actions';

const initialState = {
  newsFeed: [],
  searchResults: [],
};
const feedReducer = (
  state = initialState,
  action: {type: String; payload: any},
) => {
  switch (action.type) {
    case GET_NEWS_FEED:
      return {...state, newsFeed: action.payload};
    case SEARCH_NEWS:
      return {...state, searchResults: action.payload};
    case RESET_SEARCH_RESULTS:
      return {...state, searchResults: []};
    default:
      return state;
  }
};
export default feedReducer;
Now that our state is set up, let’s implement the search function. Add the code below in your feed/index.tsx:
import React, {useCallback, useEffect, useState} from 'react';
import {FlatList, RefreshControl, useColorScheme, View} from 'react-native';
import uuid from 'react-native-uuid';
import {useDispatch, useSelector} from 'react-redux';
import {NewsArticle, NewsTags, SearchInput} from '../../components';
import {NewsCategory} from '../../constants';
import {getNewsFeed} from '../../redux/actions';
import styles from './styles';

export const Feed: React.FC = () => {
  const {newsFeed, searchResults} = useSelector(
    (state: any) => state.feedReducer,
  );
  const [isLoading, setIsLoading] = useState(false);
  const [selectedCategory, setSelectedCategory] = useState(
    NewsCategory.business,
  );
  const [searchText, setSearchText] = useState('');
  const dispatch: Function = useDispatch();
  useEffect(() => {
    dispatch(getNewsFeed(setIsLoading, selectedCategory));
  }, [dispatch, selectedCategory]);
  const handleRefresh = useCallback(() => {
    dispatch(getNewsFeed(setIsLoading, selectedCategory));
  }, [dispatch, selectedCategory]);
  const backgroundColor = useColorScheme() === 'dark' ? '#000' : '#fff';
  return (
    <View style={[styles.container, {backgroundColor}]}>
      <SearchInput
        searchText={searchText}
        setSearchText={setSearchText}
        setIsLoading={setIsLoading}
      />
      {!searchText?.trim() && (
        <NewsTags
          selectedCategory={selectedCategory}
          setSelectedCategory={setSelectedCategory}
        />
      )}
      <FlatList
        keyExtractor={() => uuid.v4()?.toString()}
        showsVerticalScrollIndicator={false}
        data={searchText?.trim() ? searchResults : newsFeed}
        renderItem={({item, index}: any) => (
          <NewsArticle post={item} />
        )}
        refreshControl={
          <RefreshControl refreshing={isLoading} onRefresh={handleRefresh} />
        }
        style={styles.list}
      />
    </View>
  );
};
Notice that we’ve added a new component called SearchInput. Let’s create it in our code. Inside the components folder, create a folder called SearchInput and name the files inside it styles.ts and index.tsx:
Add the below code to the styles.ts file:
import {StyleSheet} from 'react-native';

export default StyleSheet.create({
  container: {
    height: 40,
    marginHorizontal: 24,
    marginBottom: 8,
    borderRadius: 20,
    paddingHorizontal: 24,
    fontWeight: '400',
  },
});
Before writing the code for SearchInput, we first need to install a library:
yarn add lodash
We’re using lodash to implement the debounce method on the searchInput’s onChangeText method. Finally, add the following code to the SearchInput/index.tsx file:
import React, {useCallback} from 'react';
import {TextInput, useColorScheme} from 'react-native';
import {useDispatch} from 'react-redux';
import {resetSearchResults, searchNews} from '../../redux/actions';
import styles from './styles';
import {debounce} from 'lodash';

export const SearchInput: React.FC<{
  searchText: string;
  setSearchText: Function;
  setIsLoading: Function;
}> = ({searchText, setSearchText, setIsLoading}) => {
  const backgroundColor = useColorScheme() === 'dark' ? '#333' : '#ddd';
  const placeholderColor = useColorScheme() === 'dark' ? '#eee' : '#111';
  const color = useColorScheme() === 'dark' ? '#fff' : '#000';
  const dispatch: Function = useDispatch();
  const searchForText = useCallback(
    debounce((text: string) => {
      if (text?.trim().length > 0) {
        dispatch(searchNews(text, setIsLoading));
      } else {
        dispatch(resetSearchResults());
      }
    }, 1000),
    [setSearchText, dispatch, setIsLoading],
  );
  return (
    <TextInput
      placeholder={'Search'}
      placeholderTextColor={placeholderColor}
      style={[styles.container, {backgroundColor, color}]}
      value={searchText}
      onChangeText={(text: string) => {
        setSearchText(text);
        searchForText(text);
      }}
      maxLength={40}
      returnKeyType={'search'}
    />
  );
};
With that, we have implemented a search functionality in our news feed application. The output will look something like the gif below:
Our app is almost complete. We’re just missing one thing, the NewsDetail screen.
As you may have seen in the output above, the shared transition effect is implemented between two screens using the react-navigation-shared-element.
First, let’s add all the required dependencies to the project:
yarn add @react-navigation/native @react-navigation/stack react-native-safe-area-context react-native-screens
Now, implement the shared transition:
yarn add react-navigation-shared-element react-native-shared-element
To set up navigation in our app, create a new file named navigation.tsx in the root of the project and add the following code to it:
import {NavigationContainer} from '@react-navigation/native';
import React from 'react';
import {createSharedElementStackNavigator} from 'react-navigation-shared-element';
import {Feed} from './src/screens/feed';
import {NewsDetails} from './src/screens/NewsDetails';

const Stack = createSharedElementStackNavigator();

export const RootNavigation = () => {
  return (
    <NavigationContainer>
      <Stack.Navigator
        initialRouteName="Feed"
        screenOptions={{headerShown: false}}>
        <Stack.Screen name="Feed" component={Feed} />
        <Stack.Screen
          name="NewsDetails"
          component={NewsDetails}
          options={{
            cardStyleInterpolator: ({current: {progress}}) => {
              return {
                cardStyle: {
                  opacity: progress,
                },
              };
            },
          }}
        />
      </Stack.Navigator>
    </NavigationContainer>
  );
};
Notice that we’ve added two screens in our SharedElementsStackNavigator. The first one is our default Feed screen, and the other is the NewsDetails screen, which we haven’t created yet.
Let’s create the NewsDetails screen and add shared elements mapping to its components. Create a new folder called NewsDetails in the screens folder and add the following two files to it:
Add the following code to the styles.ts file:
import {StyleSheet} from 'react-native';

export default StyleSheet.create({
  container: {
    flex: 1,
  },
  contentContainer: {
    paddingBottom: 120,
  },
  image: {
    height: 500,
    width: '100%',
    borderBottomLeftRadius: 50,
    borderBottomRightRadius: 50,
  },
  crossContainer: {
    position: 'absolute',
    top: 60,
    left: 30,
    zIndex: 9,
  },
  cross: {
    height: 34,
    width: 34,
  },
  title: {
    fontSize: 24,
    fontWeight: '600',
    lineHeight: 30,
    paddingHorizontal: 24,
    marginVertical: 18,
  },
  content: {
    fontSize: 16,
    fontWeight: '400',
    lineHeight: 22,
    paddingHorizontal: 24,
  },
  readMoreContainer: {
    position: 'absolute',
    paddingTop: 14,
    paddingBottom: 28,
    paddingHorizontal: 24,
    bottom: 0,
    width: '100%',
  },
  readMoreText: {
    fontSize: 13,
    fontWeight: '300',
    lineHeight: 22,
  },
  link: {
    color: '#00beff',
    textDecorationLine: 'underline',
    textDecorationStyle: 'solid',
    textDecorationColor: '#00beff',
  },
});
To display the news details on the screen, paste the code below in index.tsx:
import {useNavigation} from '@react-navigation/native';
import React, {useCallback} from 'react';
import {
  Image,
  Linking,
  ScrollView,
  Text,
  TouchableOpacity,
  useColorScheme,
  View,
} from 'react-native';
import {SharedElement} from 'react-navigation-shared-element';
import {Back} from '../../../assets';
import styles from './styles';

interface Route {
  params: {
    article: {
      author: string;
      title: string;
      urlToImage: string;
      publishedAt: string;
      url: string;
      content: string;
    };
    articleIndex: number;
  };
}
export const NewsDetails: React.FC<{route: Route}> = ({route}) => {
  const {article, articleIndex} = route?.params;
  const navigation = useNavigation();
  const goBack = useCallback(() => {
    navigation.goBack();
  }, [navigation]);
  const backgroundColor = useColorScheme() === 'dark' ? '#000' : '#fff';
  const color = useColorScheme() === 'dark' ? '#fff' : '#000';
  const contentColor = useColorScheme() === 'dark' ? '#bbb' : '#444';
  const readMoreBgColor = useColorScheme() === 'dark' ? '#222' : '#ddd';
  const handleURLPress = useCallback(() => {
    Linking.openURL(article?.url);
  }, [article]);

  return (
    <>
      <TouchableOpacity style={styles.crossContainer} onPress={goBack}>
        <Image style={styles.cross} source={Back} />
      </TouchableOpacity>
      <ScrollView
        bounces={false}
        showsVerticalScrollIndicator={false}
        style={[styles.container, {backgroundColor}]}
        contentContainerStyle={styles.contentContainer}>
        <SharedElement id={`article#${articleIndex}-Image`}>
          <Image
            style={styles.image}
            source={{uri: article?.urlToImage ?? 'https://picsum.photos/1000'}}
            resizeMode={'cover'}
          />
        </SharedElement>
        <Text style={[styles.title, {color}]}>{article?.title}</Text>
        <Text style={[styles.content, {color: contentColor}]}>
          {article?.content}
        </Text>
      </ScrollView>
      <View
        style={[styles.readMoreContainer, {backgroundColor: readMoreBgColor}]}>
        <Text style={[styles.readMoreText, {color}]} numberOfLines={2}>
          Read more at{' '}
          <Text style={styles.link} onPress={handleURLPress}>
            {article?.url}
          </Text>
        </Text>
      </View>
    </>
  );
};

(NewsDetails as any).sharedElements = (route: any) => {
  const {articleIndex} = route.params;
  return [`article#${articleIndex}-Image`];
};
We just need to pass the correct shared element mapping from the feed screen. But, before that, we need to render navigation instead of the Feed component in the App.tsx file. Add the following code to App.tsx:
import React from 'react';
import {ActivityIndicator} from 'react-native';
import {Provider} from 'react-redux';
import {PersistGate} from 'redux-persist/integration/react';
import {RootNavigation} from './Navigation';
import {persistor, store} from './src/redux/store';

const App: React.FC = () => {
  return (
    <Provider store={store}>
      <PersistGate
        loading={<ActivityIndicator size={'large'} color={'#000'} />}
        persistor={persistor}>
        <RootNavigation />
      </PersistGate>
    </Provider>
  );
};
export default App;
Now, let’s move on to the NewsArticle component. Make the following changes in the NewsArticle/index.tsx file:
import {useNavigation} from '@react-navigation/native';
import moment from 'moment';
import React, {useCallback} from 'react';
import {Image, Text, TouchableOpacity} from 'react-native';
import LinearGradient from 'react-native-linear-gradient';
import {SharedElement} from 'react-navigation-shared-element';
import styles from './styles';

type Post = {
  title: string;
  urlToImage: string;
  publishedAt: string;
  url: string;
  author: string;
};

export const NewsArticle: React.FC<{
  post: Post;
  index: number;
}> = ({post, index}) => {
  const navigation: any = useNavigation();
  const handleNavigate = useCallback(() => {
    navigation.navigate('NewsDetails', {article: post, articleIndex: index});
  }, [index, navigation, post]);
  return (
    <TouchableOpacity
      activeOpacity={1}
      style={styles.container}
      onPress={handleNavigate}>
      <SharedElement
        style={styles.imageContainer}
        id={`article#${index}-Image`}>
        <Image
          source={{
            uri:
              post?.urlToImage ??
              `https://picsum.photos/${Math.floor(Math.random() * 1000)}`,
            cache: 'force-cache',
          }}
          resizeMode={'cover'}
          style={styles.image}
        />
      </SharedElement>
      <LinearGradient
        colors={['#0000', '#000A', '#000']}
        style={styles.titleContainer}>
        <Text style={styles.text}>{post?.title}</Text>
        <Text style={styles.timestamp}>
          {moment(post?.publishedAt).format('HH:MM DD, MMMM')}
        </Text>
      </LinearGradient>
    </TouchableOpacity>
  );
};
In the code above, we wrapped the Image in SharedElement and passed it an ID, which will be common across both screens. After implementing all the respective changes, our app will look like the following image:
As you saw from the tutorial, it’s fairly easy to create a news feed application using React Native. This article was just a demo explaining how we can interact with REST API, but you can go much further, like using WebSockets for real-time updates or using the GraphQL API.
If you want to make this app more useful, you can add a webview to the app in the NewsDetail screen, and when the user presses the link to read more about the article, you can directly open the link in the webview rather than opening it in an external browser. I hope you enjoyed this article, and happy coding!

LogRocket's Galileo AI watches sessions for you and and surfaces the technical and usability issues holding back your React Native apps.
LogRocket also helps you increase conversion rates and product usage by showing you exactly how users are interacting with your app. LogRocket's product analytics features surface the reasons why users don't complete a particular flow or don't adopt a new feature.
Start proactively monitoring your React Native apps — try LogRocket for free.
Hey there, want to help make our blog better?
Join LogRocket’s Content Advisory Board. You’ll help inform the type of content we create and get access to exclusive meetups, social accreditation, and swag.
Sign up now
A breakdown of the wrapper and container CSS classes, how they’re used in real-world code, and when it makes sense to use one over the other.

This guide walks you through creating a web UI for an AI agent that browses, clicks, and extracts info from websites powered by Stagehand and Gemini.

This guide explores how to use Anthropic’s Claude 4 models, including Opus 4 and Sonnet 4, to build AI-powered applications.

Which AI frontend dev tool reigns supreme in July 2025? Check out our power rankings and use our interactive comparison tool to find out.


