Editor’s note: This article was updated on 21 July 2023 by Shalitha Suranga to update source codes and steps according to the latest library versions, and to include more useful information about React Native for Web.

When starting a new project, one of the most important decisions you will have to make is which development stack to use. You want to select a platform where most of your users are active, but the platform shouldn’t be restrictive. The future growth of your application might require you to reach users on entirely different platforms, including those that you might not even think of right now. As such, your initial stack should be versatile enough to accommodate future growth.
When it comes to versatile technologies, React Native for Web is a great option that enables developers to use React Native components and APIs on the web. This is a game changer in the battle between mobile-first frameworks, as React Native is one of the most popular choices to build cross-platform mobile applications. In this article, we will give a comprehensive overview of React Native for Web, and set up a demo project with it.
Jump ahead:
The Replay is a weekly newsletter for dev and engineering leaders.
Delivered once a week, it's your curated guide to the most important conversations around frontend dev, emerging AI tools, and the state of modern software.
With React Native for Web, developers can write a single React Native application that can run natively on Android and iOS, as well as on a web browser using standard web technologies. But considering that React, the conceptual parent of React Native, is built specifically for the web, it’s worth questioning why such technology is necessary in the first place.
The reality is that the foundation of a mobile app is entirely different from the foundation of a web app. For example, React renders basic HTML5 elements like div and span to construct its layout with the help of the React DOM renderer and standard browser DOM APIs, while React Native renders native, platform-specific components like View and Text with the help of the React Native renderer and mobile operating system APIs. Due to this difference, React officially supports web projects, and React Native officially supports mobile projects.
The React Native for Web open source, community project is an attempt to bridge this gap. It was built to help create truly cross-platform (web included) applications using a single React Native codebase. Let’s find out how it does that.
As we mentioned earlier, web apps and mobile apps have very different foundations. There are distinct APIs in both platforms to do the same job, like rendering the UI.
The idea behind any framework that aims to bridge this gap is simple: use one platform’s APIs to build the equivalent of the other platform’s APIs. React Native for Web does that. In programming theory, this process is known as porting, so in other words, React Native for Web is a ported React Native framework version targeted for the web platform.
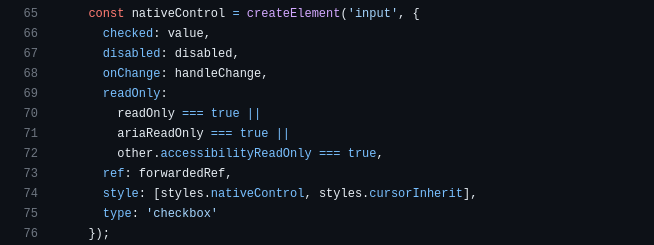
React Native for Web provides browser-compatible equivalents of React Native components. For example, if a <View> component is used to render views in React Native mobile, a browser-compatible version of this <View> component is available in React Native for Web, which has a method to compile this view down to a web <div>. The React Native for Web project constructs web-based, React Native-like components with atomic DOM elements on the browser via the React core web APIs (i.e., React.createElement). For example, it renders a React Native-like checkbox on the web browser using the following code snippet:
React Native for Web requires a package alias configuration that maps react-native to react-native-web, so when you import and use a React Native component from react-native in the web mode, the alias configuration renders the native-equivalent HTML component from react-native-web. On mobile, the React Native bundler picks native components from react-native.
This raises an important point: not all native components can be made browser-friendly. Some mobile-oriented components make use of mobile hardware APIs, which are not directly accessible by a web browser. This means we can’t use React Native for Web to completely port an app into its web version. But we can still port a major part of it, and more often than not, that is sufficient.
Styling is another area of difference between React and React Native. In React, we can use a long list of styling solutions, including CSS, Sass, CSS-in-JS, etc. In React Native, on the other hand, all styles are written in a CSS-in-JS pattern with the StyleSheet class. React Native for Web has a web-based port of the React Native’s StyleSheet class, so your custom app styles will look the same on both mobile and web.
As explained before, React Native for Web ports React Native for the web platform and helps you run React Native mobile apps on the web browser. Microsoft added desktop support for React Native and let developers run their React Native apps on Windows and macOS. React Native for Web added web platform support for React Native. As a result, developers can now use a single React Native APIs-based codebase to create a cross-platform app that works on Android, iOS, Windows, macOS, and web.
Using React Native for Web to create a web app gives you the following benefits:
You’ll have the following benefits if you use React Native for Web to run your React Native app on browsers (port a native app to the web platform):
You can visit the React Native Directory to find React Native packages that provide web support. The following popular web frameworks integrate React Native for Web and let you use built-in React Native components:
Most React Native-focused UI kits like React Native Elements, React Native Paper, and NativeBase work on the browser with React Native for Web integration. Also, you can directly run an Expo-based React Native app on the browser with Expo’s built-in React Native for Web integration.
Now that we have a theoretical understanding of the concepts behind this addition to the React Native family of APIs, let’s go through the installation process to understand how to set up our web-friendly React Native application. There are two ways we can set up a React Native for Web application: Expo and Create React App.
Expo is a framework for universal React application development. It primarily supports developing apps for Android and iOS with React Native as the foundation, and supports the web platform via Expo for Web that uses React Native for Web under the hood.
Expo for Web comes with a collection of cross-platform APIs out of the box, including web build optimizations, and provides a universal SDK for running native mobile Expo apps on the web using React Native for Web. To bootstrap a React Native for Web application using Expo for Web, follow the steps below:
First, create a new React Native app with Expo using the following command:
npx create-expo-app ReactNativeWebDemo
cd ReactNativeWebDemo
Next, install the dependencies required for the web platform support:
npx expo install react-dom react-native-web @expo/webpack-config
Then, add the following demo application source to your App.js file:
import React, {useState} from 'react';
import {
  StyleSheet,
  Text,
  View,
  Pressable,
  useWindowDimensions,
} from 'react-native';

export default function App() {
  const {height} = useWindowDimensions();
  const [number, setNumber] = useState(0);

  function handlePress() {
    setNumber(parseInt(Math.random() * 10000, 10) % 100);
  }

  return (
    <View style={[styles.container, {height}, StyleSheet.absoluteFill]}>
      <Text>Random number: {number}</Text>
      <View style={styles.br} />
      <Pressable
        style={({pressed}) => [
          {
            opacity: pressed ? 0.7 : 1,
          },
          styles.btn,
        ]}
        onPress={handlePress}>
        <Text style={styles.btnText}>Generate a number</Text>
      </Pressable>
    </View>
  );
}

const styles = StyleSheet.create({
  container: {
    flex: 1,
    backgroundColor: '#fff',
    alignItems: 'center',
    justifyContent: 'center',
  },
  br: {
    height: 12,
  },
  btn: {
    backgroundColor: '#222',
    padding: 10,
  },
  btnText: {
    color: '#fff',
  },
});
Finally, run your Expo app on the web browser with the following command:
npm run web
# --- or ---
yarn web
Your React Native app will work on the browser by rendering DOM elements thanks to React Native for Web:
The same app will also work on mobile devices with native UI elements:

You can generate a deployable web app using the following command:
npx expo export:web
The above command will create static resources in the ./web-build directory, so you can test with serve:
cd web-build
npx serve
Create React App (CRA) is the standard way to bootstrap web-only React applications. Although it comes with built-in support for aliasing react-native-web to react-native, it is still recommended to use Expo. However, we can bootstrap a React Native for Web application with CRA by following the steps below:
First, create a new React app with CRA:
npx create-react-app react-native-web-demo
cd react-native-web-demo
Next, install React Native for Web:
npm install react-native-web
# -- or ---
yarn add react-native-web
Add the following demo app source to your App.js file:
import React, {useState} from 'react';
import {
  StyleSheet,
  Text,
  View,
  Pressable,
  useWindowDimensions,
} from 'react-native';

export default function App() {
  const {height} = useWindowDimensions();
  const [number, setNumber] = useState(0);

  function handlePress() {
    setNumber(parseInt(Math.random() * 10000, 10) % 100);
  }

  return (
    <View style={[styles.container, {height}, StyleSheet.absoluteFill]}>
      <Text>Random number: {number}</Text>
      <View style={styles.br} />
      <Pressable
        style={({pressed}) => [
          {
            opacity: pressed ? 0.7 : 1,
          },
          styles.btn,
        ]}
        onPress={handlePress}>
        <Text style={styles.btnText}>Generate a number</Text>
      </Pressable>
    </View>
  );
}

const styles = StyleSheet.create({
  container: {
    flex: 1,
    backgroundColor: '#fff',
    alignItems: 'center',
    justifyContent: 'center',
  },
  br: {
    height: 12,
  },
  btn: {
    backgroundColor: '#222',
    padding: 10,
  },
  btnText: {
    color: '#fff',
  },
});
AppRegistry is the JavaScript entry point to running all React Native apps, and you can register the App root component by replacing the code in the index.js file with the following:
import { AppRegistry } from 'react-native';
import App from './App';

AppRegistry.registerComponent('App', () => App);
AppRegistry.runApplication('App', {
  rootTag: document.getElementById('root')
});
Then, run your React app using the following command:
npm start
# --- or ---
yarn start
Your CRA-based React app will run the React Native demo app on the browser, as shown in the following preview:

As usual, you can create a deployable React app with the following command:
npm run build
# --- or ---
yarn build
The above command will create static resources in the ./build directory, so you can test with serve:
cd build
npx serve
React Native for Web recommends using the Expo CLI to create multi-platform apps that work on native and web because it comes with the built-in configuration for the web platform. In other words, using the Expo CLI, you can develop/deploy apps for native and web platforms, like Flutter developers do with the official Flutter CLI. React Native doesn’t officially support the web platform, but Expo implements the web support and lets developers deploy React Native apps for web users productively.
If you don’t use Expo, you can add web support using several manual approaches:
react-scripts‘s default configurationHere, we’ll discuss the first approach because it’s the easiest way to manually add web support. For the second approach, you can create a custom bundler configuration without react-scripts based on this complete guide.
First, create a React Native app with the following command (without using Expo):
npx react-native init ReactNativeWebDemo
cd ReactNativeWebDemo
Then, add CRA’s default HTML page source to ./public/index.html by creating a new directory and file:
mkdir public
touch public/index.html
Then, install web dependencies with the following command:
npm install react-native-web react-scripts react-dom
# --- or ---
yarn add react-native-web react-scripts react-dom
Use a separate entry point for React Native:
mv index.js index.native.js
Do the same for the web platform with the following command:
mkdir src
touch src/index.js
Then, add the following code to src/index.js to let React Native for Web bootstrap the app:
import {AppRegistry} from 'react-native';
import App from './App';

AppRegistry.registerComponent('App', () => App);
AppRegistry.runApplication('App', {
  rootTag: document.getElementById('root'),
});
You can add a demo app source to the ./src/App.js file:
import React, {useState} from 'react';
import {
  StyleSheet,
  Text,
  View,
  Pressable,
  useWindowDimensions,
} from 'react-native';

export default function App() {
  const {height} = useWindowDimensions();
  const [number, setNumber] = useState(0);

  function handlePress() {
    setNumber(parseInt(Math.random() * 10000, 10) % 100);
  }

  return (
    <View style={[styles.container, {height}, StyleSheet.absoluteFill]}>
      <Text>Random number: {number}</Text>
      <View style={styles.br} />
      <Pressable
        style={({pressed}) => [
          {
            opacity: pressed ? 0.7 : 1,
          },
          styles.btn,
        ]}
        onPress={handlePress}>
        <Text style={styles.btnText}>Generate a number</Text>
      </Pressable>
    </View>
  );
}

const styles = StyleSheet.create({
  container: {
    flex: 1,
    backgroundColor: '#fff',
    alignItems: 'center',
    justifyContent: 'center',
  },
  br: {
    height: 12,
  },
  btn: {
    backgroundColor: '#222',
    padding: 10,
  },
  btnText: {
    color: '#fff',
  },
});
Also, make sure to use the same App component for native platforms from the src directory by adding the following code to index.native.js:
import {AppRegistry} from 'react-native';
import App from './src/App';
import {name as appName} from './app.json';

AppRegistry.registerComponent(appName, () => App);
Finally, we can add two npm scripts to run our React Native app on the browser and generate deployable static files by adding the following setup to your package.json file as follows:
  "scripts": {
    /...
    "web": "react-scripts start",
    "build-web": "react-scripts build",
    /...
Now, you can enter either npm run web or yarn web to run the React Native for Web-based app on the browser:
To create a deployable React app, use the following command:
npm run build-web
# --- or ---
yarn build-web
The above command will create static resources in the ./build directory, so, again, you can test with serve:
cd build
npx serve
This demo app will also work on your mobile device if you use react-native CLI commands with Metro. The above approaches require manually setting up web platform support, so it’s recommended to use the Expo CLI for developing multi-platform React Native apps.
CRA and the official React Native CLI create Jest-runner-based unit tests for newly scaffolded projects. Also, you can add Jest-based unit tests to an Expo project in record time (see the official guide here). React Native uses the react-test-renderer package, and React uses @testing-library/react to run tests within the JavaScript environment without depending on the browser or mobile environments. So, your React Native tests will run properly even if you use React Native for Web via the react-native-web package.
But, by default, Jest imports React Native modules from react-native, so it’s required to add an alias in jest.config.js to use react-native-web:
{
  moduleNameMapper: {
    "^react-native$": "react-native-web"
  }
}
See the following simple test case that I wrote for the previous demo app in ./__tests__/App.test.js:
import 'react-native';
import React from 'react';
import App from '../src/App';
import {it} from '@jest/globals';
import renderer from 'react-test-renderer';

it('renders correctly', () => {
  renderer.create(<App />);
});
You can run tests using Jest runner as you typically do in React or React Native:
Check out this comprehensive guide to learn more about unit testing React Native apps with Jest. It’s possible to use Chrome Dev Tools to debug your React Native for Web apps with your favorite developer extensions.
React Native for Web is a community-maintained project and not a part of the official React Native framework. As we discussed before, Expo also uses this community project as a dependency to add web platform support for React Native apps. The project’s maintainers strive to make the project compatible with the latest React Native framework versions, but there are several limitations that we need to consider before using React Native for Web:
Alert, RefreshControl, etc.You can check the complete compatibility document from React Native for Web’s official documentation.
In this tutorial, we discussed what React Native for Web is, and the problem it solves. We also learned how to set up a React Native for Web project before setting out to create our own React Native for Web application from scratch. Finally, we created a multi-platform React Native project with CRA’s tools, the official React Native CLI, and React Native for Web.
Interestingly, React Native for Web is used in production web apps by Twitter, Uber, Flipkart, The Times, and Major League Soccer. I hope you learned enough to try it out in your next multi-platform project!

LogRocket's Galileo AI watches sessions for you and and surfaces the technical and usability issues holding back your React Native apps.
LogRocket also helps you increase conversion rates and product usage by showing you exactly how users are interacting with your app. LogRocket's product analytics features surface the reasons why users don't complete a particular flow or don't adopt a new feature.
Start proactively monitoring your React Native apps — try LogRocket for free.

TSRX adds first-class control flow, conditional hooks, and scoped styles to React via a TypeScript compiler extension — no new framework required.

Learn how to build a full React Native auth system using Better Auth and Expo — with email/password login, Google OAuth, session persistence, and protected routes.

Compare the top AI development tools and models of June 2026. View updated rankings, feature breakdowns, and find the best fit for you.

Learn how Bloom filters reduce database lookups for username availability checks while preserving correctness at scale.
Would you be interested in joining LogRocket's developer community?
Join LogRocket’s Content Advisory Board. You’ll help inform the type of content we create and get access to exclusive meetups, social accreditation, and swag.
Sign up now

