With a typewriter effect, words are displayed one letter at a time instead of all at once, making the text appear as if it’s being written in real time. You can find an example of a code block typewriter effect on Codepen’s landing page that uses syntax highlighting, a type of special color formatting, to easily display written text in the form of code.

In this article, we’ll learn how to build a similar code block typewriter effect from scratch with React. We’ll also demonstrate an alternative approach that uses a pre-existing typewriter package. To follow along with this tutorial, you’ll need basic knowledge of React. We’ll cover the following:
You can find the entire source code for this tutorial at this GitHub repo. Let’s get started!
If you don’t have React installed already, navigate in your system to your project directory, open a command-line window, and run the following bash scripts in it:
npx create-react-app typewriter
The command above creates a React project folder called typewriter with all the necessary dependencies for building our application. To easily style our application, we’ll use Tailwind CSS. You can install Tailwind CSS by running the following commands in your CLI:
npm install -D tailwindcss postcss autoprefixer
npx tailwindcss init -p
Once the installation is complete, modify the tailwind.config.js file to allow support for jsx elements, as shown below:
/** @type {import('tailwindcss').Config} */
module.exports = {
  content: [
    "./src/**/*.{js,jsx,ts,tsx}",
  ],
  theme: {
    extend: {},
  },
  plugins: [],
}
Finally, add the following Tailwind CSS directives to the top level of index.css:
@tailwind base;
@tailwind components;
@tailwind utilities;
Our typewriter effect will consist of two main parts, a container where we’ll keep the text that we want to animate and a a blinking cursor to mimic a typewriter.
First, in our App.js file, we’ll build the display window for the typewriter effect:
import "./App.css";
import {React, useState, useEffect} from "react";

function App() {
  const [text1, setText1] = useState("const sayHello = () = {");
  const [text2, setText2] = useState("Console.log('hello')");
  const [text3, setText3] = useState("//This prints out Hello World");
  return (
    <div className=" flex h-screen justify-center items-center">
      <div className=" h-1/2 w-1/2 bg-black rounded-md flex items-center pl-6">
        {/* type writer display */}
        <span>
          <div className=" text-white text-2xl blinking-cursor">{text1}</div>
          <div className=" text-white text-2xl blinking-cursor">{text2}</div>
          <div className=" text-white text-2xl blinking-cursor">{text3}</div>
          <div className=" text-white text-2xl blinking-cursor">{`}`}</div>
        </span>
      </div>
    </div>
  );
}

export default App;
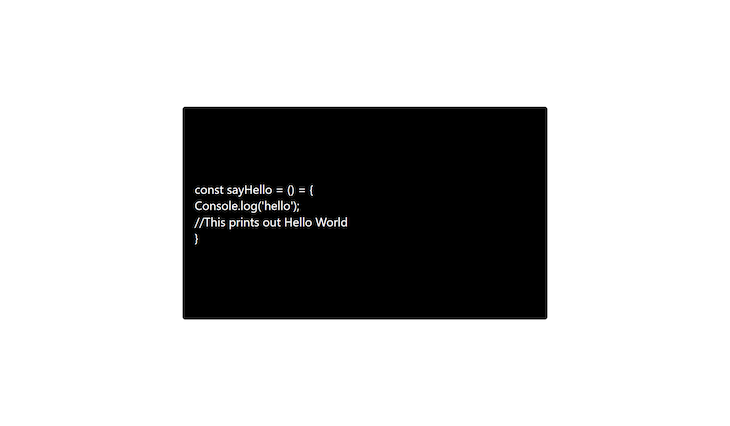
The code above creates a container where we’ll keep the text that we want to animate with our typewriter effect. If we run the code above with the npm start command, we’ll get a “Hello, World!”result similar to the image below:
Next, we’ll build and append a blinking cursor to the ending of the text. Add the code below to index.css:
.bg-code{
  background-color: rgb(40, 42, 54);
}

.blinking-cursor::after {
  content: "|";
  animation: blink 1s step-end infinite;
}
@keyframes blink {
  from,
  to {
    opacity: 1;
  }
  50% {
    opacity: 0;
  }
}
The CSS styles above add a | to the end of each text, causing a blinking effect that mimics a cursor.
To create our typewriter effect, we’ll use the React useEffect Hook. To do so, add the following modifications to your code:
const first_text = "const sayHello = () = {";
  const second_text = "console.log('hello')";
  const third_text = "//This prints out Hello World";

  const [text1, setText1] = useState("");
  const [text2, setText2] = useState("");
  const [text3, setText3] = useState("");

  useEffect(() => {
    const timeout = setTimeout(() => {
      setText1(first_text.slice(0, text1.length + 1));
    }, 100);
    return () => clearTimeout(timeout);
  }, [text1]);

  useEffect(() => {
    const timeout = setTimeout(() => {
      setText2(second_text.slice(0, text2.length + 1));
    }, 250);

    return () => clearTimeout(timeout);
  }, [text2]);

  useEffect(() => {
    const timeout = setTimeout(() => {
      setText3(third_text.slice(0, text3.length + 1));
    }, 300);

    return () => clearTimeout(timeout);
  }, [text3]);
In the code above, we used a setTimeout function and a slice operator. The setTimeout function executes the code block after the specified interval. We use the splice operator to divide the entire string into characters and return the text one character at a time.
For the callback, we use the states. Every time we enter a new character, the state gets updated, and the setTimeout function is executed. As a result, the setTimeout runs until the entire text is completely typed.
To loop the typewriter effect, we’ll add two states, isdeleting and istyping, for when the user wants to delete text and when they finish typing, respectively:
const textState = ["istyping", "isdeleting"];
const [typing, setTyping] = useState(textState[0]);

function sleep(ms) {
    return new Promise((resolve) => setTimeout(resolve, ms));
}
Now that we’ve created states for typing and deleting the text, let’s use the sleep function to create a delay between switching from the two states. Therefore, when the user is completely finished typing the text, we’ll implement a pause. Let’s go ahead and modify our code to use these states, as shown below:
useEffect(() => {
    const timeout = setTimeout(() => {
      if (typing === "istyping" && text1 !== first_text) {
        setText1(first_text.slice(0, text1.length + 1));
      }
      else if (text1 === first_text && typing === "istyping"){
        sleep(2000).then(()=>{
        setTyping(textState[1])
        })
      }
      else if ( (text1 === first_text && typing==="isdeleting") || typing === "isdeleting" ) {
        setText1(first_text.slice(0, text1.length - 1));
        if(text1.length<=2){
            setTyping(textState[0])
        }
      }
    }, 100);
  return () => clearTimeout(timeout);
}, [text1, typing1]);
In the code above, we check that typing is equal to istyping and that the text is not equal to the full string. If this returns true, we’ll run the typing effect. When the text is similar to the full string, we use the sleep function to switch to the isdeleting state after two seconds.
Finally, we use the last condition to delete the text one character at a time until only a single letter remains. At this point, the typing state is set back to istyping, and the entire process begins again. We’ll do the same for text2 and text3 also.
To highlight our text to look like a code block, we’ll install the React Syntax Highlighter via the CLI:
npm i react-syntax-highlighter
When this package is installed, we can import it in App.js and use it as follows:
import SyntaxHighlighter from 'react-syntax-highlighter';
import { docco } from 'react-syntax-highlighter/dist/esm/styles/hljs';
//...
<span>
  <div className=" text-2xl">
    <SyntaxHighlighter className="blinking-cursor" language="javascript" style={dracula}>
      {text1}
    </SyntaxHighlighter>
  </div>
  <div className=" text-2xl">
    <SyntaxHighlighter className="blinking-cursor" language="javascript" style={dracula}>
      {text2}
    </SyntaxHighlighter>
  </div>
  <div className=" text-2xl">
    <SyntaxHighlighter className="blinking-cursor" language="javascript" style={dracula}>
      {text3}
    </SyntaxHighlighter>
  </div>
  <div className=" text-2xl">
    <SyntaxHighlighter className="blinking-cursor" language="javascript" style={dracula}>
      {`}`}
    </SyntaxHighlighter>
  </div>
</span>
Now that we’ve implemented our Syntax Higlighter component, we can wrap up our typewriter effect.
As an alternative to coding and customizing our own typewriter effect, we can use a pre-built library to save time.
An example of a library that handles the typewriter effect is react-typewriter-effect. We can install this package via the CLI with the following command:
npm i react-typewriter-effect
Once installation is complete, we can use it in our application as follows to get a typewriter effect:
import TypeWriterEffect from 'react-typewriter-effect';
//...

<TypeWriterEffect
  textStyle={{ fontFamily: 'Red Hat Display' }}
  startDelay={100}
  cursorColor="black"
  text="Text for typewriting effect here"
  typeSpeed={100}
  eraseSpeed={100}
/>
The code above will produce a typewriter effect for the specified text string.
In this article, we’ve learned how to easily create a typewriter effect using React. Implementing this feature in your website or application can improve your UI by adding visual interest and directing your user’s attention where you want it to go. You can add on to the typewriter effect we’ve built from scratch to implement more of your own customizations, or you can use a library that implements this feature for you, like react-typewriter-effect.
I hope you’ve enjoyed this article, and be sure to leave a comment if you have any questions. Happy coding!
Install LogRocket via npm or script tag. LogRocket.init() must be called client-side, not
server-side
$ npm i --save logrocket

// Code:

import LogRocket from 'logrocket';
LogRocket.init('app/id');
// Add to your HTML:

<script src="https://cdn.lr-ingest.com/LogRocket.min.js"></script>
<script>window.LogRocket && window.LogRocket.init('app/id');</script>
Would you be interested in joining LogRocket's developer community?
Join LogRocket’s Content Advisory Board. You’ll help inform the type of content we create and get access to exclusive meetups, social accreditation, and swag.
Sign up now
Not sure if low-code is right for your next project? This guide breaks down when to use it, when to avoid it, and how to make the right call.

Compare Firebase Studio, Lovable, and Replit for AI-powered app building. Find the best tool for your project needs.

Discover how to use Gemini CLI, Google’s new open-source AI agent that brings Gemini directly to your terminal.

This article explores several proven patterns for writing safer, cleaner, and more readable code in React and TypeScript.


