Terminals are a way to access applications using a set of predefined commands. They can be for a variety of use cases, such as connecting to a remote server, interacting with a database engine, and much more. Termino.js is a web-based terminal that makes it easy to embed a terminal into a web application.

This article will explore what Termino.js is, and how to easily integrate it into your web app to create great terminals.
Let’s get started!
The Replay is a weekly newsletter for dev and engineering leaders.
Delivered once a week, it's your curated guide to the most important conversations around frontend dev, emerging AI tools, and the state of modern software.
A web-based terminal is a terminal that can be accessed on a web browser. It is embedded in a browser and allows users to interact with applications, systems, remote servers and databases, and much more without needing a physical terminal setup or installation on the user’s device. With web-based terminals, everything users need is right in the browser.
Termino.js is an open source JavaScript library that easily integrates an intuitive, web-based terminal into your webpage. Extendable and customizable, Termino.js is useful if you want to display a component on your site that could act as a terminal without the overhead of importing a fully blown terminal. It also saves time by quickly integrating a custom, lightweight terminal in your web app.
Termino.js can be used:
In our demo project, we will see how to receive inputs from an end user and return customized outputs. We will also explore how to customize the look and feel of the terminal and later see an advanced section where we will create custom methods that various user commands can interact with.
To start, we’ll create a simple web-based application. Head over to the terminal and run the following command:
mkdir termino-web && cd termino-web
Next, create an index.html file:
touch index.html
Update the contents as follows:
<!DOCTYPE html>
<html lang="en">
<head>
<meta charset="UTF-8" />
<meta name="viewport" content="width=device-width, initial-scale=1.0" />
<title>Document</title>
</head>
<body>
<div id="terminal">
<pre>
Next, create the index.mjs file. This file will contain the logic for the app and is where Termino.js will be initiated and called:
touch index.mjs
Update the contents of the file with the following code:
import { Termino } from "https://cdn.jsdelivr.net/gh/MarketingPipeline/[email protected]/dist/termino.min.js";
let term = Termino(document.getElementById("terminal"));
term.output("Hello world!");
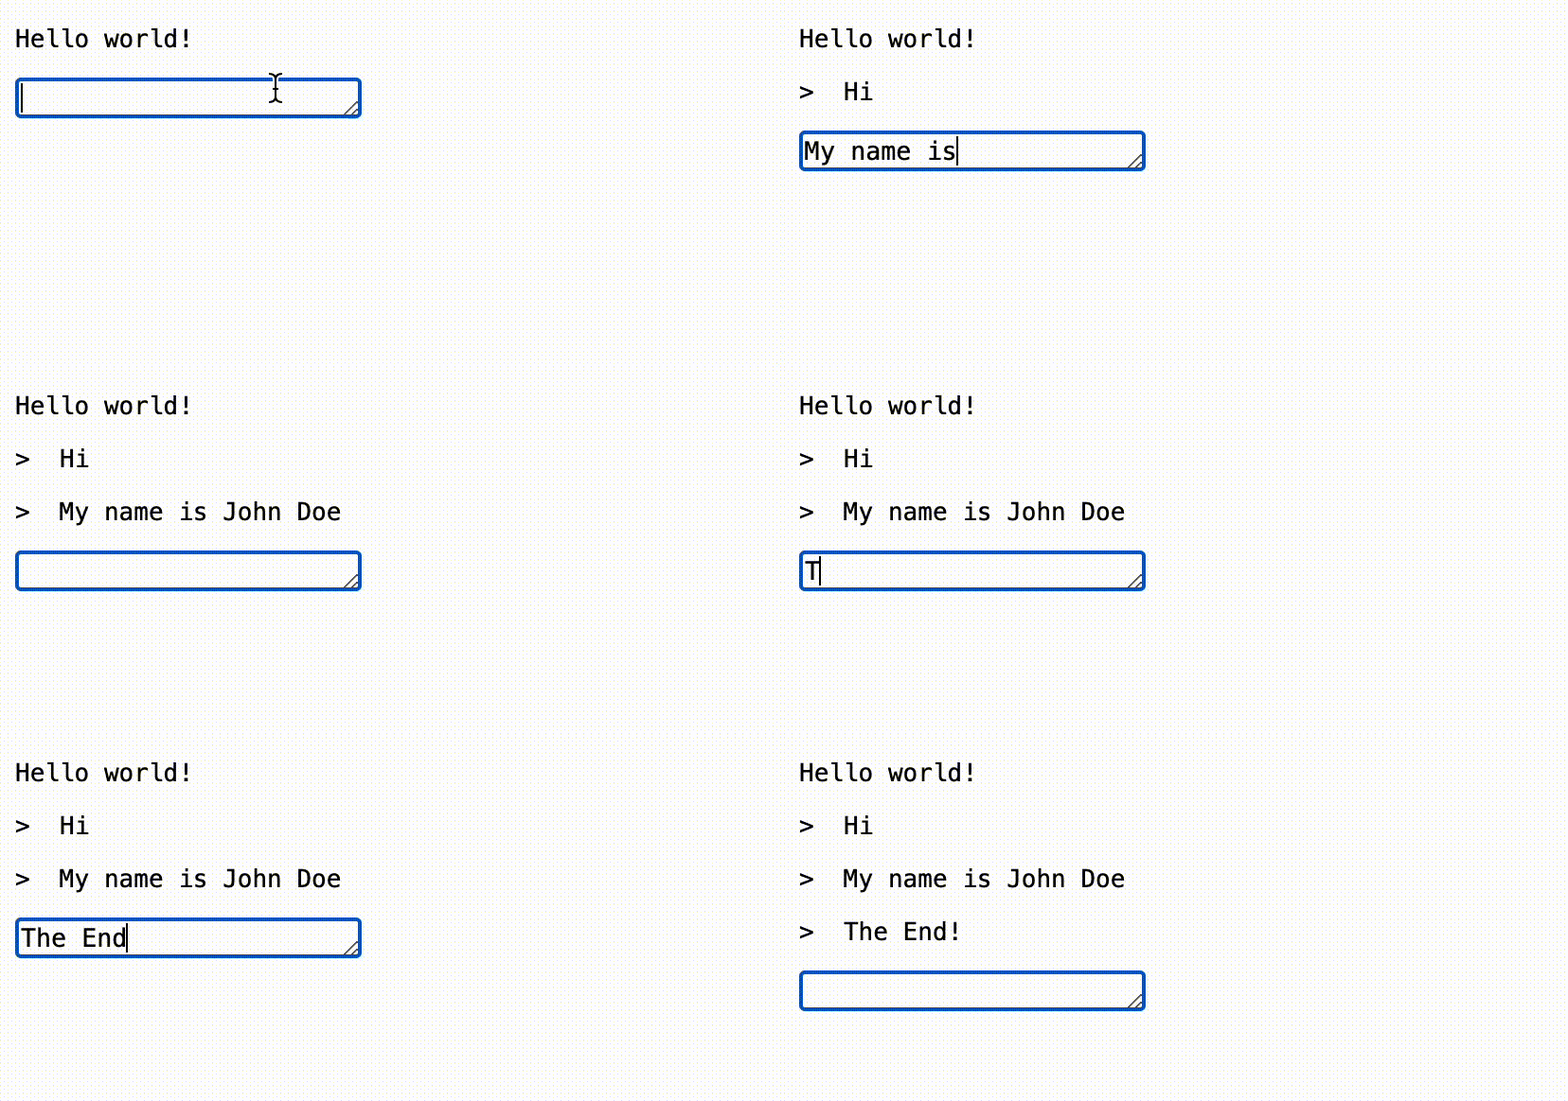
When we visit the page, we will see the interactive terminal in action:

We just implemented a web terminal that takes user input and returns predefined output with just three lines of code. And because Termino.js is lightweight, this doesn’t have any negative impact on the webpage — more reason for choosing this terminal!
To explore more of Termino.js’ functionalities, let’s now customize the basic app we created.
First, create an index.css file:
touch index.css
Then, replace the contents with the following:
.repl {
  text-shadow: none;
  color: #333;
  background: #f8f8f8;
  padding: 0;
  text-align: left;
  width: 600px;
  margin: 50px auto;
  border-radius: 3px;
  border: 1px solid #ddd;
  overflow: hidden;
}
.repl code {
  height: 200px;
  overflow-y: scroll;
}
pre {
  margin: 0;
}
.termino-console {
  padding: 11px 16px;
  display: block;
}
.termino-input-container {
  display: flex;
}
.termino-input-container > * {
  outline: none;
  border: none;
  white-space: pre-wrap;
  font-family: monospace;
  color: #444;
  background: #f0f0f0;
  min-height: 14px; /* minimum one line */
  padding: 10px;
  margin: 0;
  border-radius: 0 0 3px 3px;
  border-top: 1px solid #ddd;
}
.termino-input {
  flex: 1;
  height: 100%; /* start off one line tall */
  padding-left: 0;
}
.termino-prompt a {
  font-weight: bold;
  padding: 8px 10px;
}
@media screen and (max-width: 800px) {
  .repl {
    width: 100%;
  }
}
.lua {
  resize: none;
  overflow: hidden;
}
pre {
  word-break: break-all;
  white-space: pre-line;
}
.repl code {
  scroll-behavior: smooth;
}
/* hide scrollbar but allow scrolling */
.repl code {
  -ms-overflow-style: none; /* for Internet Explorer, Edge */
  scrollbar-width: none; /* for Firefox */
  overflow-y: scroll;
}
.repl code::-webkit-scrollbar {
  display: none; /* for Chrome, Safari, and Opera */
}
.loading:after {
  content: " .";
  animation: dots 1s steps(5, end) infinite;
}
@keyframes dots {
  0%,
  20% {
    color: rgba(0, 0, 0, 0);
    text-shadow: 0.25em 0 0 rgba(0, 0, 0, 0), 0.5em 0 0 rgba(0, 0, 0, 0);
  }
  40% {
    color: white;
    text-shadow: 0.25em 0 0 rgba(0, 0, 0, 0), 0.5em 0 0 rgba(0, 0, 0, 0);
  }
  60% {
    text-shadow: 0.25em 0 0 white, 0.5em 0 0 rgba(0, 0, 0, 0);
  }
  80%,
  100% {
    text-shadow: 0.25em 0 0 white, 0.5em 0 0 white;
  }
}
Finally, update the index.html file, adding the link to the CSS stylesheet and any necessary changes:
<!DOCTYPE html>
<html lang="en">
<head>
<meta charset="UTF-8" />
<meta name="viewport" content="width=device-width, initial-scale=1.0" />
<title>Document</title>
<link rel="stylesheet" href="index.css" />
</head>
<body>
<section
class="section--standalone"
id="terminal"
terminal-processed="true"
>
<div class="repl">
<pre>
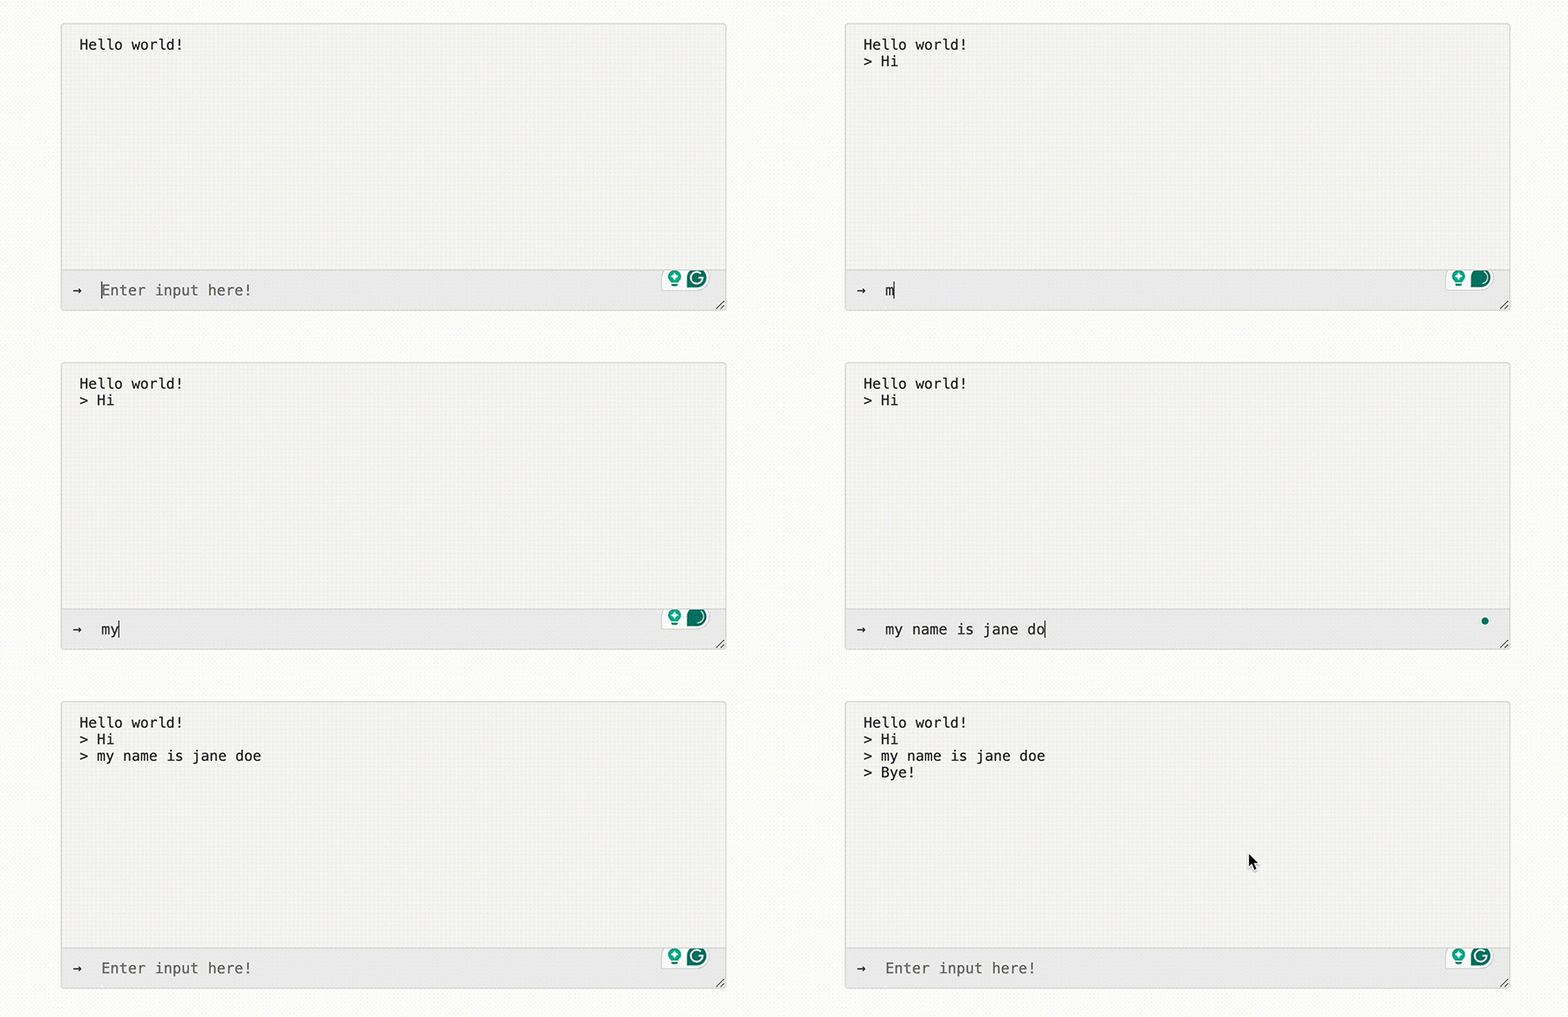
Now, when we visit the page, we will see the interactive terminal in action:

In the above example, we applied custom styles to Termino.js. This is useful especially if you want to conform to a specific design pattern or branding style.
Now, let’s explore some more complex uses of Termino.js.
We will see how to add custom methods that get called as a user interacts with the terminal. This is a great way of showing how easy it is to interact with custom methods within your web app, like interacting with a third-party endpoint via an API call.
Update the contents of the index.mjs file with the code below:
import { Termino } from "https://cdn.jsdelivr.net/gh/MarketingPipeline/[email protected]/dist/termino.min.js";
let term = Termino(document.getElementById("terminal"));
function print_termino() {
  term.output("Termino.js");
}
async function terminalApp() {
  term.output(`1. Print Termino.js
    2. Multiply two numbers
    3. Who created you?
    4. Exit`);
  // call Termino.js / your terminal for inital input
  let termvalue = await term.input("What would you like to do?");
  // function to multiply numbers
  async function multiply_numbers() {
    let number1 = await term.input("First number to multiply");
    let number2 = await term.input("Second number to multiply");
    term.output(
      `Product of ${number1} and ${number2} is ${
        Number(number1) * Number(number2)
      }`
    );
  }
  async function printDev() {
    term.output(
      "Chibuike is the creator of this demo. His Github profile is <a href='https://github.com/chyke007'> chyke007</a>, if you would like to hire him for any work. Feel free to reach him on GitHub"
    );
  }
  if (termvalue === "1") {
    await print_termino();
  }
  if (termvalue === "2") {
    await multiply_numbers();
  }
  if (termvalue === "3") {
    await printDev();
  }
  if (termvalue === "4") {
    term.output("You chose option 4, exiting terminal");
    await term.delay(2000);
    term.kill();
  }
  if (
    termvalue != "1" &&
    termvalue != "2" &&
    termvalue != "3" &&
    termvalue != "4"
  ) {
    term.output("Invalid choice");
  }
  // after called - repeat function again (if not exit menu)
  if (termvalue != "4") {
    terminalApp();
  }
}
terminalApp();
In this code snippet, the user is prompted to enter an input that is between 1 and 4. Depending on the input, different actions are carried out. If an invalid input is entered by the user, the text Invalid choice is shown by the terminal, which you can see on line 48.
After processing each command, the terminalApp method is called to start the process all over again.
A demo of the result is shown below:

Termino.js offers users many benefits, including the following:
Despite its many benefits, Termino.js and web-based terminals and terminal components can encounter issues, including:
How do I create a web-based terminal?
Most web-based terminals are included as external script tags on the webpage. Once that is done, simple HTML content can be used to design the interface and have it all running quickly.
Can I have multiple terminals on a page?
Yes, most terminals support this. It usually depends on the terminal in use. Termino.js supports having multiple terminals on the same page.
Can I include my custom logic?
Yes, you can — most web-based terminals are extendable, including Termino.js.
Does it have an impact on my website performance?
No, a web-based terminal is lightweight and mostly loaded from a CDN, so it won’t hurt the performance of your web app.
Below are other open source web-based terminals that compare with Termino.js:
Termino.js is a powerful and flexible library for integrating web-based terminals into applications. This tutorial demonstrated the simplicity of setting up a basic terminal using Termino.js and provided an exploration of its more advanced functionalities, such as custom styling.
I hope you enjoyed this article and have learned how easy it is to create a web-based terminal in your next project. Thanks for reading!
There’s no doubt that frontends are getting more complex. As you add new JavaScript libraries and other dependencies to your app, you’ll need more visibility to ensure your users don’t run into unknown issues.
LogRocket is a frontend application monitoring solution that lets you replay JavaScript errors as if they happened in your own browser so you can react to bugs more effectively.

LogRocket works perfectly with any app, regardless of framework, and has plugins to log additional context from Redux, Vuex, and @ngrx/store. Instead of guessing why problems happen, you can aggregate and report on what state your application was in when an issue occurred. LogRocket also monitors your app’s performance, reporting metrics like client CPU load, client memory usage, and more.
Build confidently — start monitoring for free.

React Server Components and the Next.js App Router enable streaming and smaller client bundles, but only when used correctly. This article explores six common mistakes that block streaming, bloat hydration, and create stale UI in production.

Gil Fink (SparXis CEO) joins PodRocket to break down today’s most common web rendering patterns: SSR, CSR, static rednering, and islands/resumability.

@container scroll-state: Replace JS scroll listeners nowCSS @container scroll-state lets you build sticky headers, snapping carousels, and scroll indicators without JavaScript. Here’s how to replace scroll listeners with clean, declarative state queries.

Explore 10 Web APIs that replace common JavaScript libraries and reduce npm dependencies, bundle size, and performance overhead.
Would you be interested in joining LogRocket's developer community?
Join LogRocket’s Content Advisory Board. You’ll help inform the type of content we create and get access to exclusive meetups, social accreditation, and swag.
Sign up now